

Introduction
My first time seeing a Makey Makey in action was at TEDx Bozeman, where several stools had been rigged up to play synthesized percussion instruments when you held your stool along with a ground wire. It was a very fun demo to play with. When watching Makey Makey videos, my favorite projects all involved playing music with it. After looking more into the Makey Makey, I decided that between the form factor and the hoops you had to jump through to get music to play, it wasn't quite what I wanted. I decided to make my own board, which had more of a focus on music.
For those that don't know, the Makey Makey, is an Arduino compatible board that comes preloaded with firmware that allows it to behave like a keyboard and mouse when connected to your computer. There are a few exposed connections on the board that alligator clips can connect to and when you touch any of them (or anything that conducts electricity that is connected to them) while also touching a ground wire, your body completes the circuit and a keyboard or mouse event is sent to the computer. Awesome! This allows for so many things, from playing Mario using a play dough controller to a banana piano. It just wasn't quite what I wanted, though. The alligator clips are very convenient for rigging something up quickly, but it also makes your creations very transient and easily broken apart. The mouse and keyboard presses again, are convenient as everything on the computer already works with that interface, but I like to program my own behaviors while still being quick and easy. The musical demos are super fun to play with, but you need special software to bind your keyboard presses to specific keys and that was about the limit to what you could easily do. I decided to develop my own board and Arduino library that addresses these issues.
MUSE
I call the board MUSE, music using simple electronics. MUSE has the same circuitry that allows the Makey Makey to use high resistance items (such as your body) to complete circuits and trigger events. Its features include:
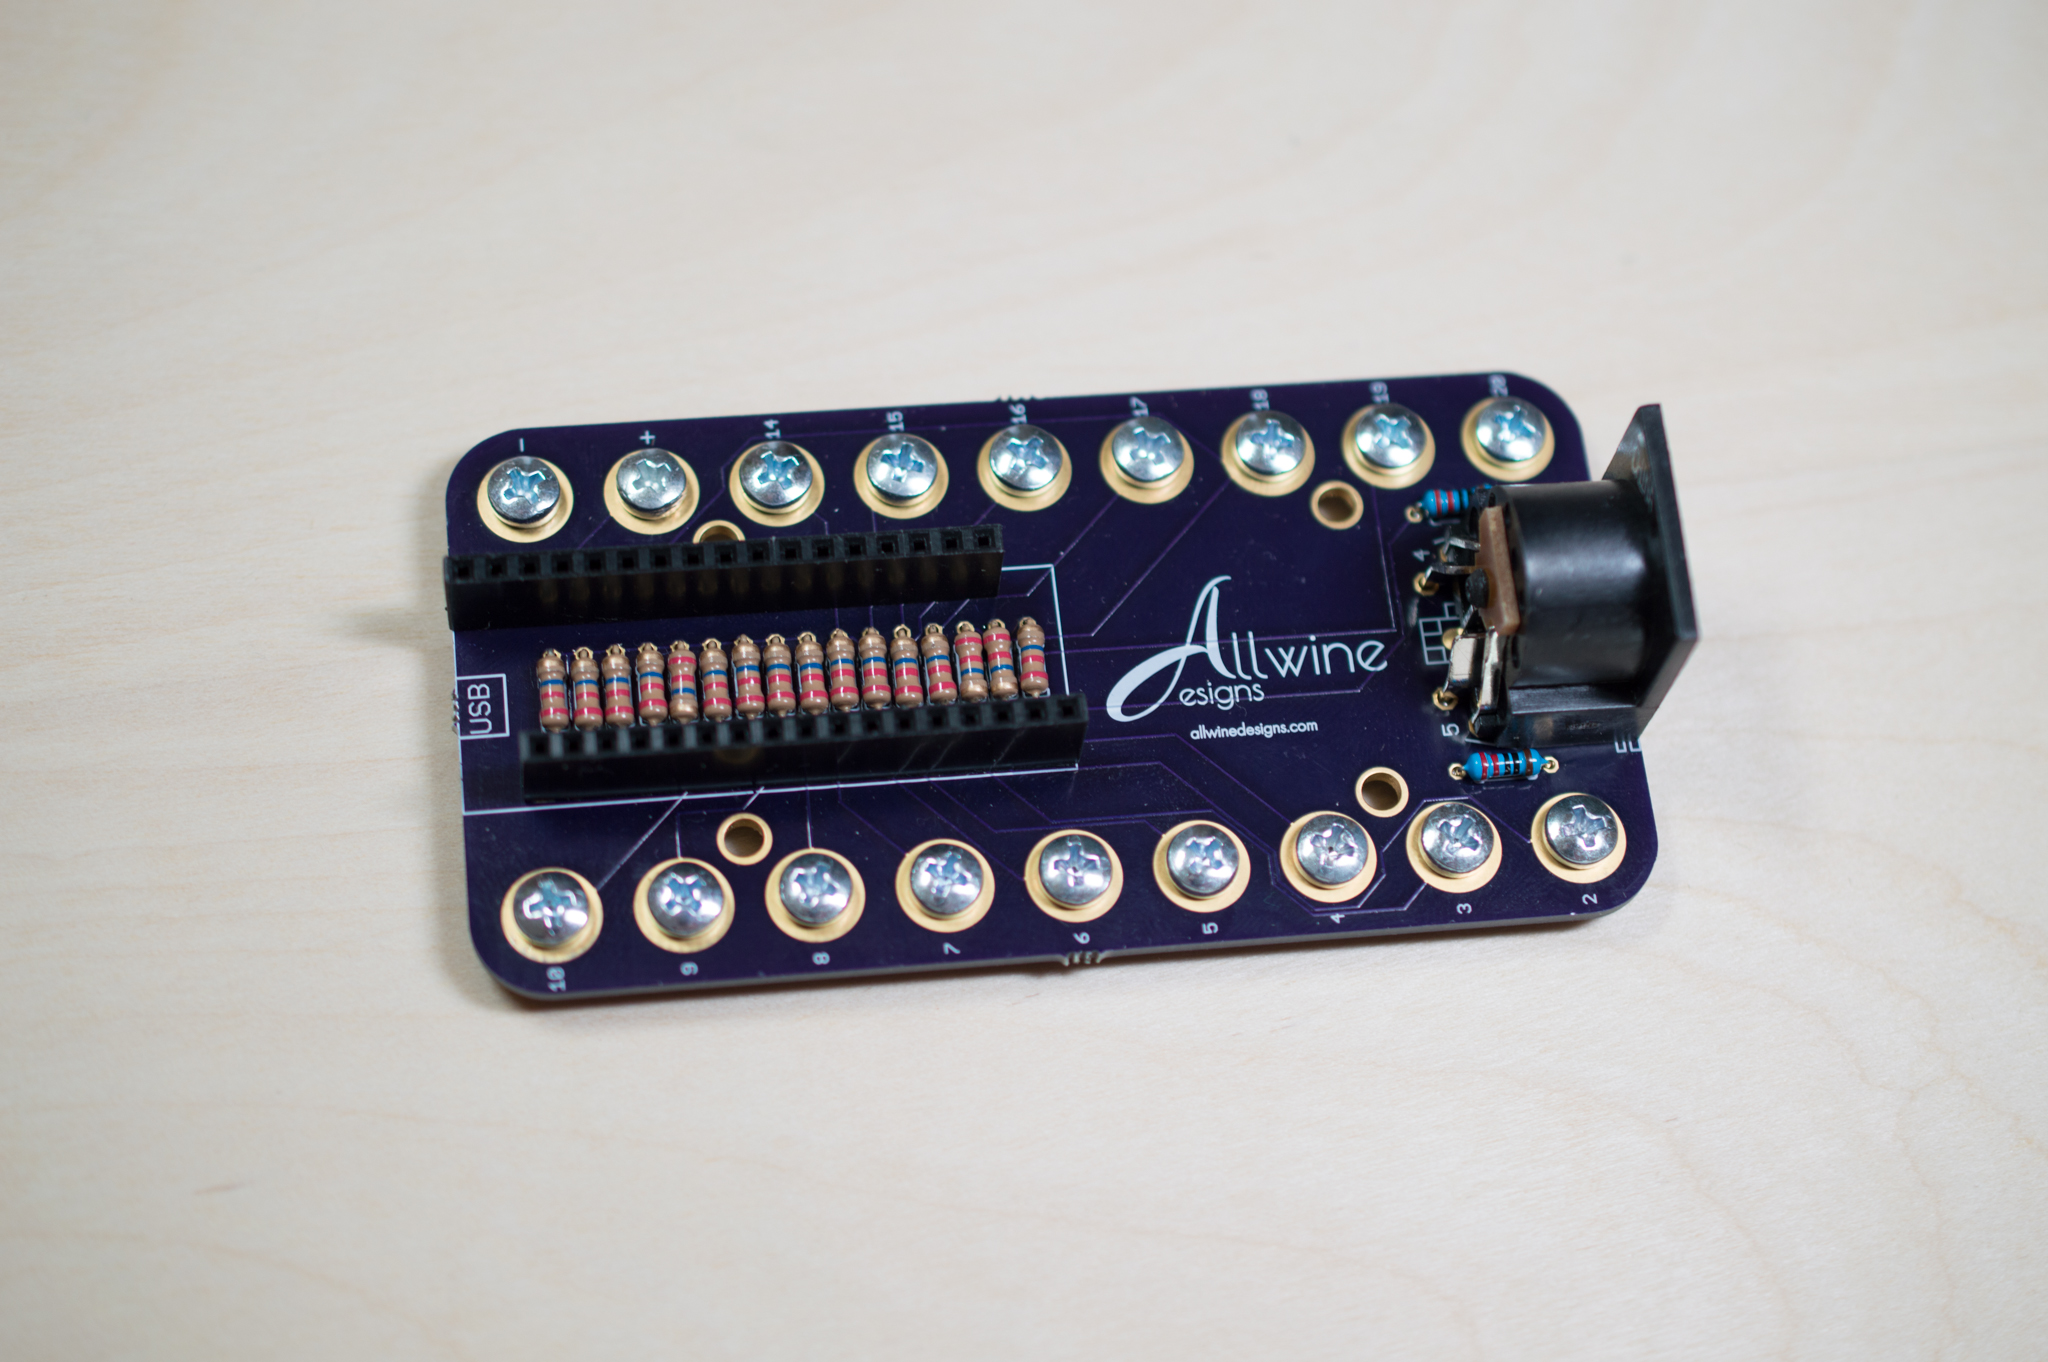
- A MIDI output port so it can be directly hooked up to a synthesizer.
- Screw terminals for easy, yet secure connections using raw wire or ring terminals.
- 16 pins that can easily be programmed to output MIDI events when triggered.
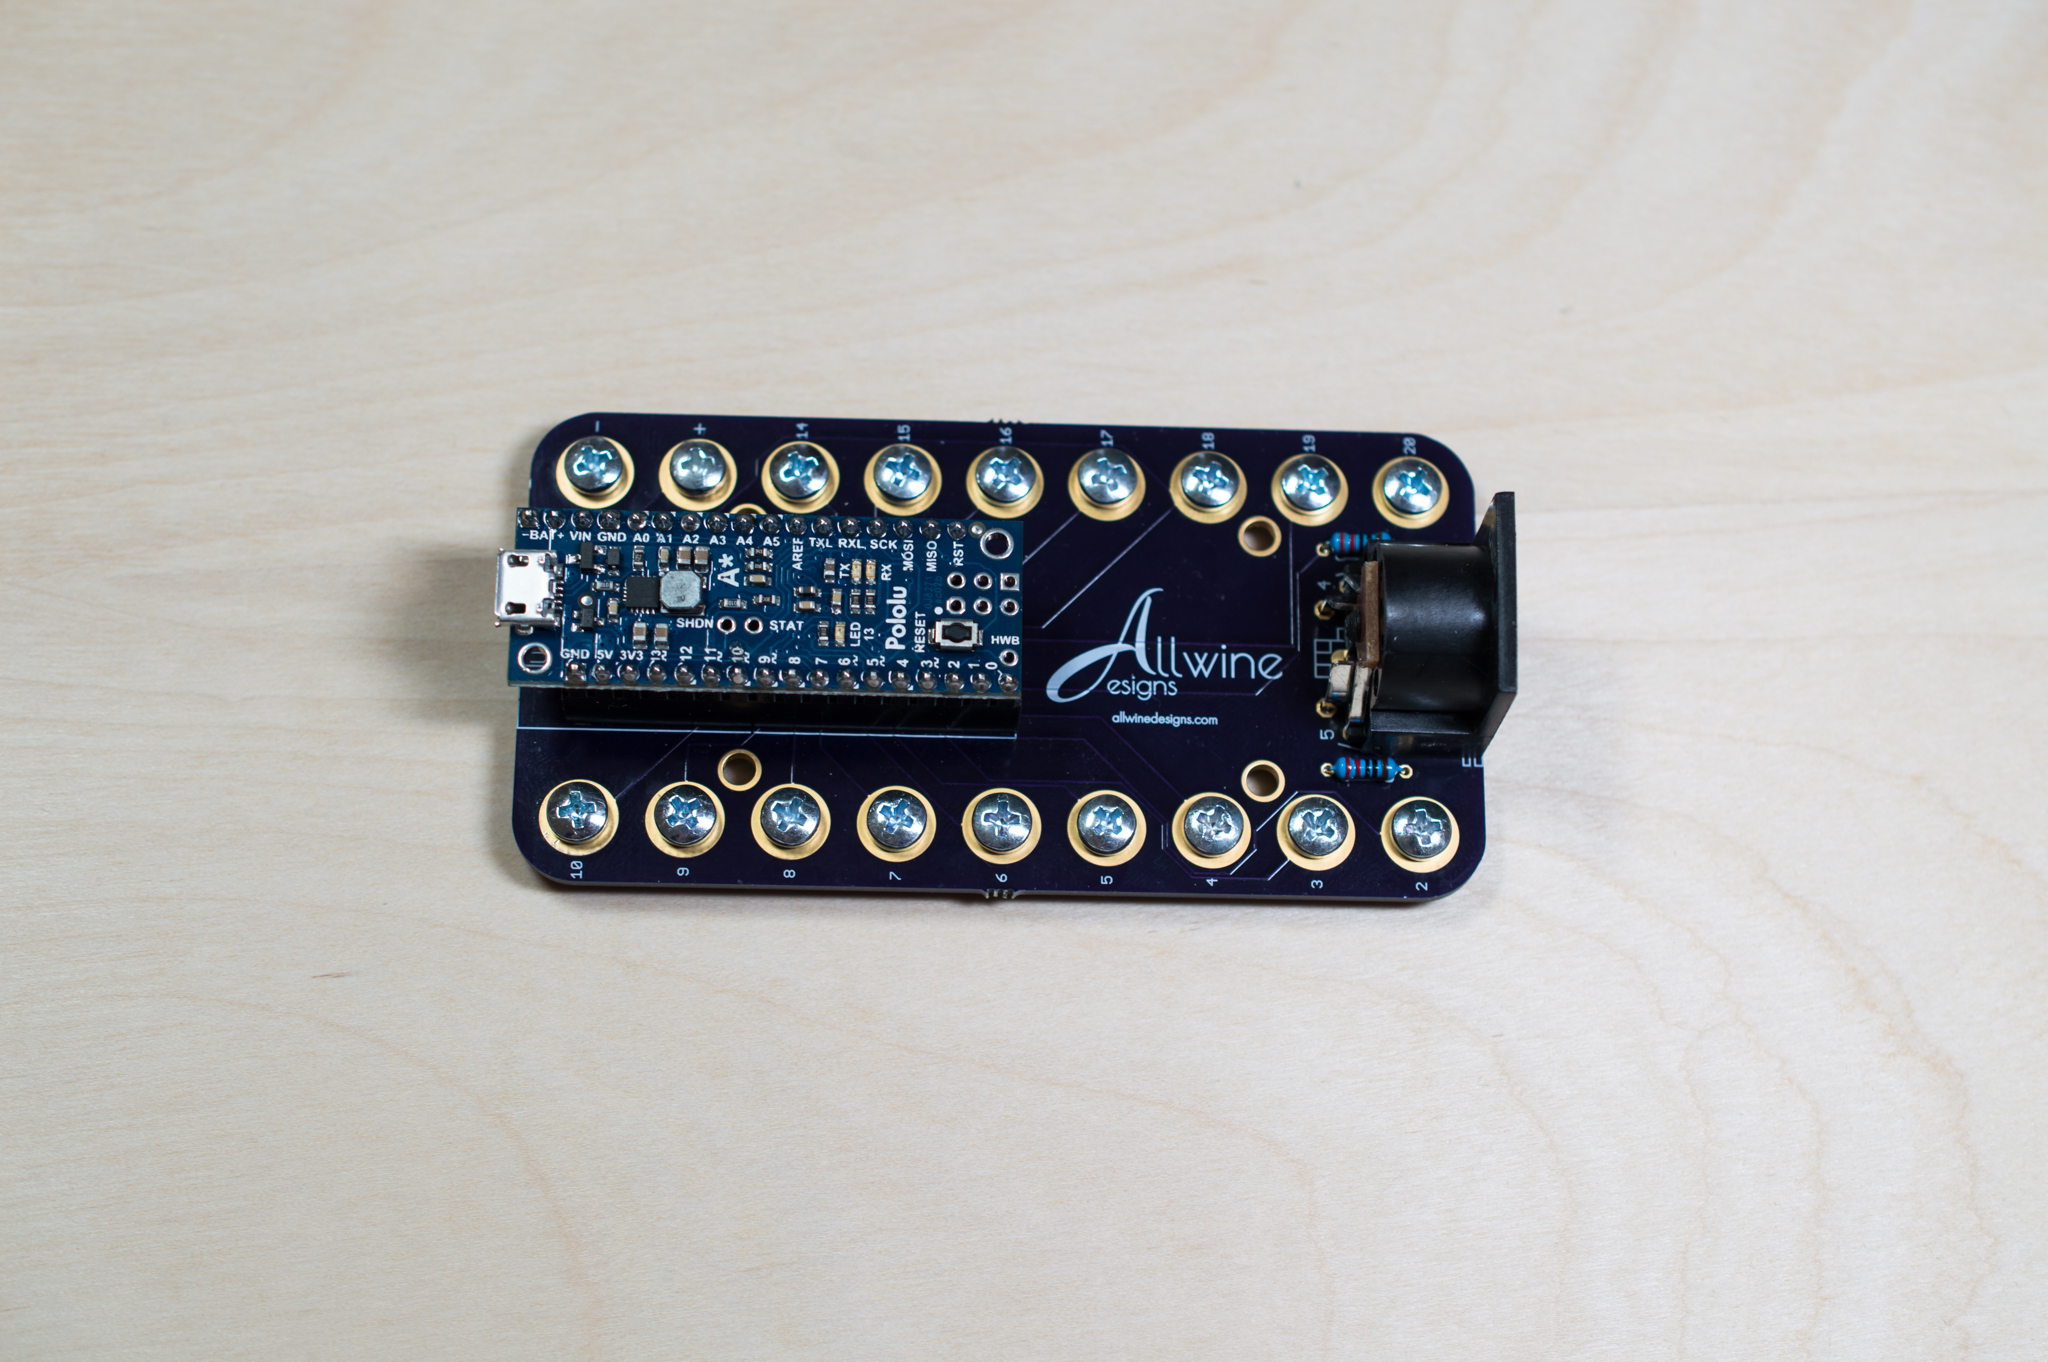
- Female headers for a Pololu A-Star 32U4 Mini, which sports the same processor as the Makey Makey.
All the components are simple through hole connections. The brain that is designed to power MUSE is the Pololu A-Star 32U4 Mini, but the corresponding pins could be connected to any other Arduino compatible board. The 32U4 chip on the Pololu A-Star Mini is the same chip that is in the Makey Makey, so it could be used as a keyboard and mouse, but the idea behind MUSE was to directly output MIDI so it can easily be hooked up to a synthesizer and immediately begin playing music.
Getting Started
If you're interested in a MUSE kit, please head over to the product page and fill out the form to be notified when we have them in stock. You can also source your own kit:
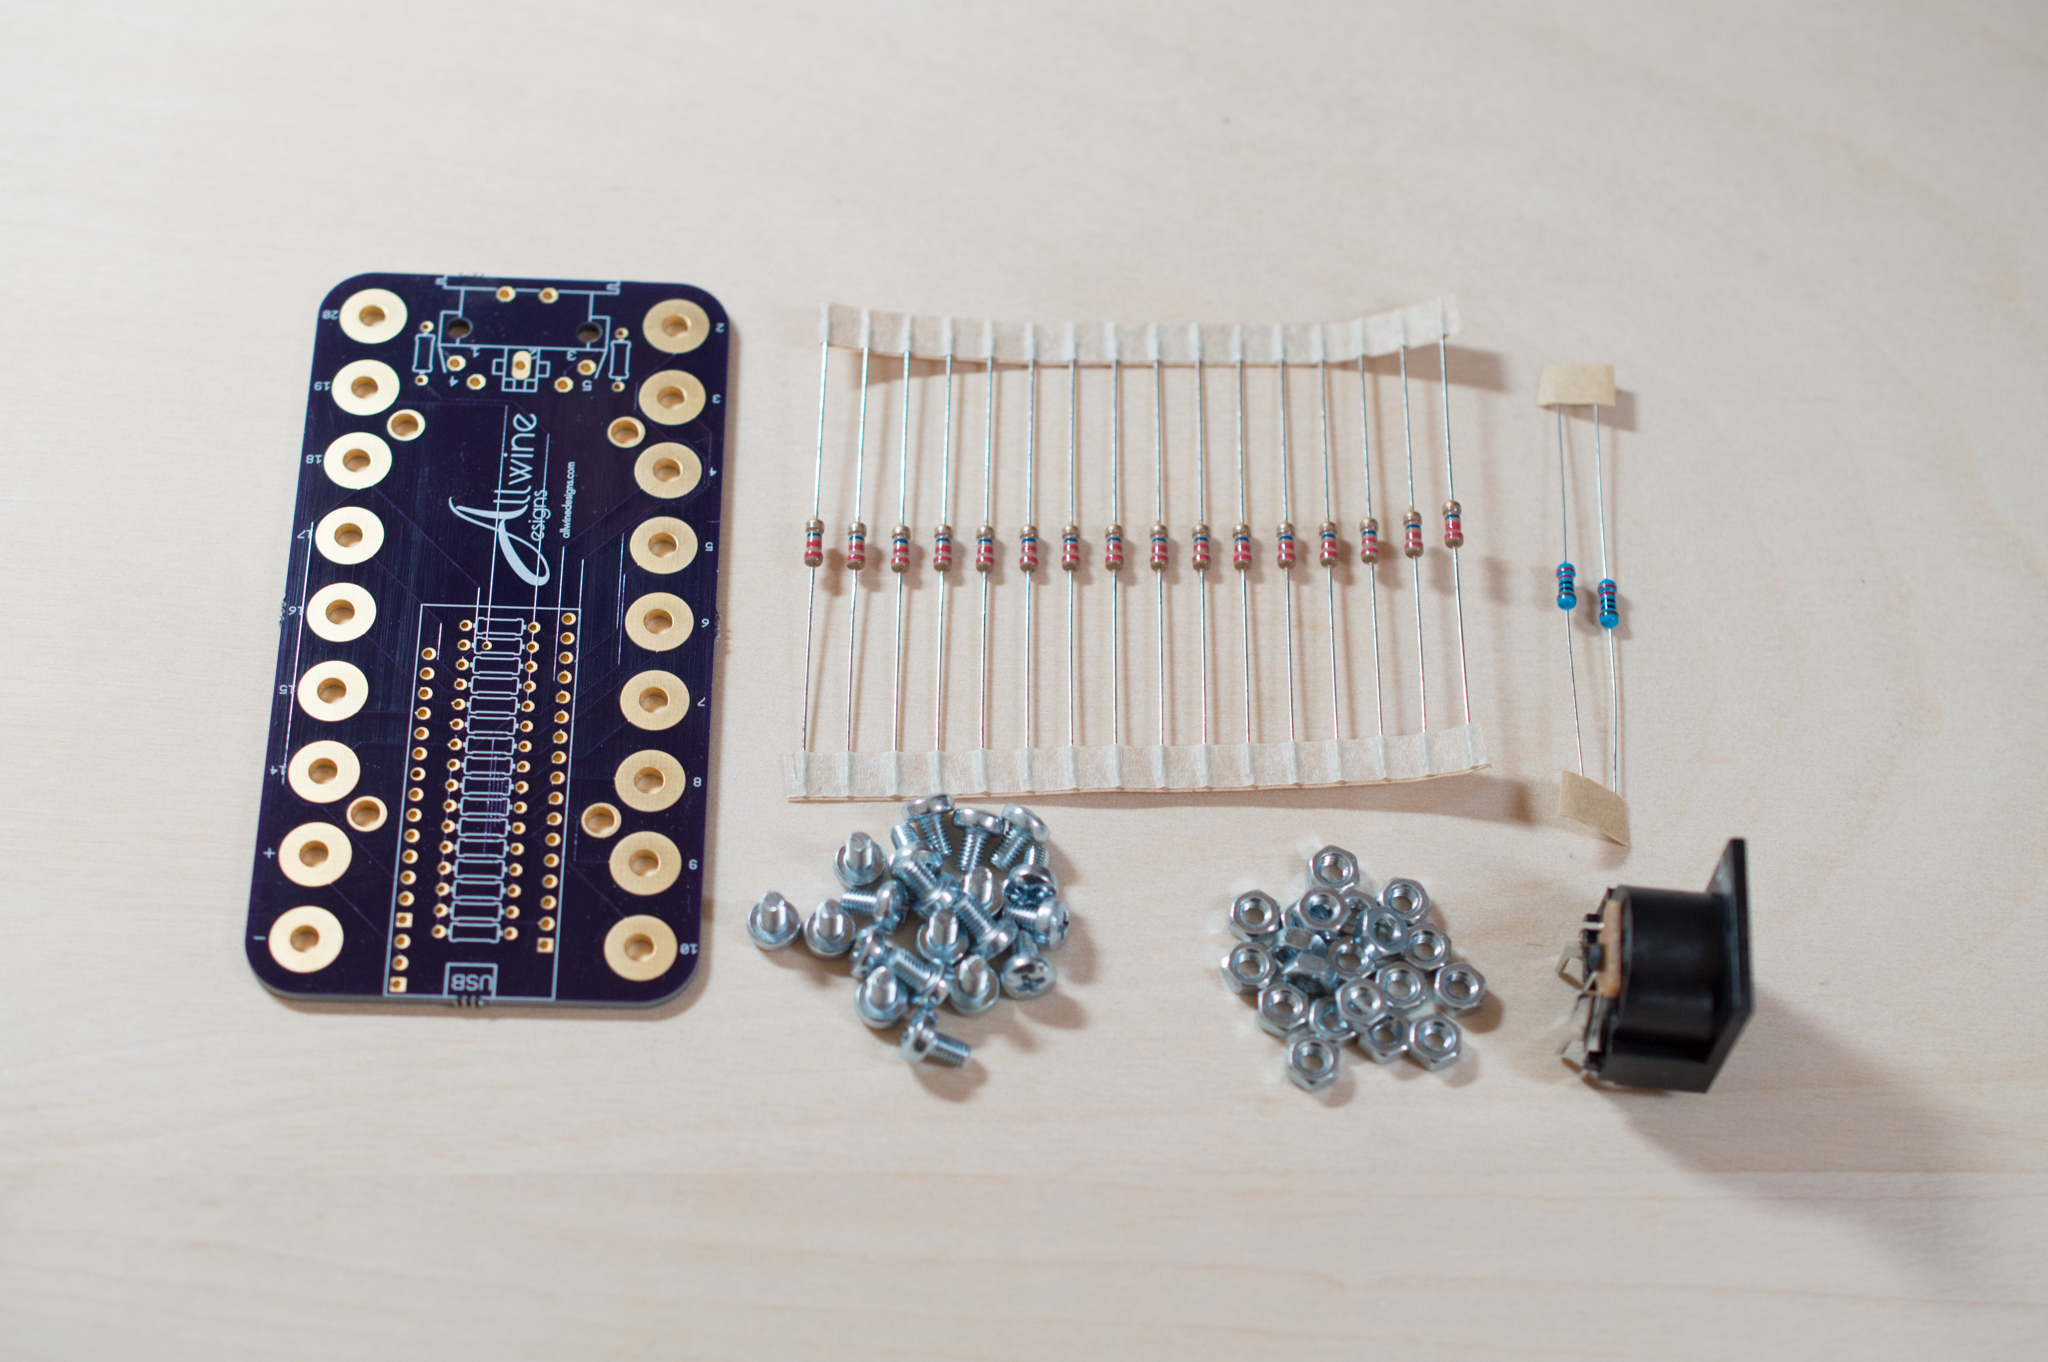
- MUSE PCB - You can order them in multiples of 3 from Osh Park. You can source them elsewhere with the Eagle files here.
- 22Mohm resistors - This is a pack of 50. You'll only need 16 of them.
- 220 ohm resistors - This is a pack of 50. You'll only need 2 of them.
- SDS-50J MIDI connector - This is the only one I could find on Amazon, and it shows the wrong picture, but seems to be the right part number. This is the link to the right part on DigiKey (if you go that route, you'll probably want to get the 22M and 220 resistors from DigiKey as well).
- M3 machine screws - You'll need 18 to put one in every hole in the PCB.
- M3 hex nuts - Again, you'll need 18.
- Female headers - If you want the Arduino-compatible board to be removable, you can solder on these headers. Otherwise, you can just solder the Pololu to the MUSE PCB (I prefer having the headers, so I can pop out the Arduino and use it for other projects when I'm not actively using this Circle of Fifths).
I'll update this post when I have more details about how to get started using MUSE. In the mean time, check out these MUSE projects: