

Check out my other interactive widgets for building a shelf/table/bench for the garage or a finished indoor table of any kind.
Introduction
Check out this tutorial as an Instructable here. Please consider voting for it in the Tables and Desks Contest!
Update: I won Third Prize in the Tables and Desks contest on Instructables. Thank you to everyone who voted for me!
I've been getting my garage into shape to be able to work on all kinds of projects. I anticipate doing all sorts of making from coding, to soldering electronics, to woodworking, to 3D printing and other CNC projects. Over the last fews years, I've accumulated some fun toys such as a MakerBot Replicator 2 (won in an Instructables contest), a Pocket NC 5-axis desktop CNC machine (traded for some programming work) and some other more common tools such as a soldering iron and other traditional tools. I'd like to have access to these tools on my work bench while still having plenty of room to work. I'd also like to be able to work standing up or sitting down, so I figured a standing desk with a stool would be the way to go.
A friend of mine made some standing work benches for his shop that I liked but were not quite as deep as I wanted. I figured a 3 foot deep work bench would work great. I always like to have a programming component to my projects, so I adapted my friend's design to be an interactive OpenJSCAD widget which allowed me to set the depth along with any other dimension to my taste. You can play with the widget yourself on my blog post (don't worry, no coding required). It allows you to customize the table to fit your space, to suit your height, or just tweak things to taste. I've read that the ergonomic height for light work is about 3 inches below the height of your elbow, so I made mine 43 inches tall, but you can adjust the height to anything you like. All required boards and exactly how to cut them will be generated for you along with the number of required screws. Give it a try! You can design your own table and follow these instructions for how to assemble it, or just follow along to build the same one that I did.
Interactive Widget
Everyone has different needs for a standing desk. Adjust the parameters below to customize the build to your needs.
Have a configuration that worked particularly well for you? Let me know in the comments!
Instructions
You can click and drag in the widget below to rotate your view. Hold the shift key and click and drag to shift the camera around (on mobile tap and hold for more than half a second to shift the camera around). Use the mouse wheel to zoom in and out.
Setting Descriptions
Table Width - The total width that your table will take up. Have a specific space in mind and an 8ft table just won't quite make it? Adjust this to the exact size for your space (max of 8 feet).
Table Height - Not 6'1"? Plan on using it for a different purpose? Adjust this to match your height needs. I recommend 3" below your elbow when standing for light work (soldering, small assembly) or 6" below your elbow for heavy work. This is the measurement from the ground to the top face of your table.
Table Depth - Want to use a whole 8'x4' sheet of plywood for your table top? Just half? Adjust this value to change the depth of your table to match your needs.
Backboard - Check this box if you want a backboard with a shelf on top. The backboard leaves a 3-1/2" gap between the peg board and the table top (so a 2" gap that cords can fit through). The shelf above the peg board also has a 2" gap between the frame and the shelf so cords can easily be run down to the table.
Shelf Height - This measurement determines exactly how tall your shelf will be from the ground up. Keep in mind how deep your table is. While I can readily reach things on my shelf, I made it a little too tall to easily reach the power strips that I mounted to the top of the frame. This height also ends up adjusting the height of the peg board. I adjusted the height to make the peg board come out to 24" tall, exactly half a 8'x4' sheet.
Shelf Depth - How deep the shelf will be. The default value of 11.875" allows for both the 36" table top and shelf to be cut from a single sheet of 8'x4' plywood with an 1/8" kerf (saw blade thickness). Setting this to 0 will remove the shelf and the Shelf Height measurement will represent the height of the backboard frame instead.
Overhang - Suggested in the Instructable comments. This allows for you to design the plywood sheet to hang off the front of your table for easier clamping and sweeping debris off the table top.
Materials
Please consider using the links to lumber and other materials below to support Allwine Designs! Even if you plan to pick up your materials from Home Depot, you can buy online and choose to pick up in store.
- 96" 2x4s
Cut each 2x4 to the following lengths.
A kerf (saw blade thickness) of 1/8" is assumed. Note that the listed lengths are correct, but the outlines displayed around them are only approximate and may not be proportional to the actual dimensions as they adapt to screen size and font size.
- 96" x 48" x 3/4" Plywood Sheet
Cut each sheet to the following dimensions.
A kerf (saw blade thickness) of 1/8" is assumed.
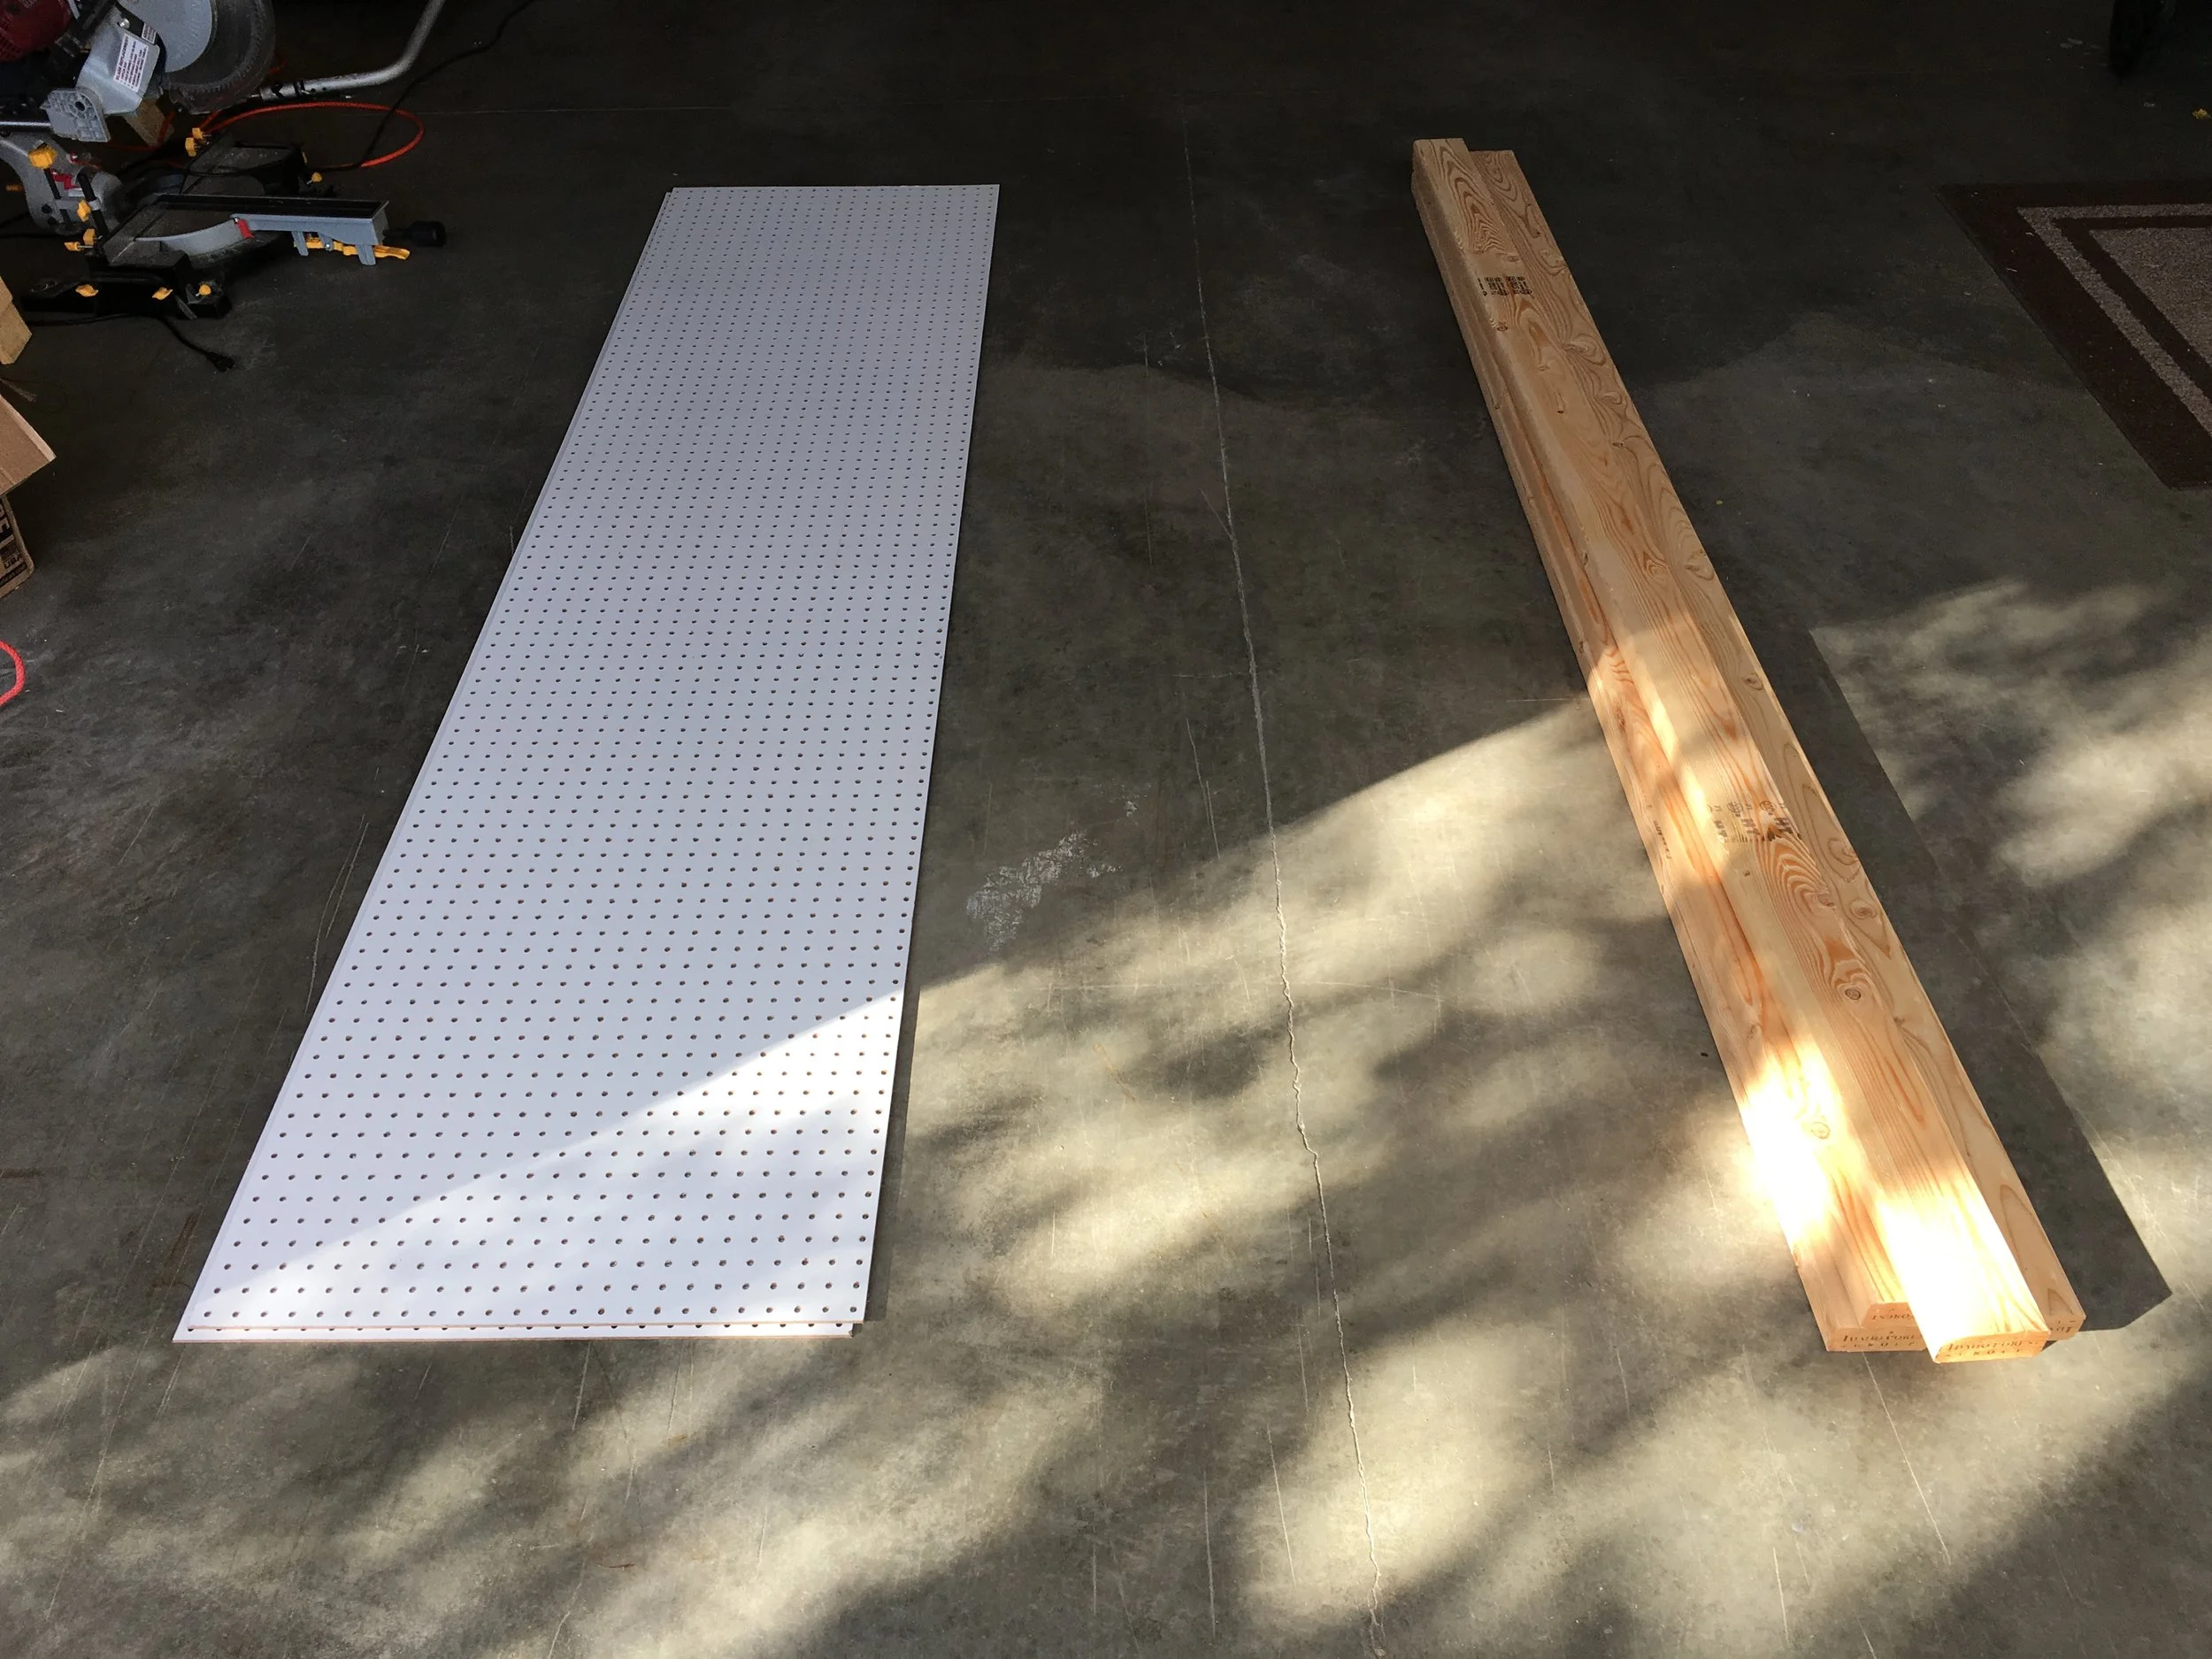
- 96" x 48" Peg Board Sheet
Cut each sheet to the following dimensions.
A kerf (saw blade thickness) of 1/8" is assumed.
- #10 x 4" Self Drilling Wood Screws
Such as SPAX or similar.
Dimensions
The following dimensions are referenced in the walkthrough below.
- " -
Like what you see? Want to be notified about awesome projects like this one?
Tools
These are the tools I used in this project.
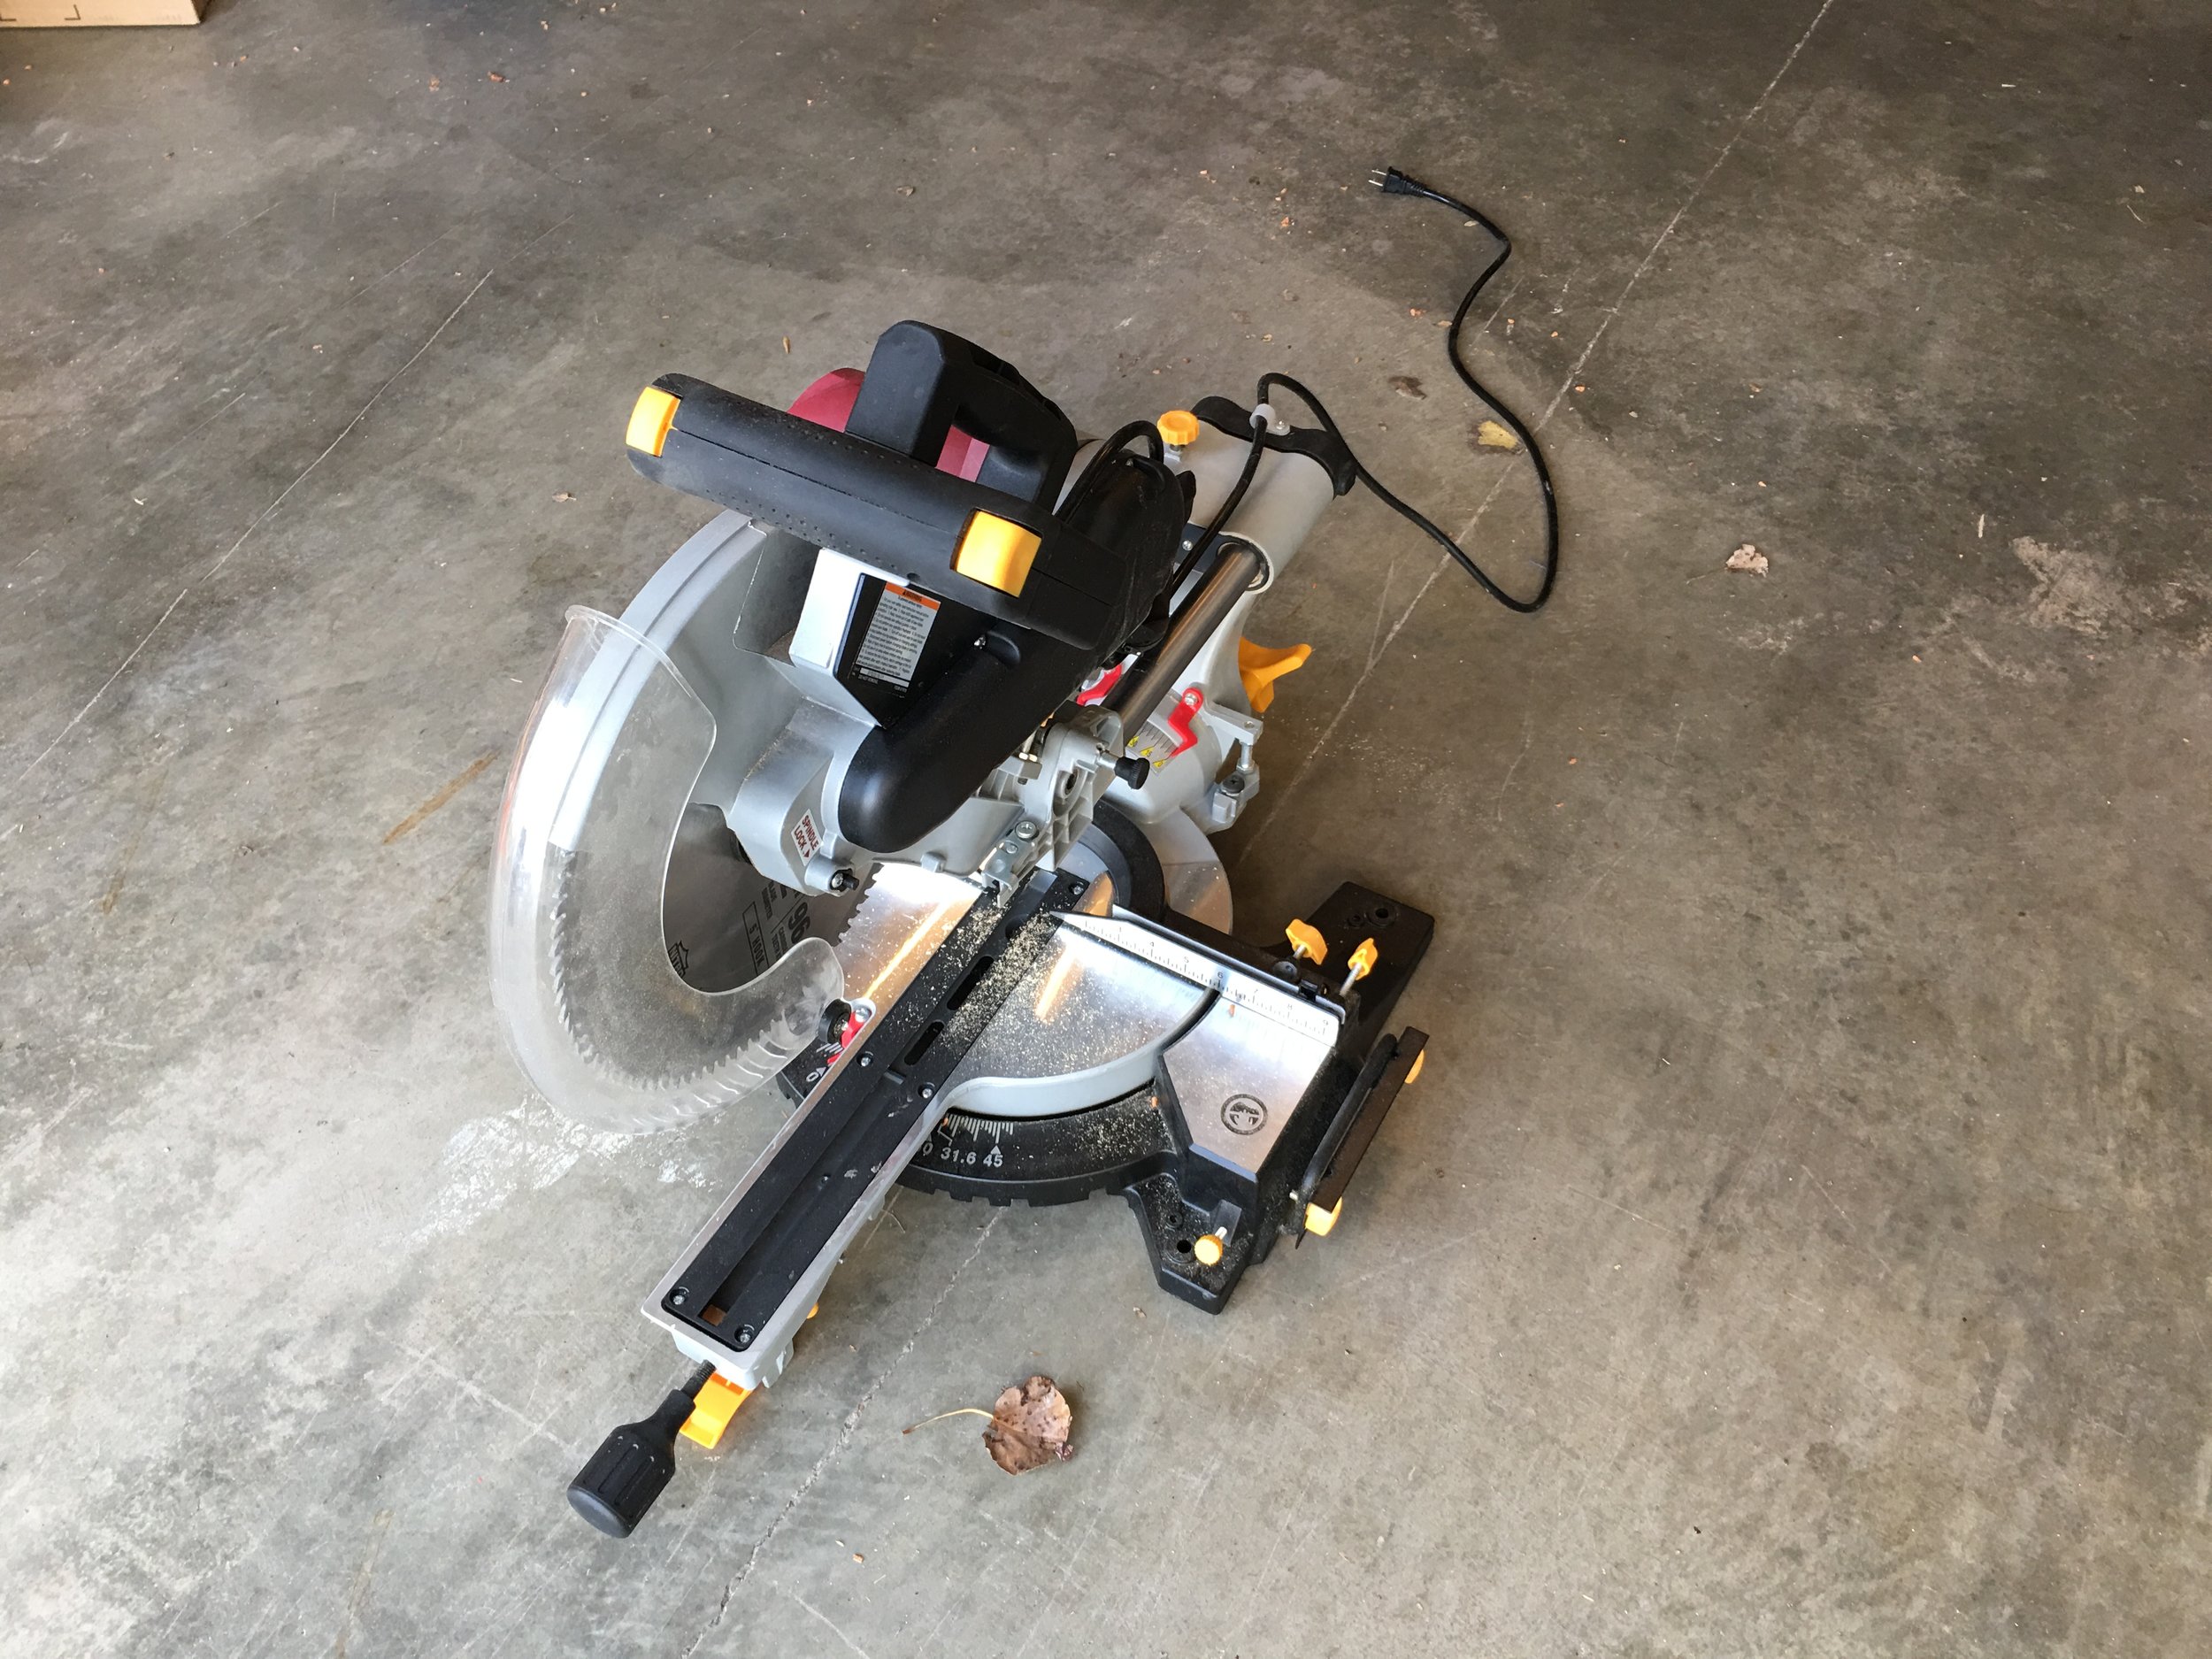
Miter saw - Used to cut our 2x4s.
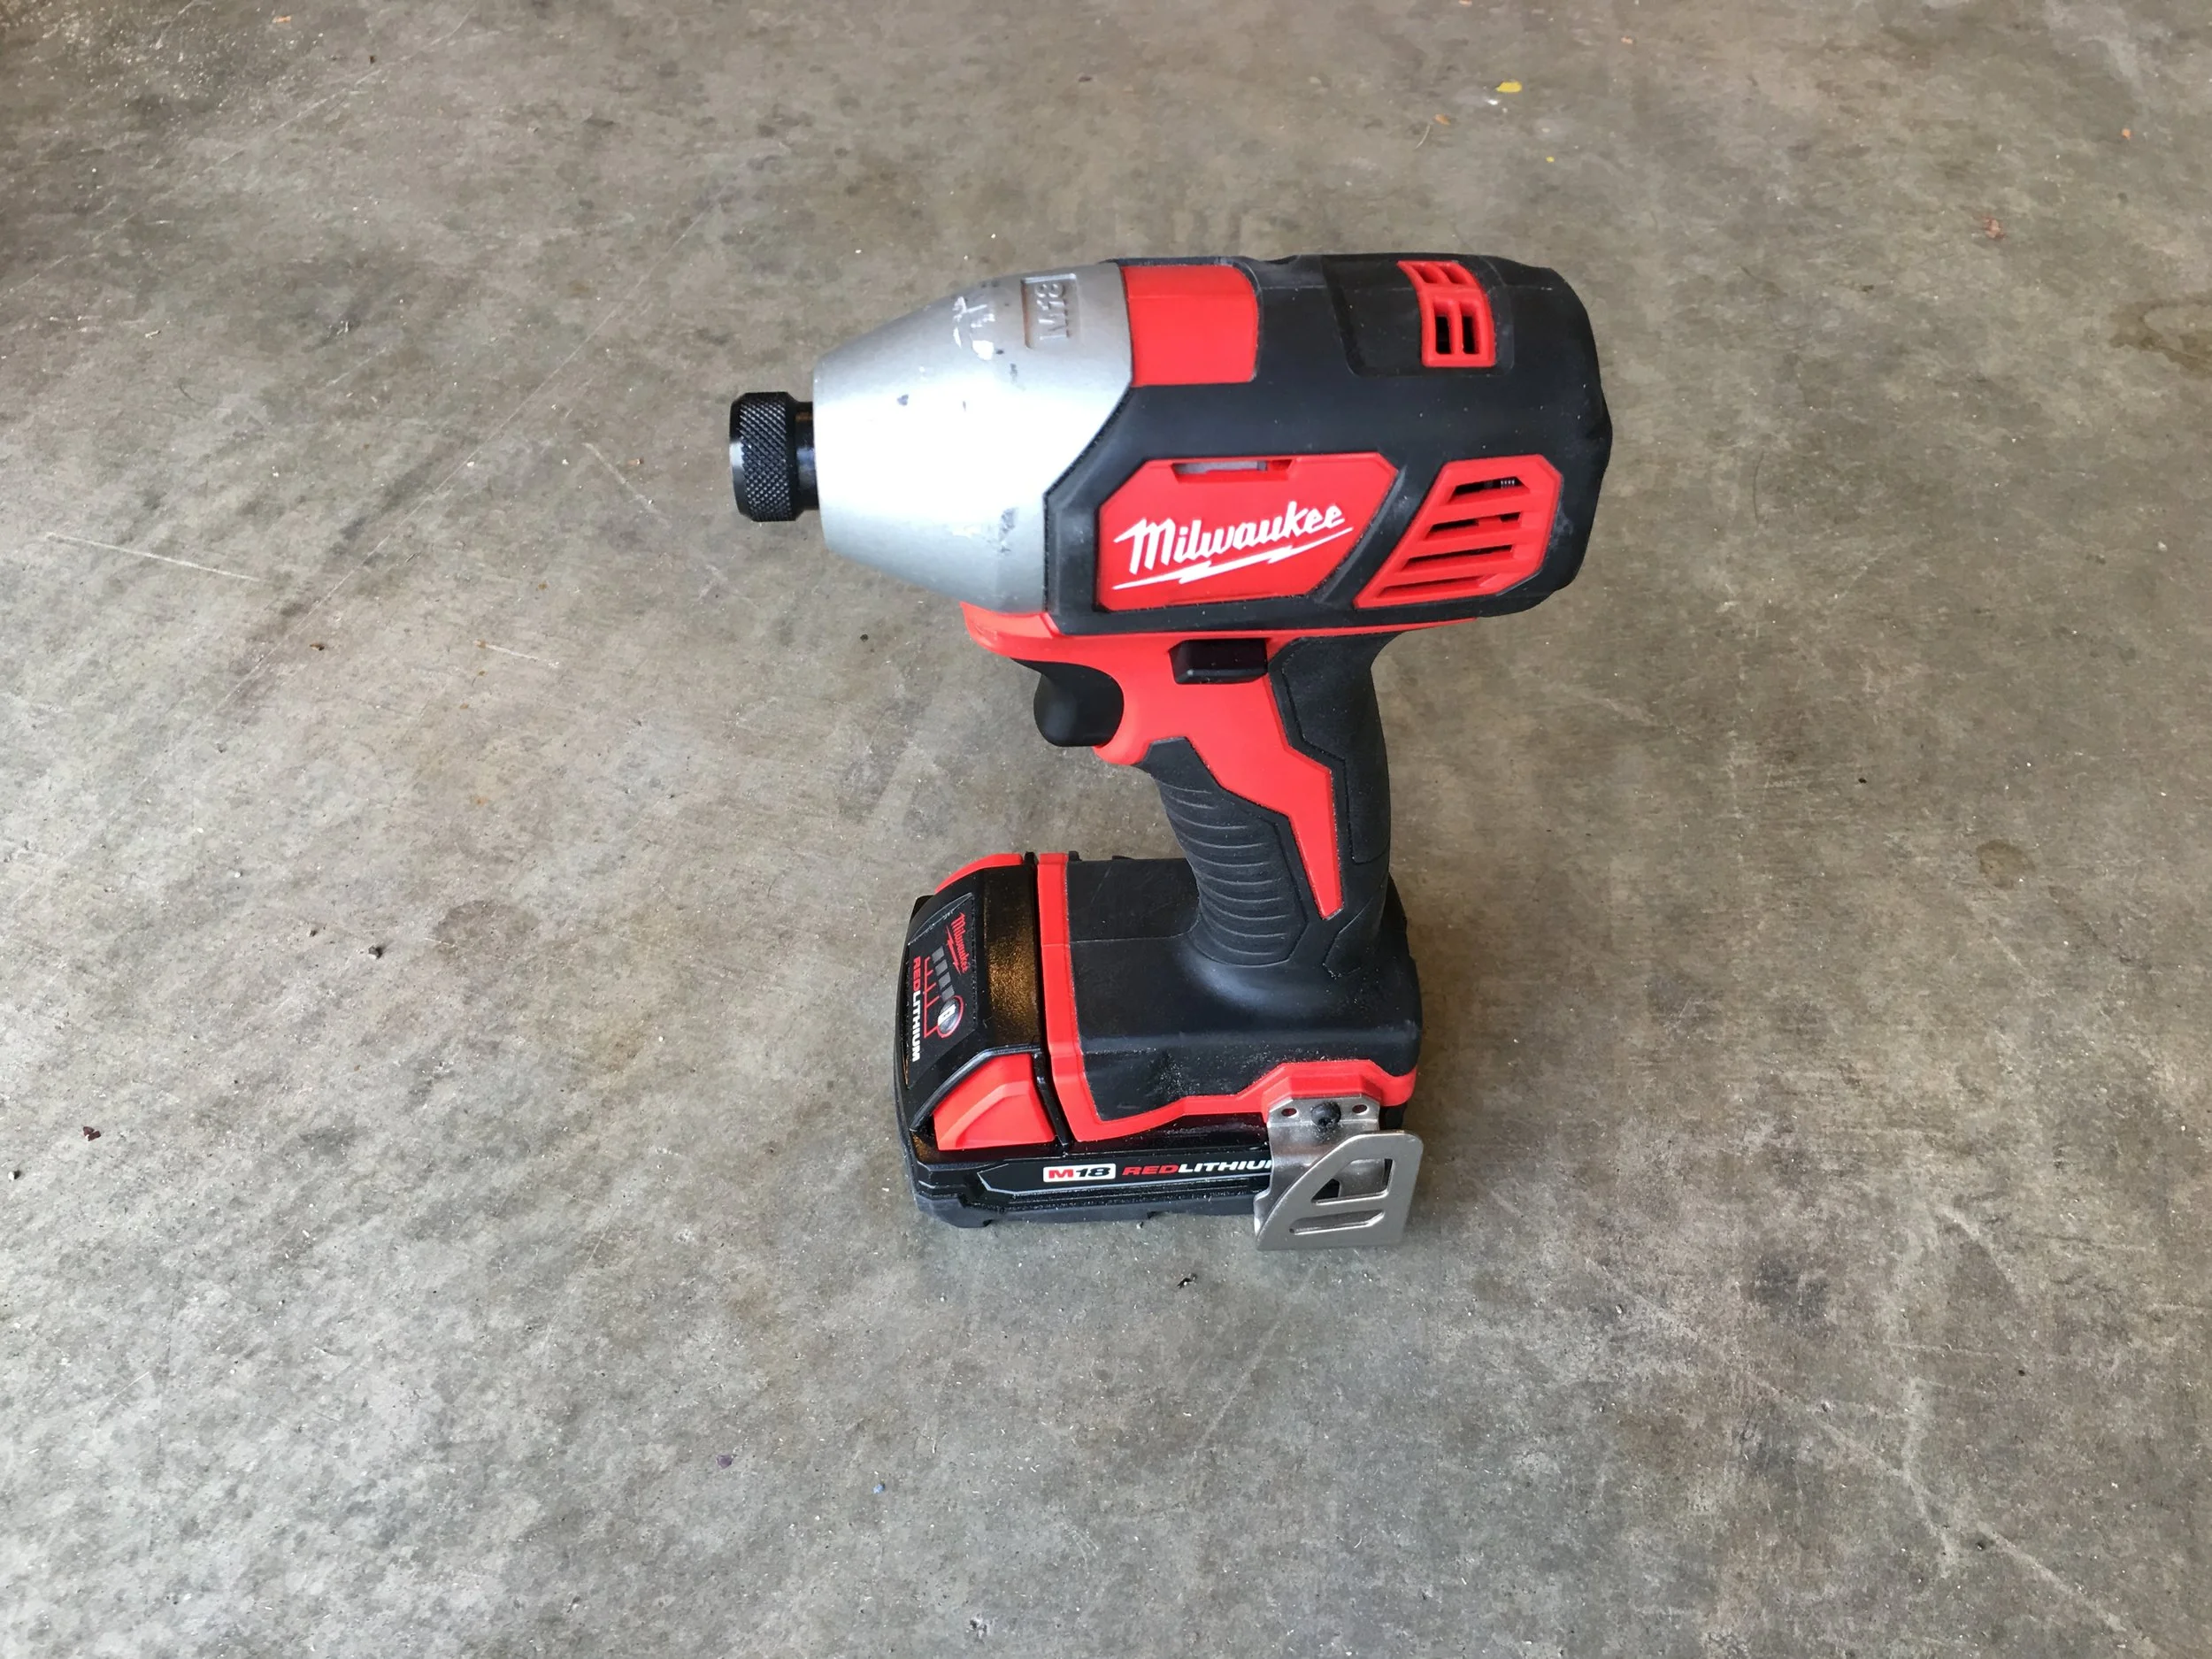
Impact Driver - Used to screw everything together.
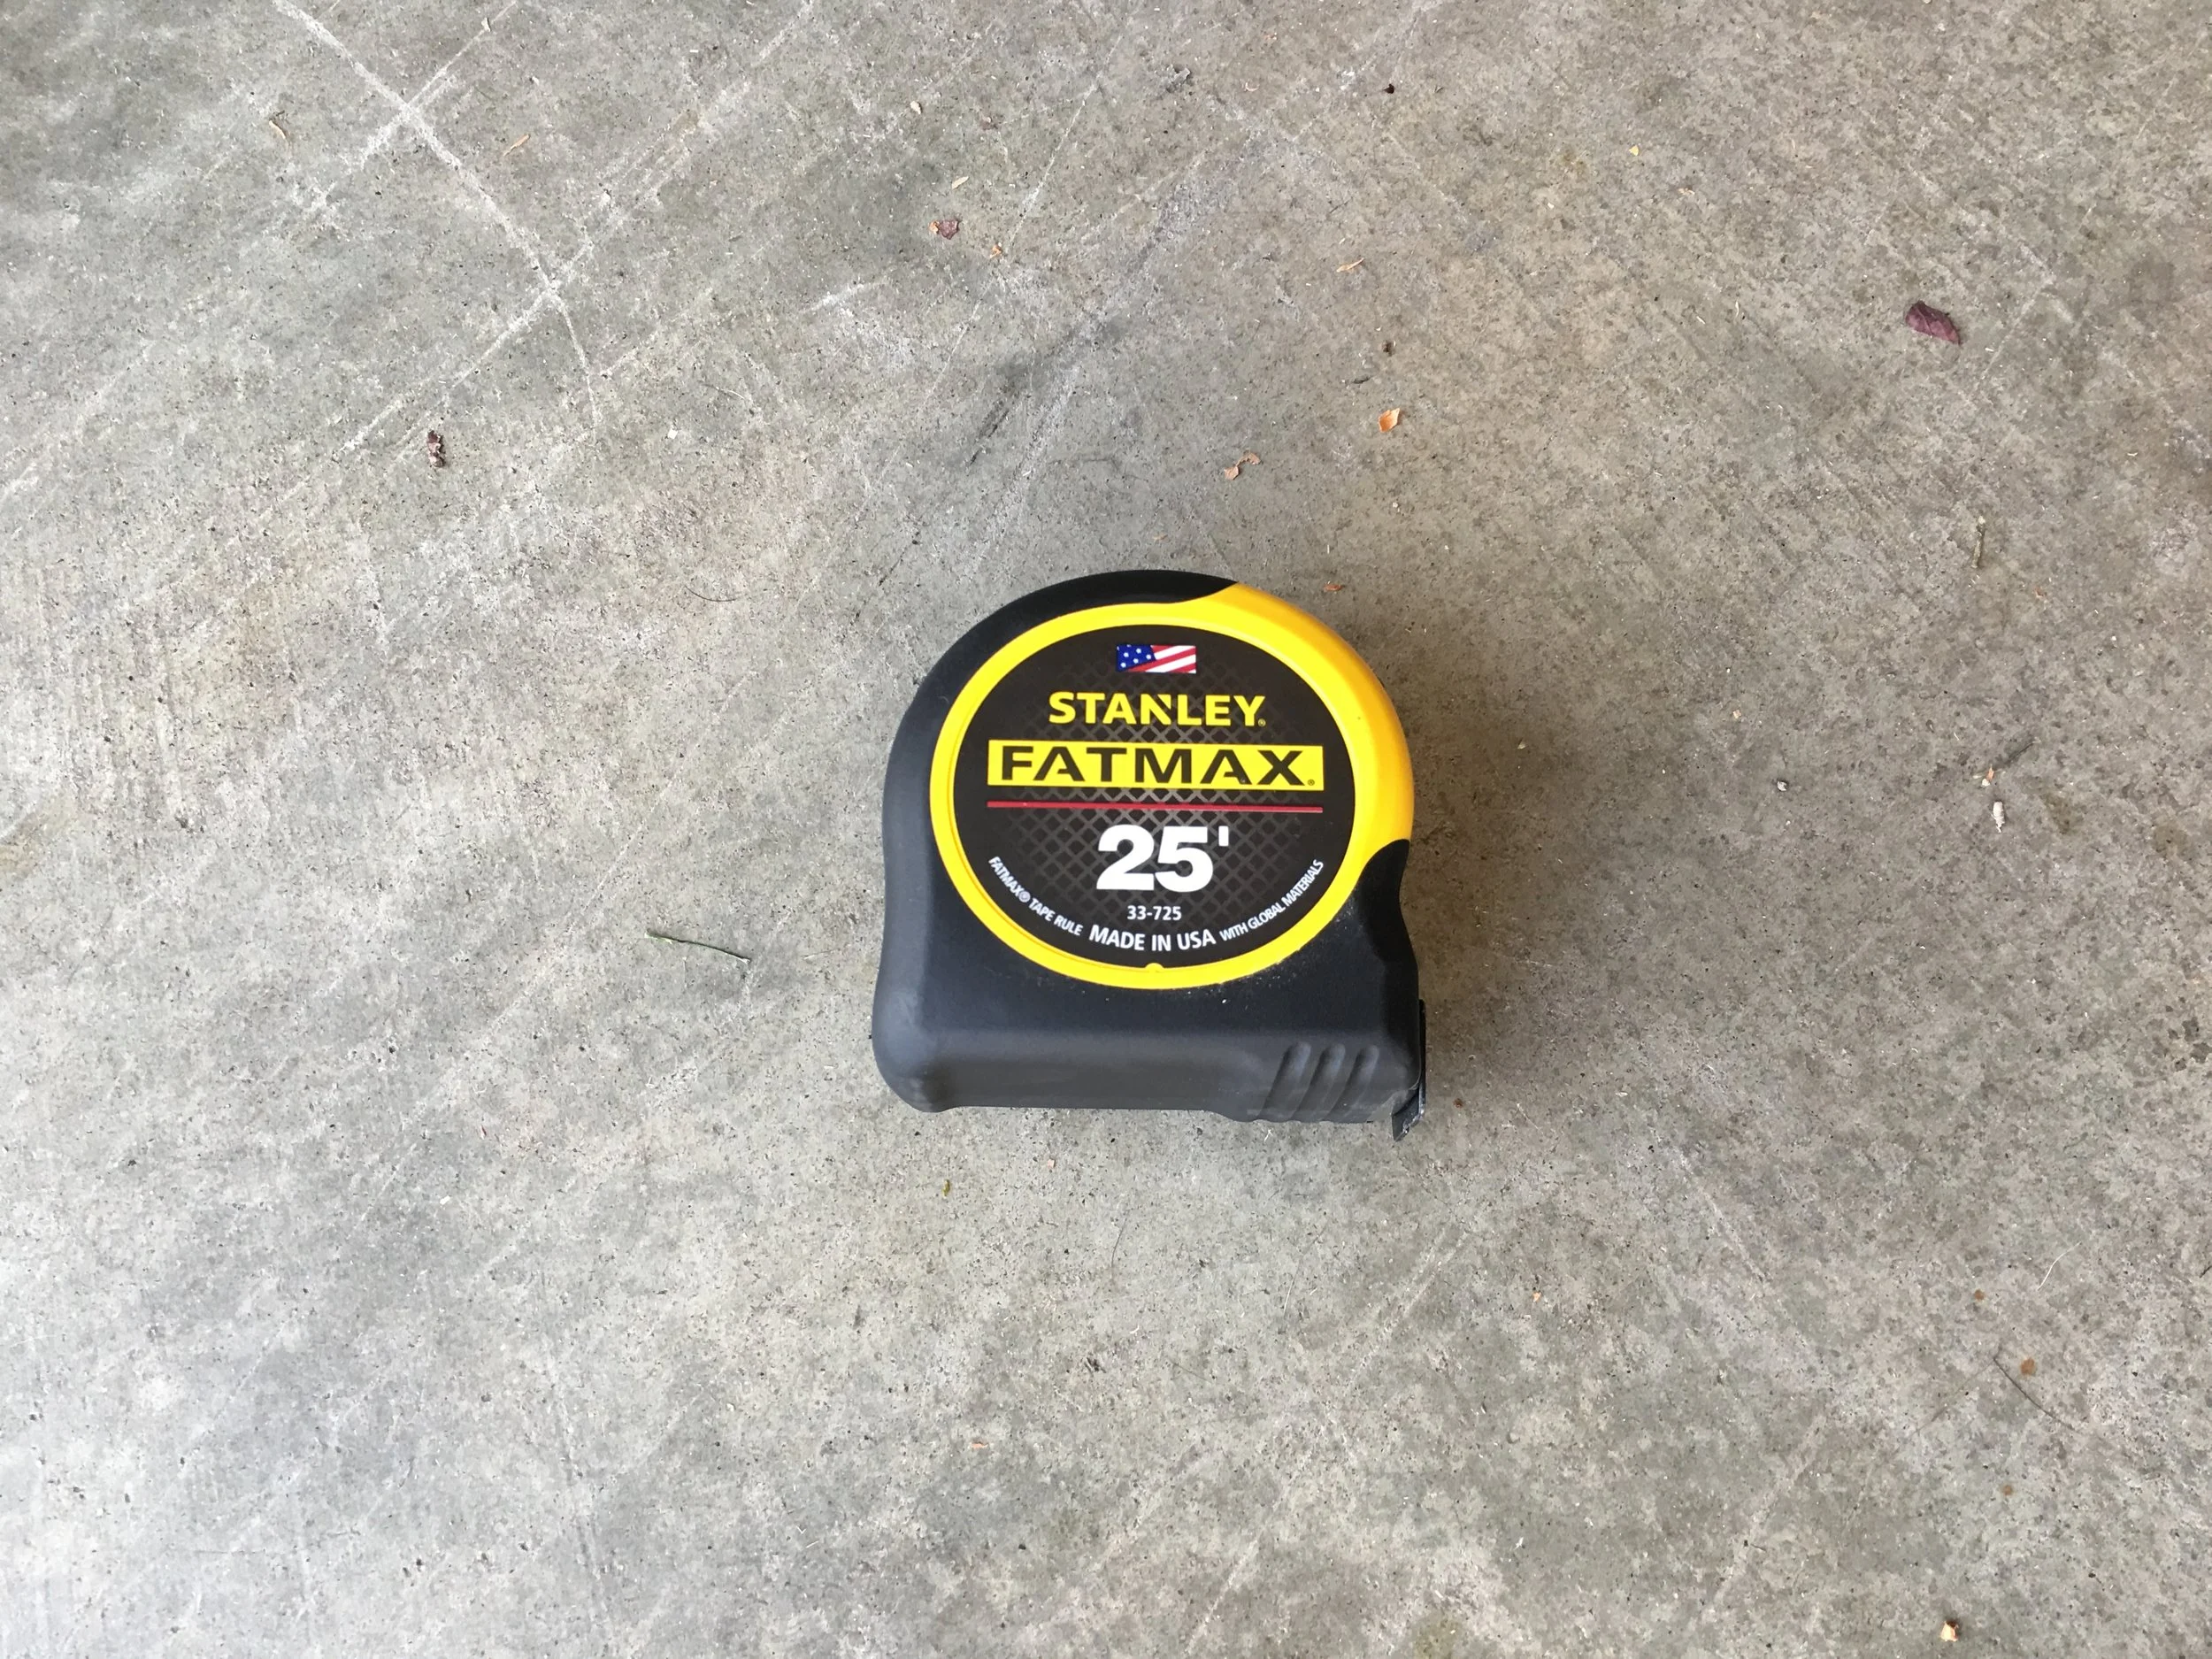
Tape Measure - Used to measure everything. This one is especially thick, which allows it to span 11 feet or more while unsupported.
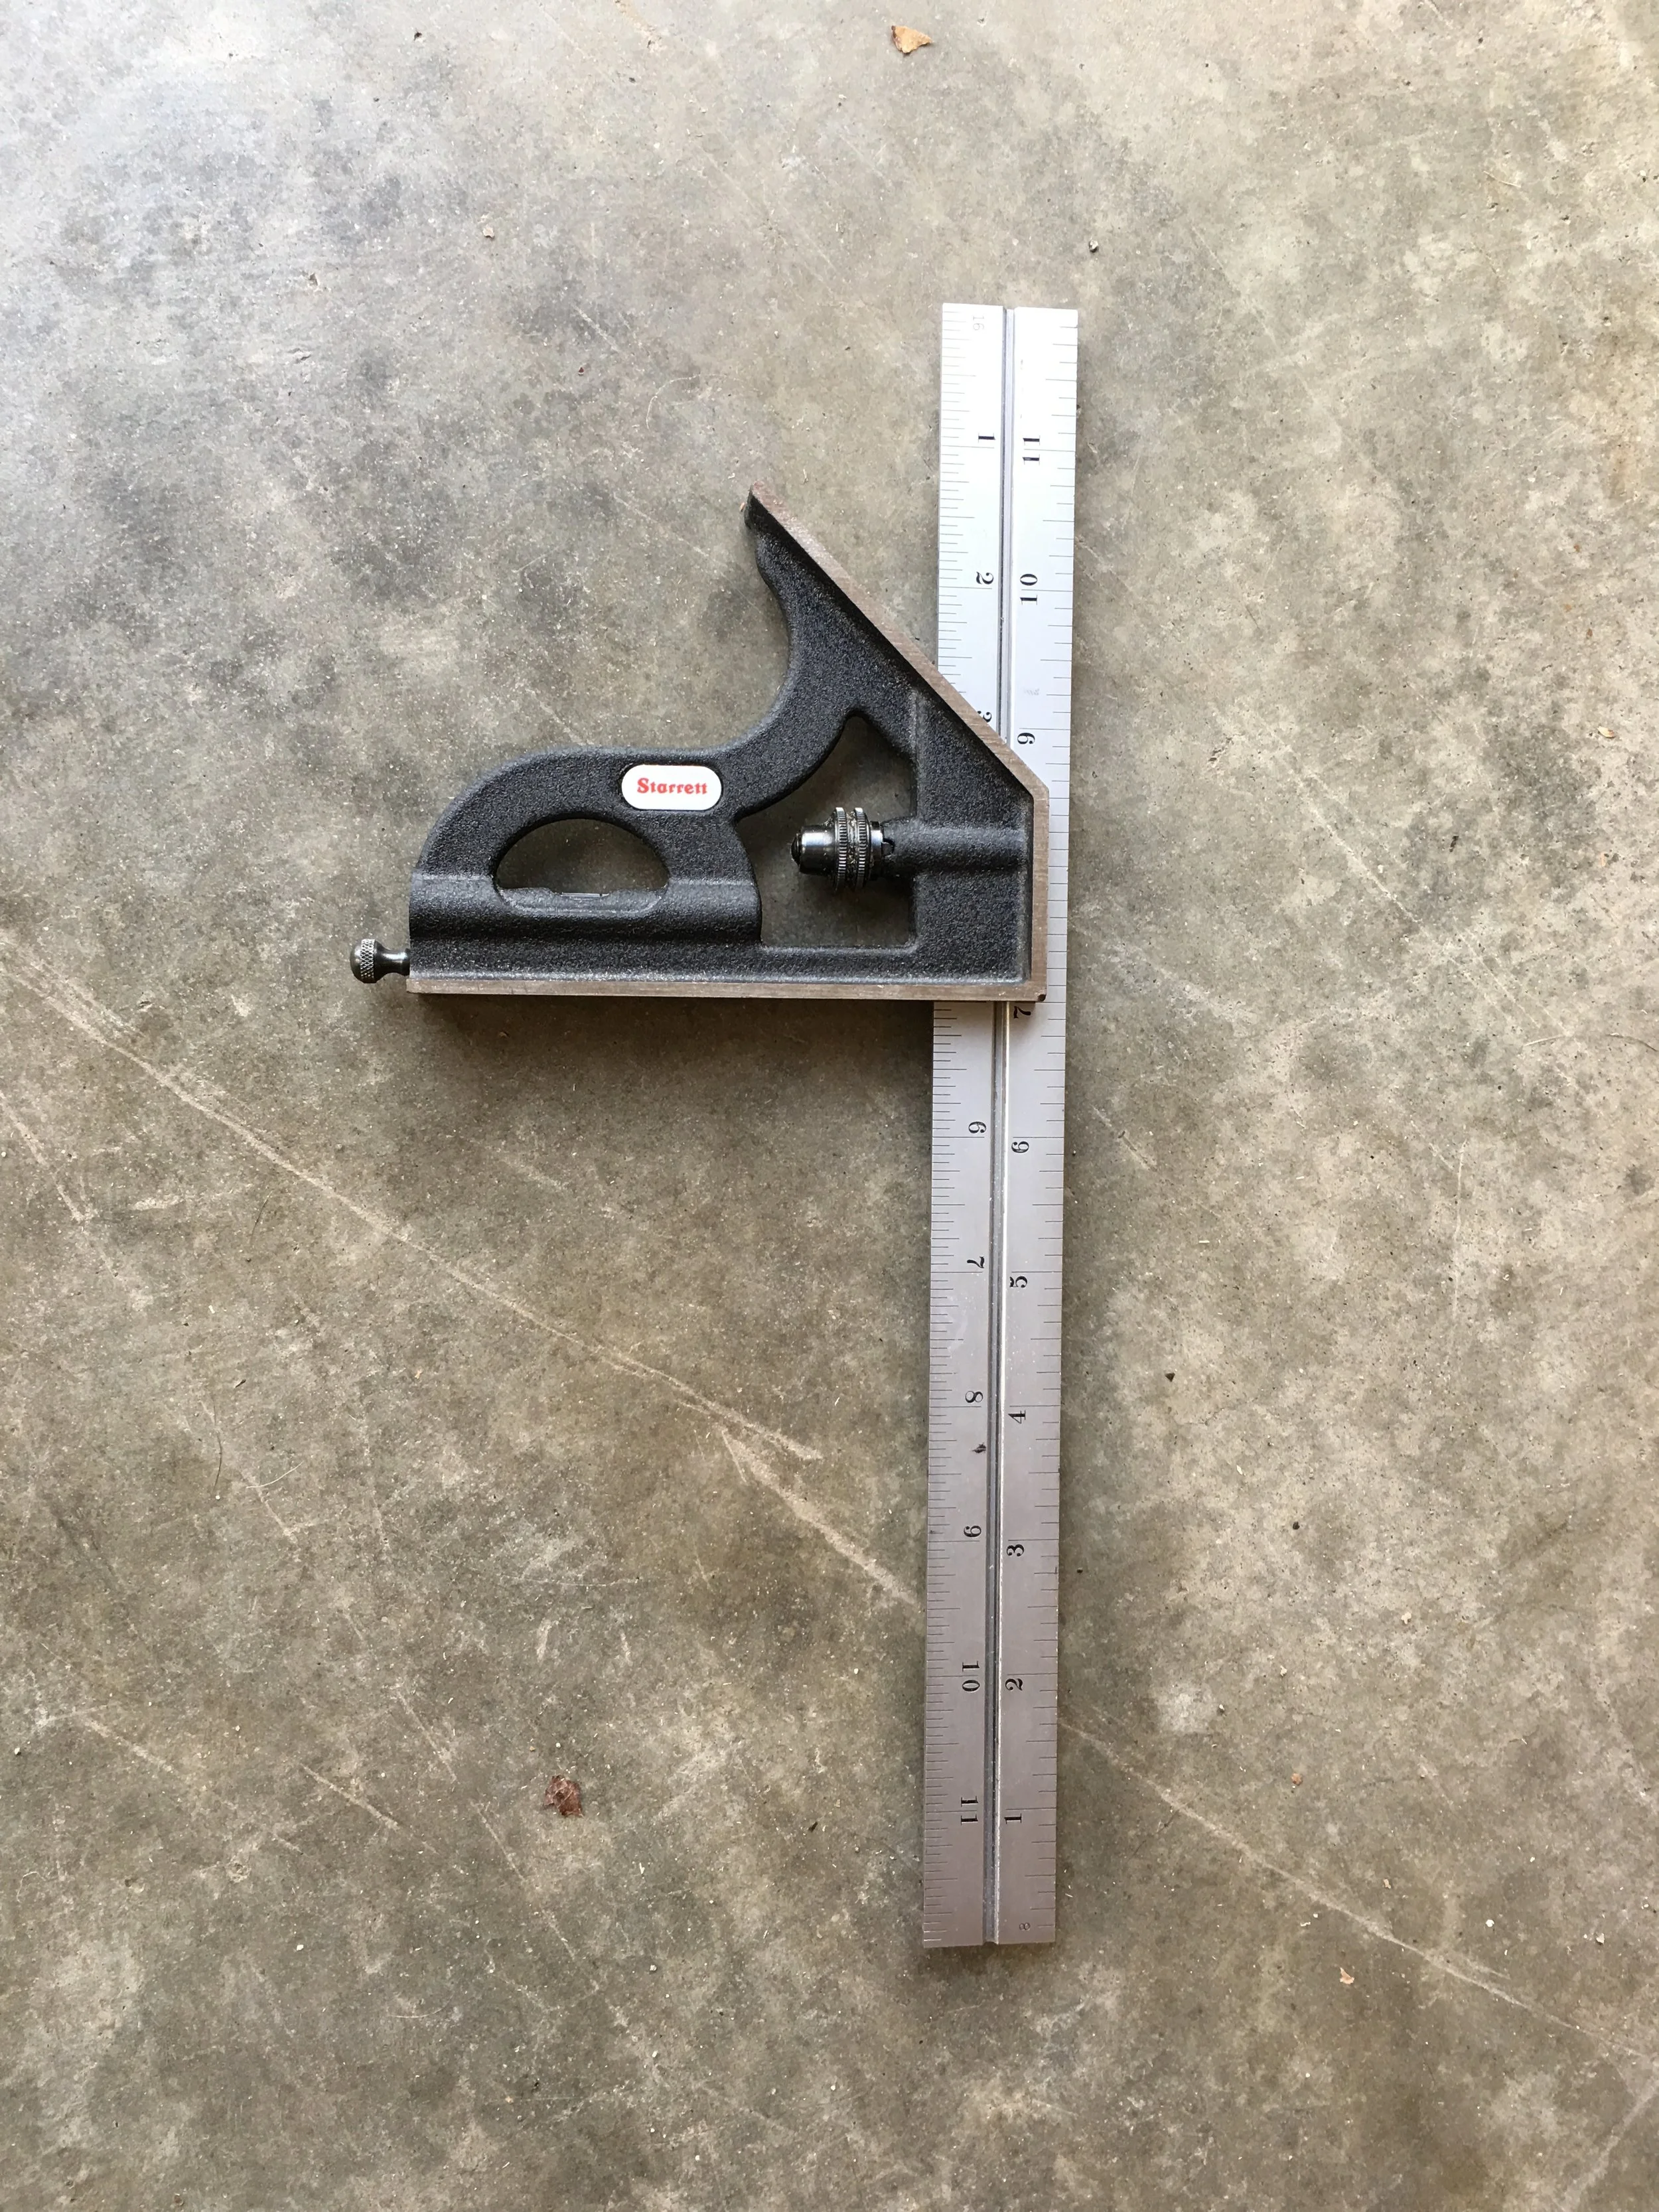
Combination square (optional) - The combination square was helpful when marking off lengths and getting a 45 degree mark. This one was a gift and is rather pricey, but there are alternatives that would suffice for less than $15.
Walkthrough
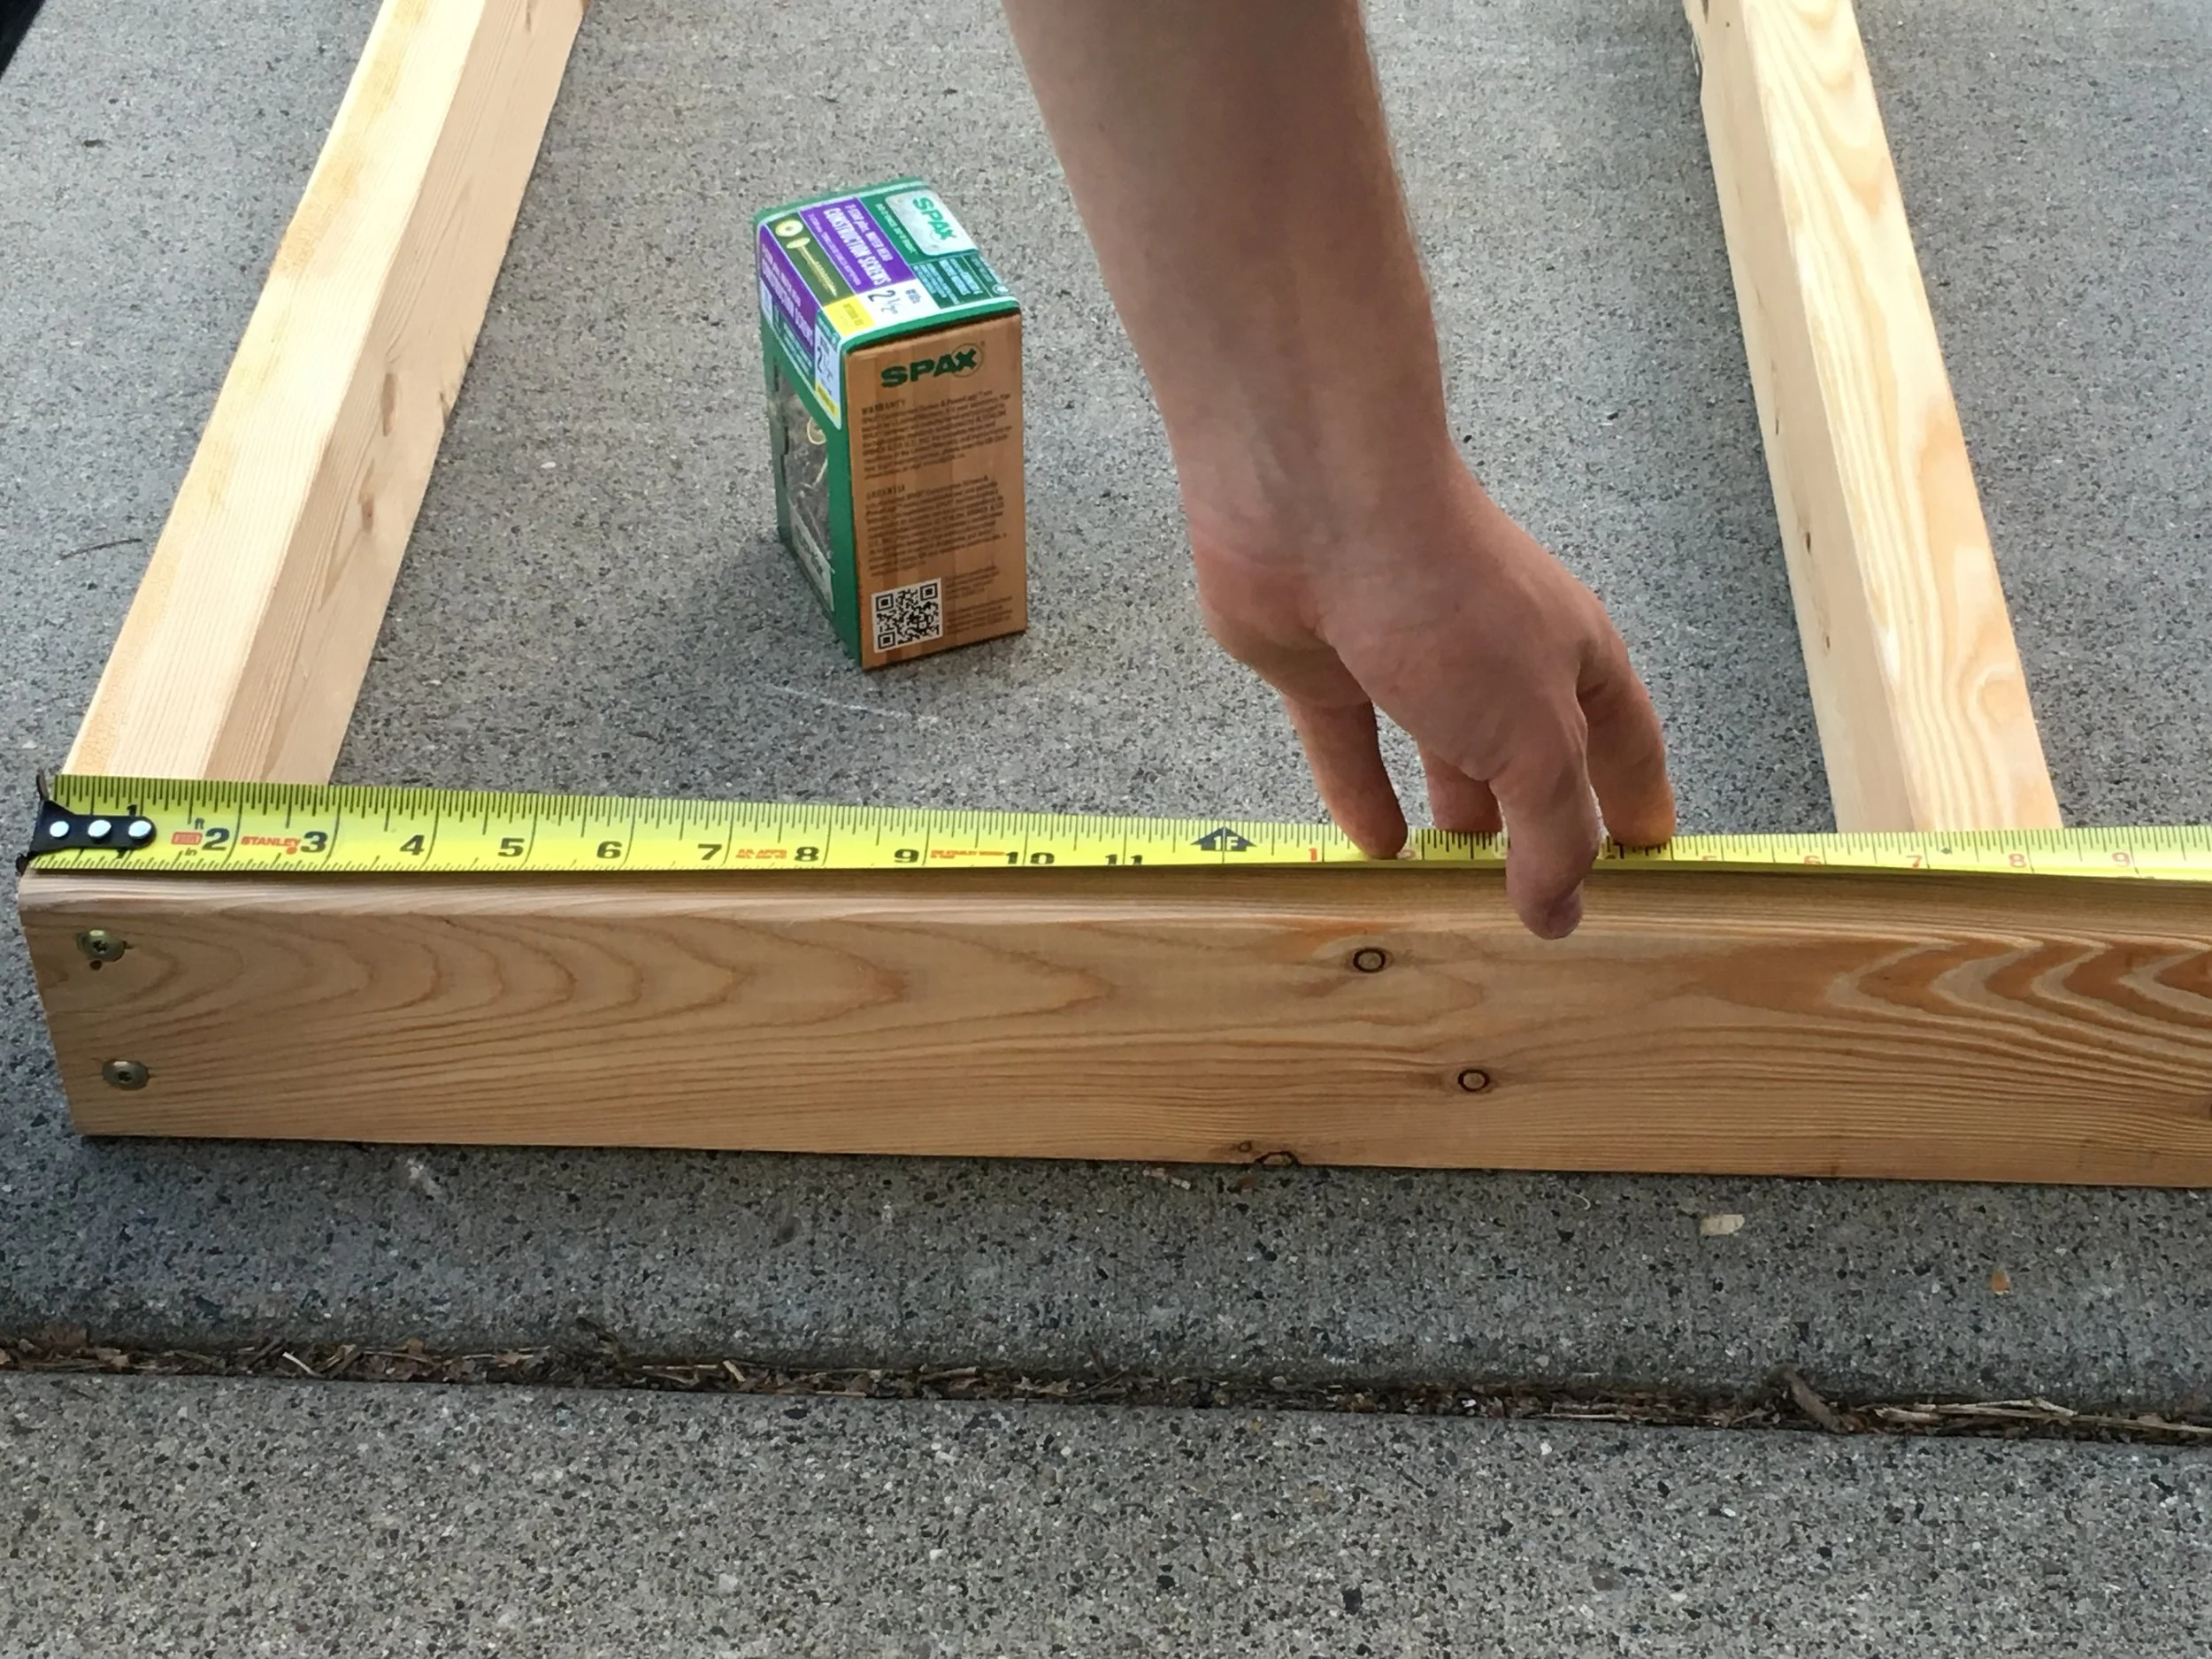
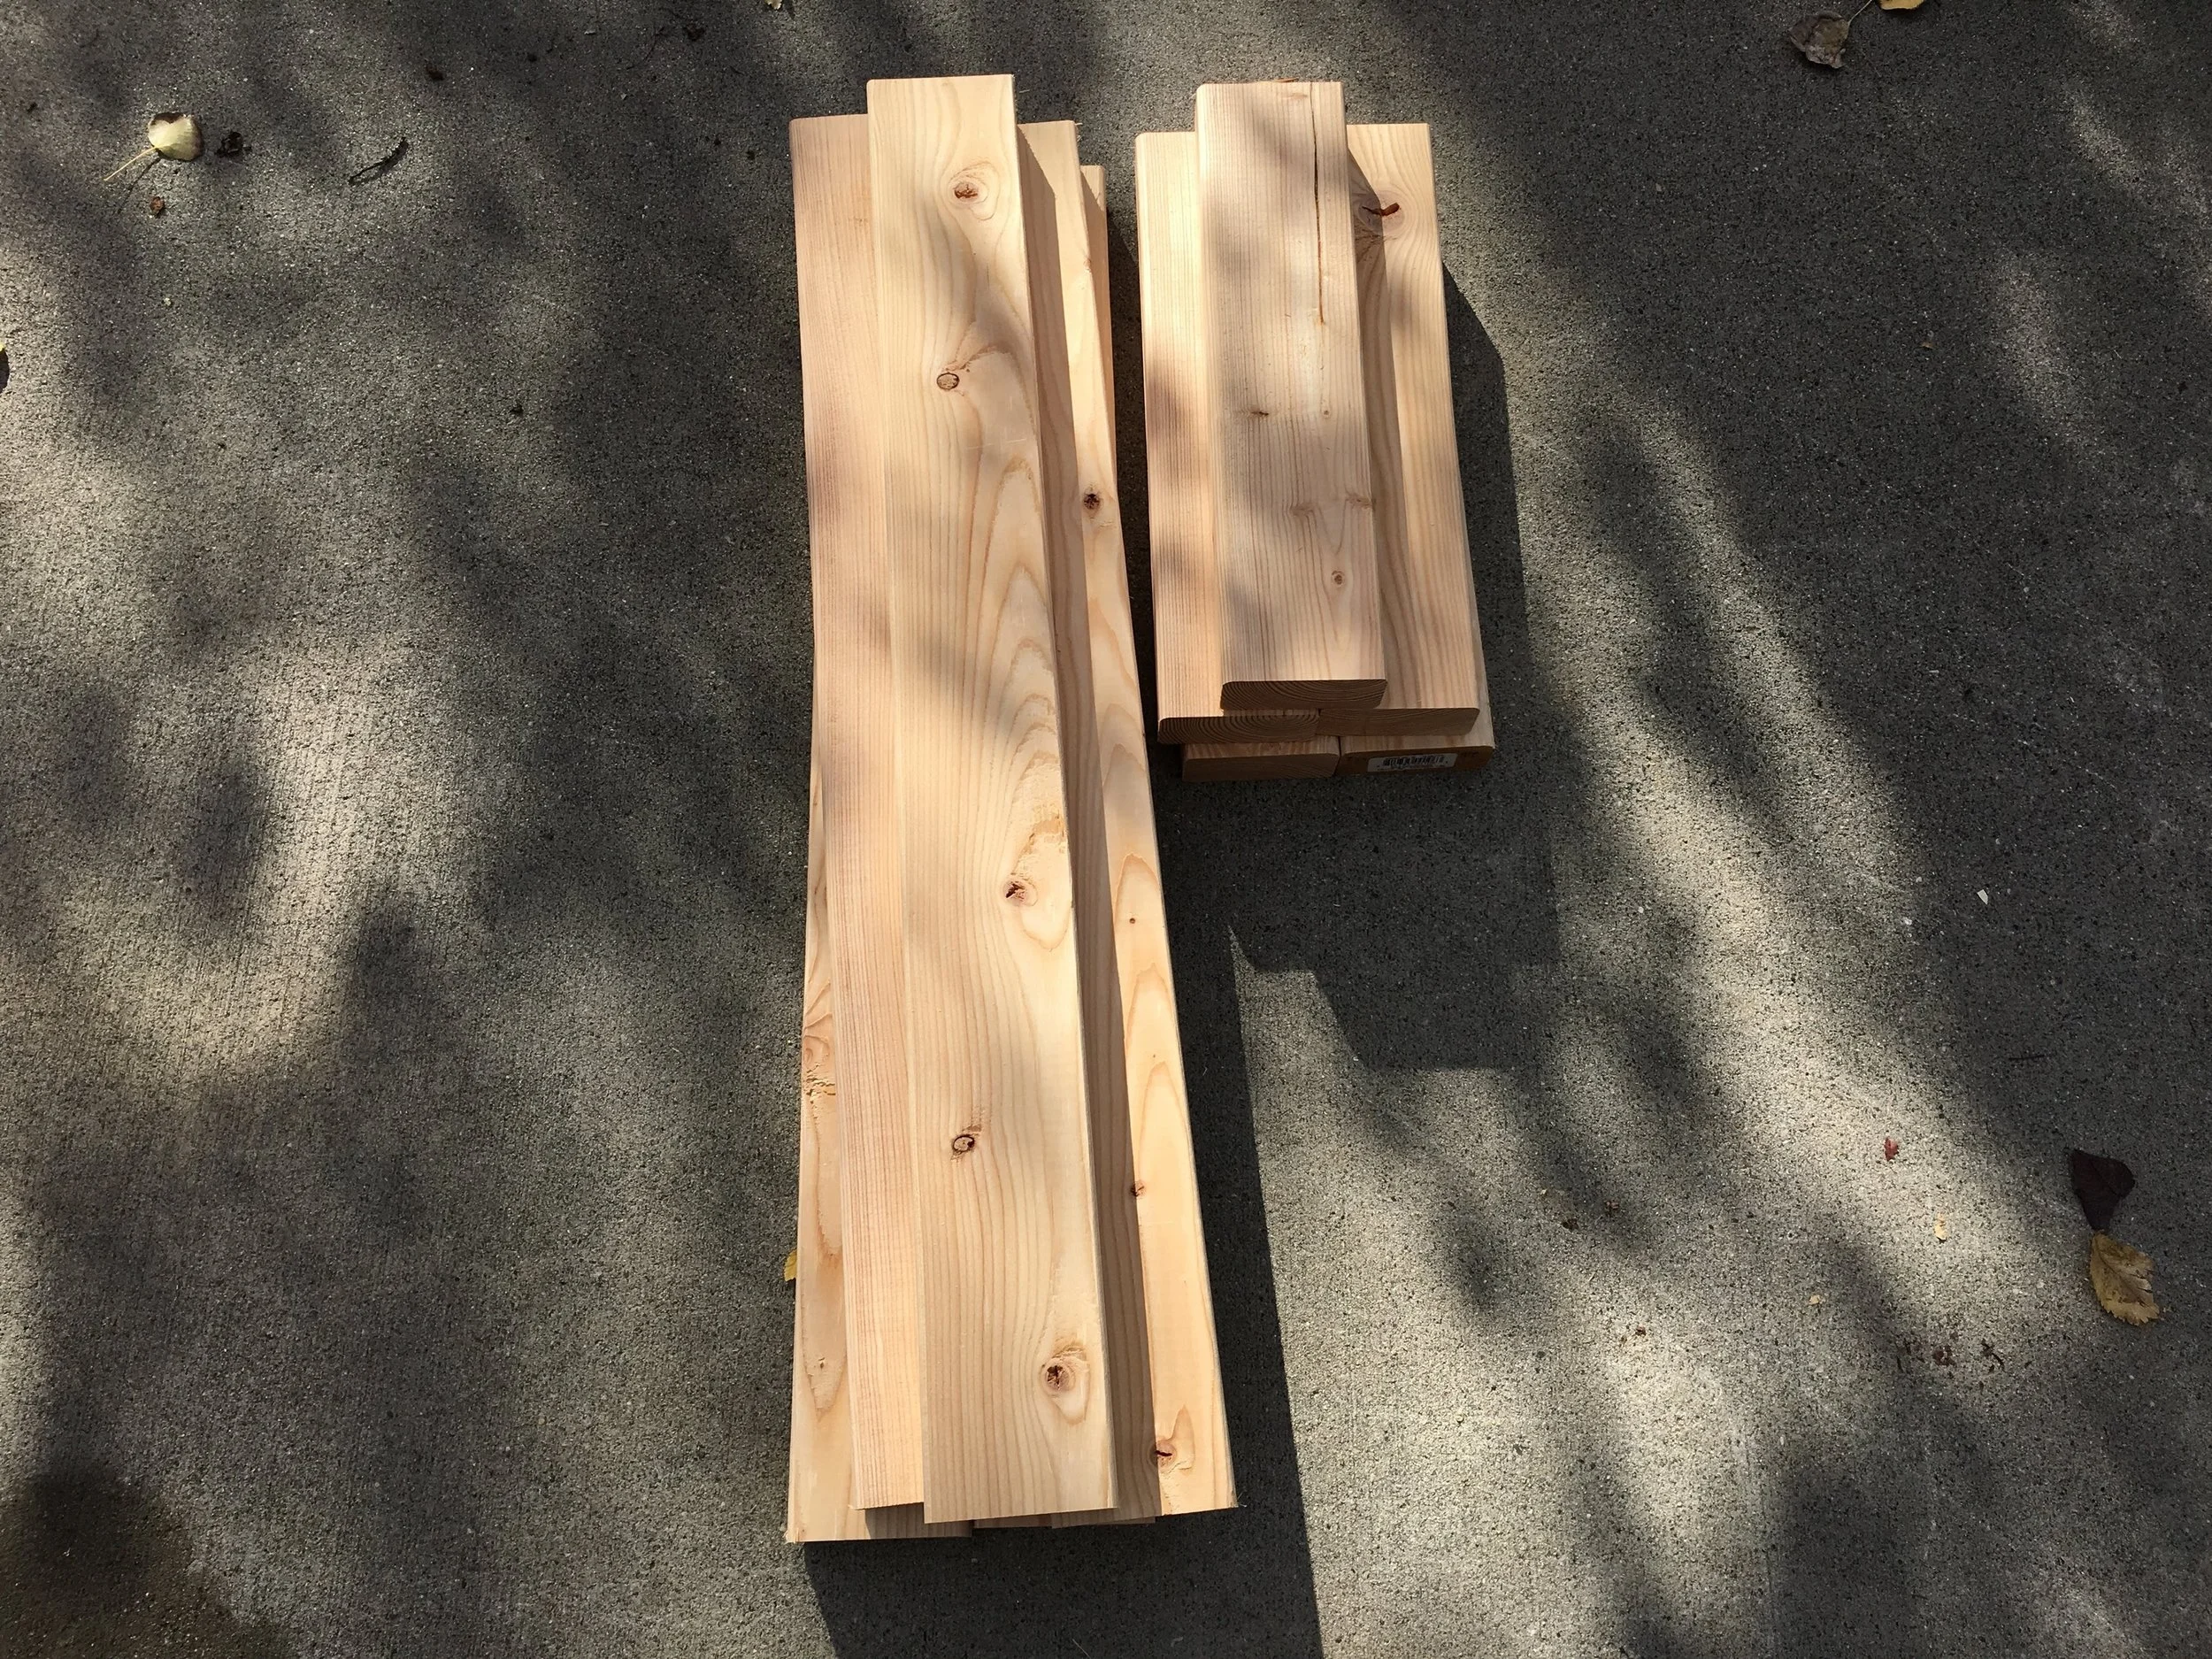
After getting all your 2x4s and plywood, cut them to the dimensions listed above. Sorting them into piles based on their labeled letter. We'll assemble them in the order they are labeled from A-K.
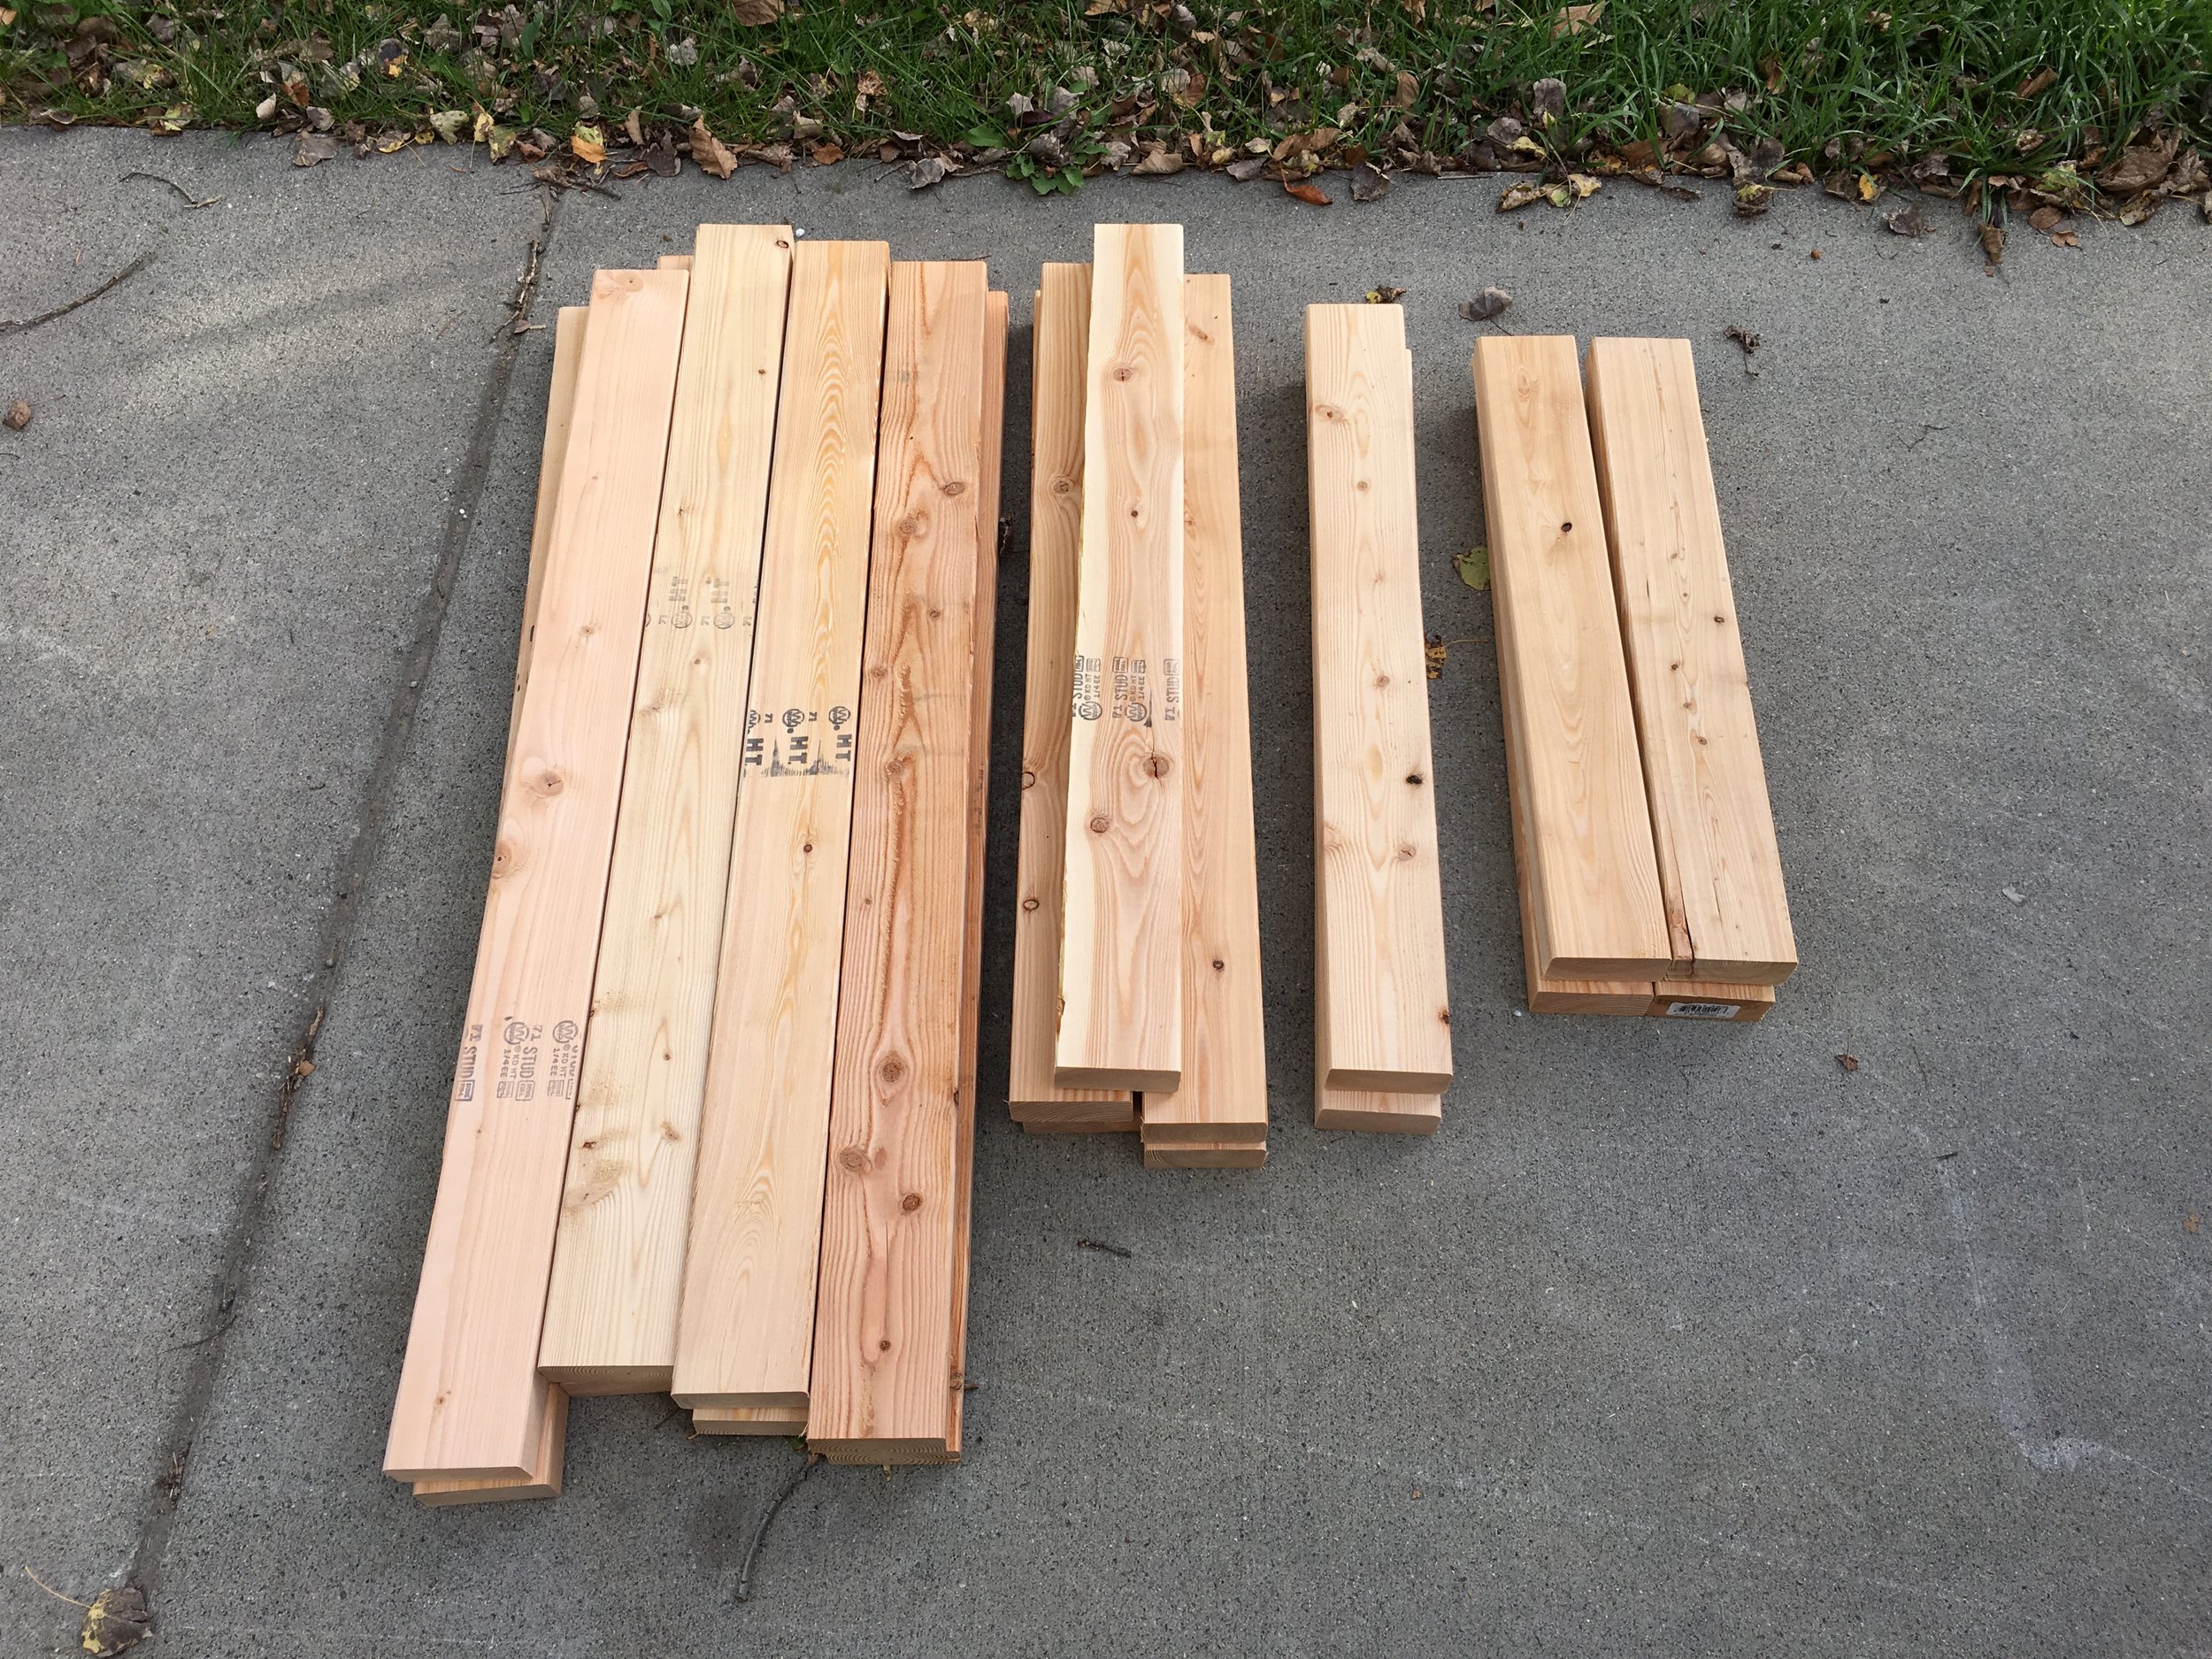
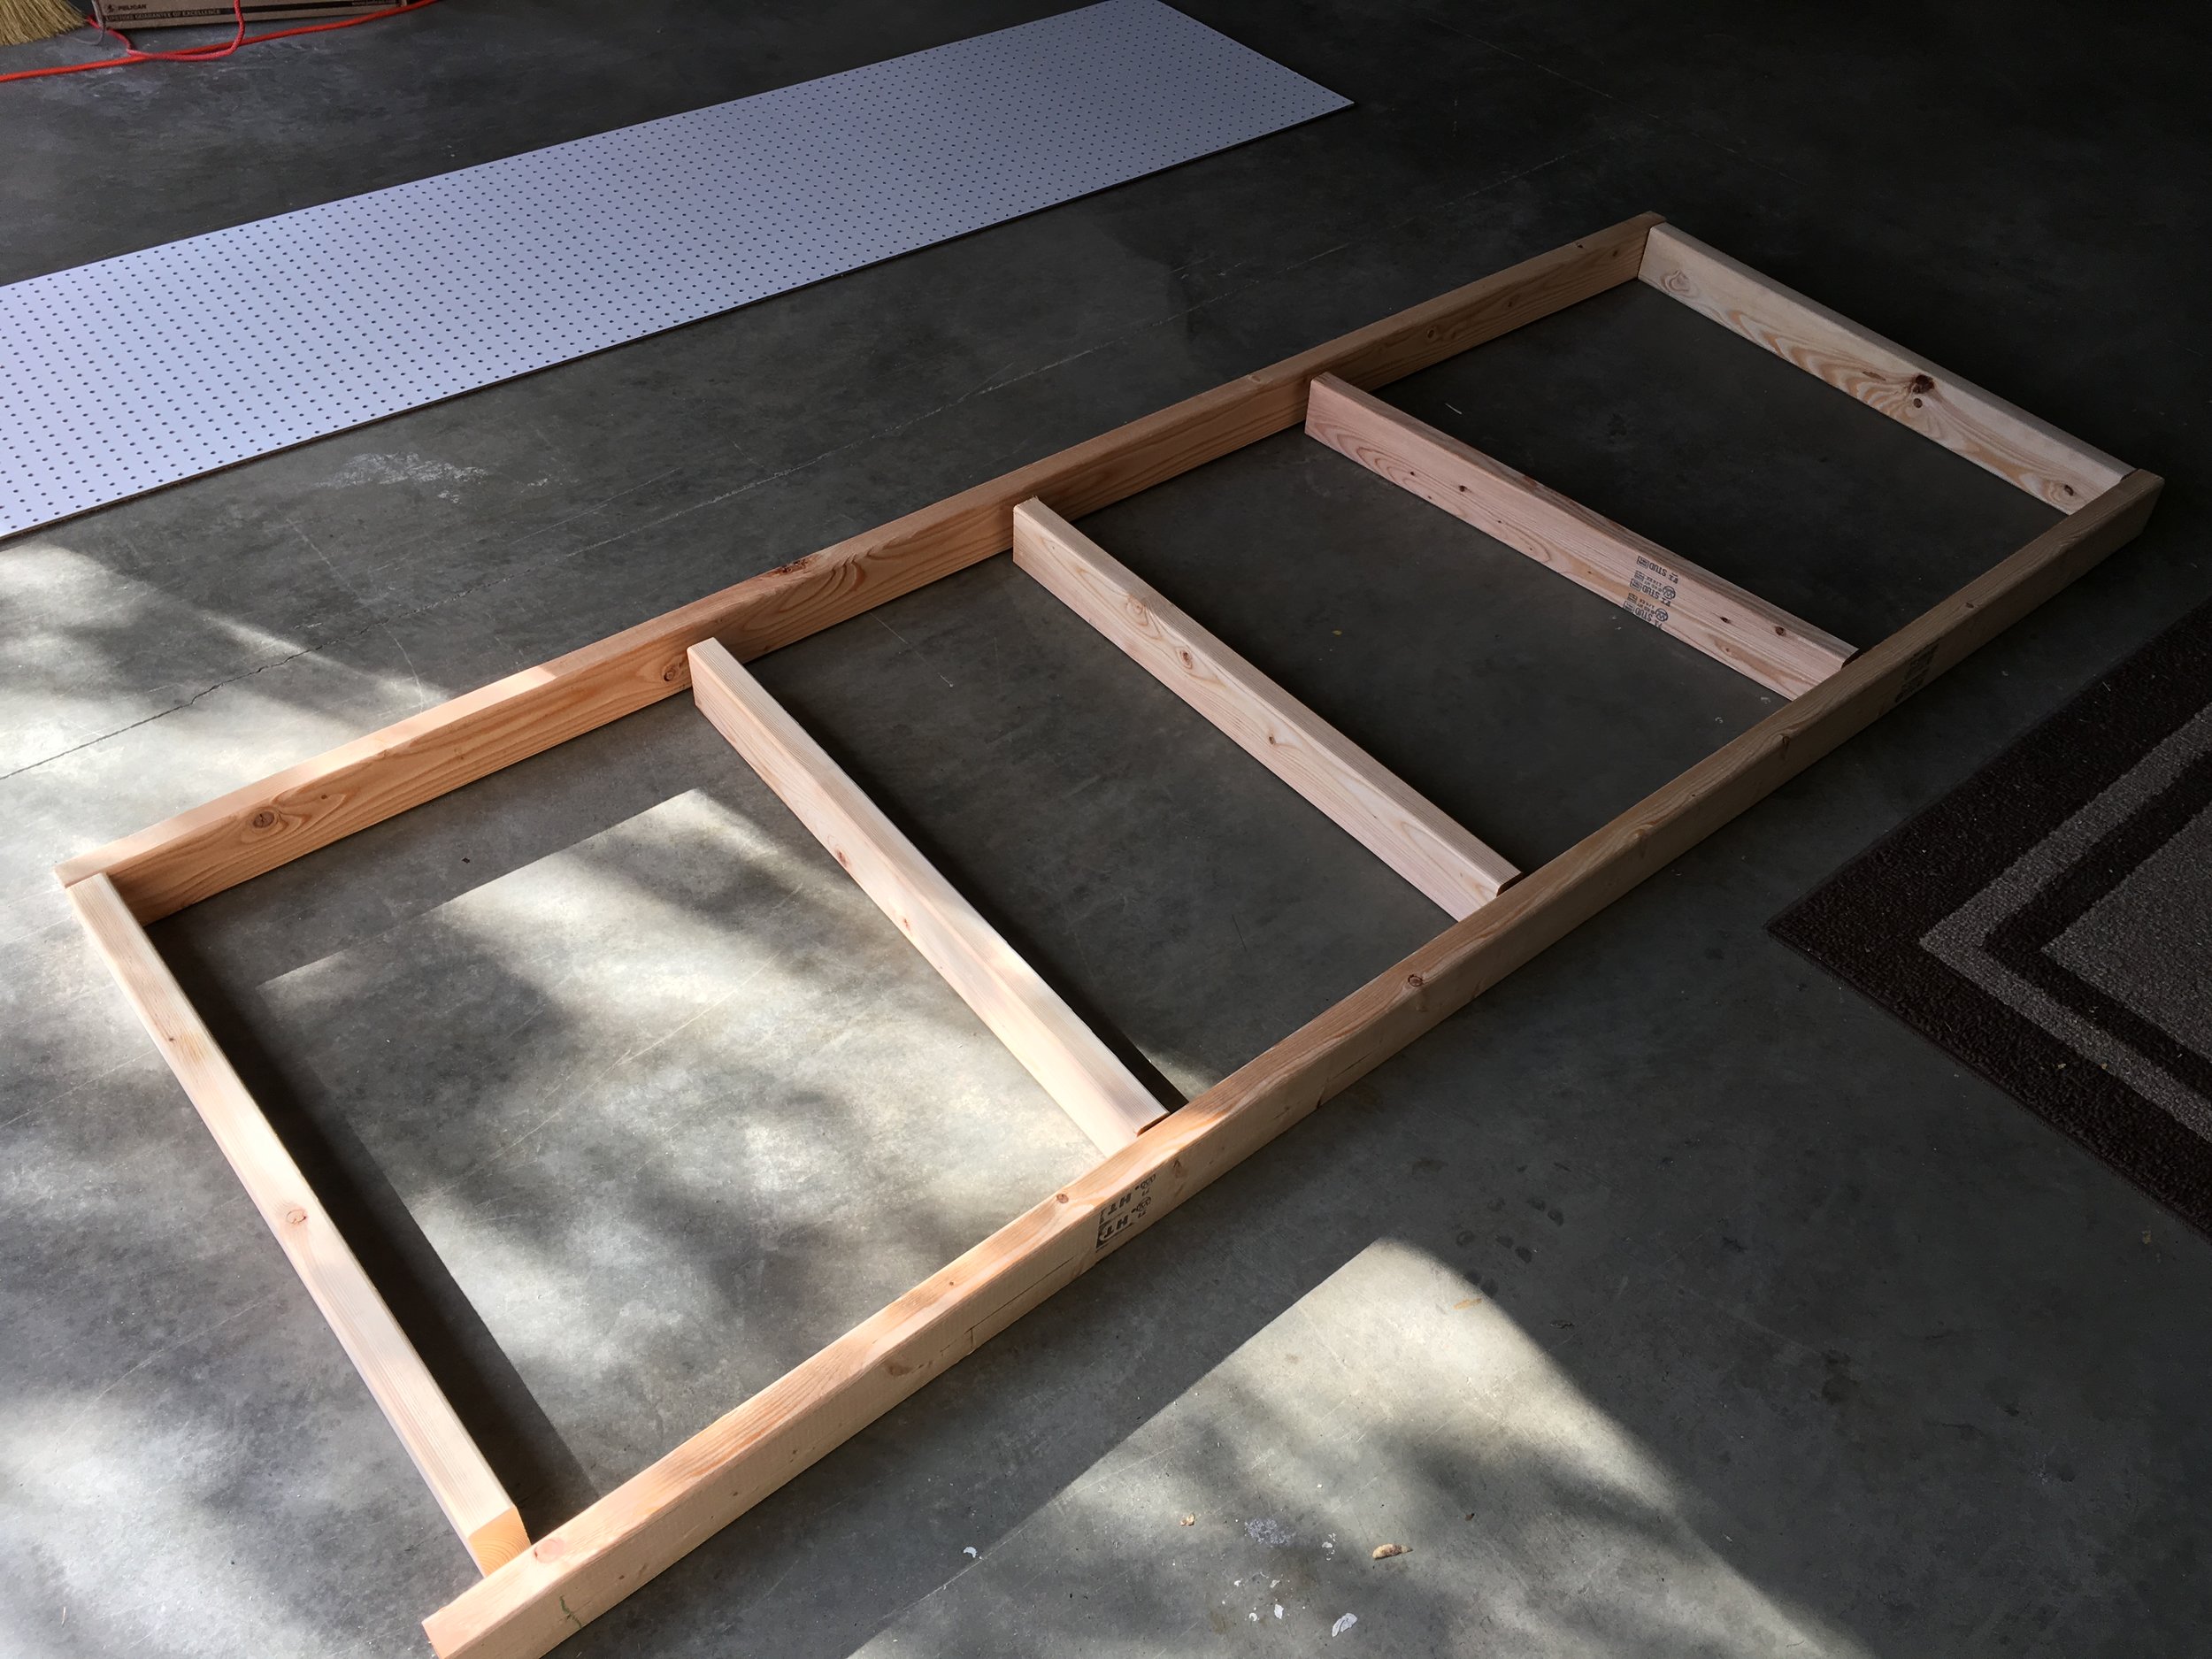
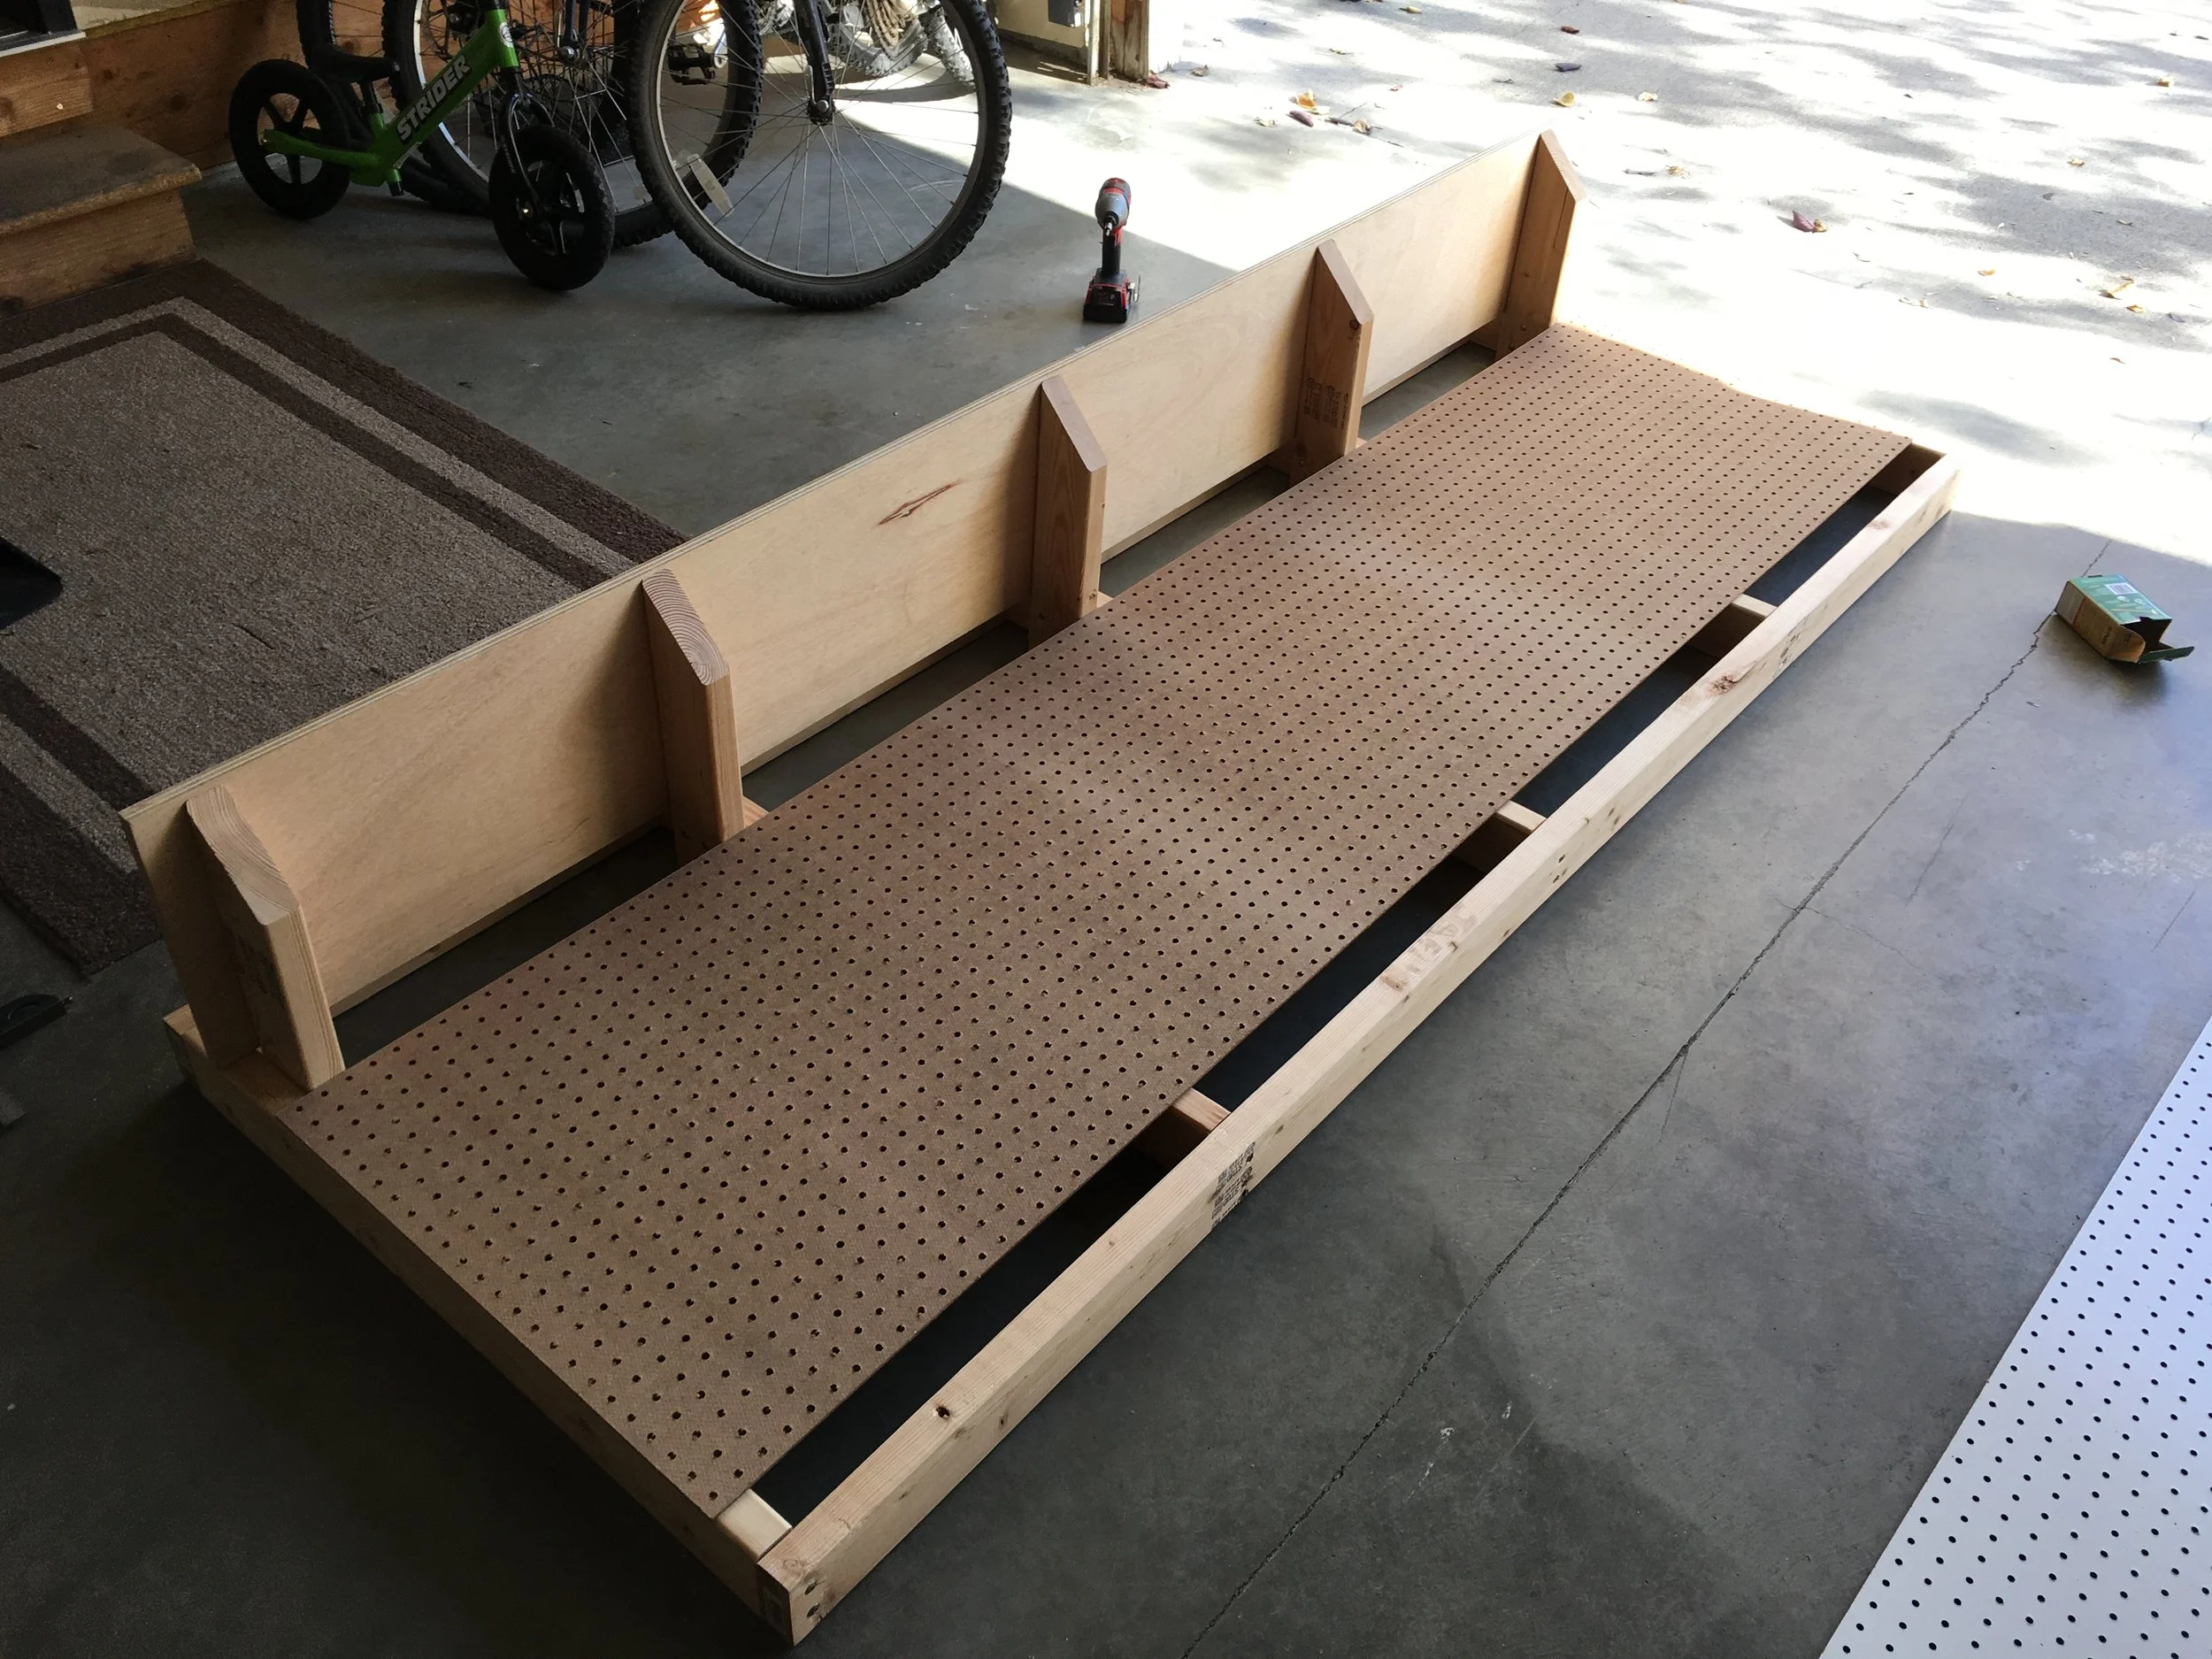
Boards cut to length for the table without a back board.
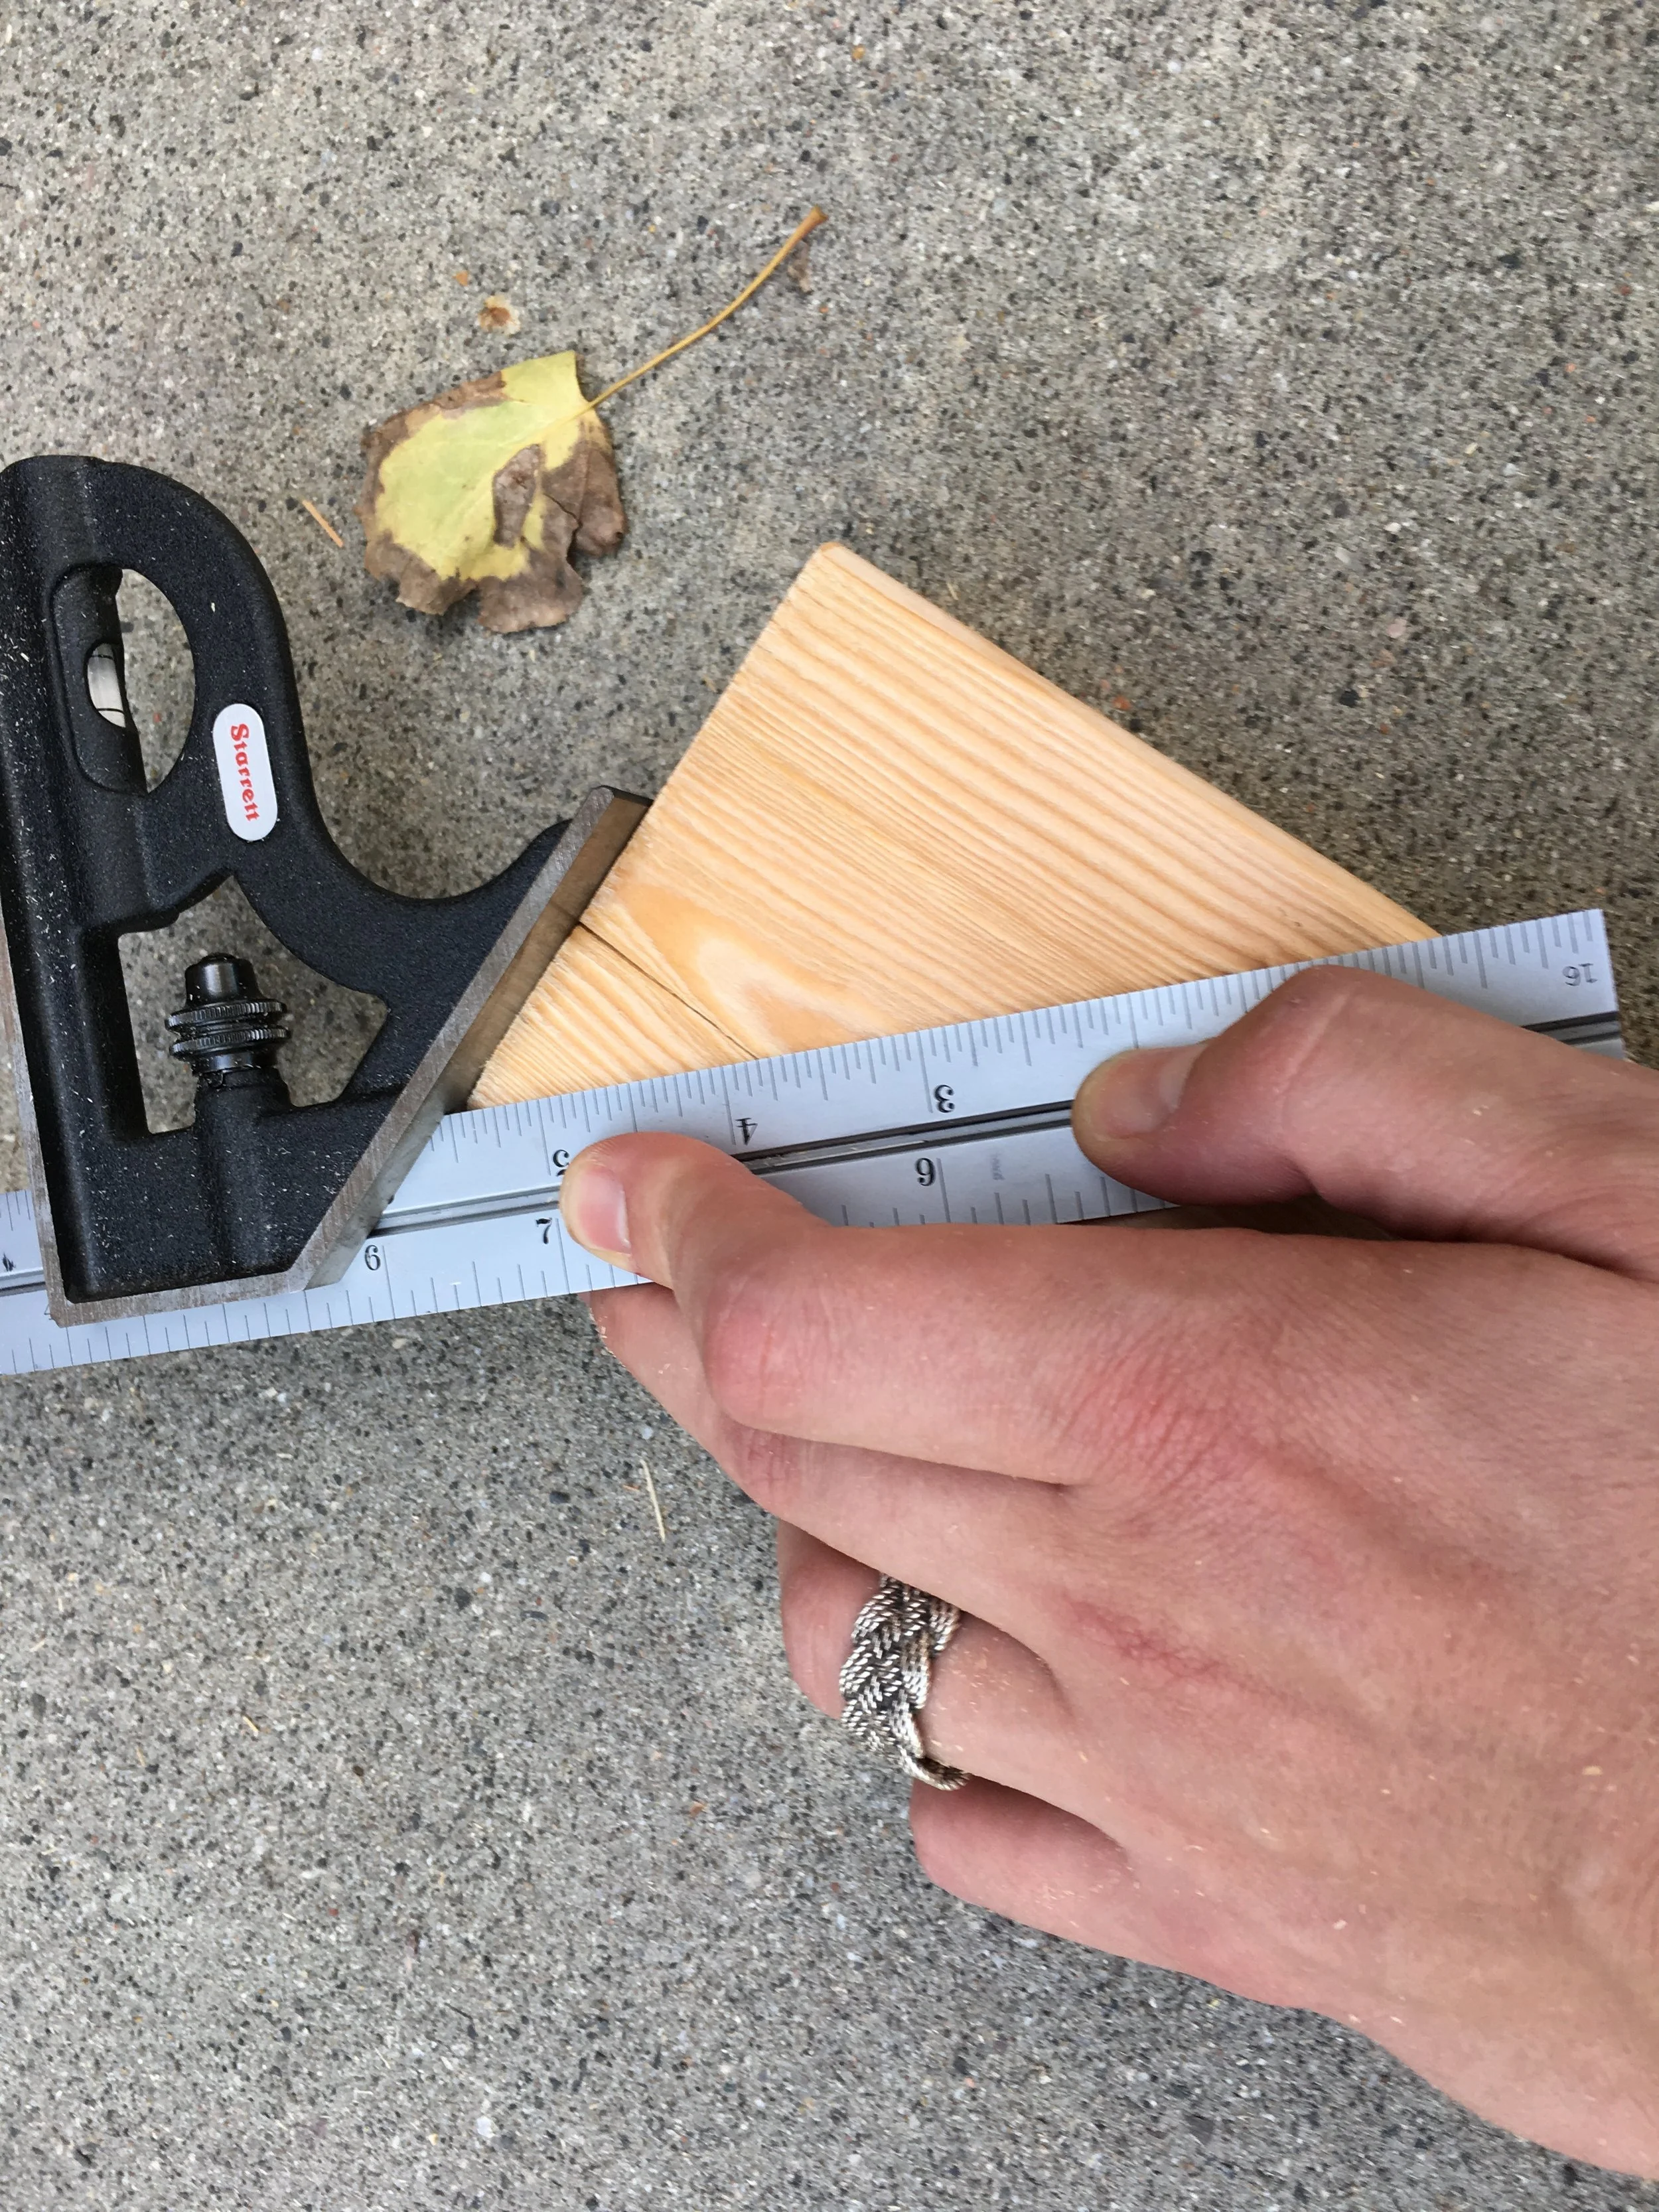
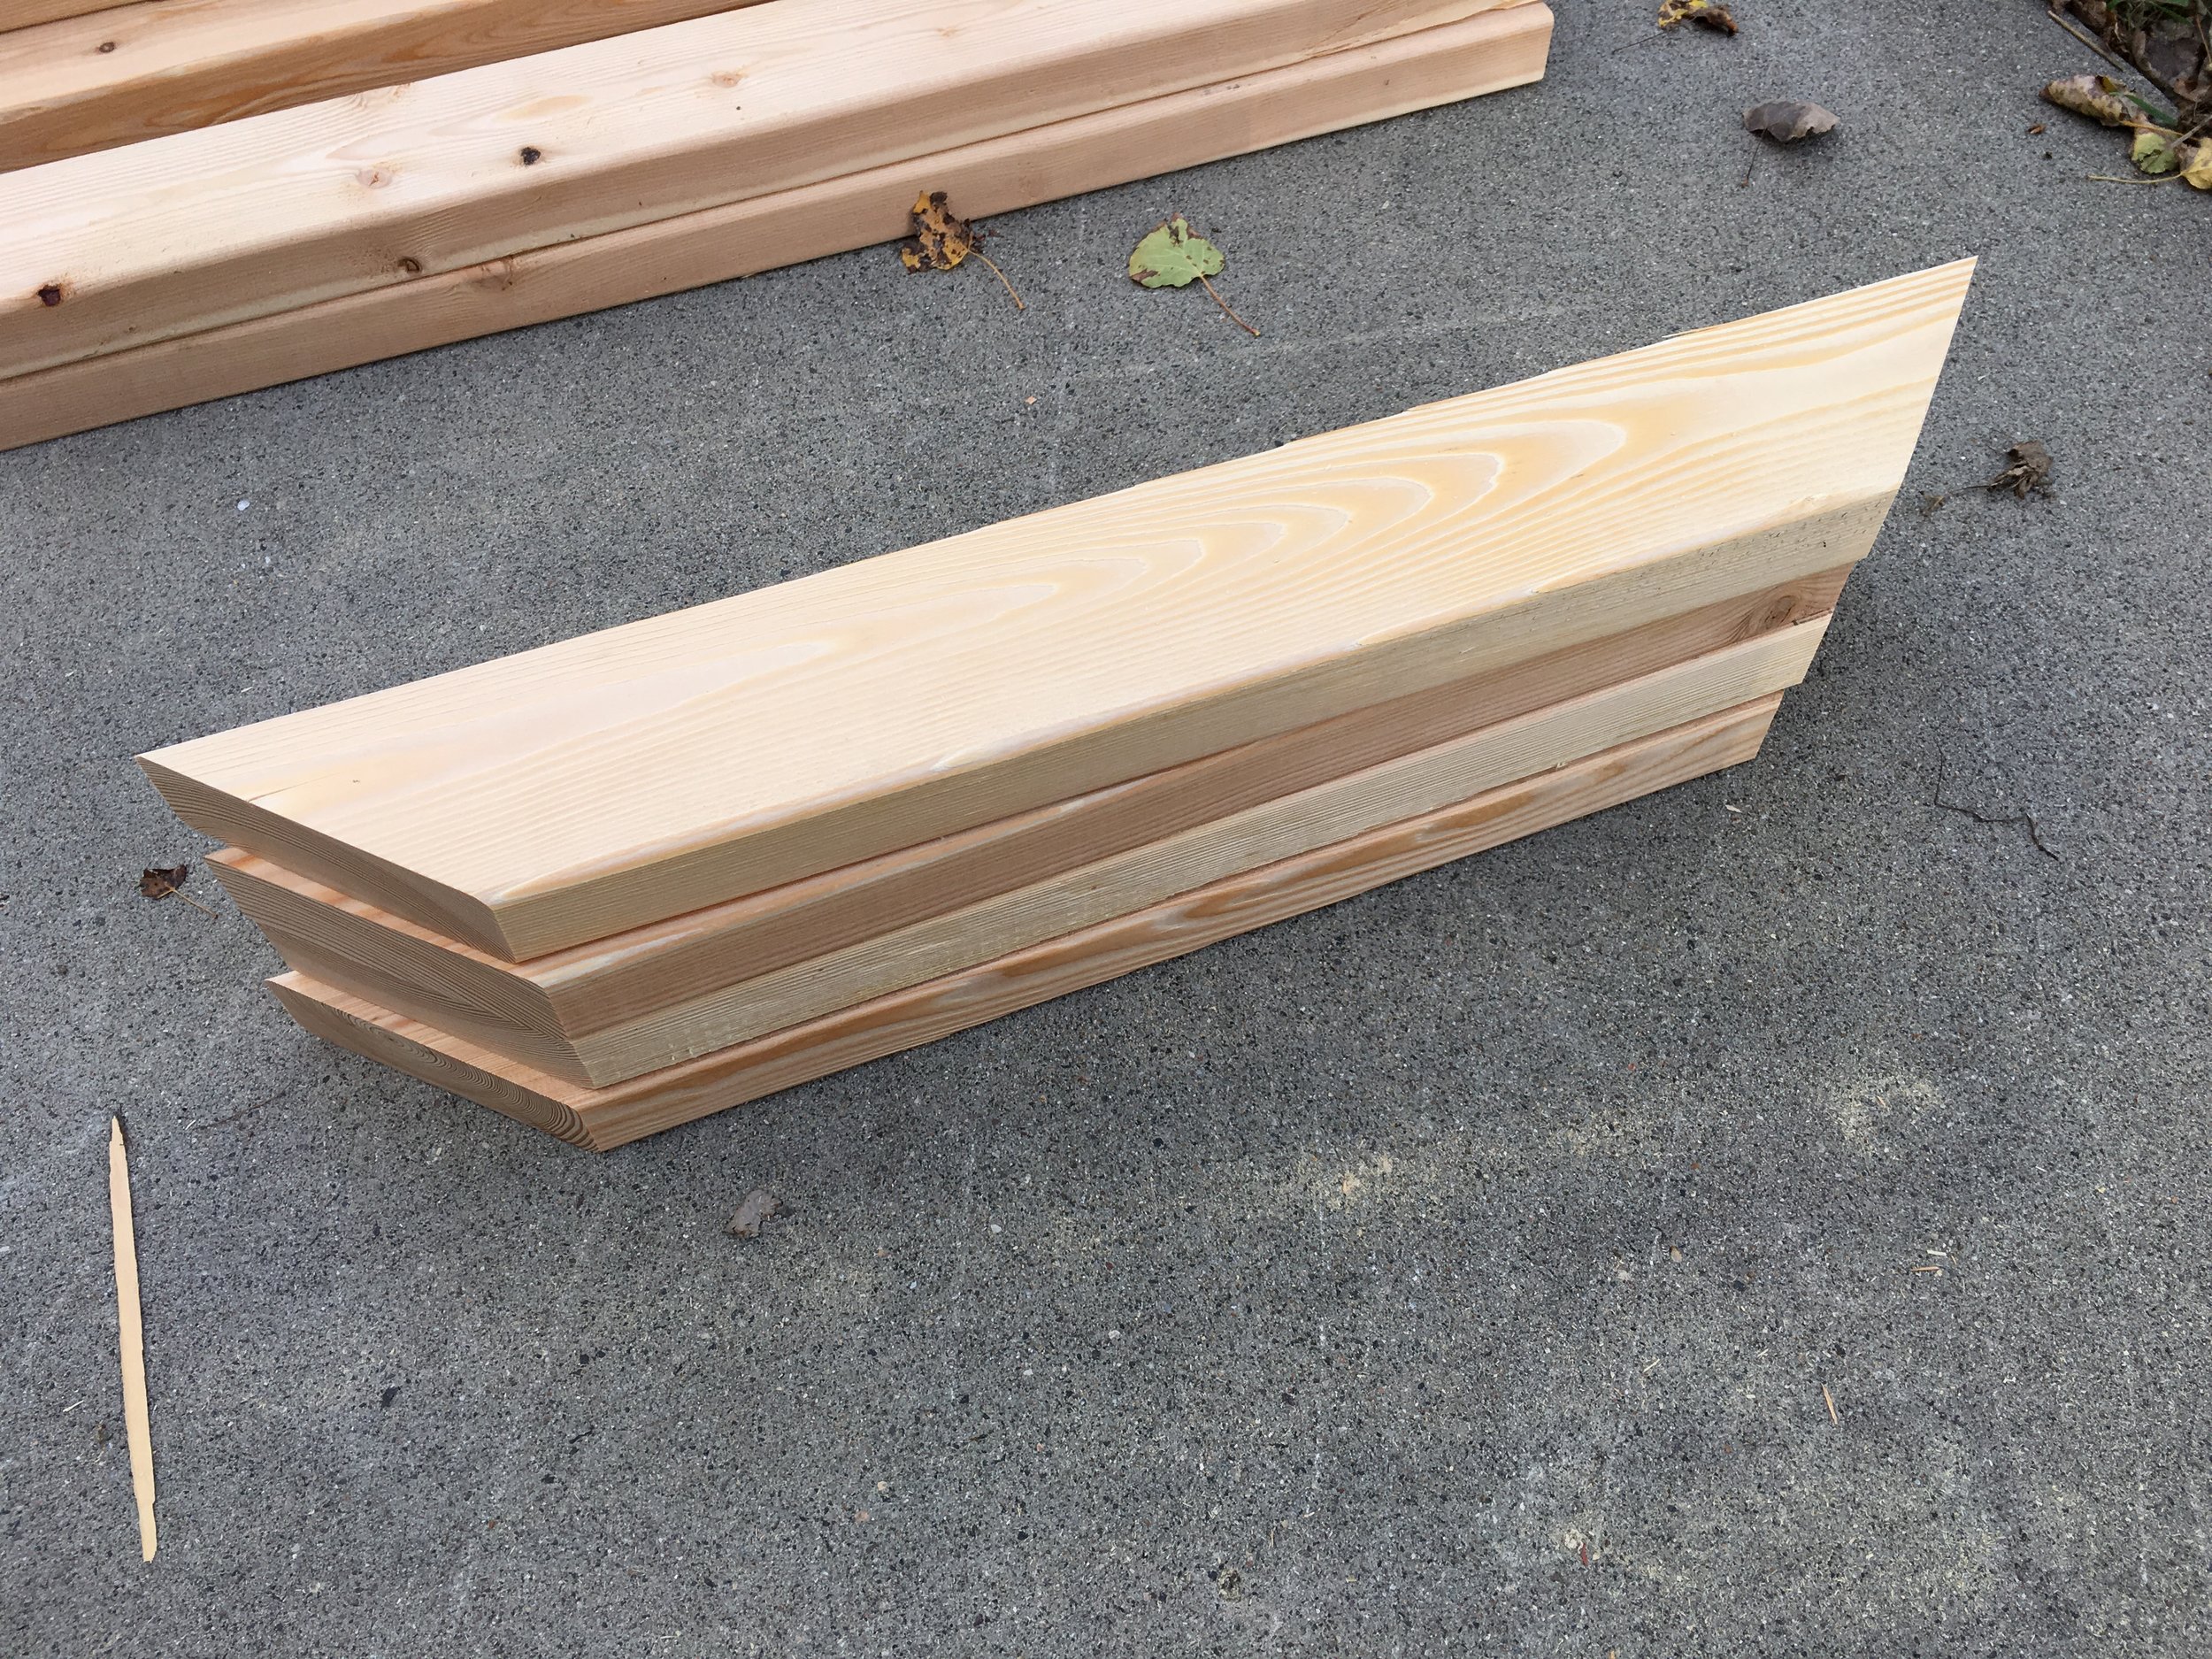
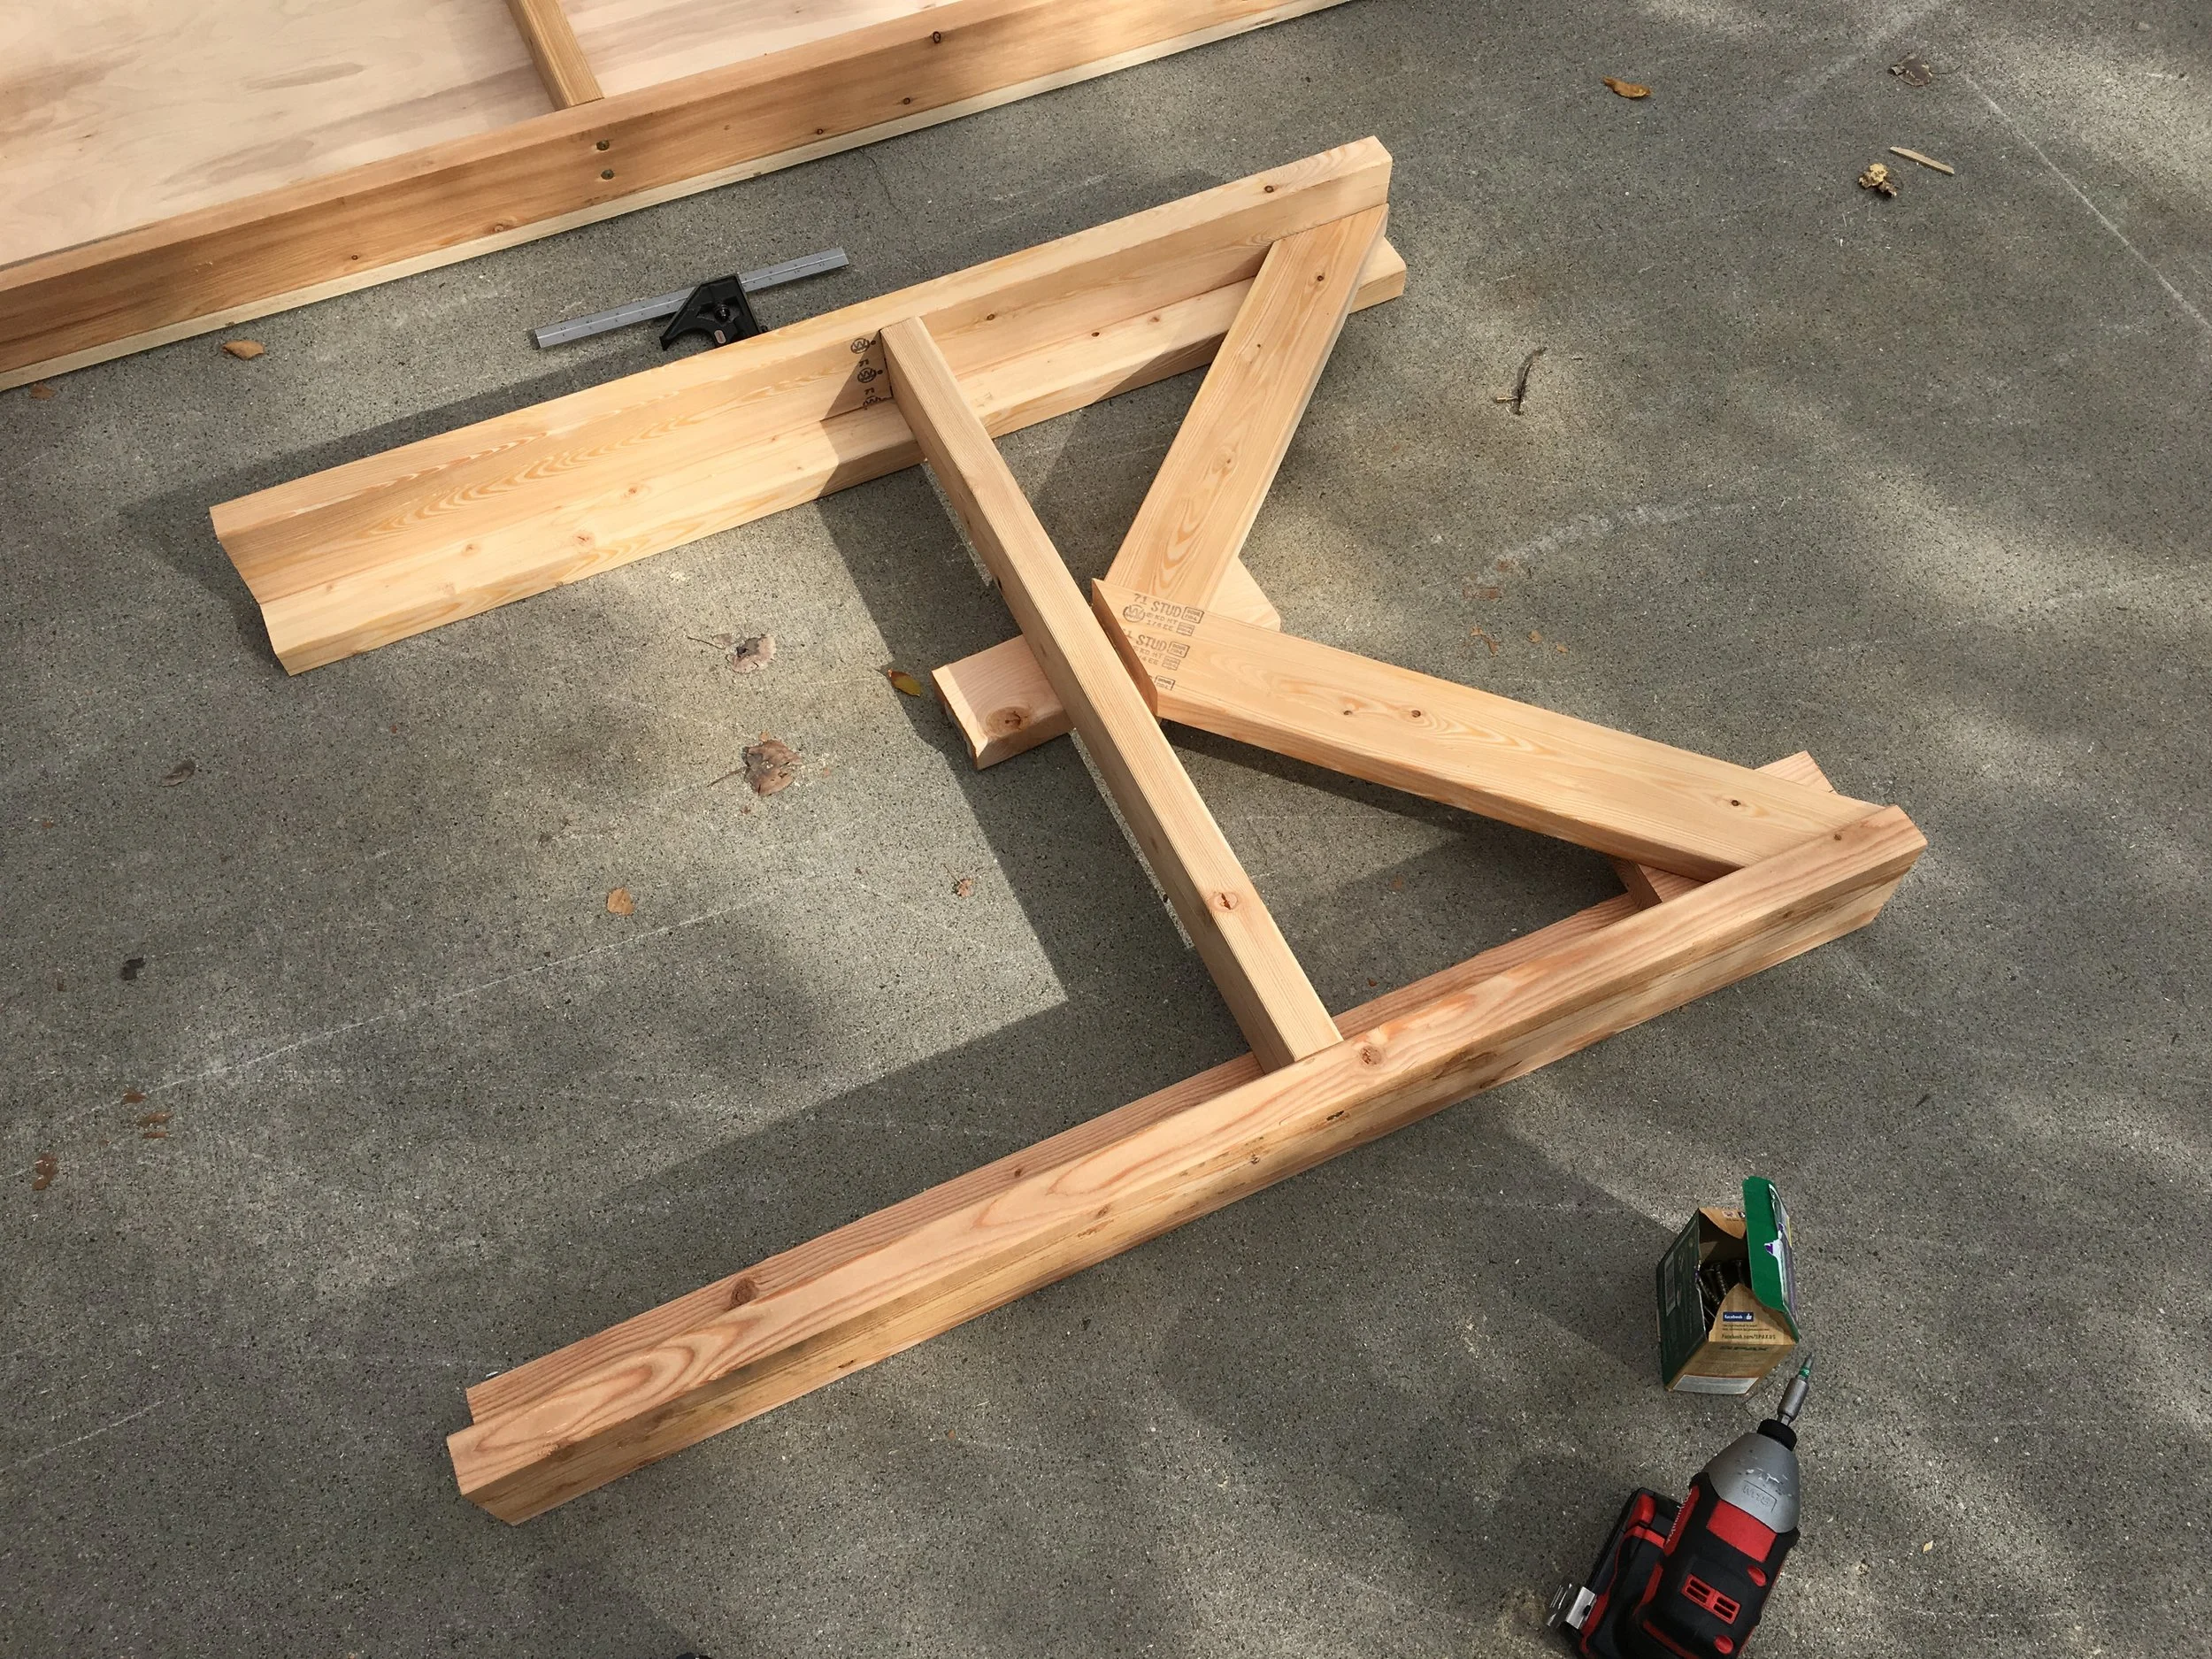
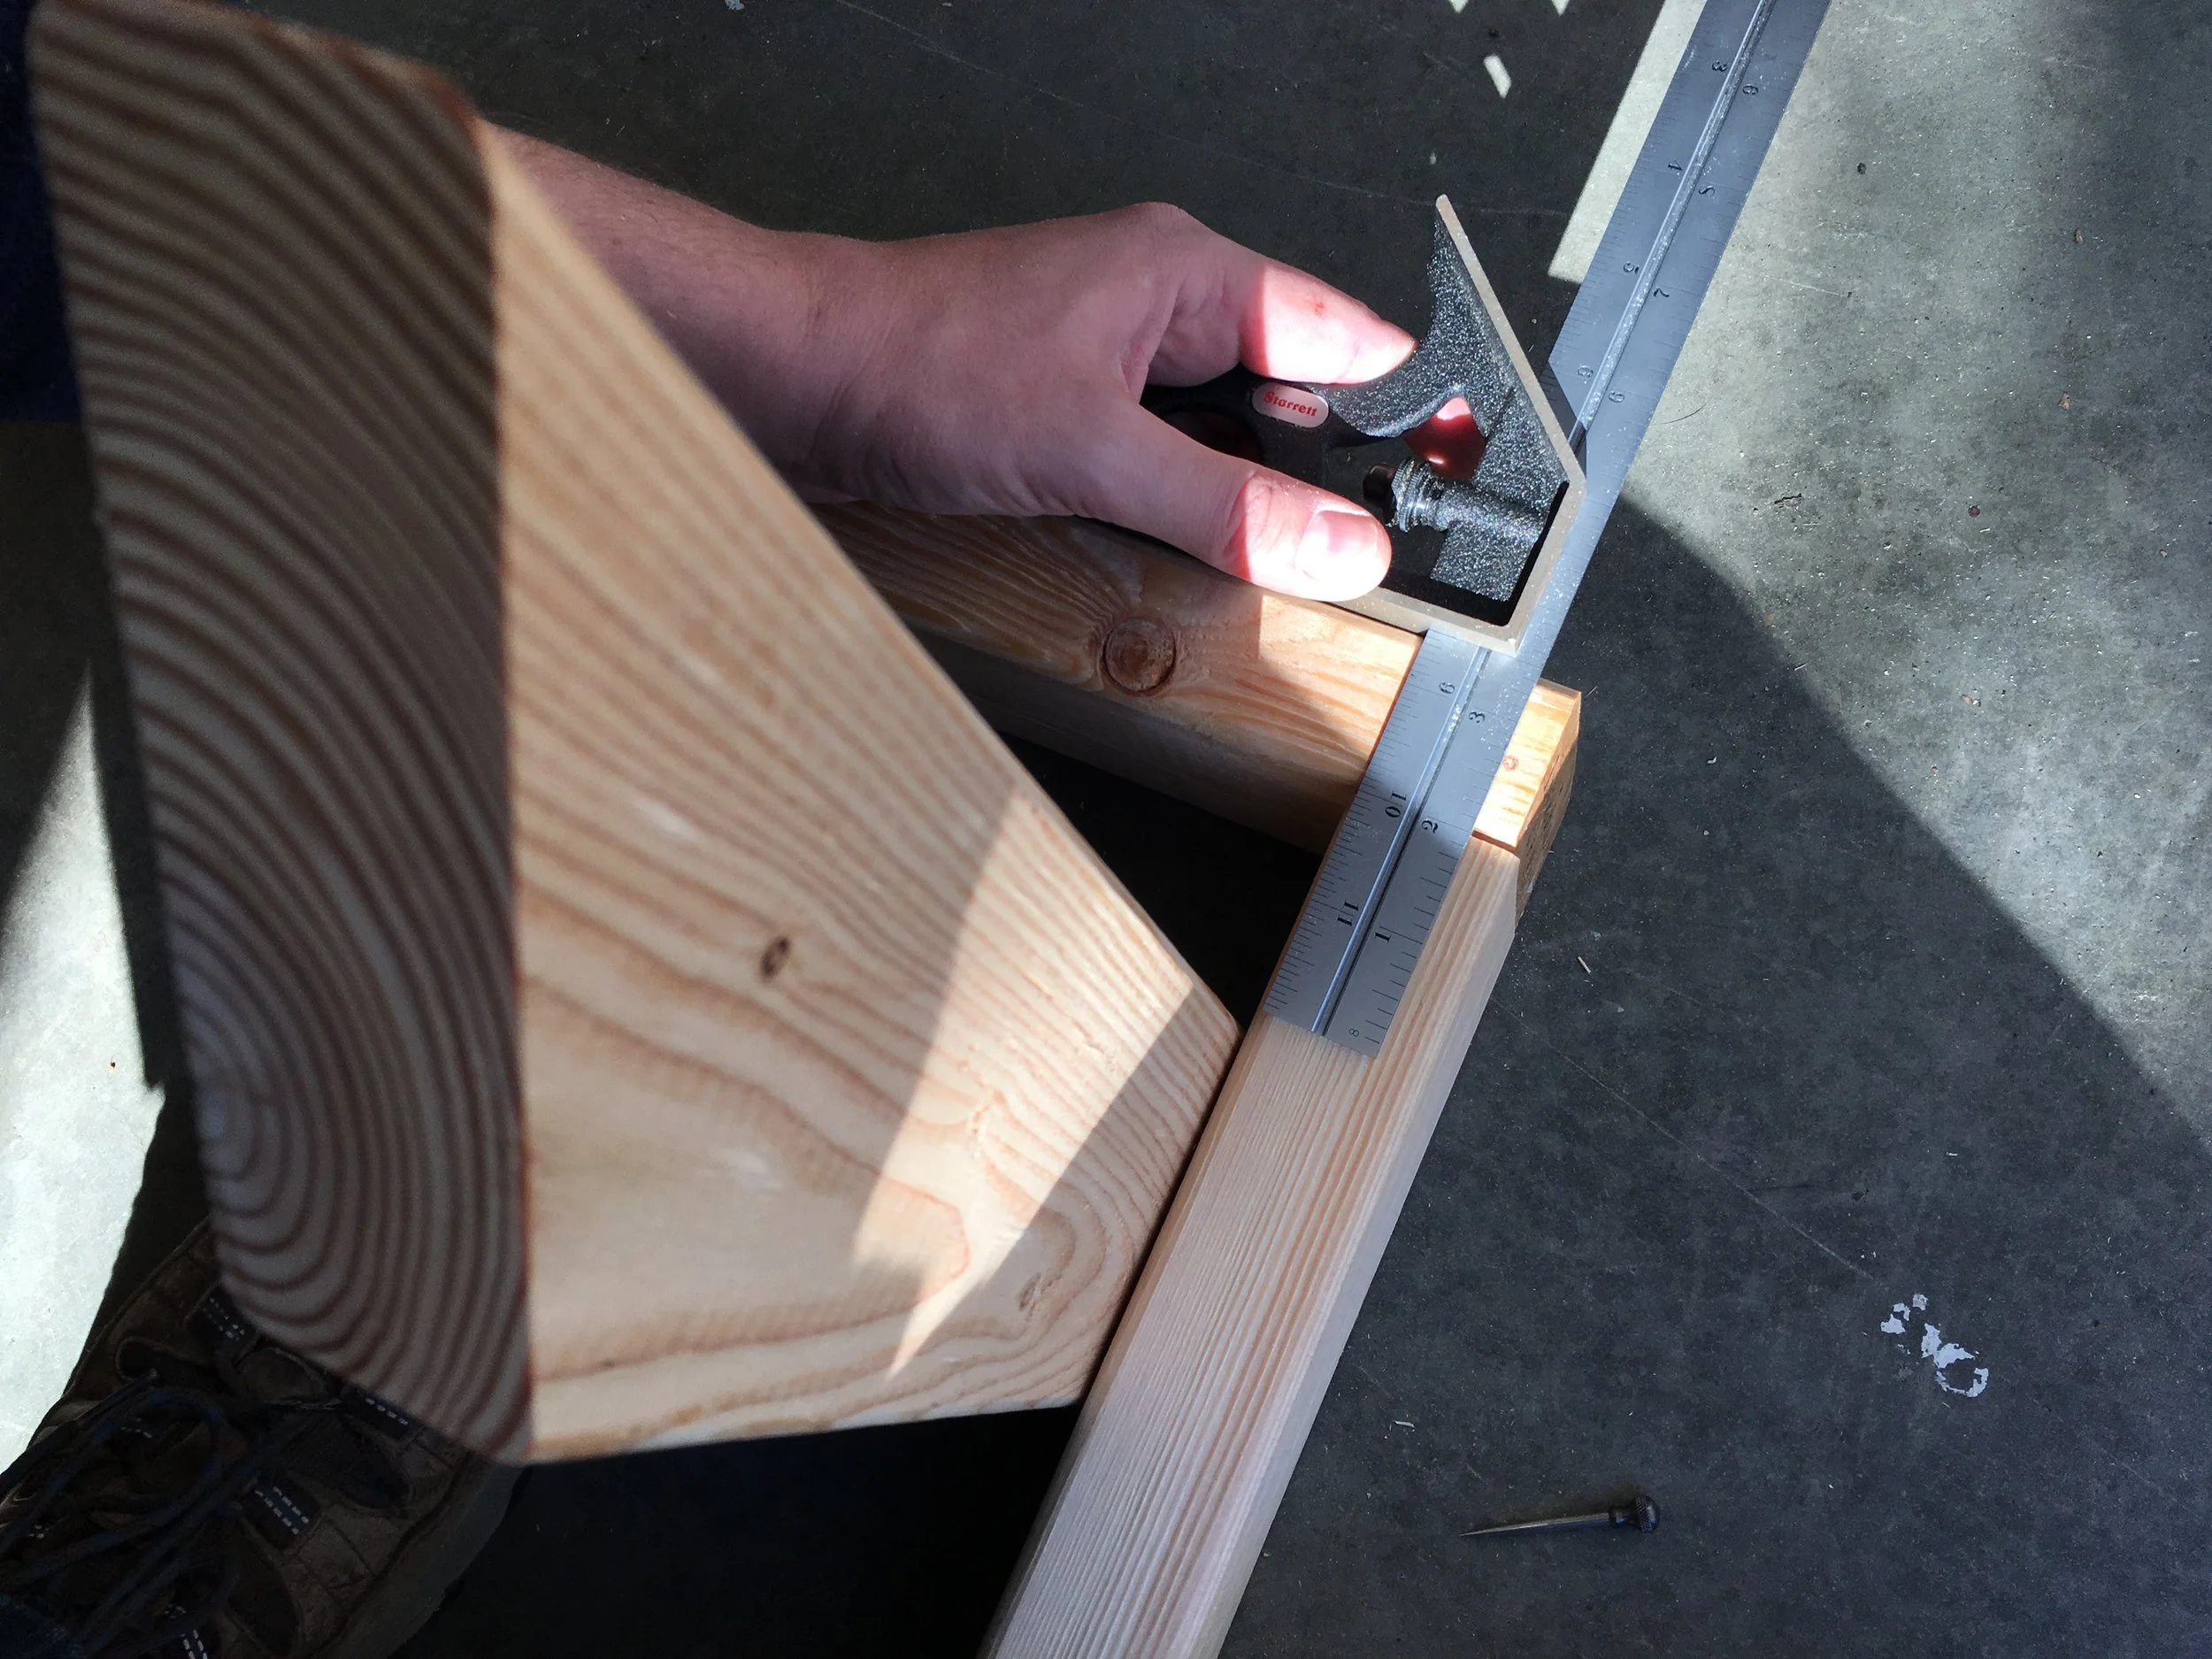
To get it out of the way, let's make the 45 degree cuts for the cross supports, labeled F. I marked my boards using a combination square before cutting so I could easily line up the saw blade.

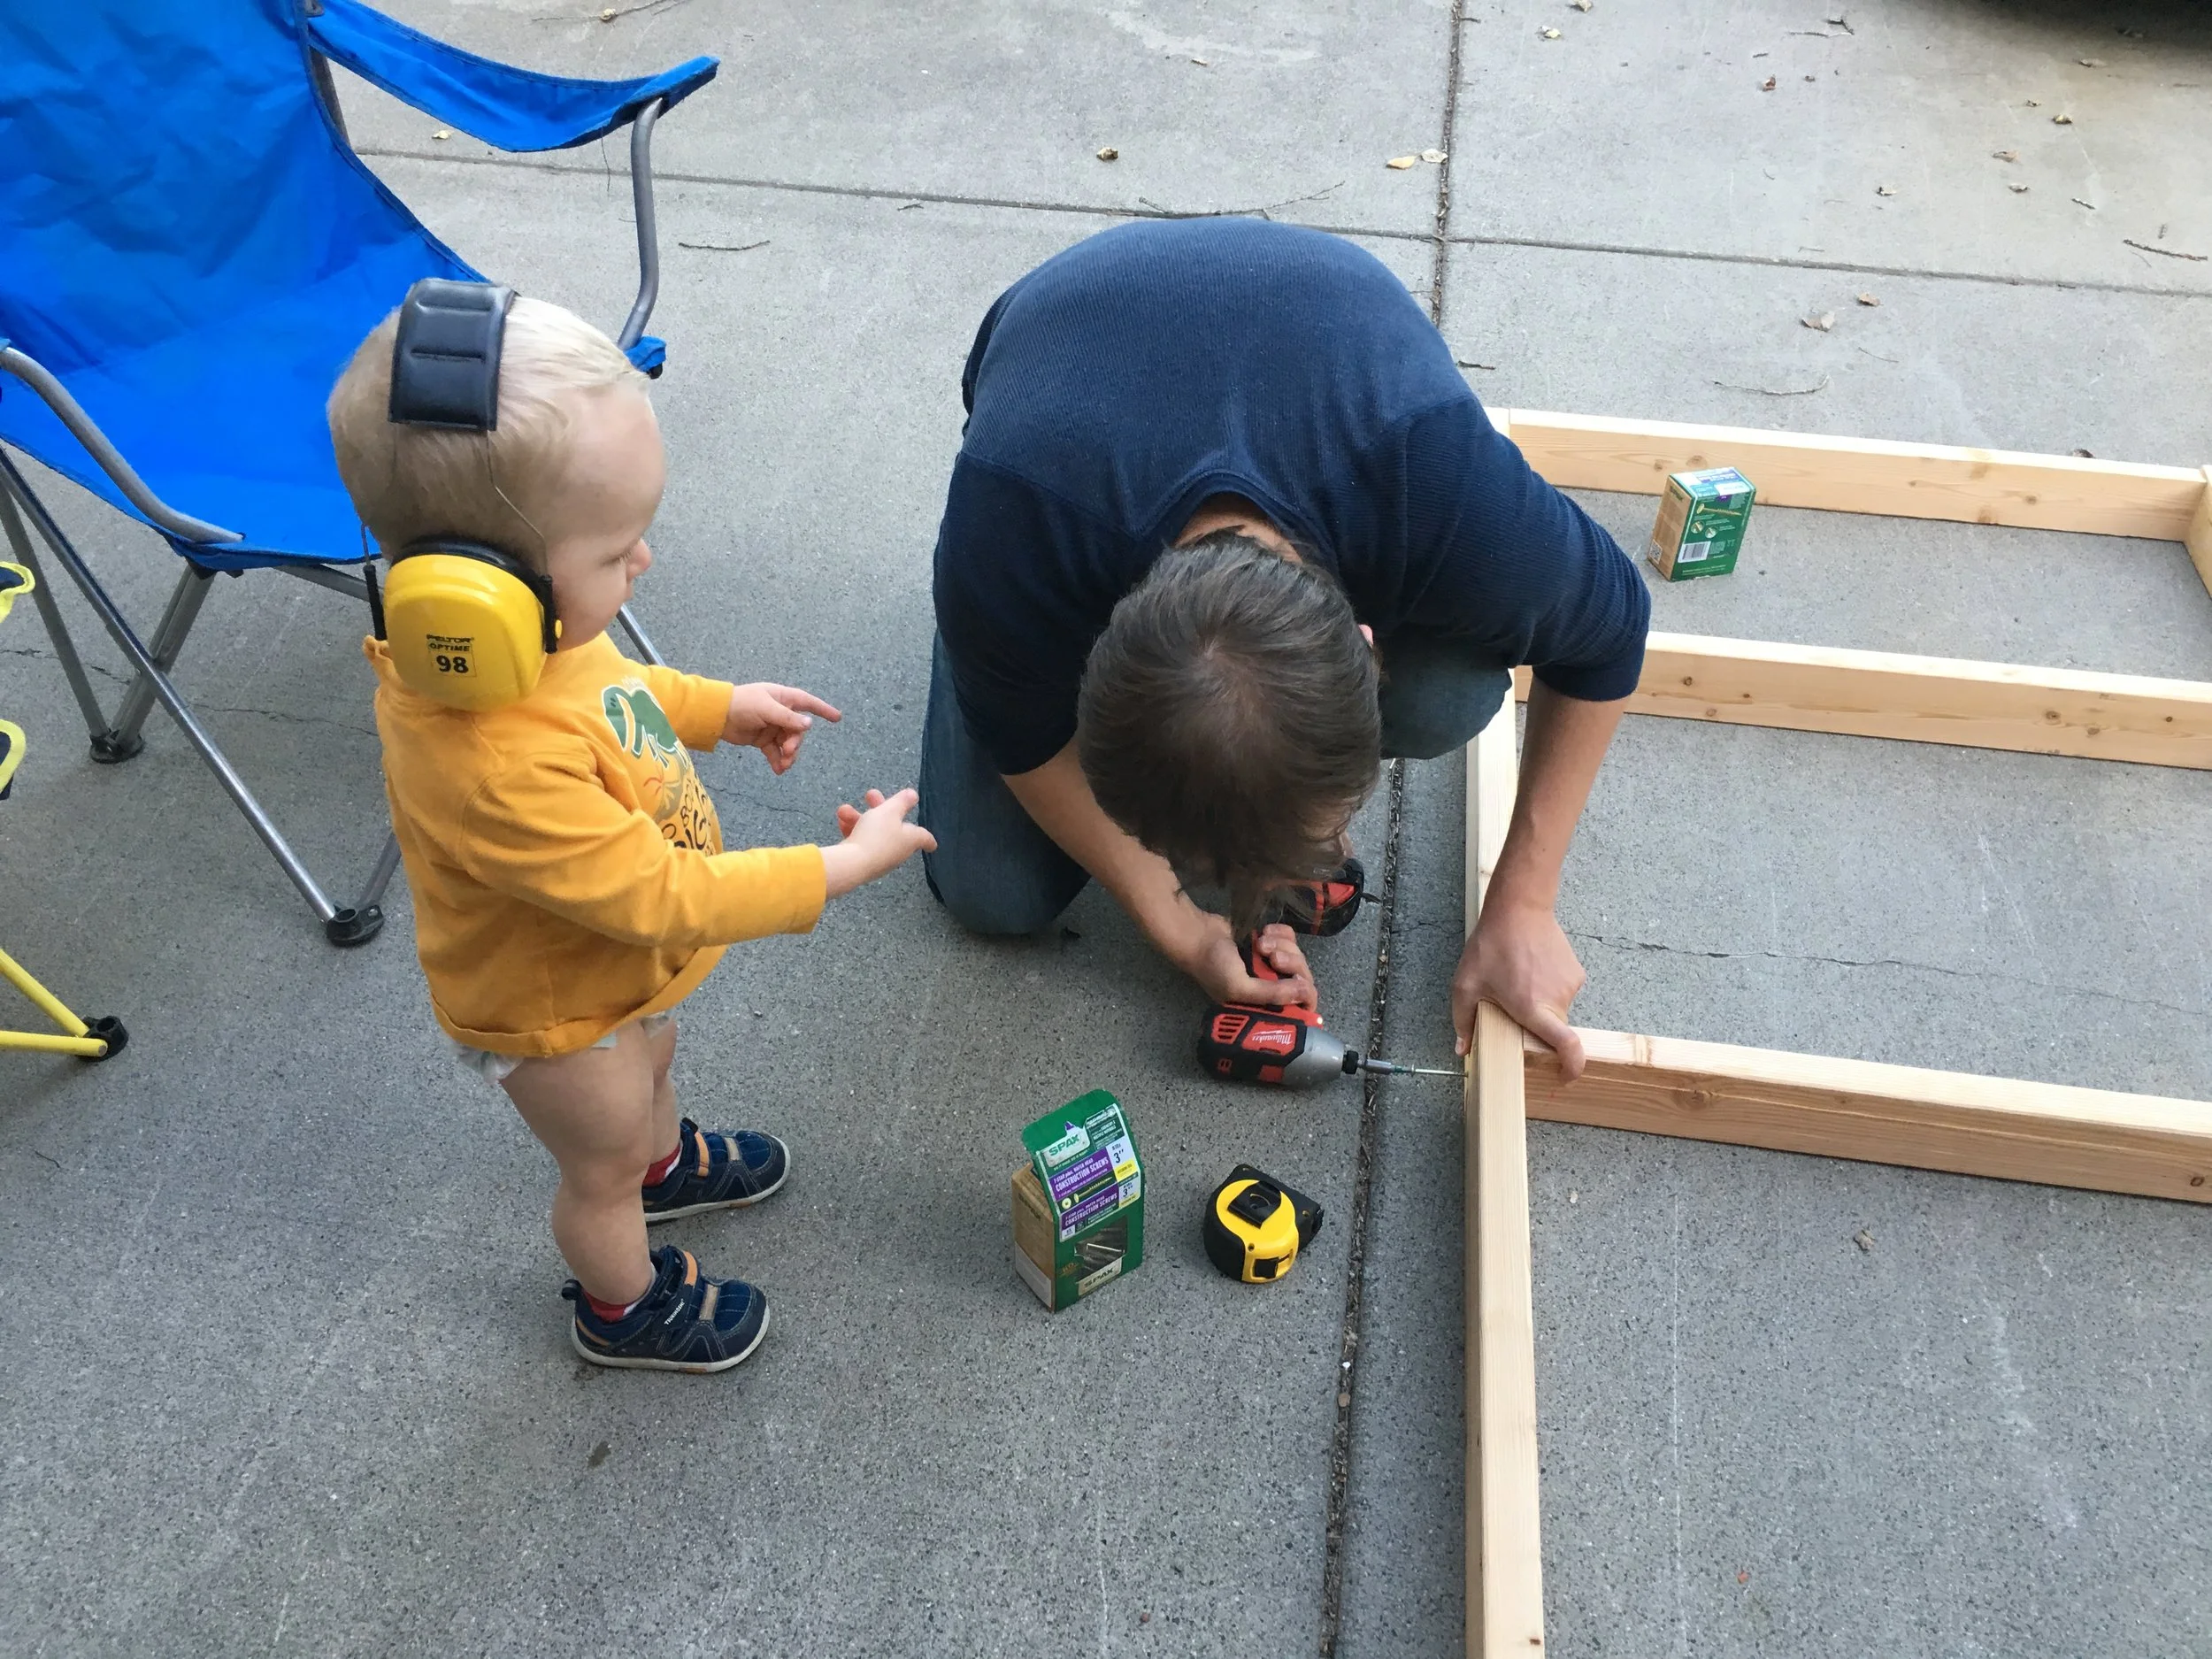
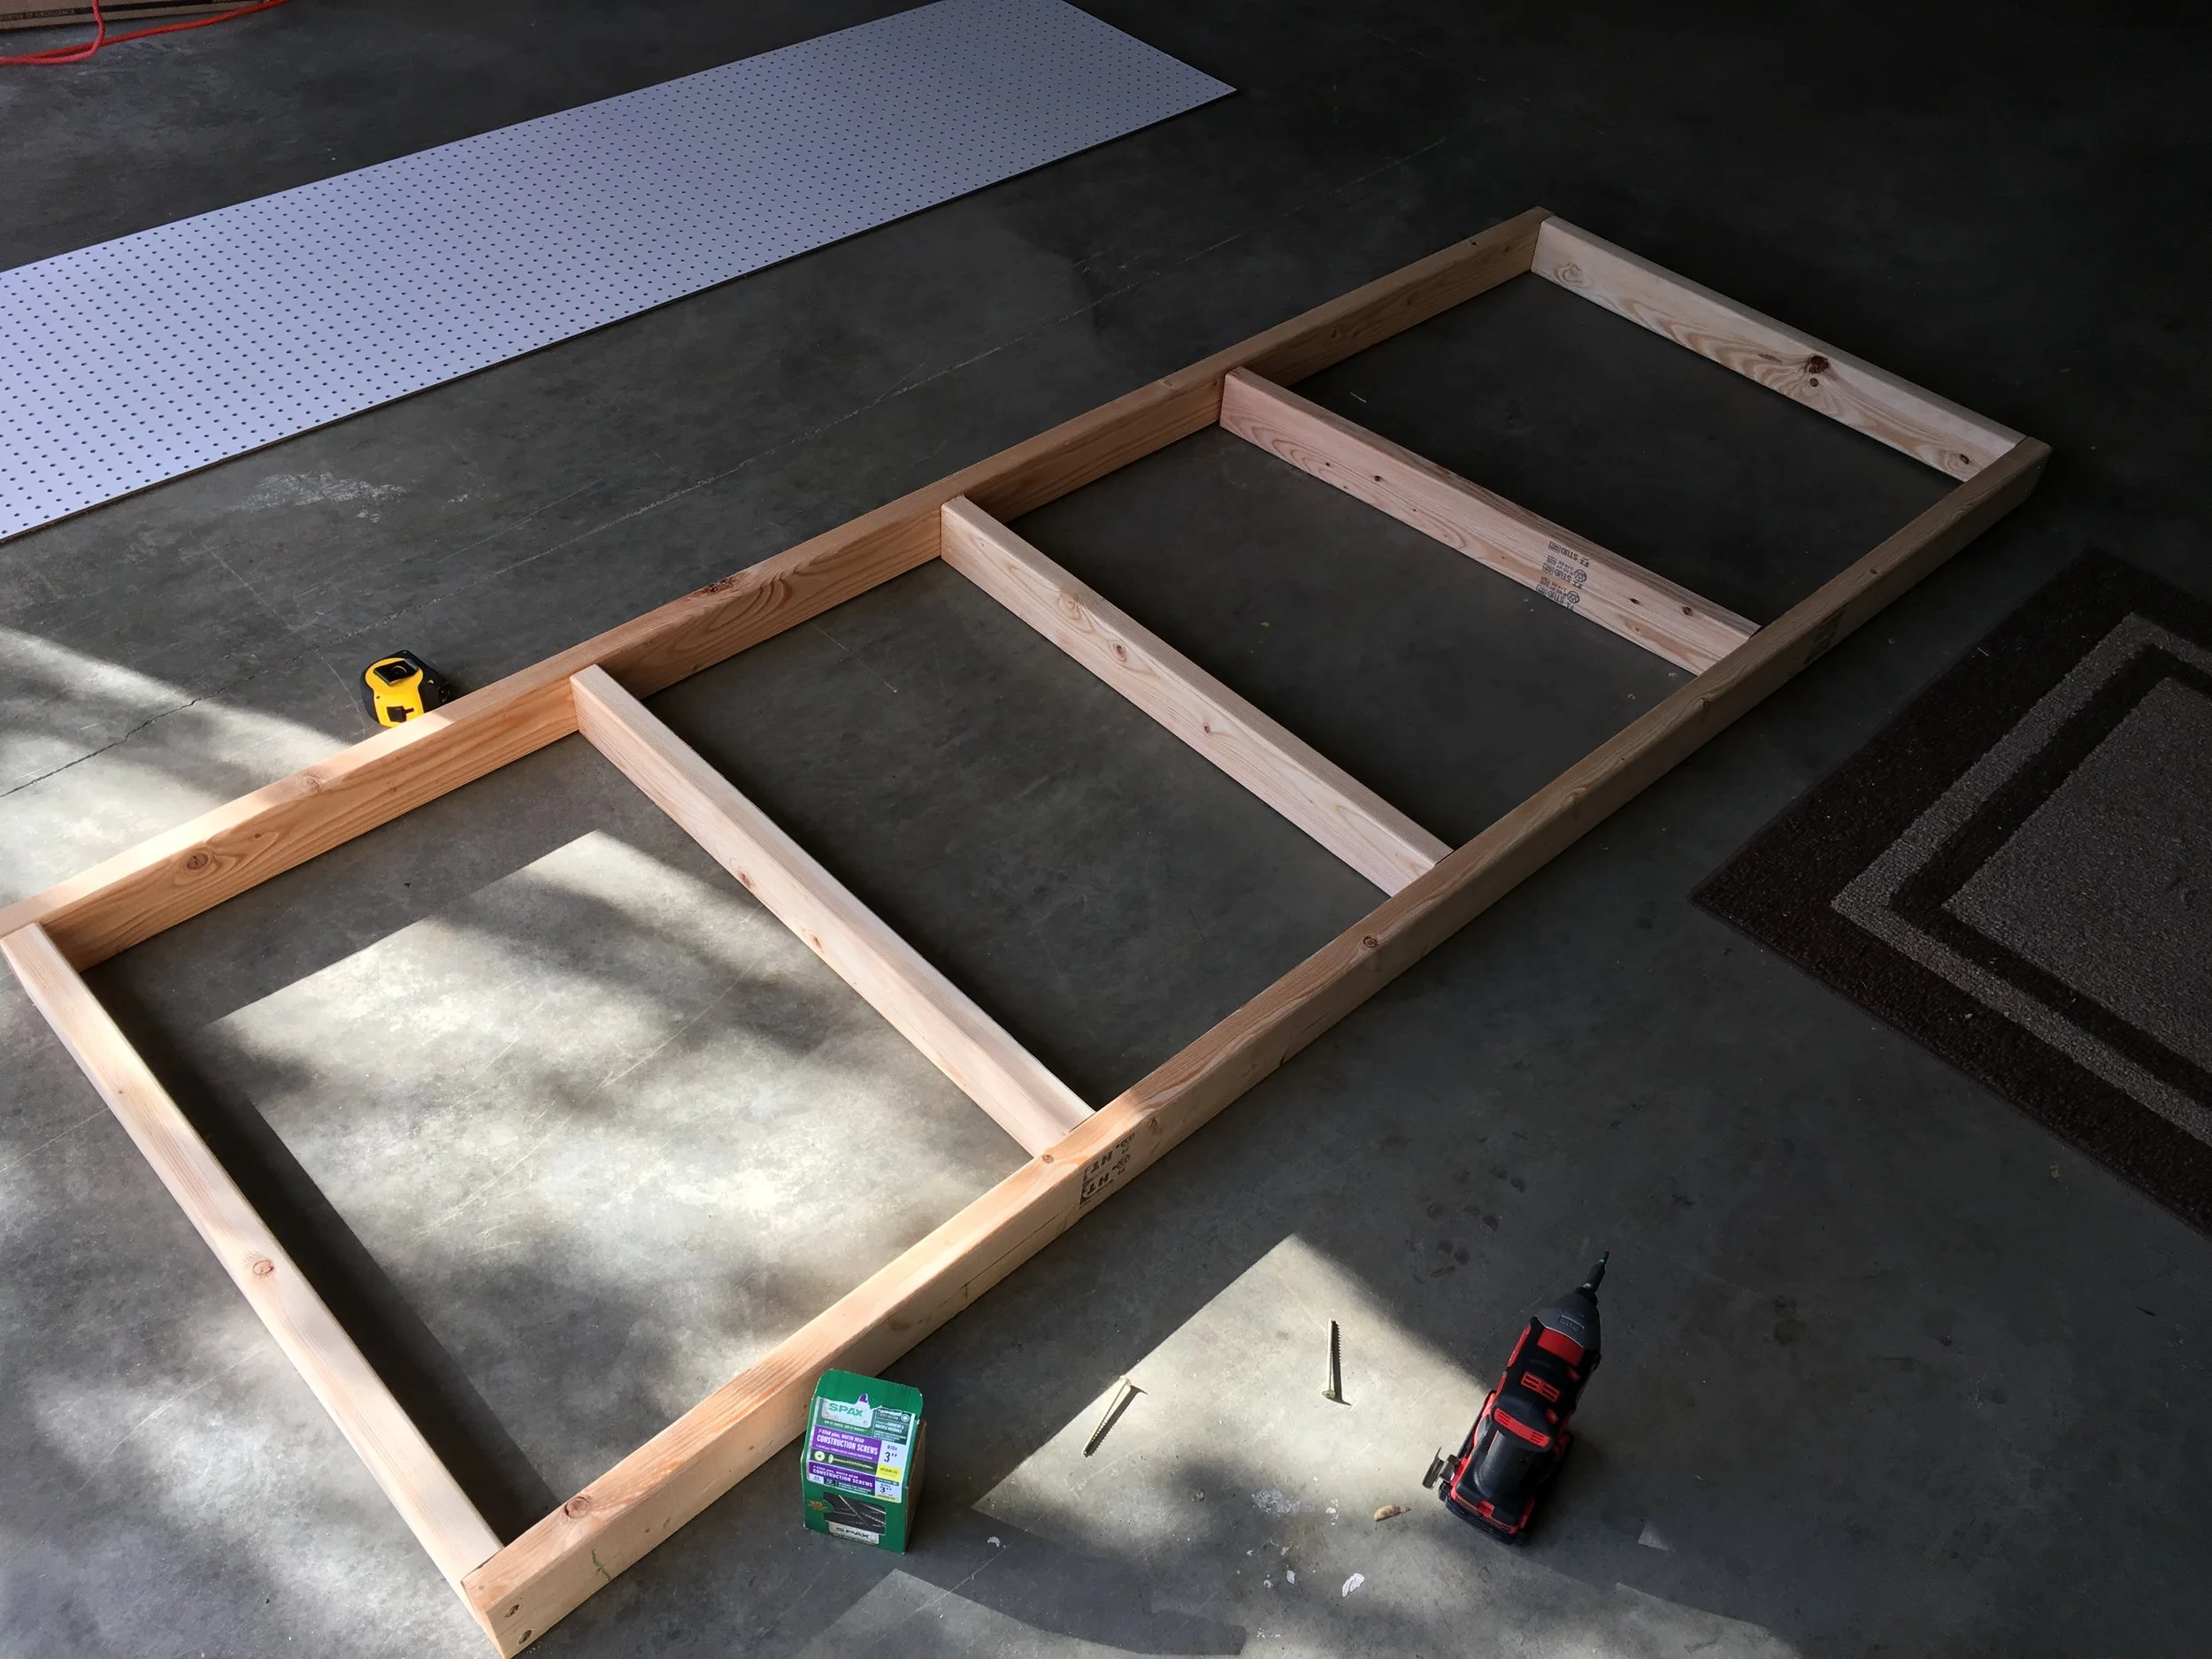
Now lay out the frame of the table top using boards labeled A and B and start screwing everything together, 2 screws per joint. I used 3" screws. The distance between supports varies depending on your configuration (see dimension I), but they will be no more than 2 feet apart and are evenly spaced.
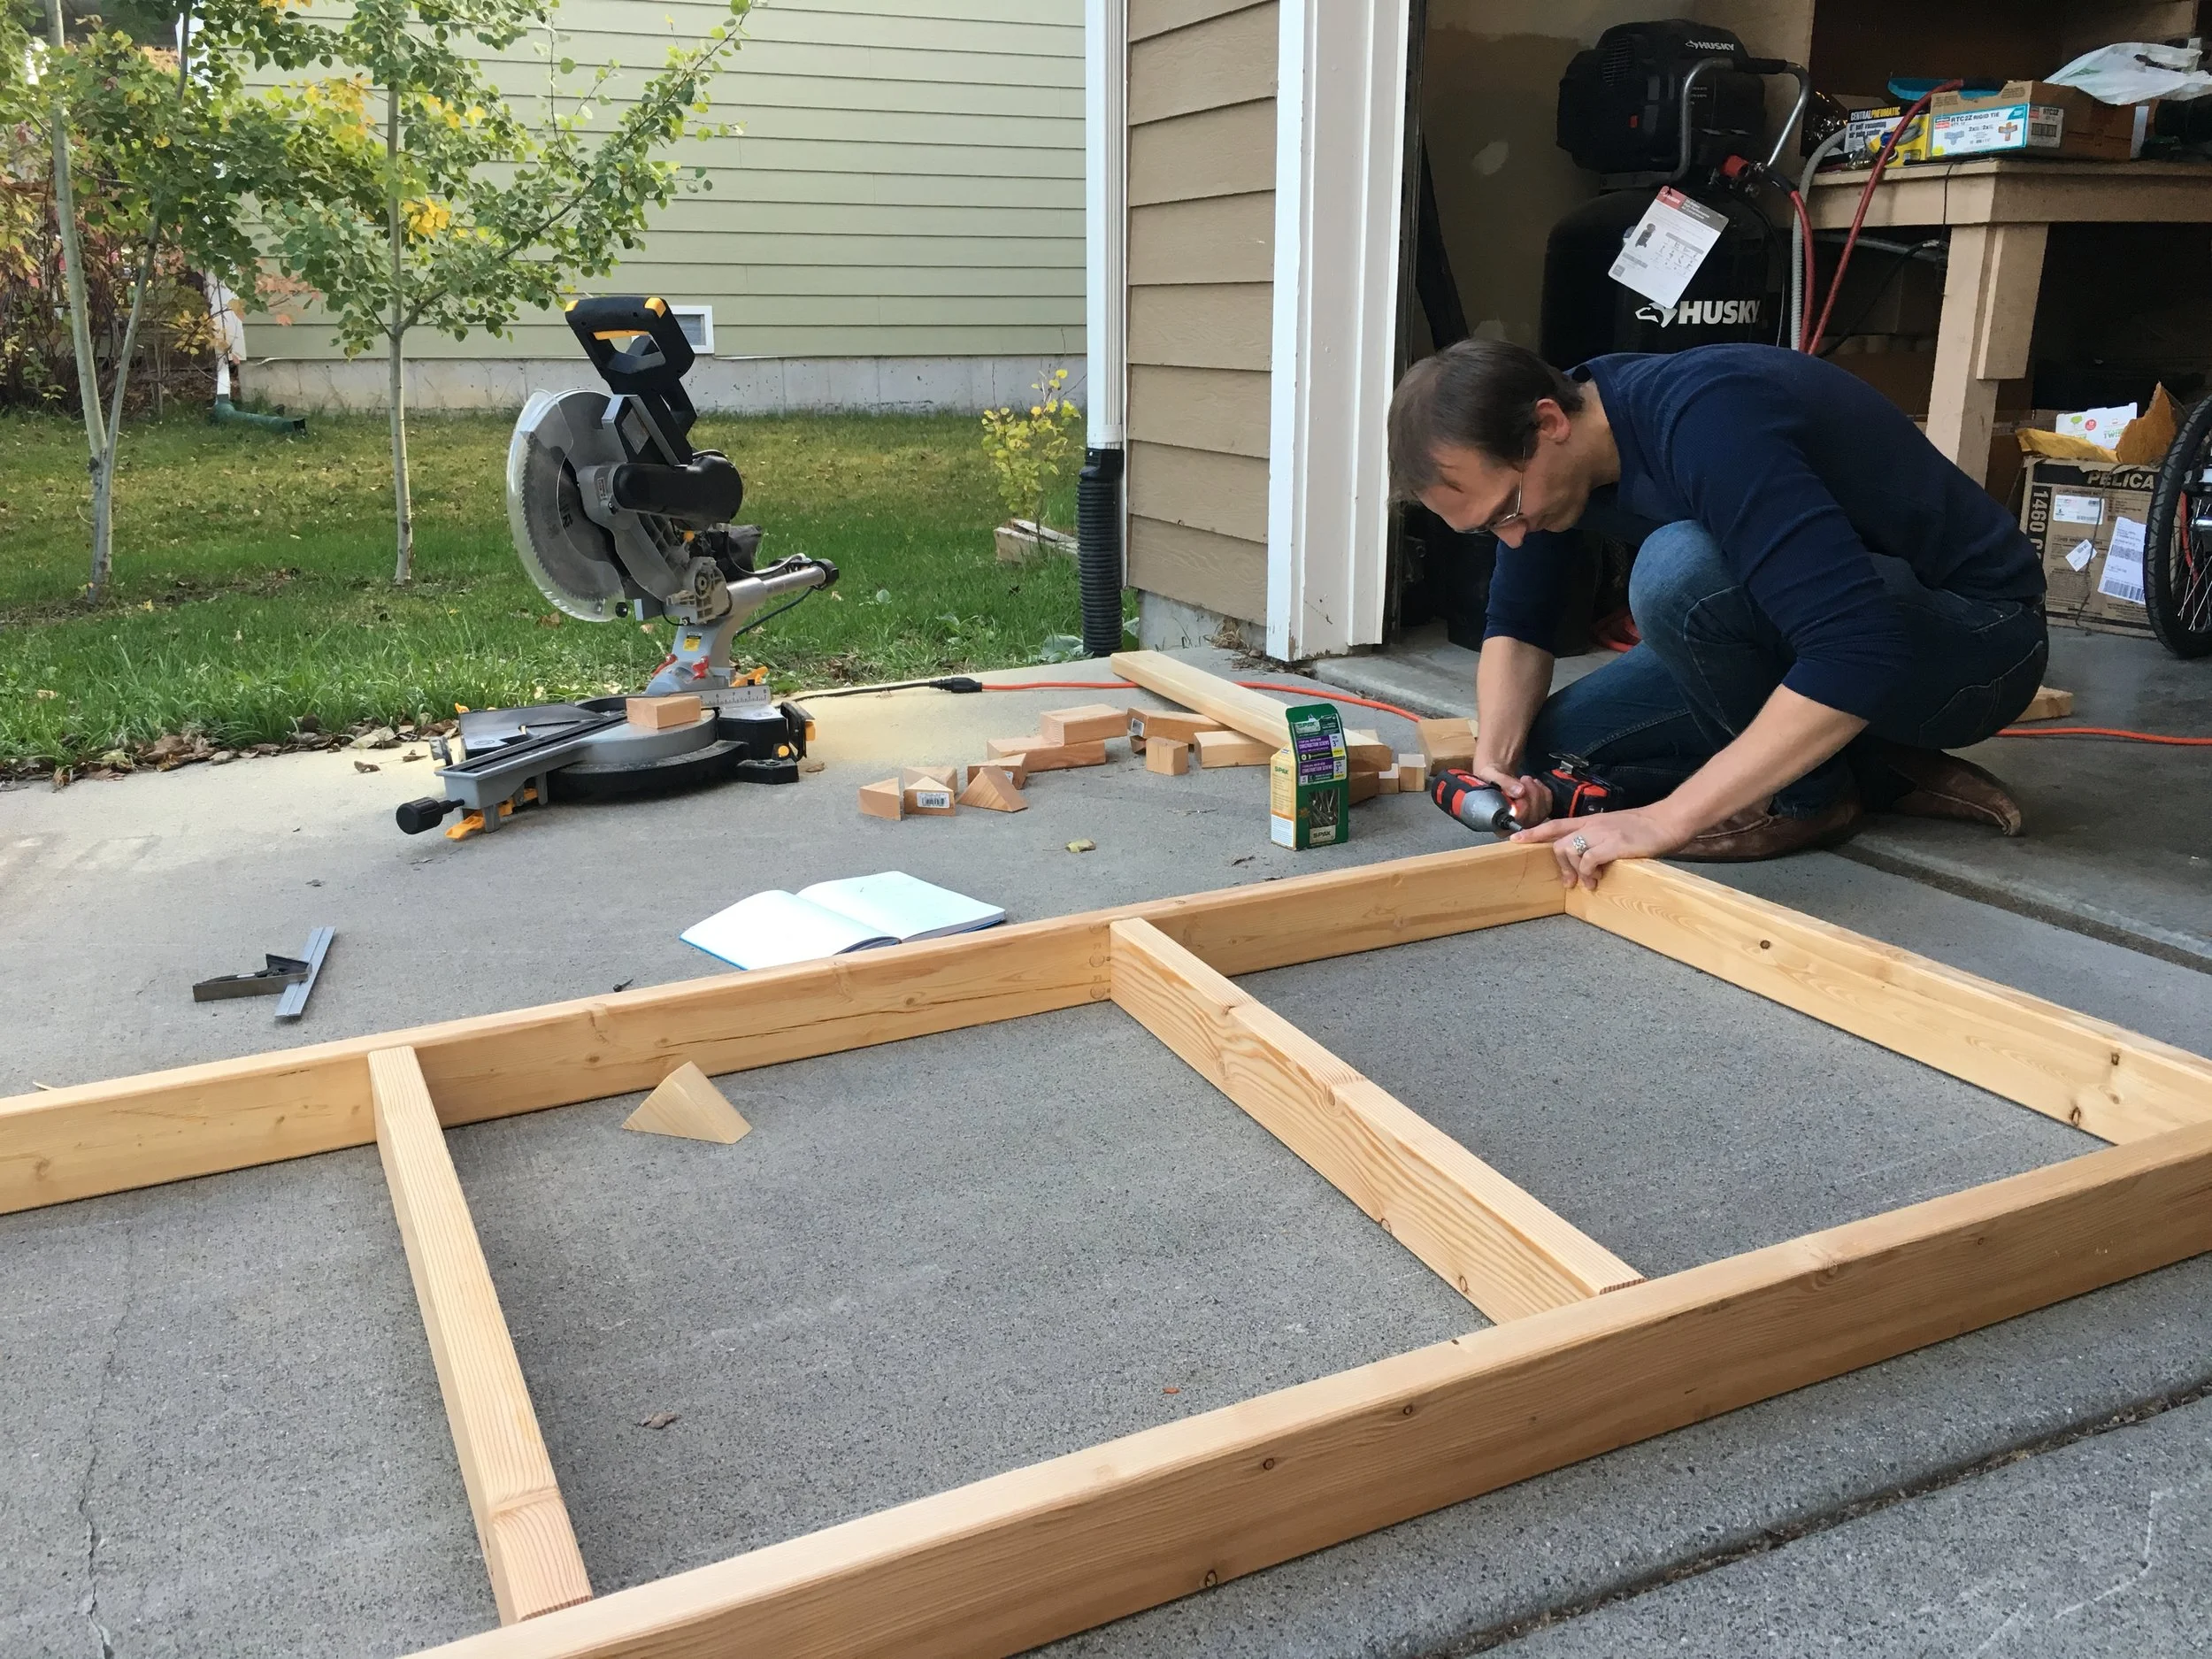
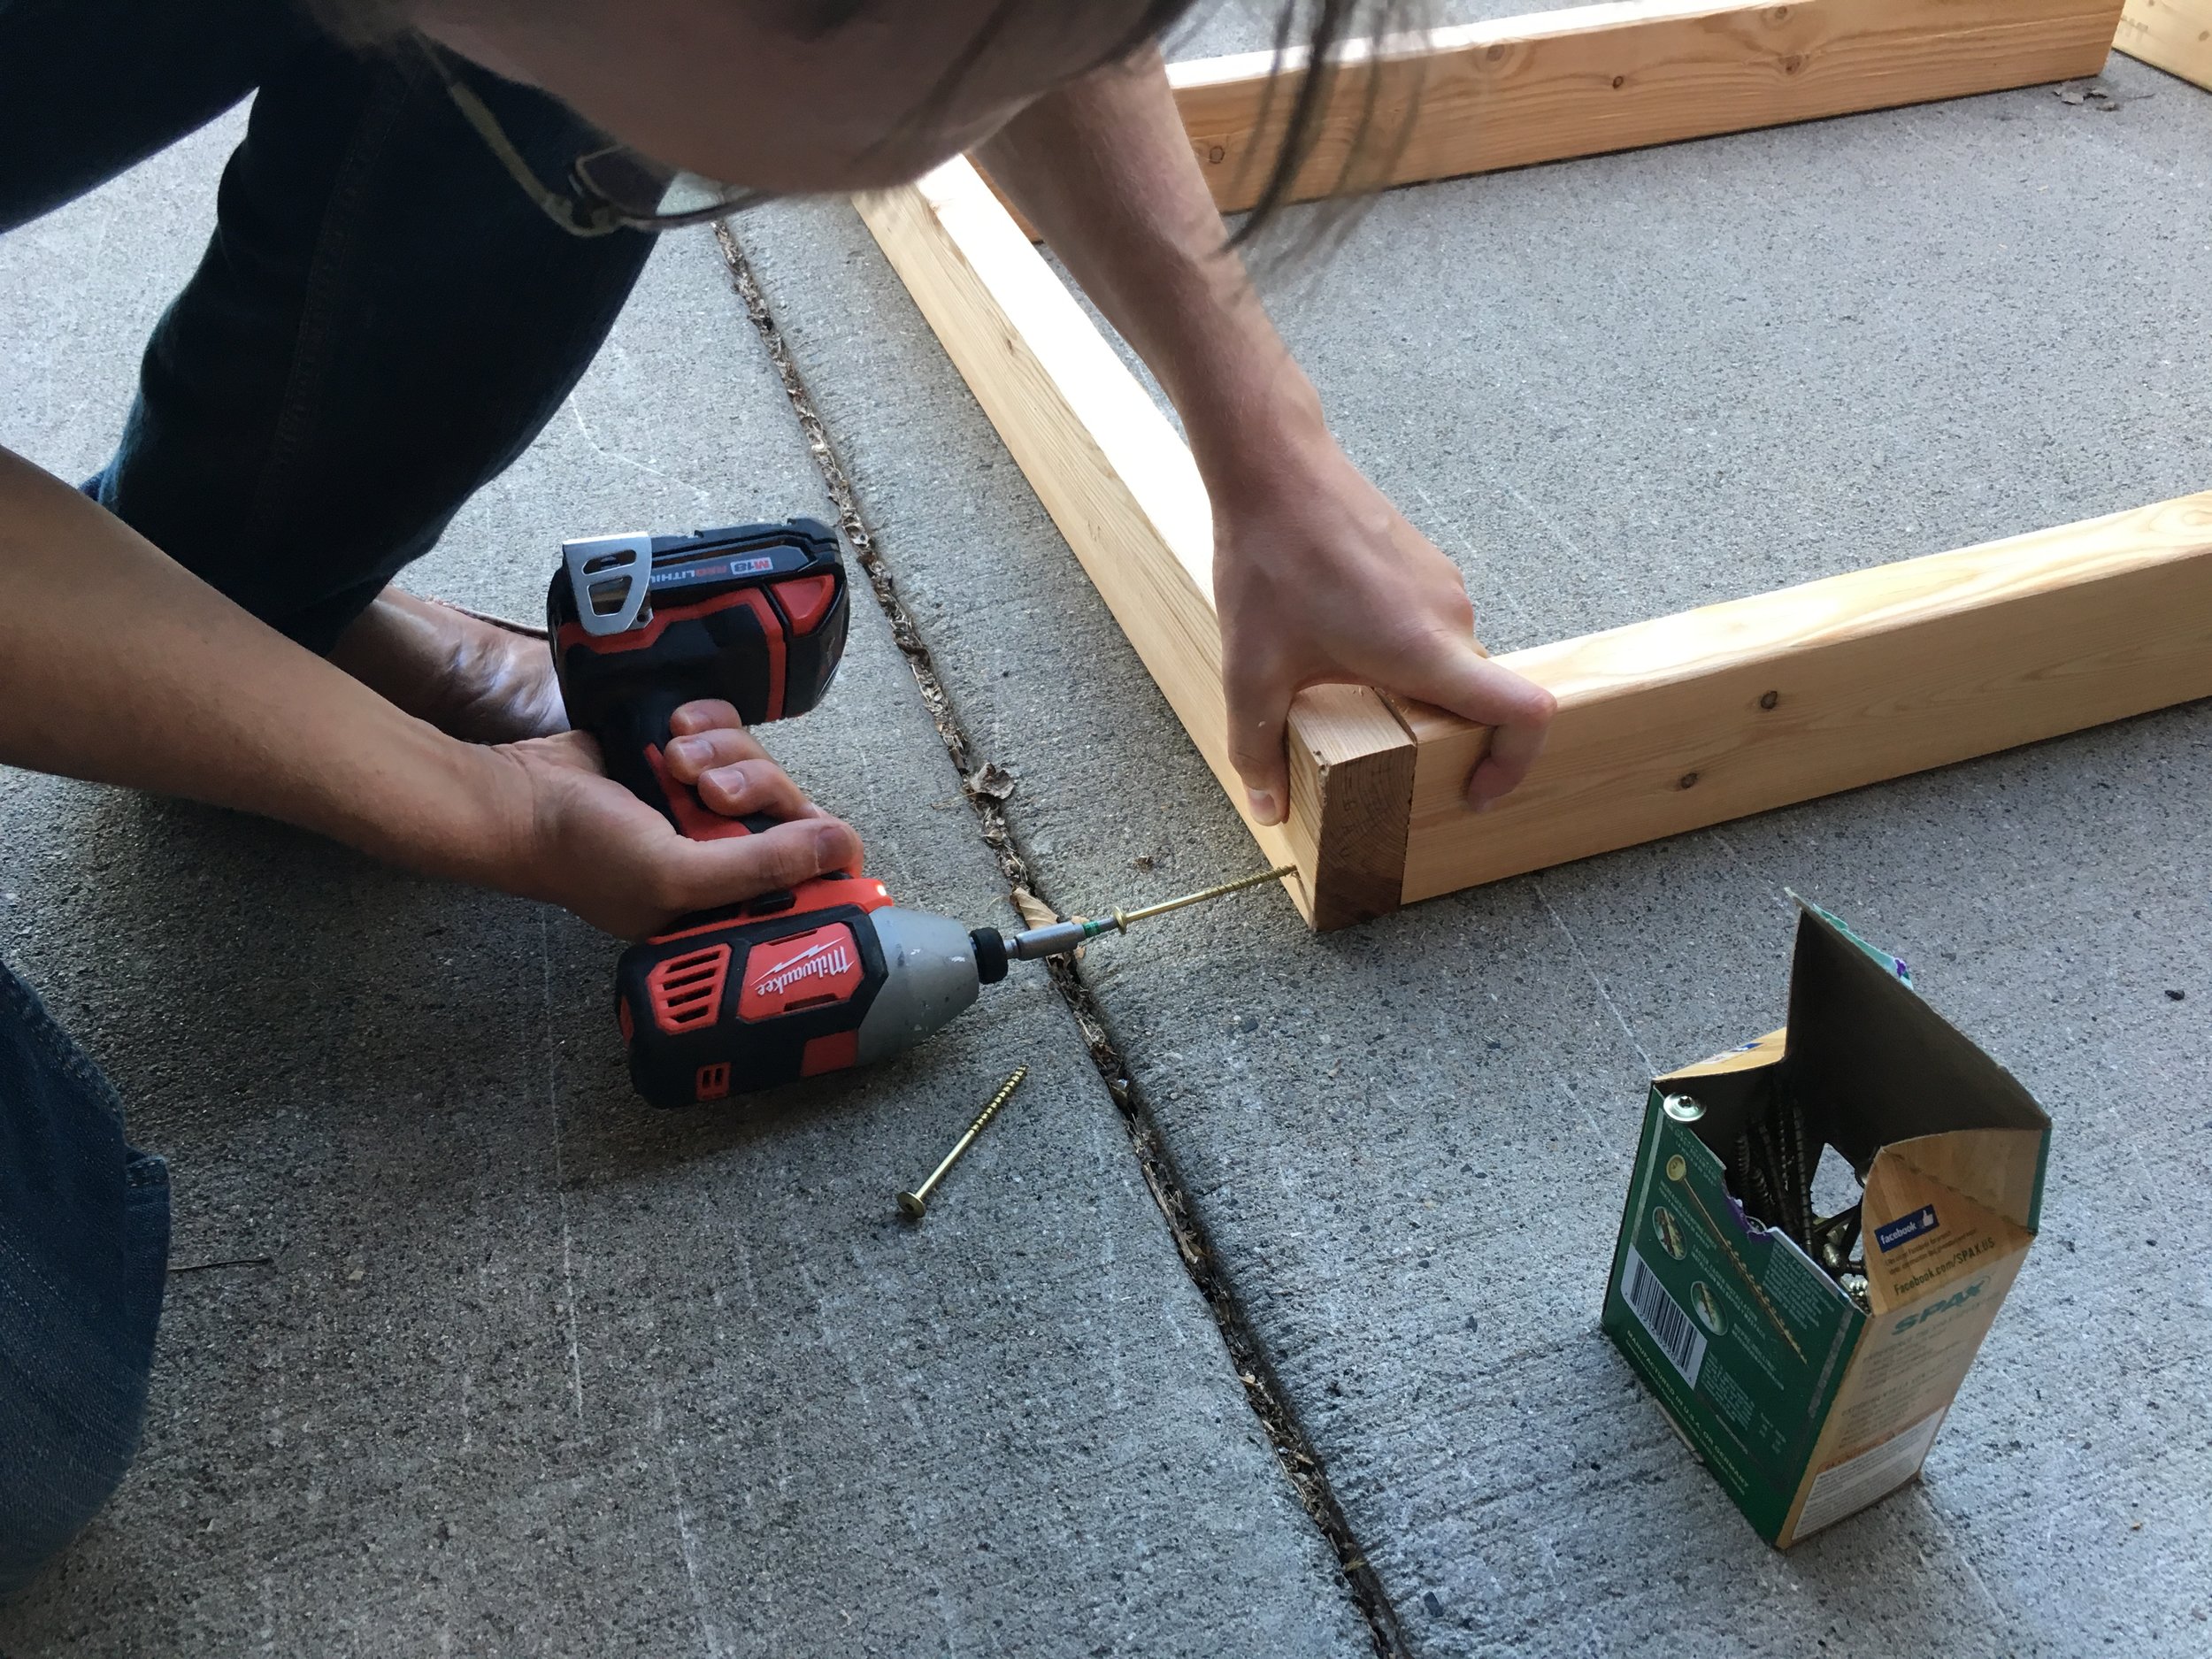
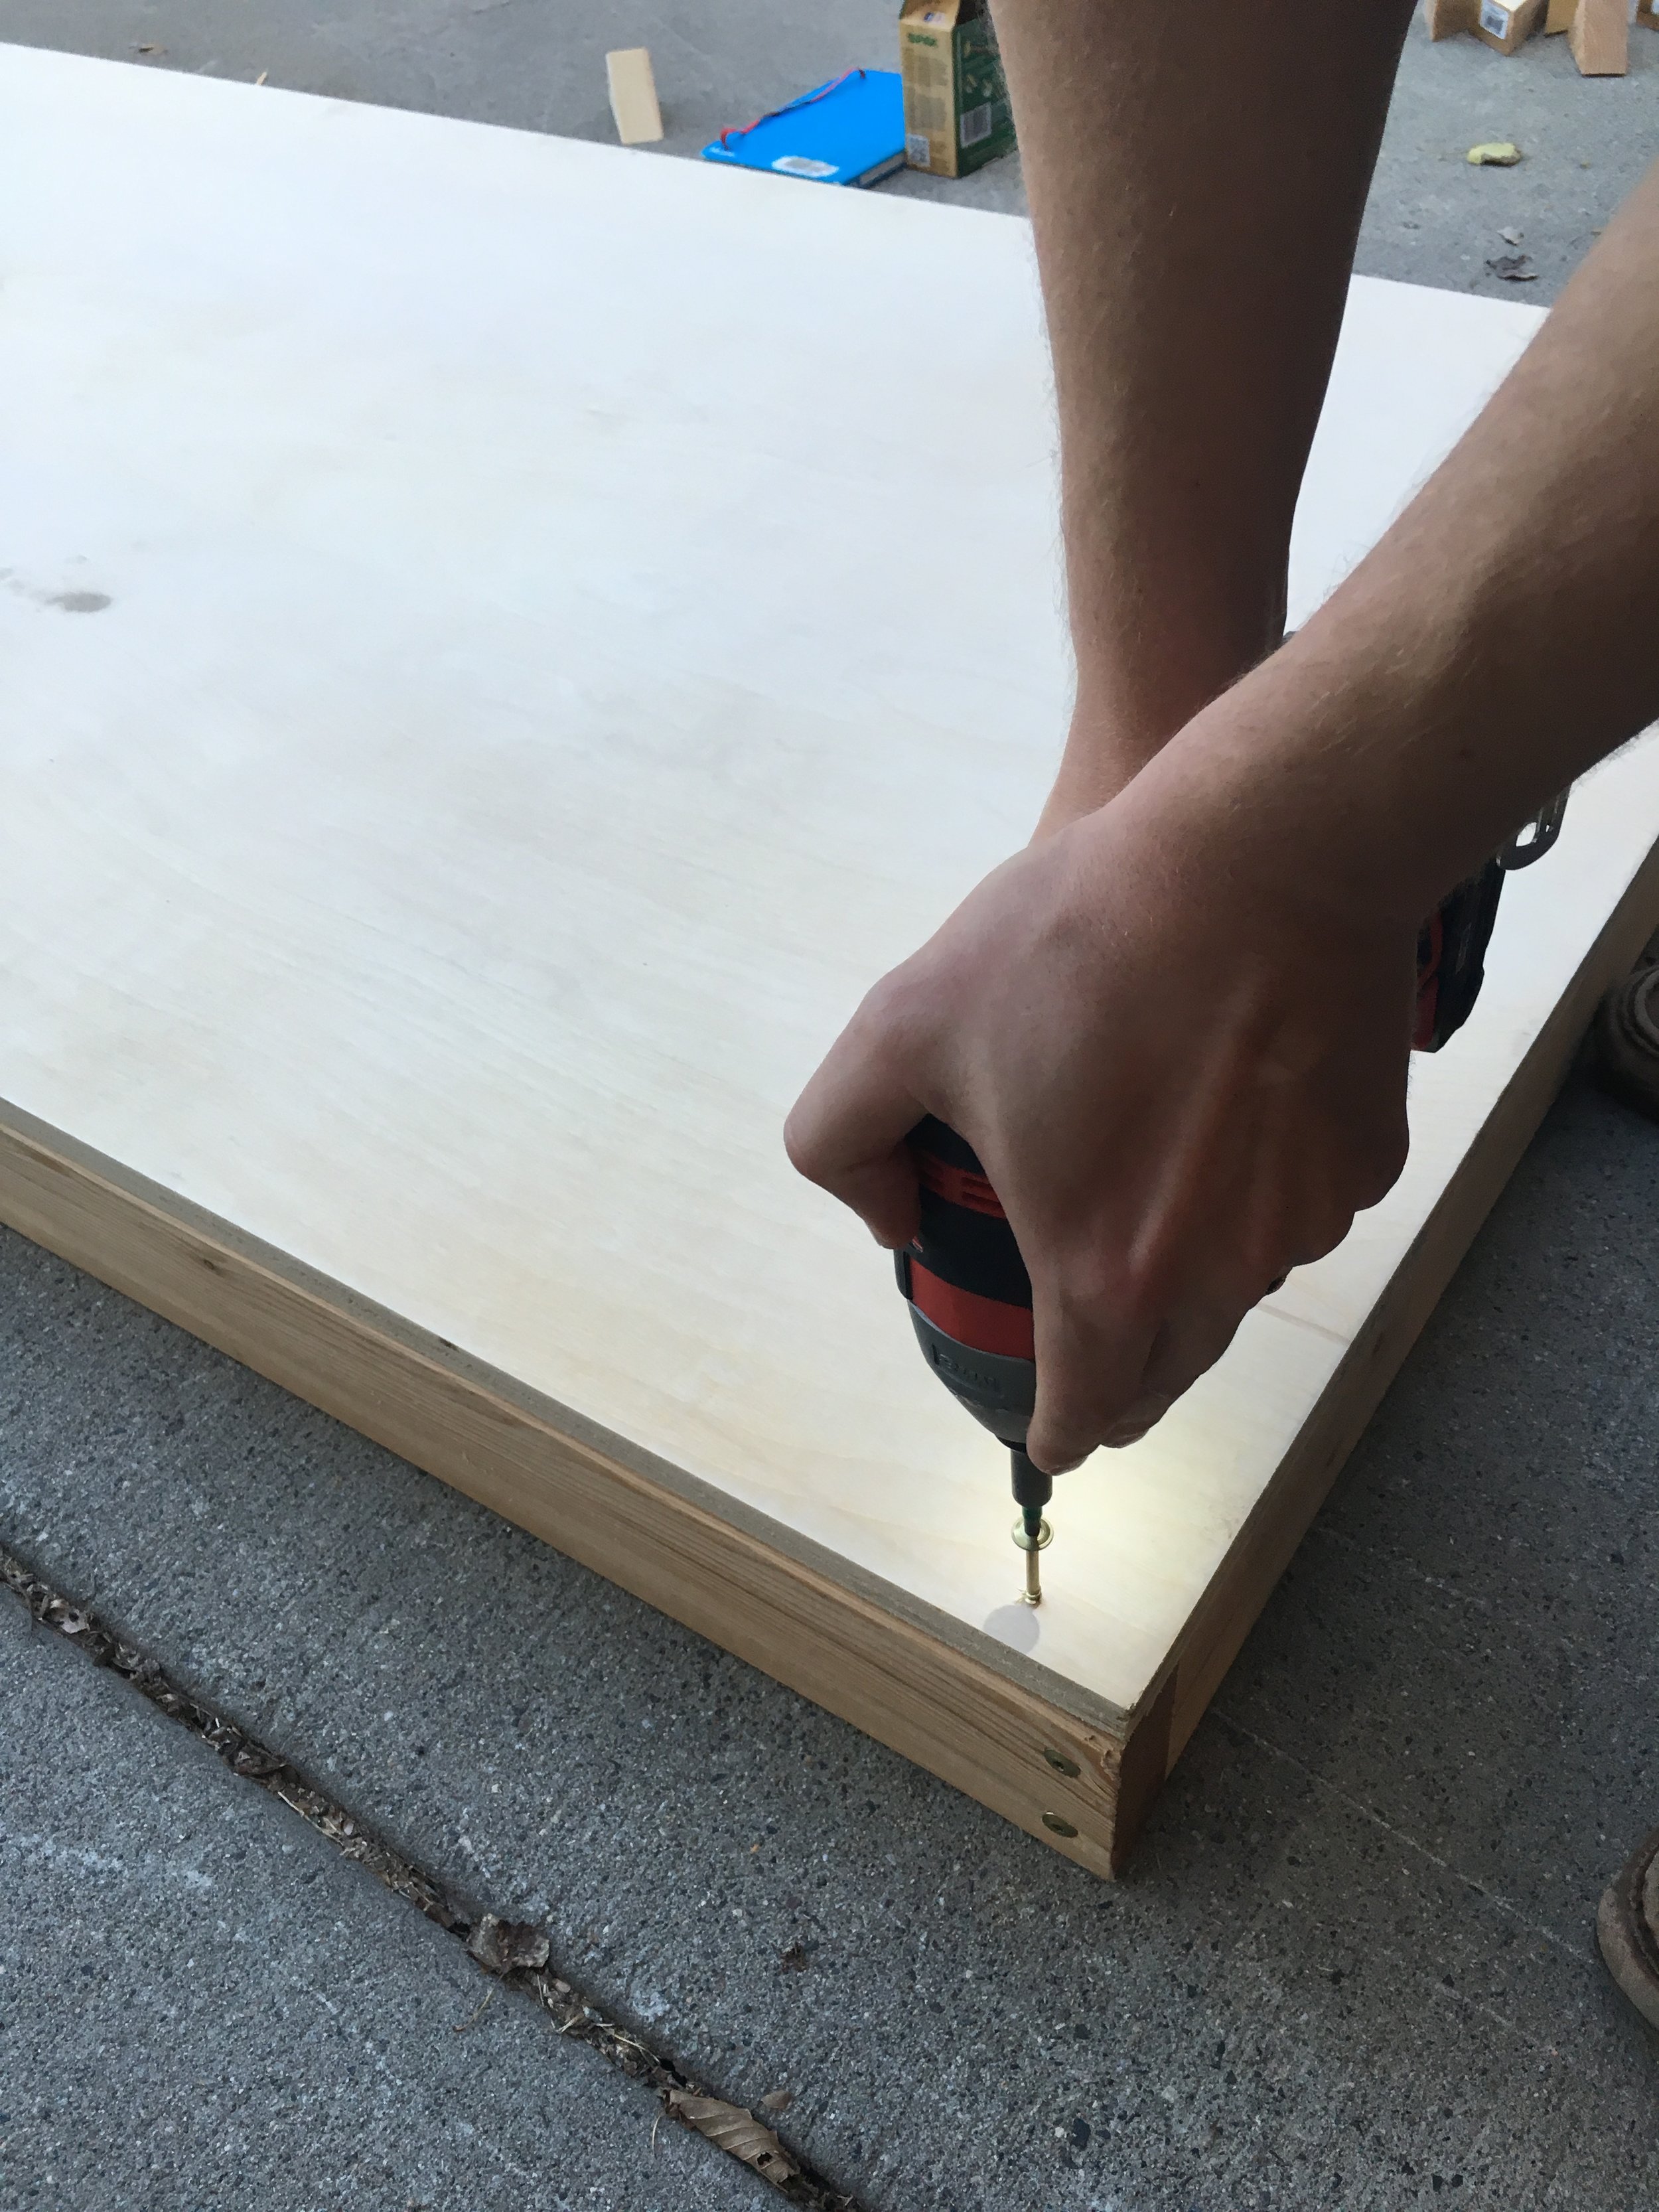
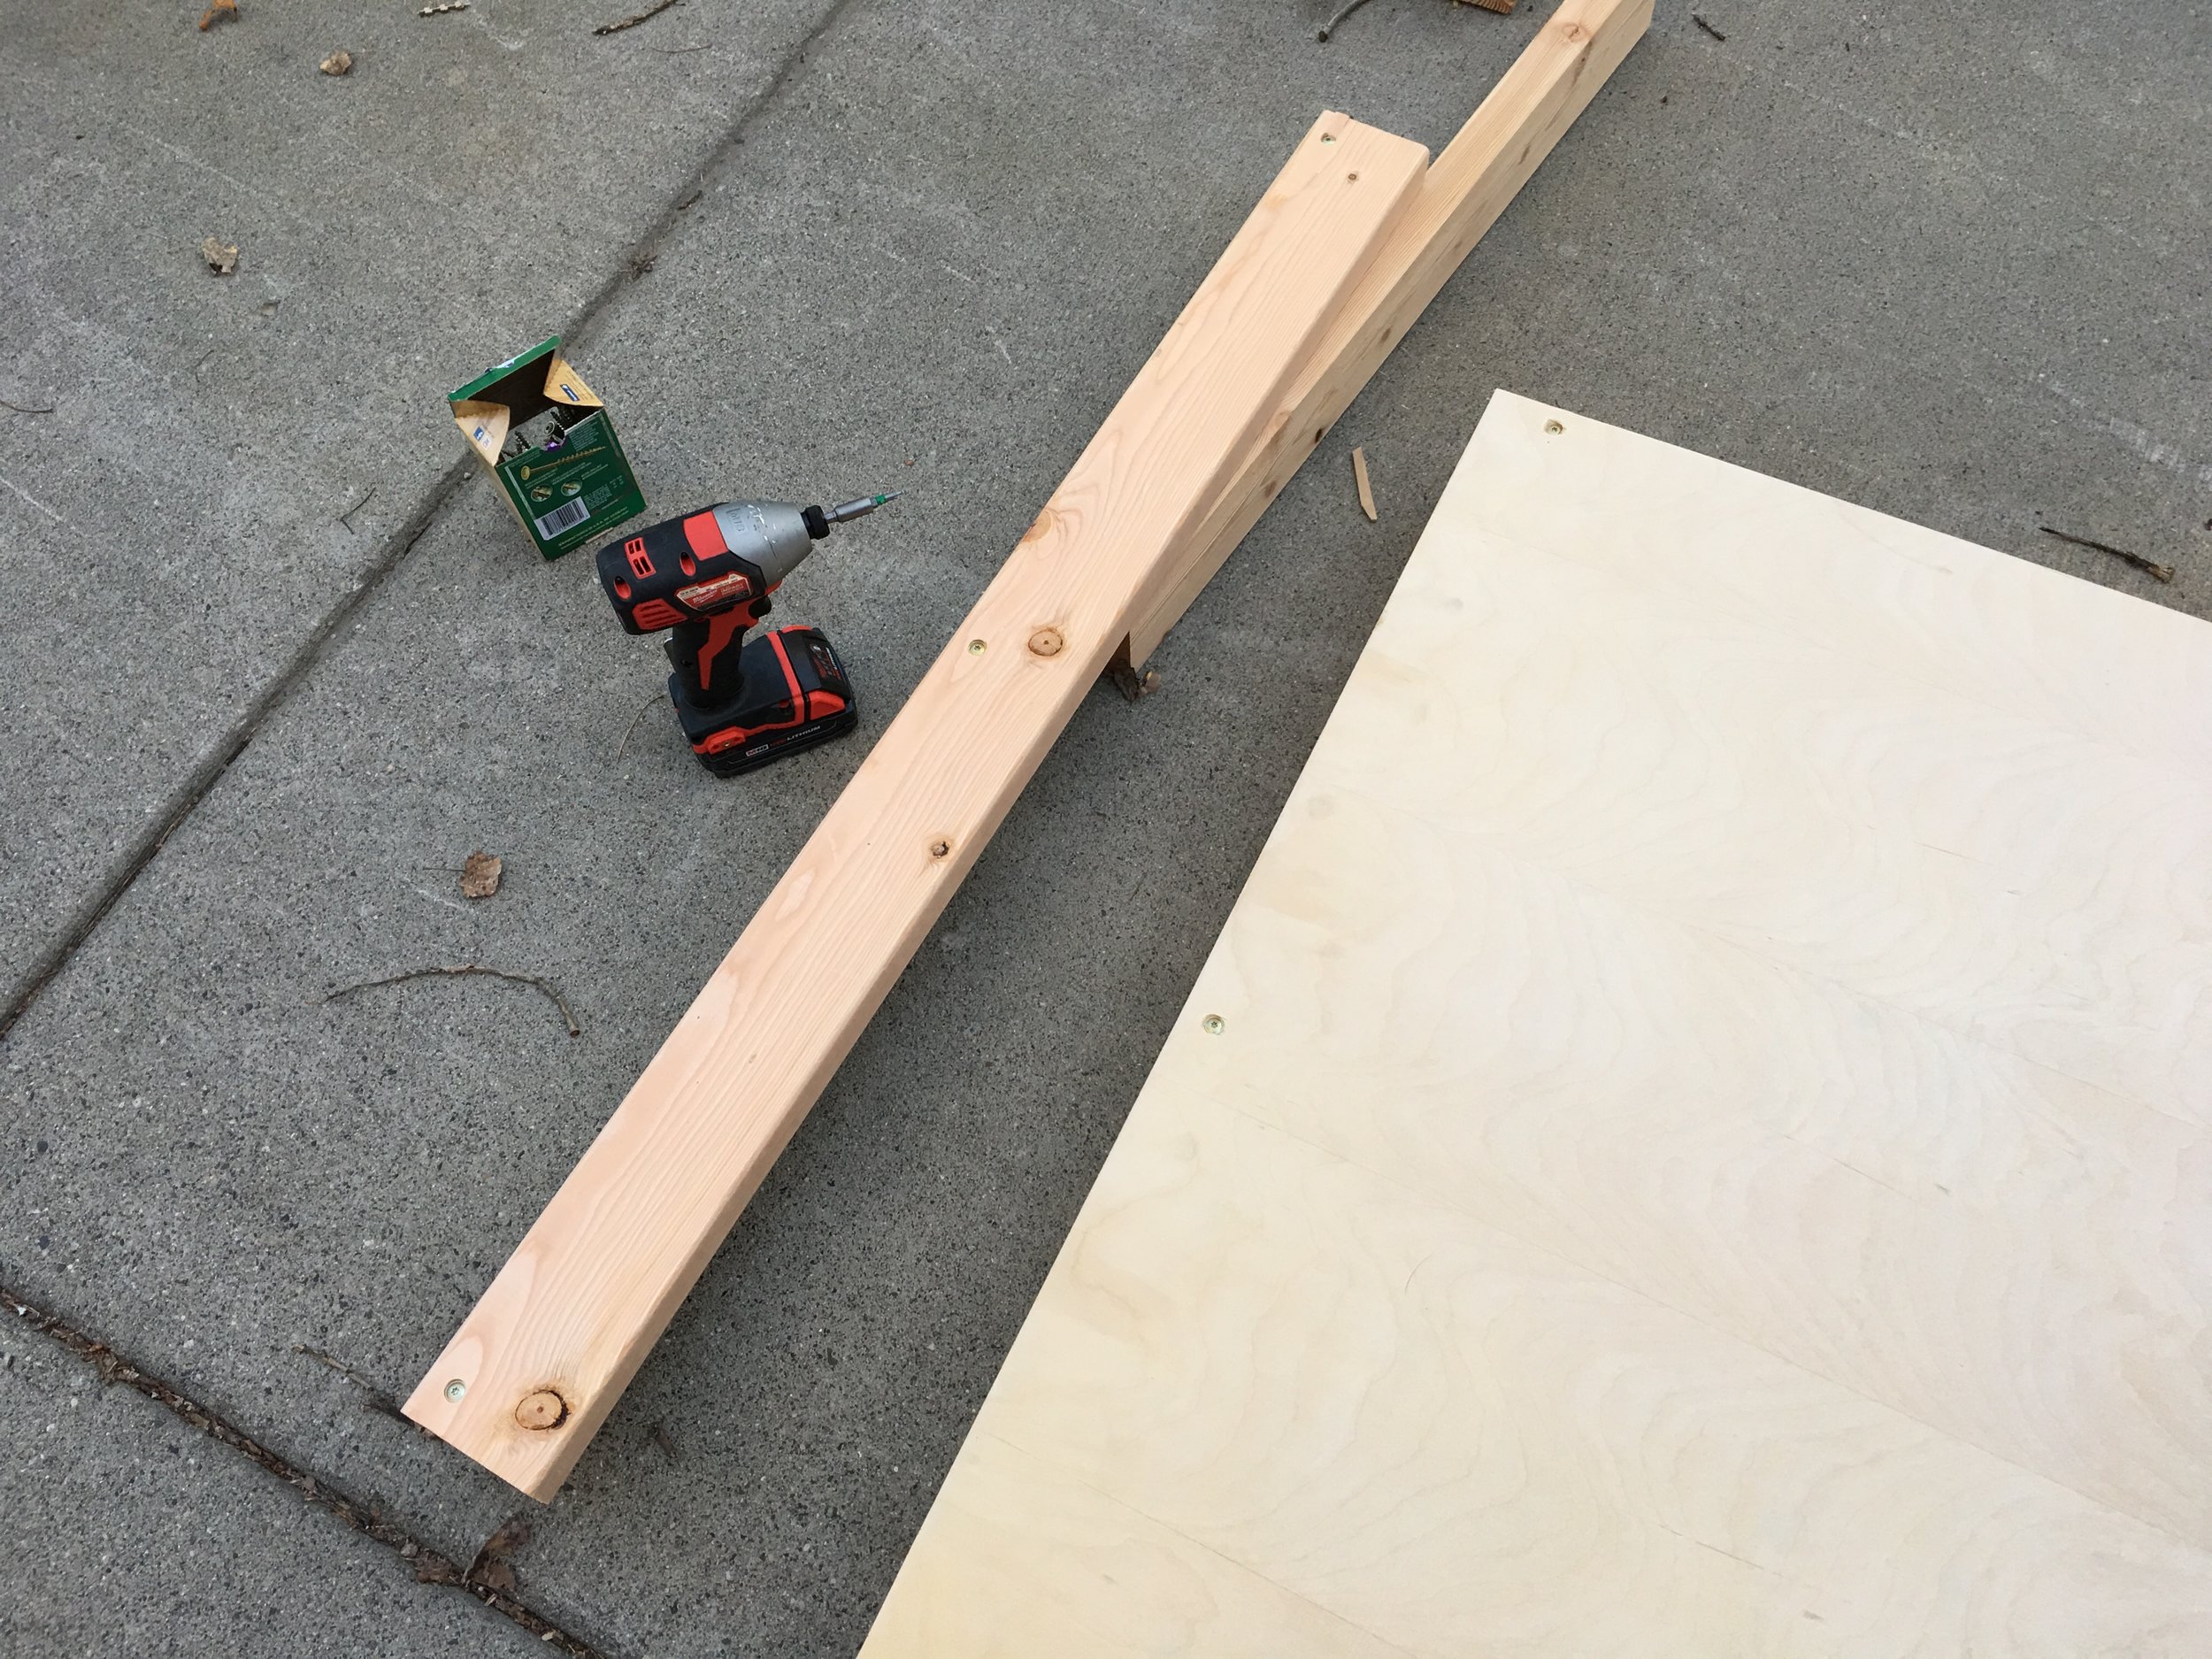
Next, place your plywood sheet labeled C on top, square it up with the frame you just built and screw it down. I used 2-1/2" screws to secure the plywood. I put a screw in at the edge of every support (just over from them, so I didn't hit the screws that were already in).
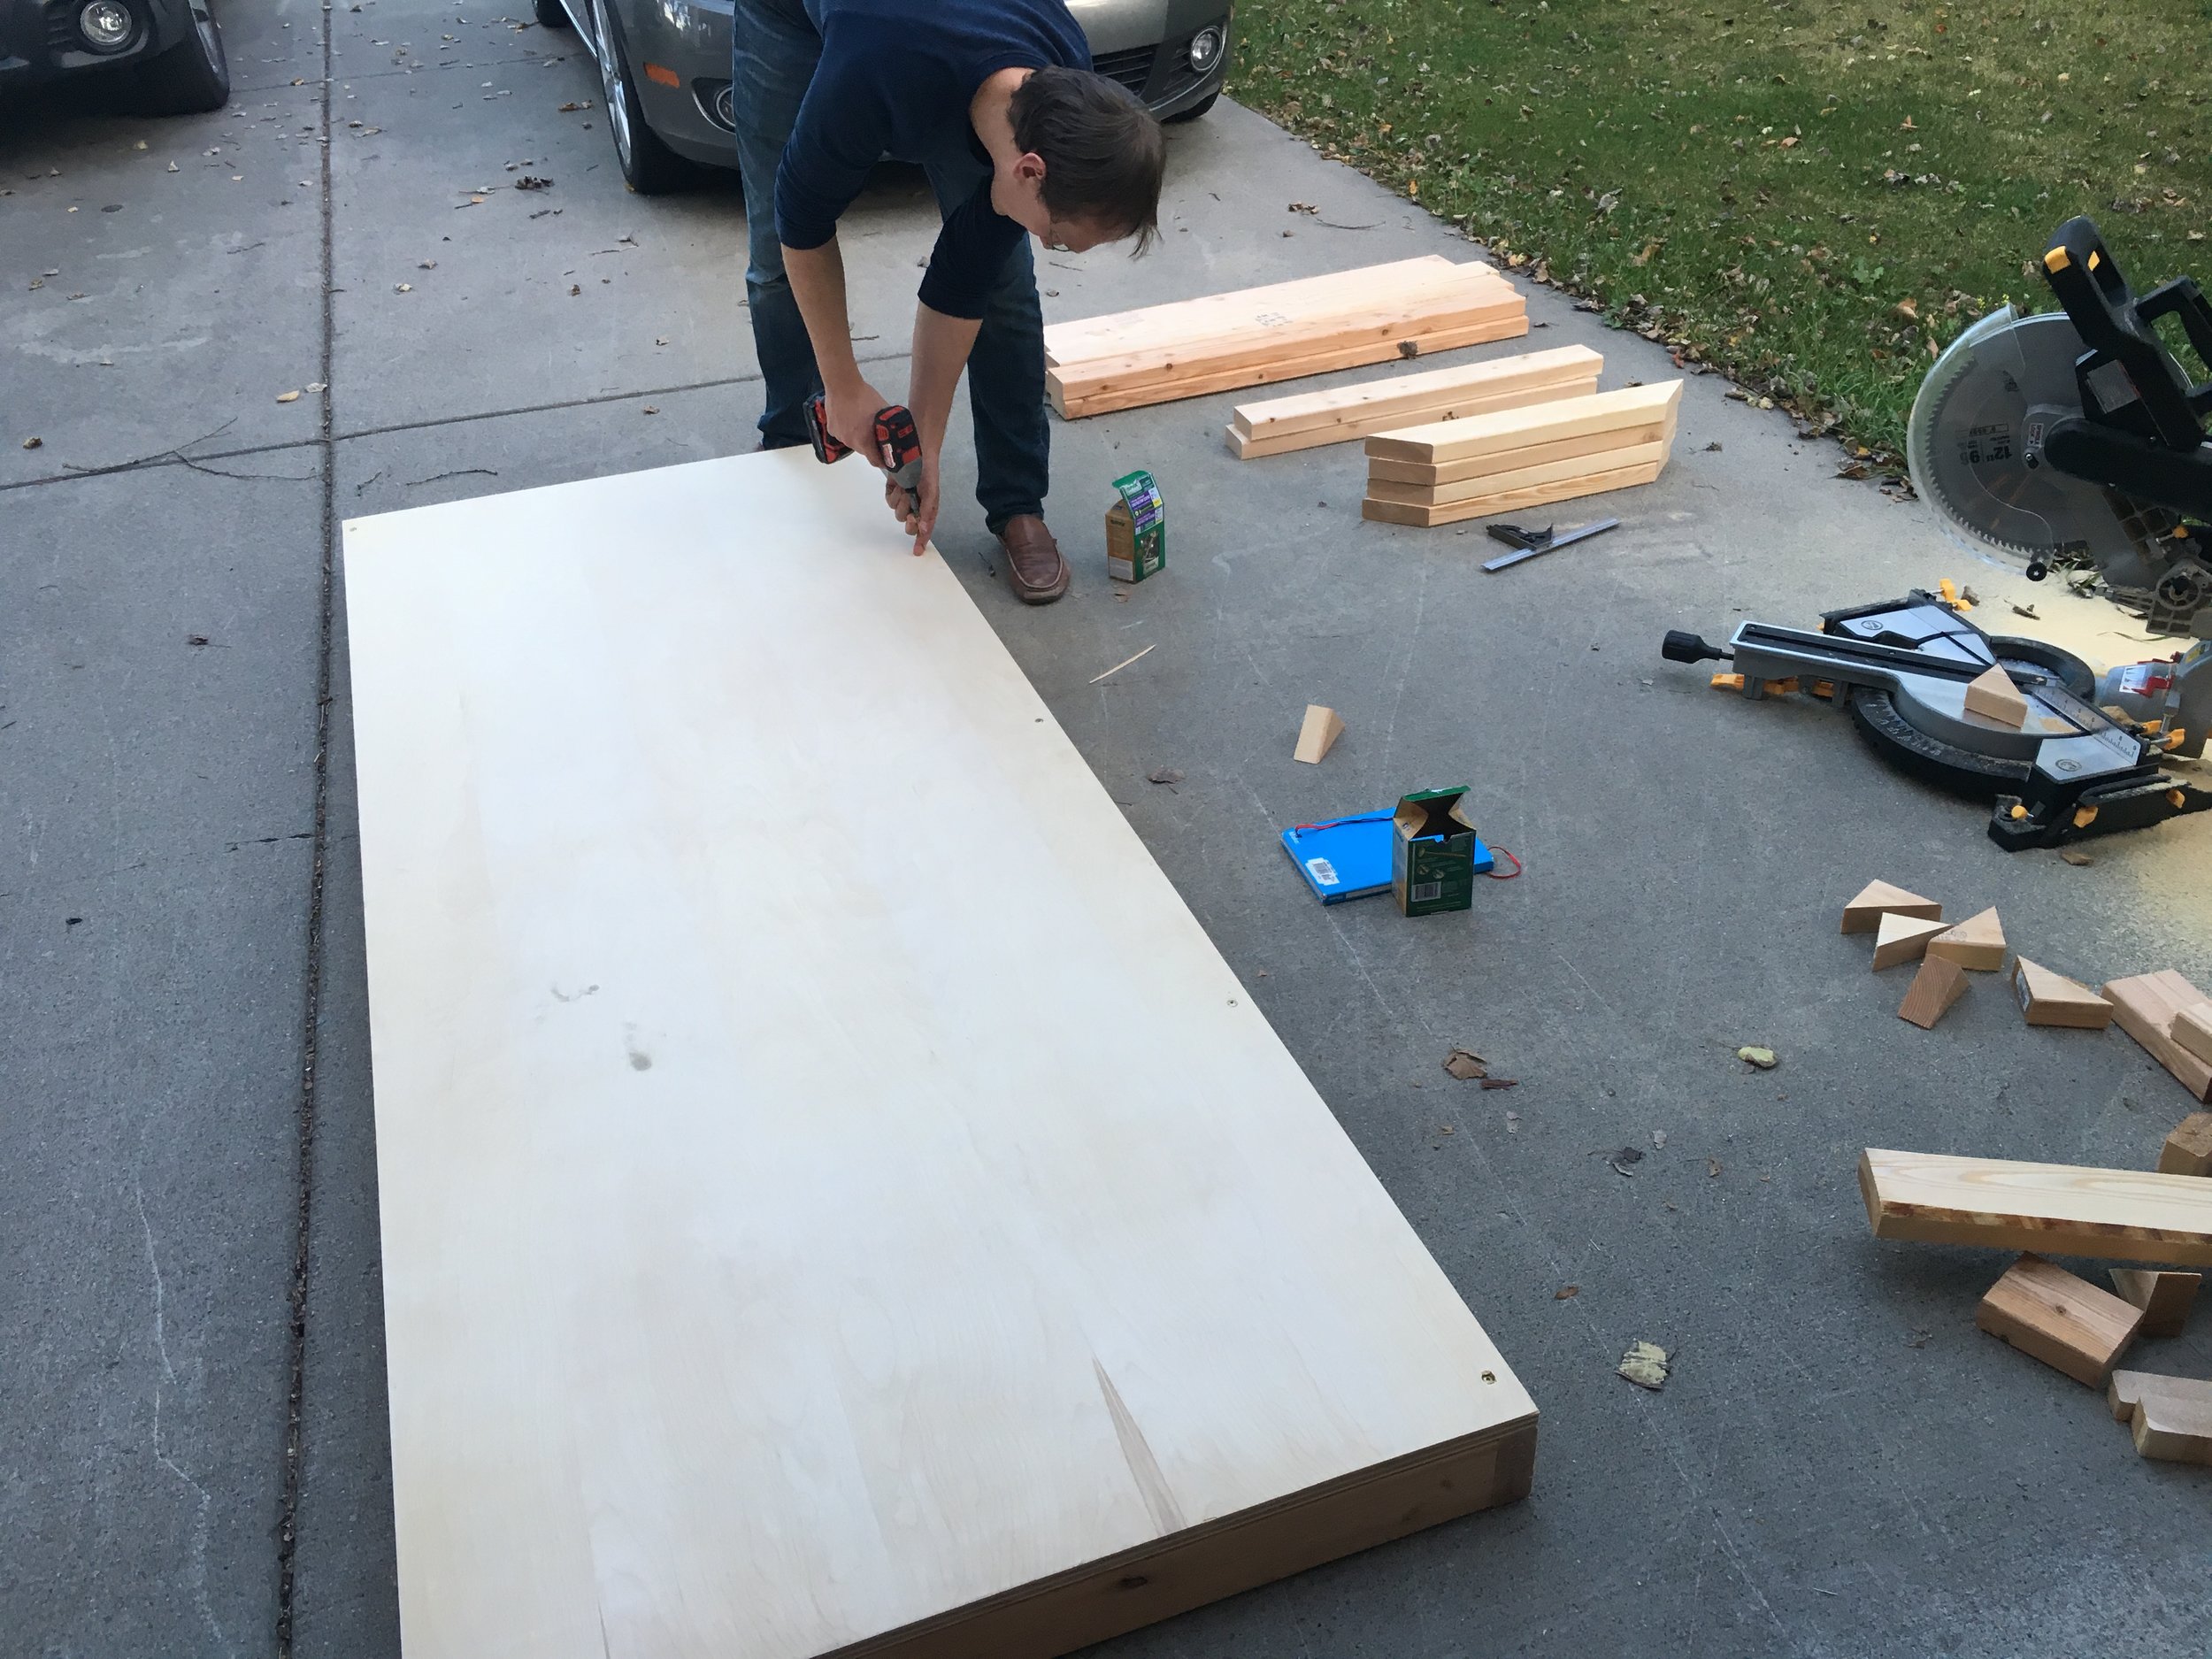
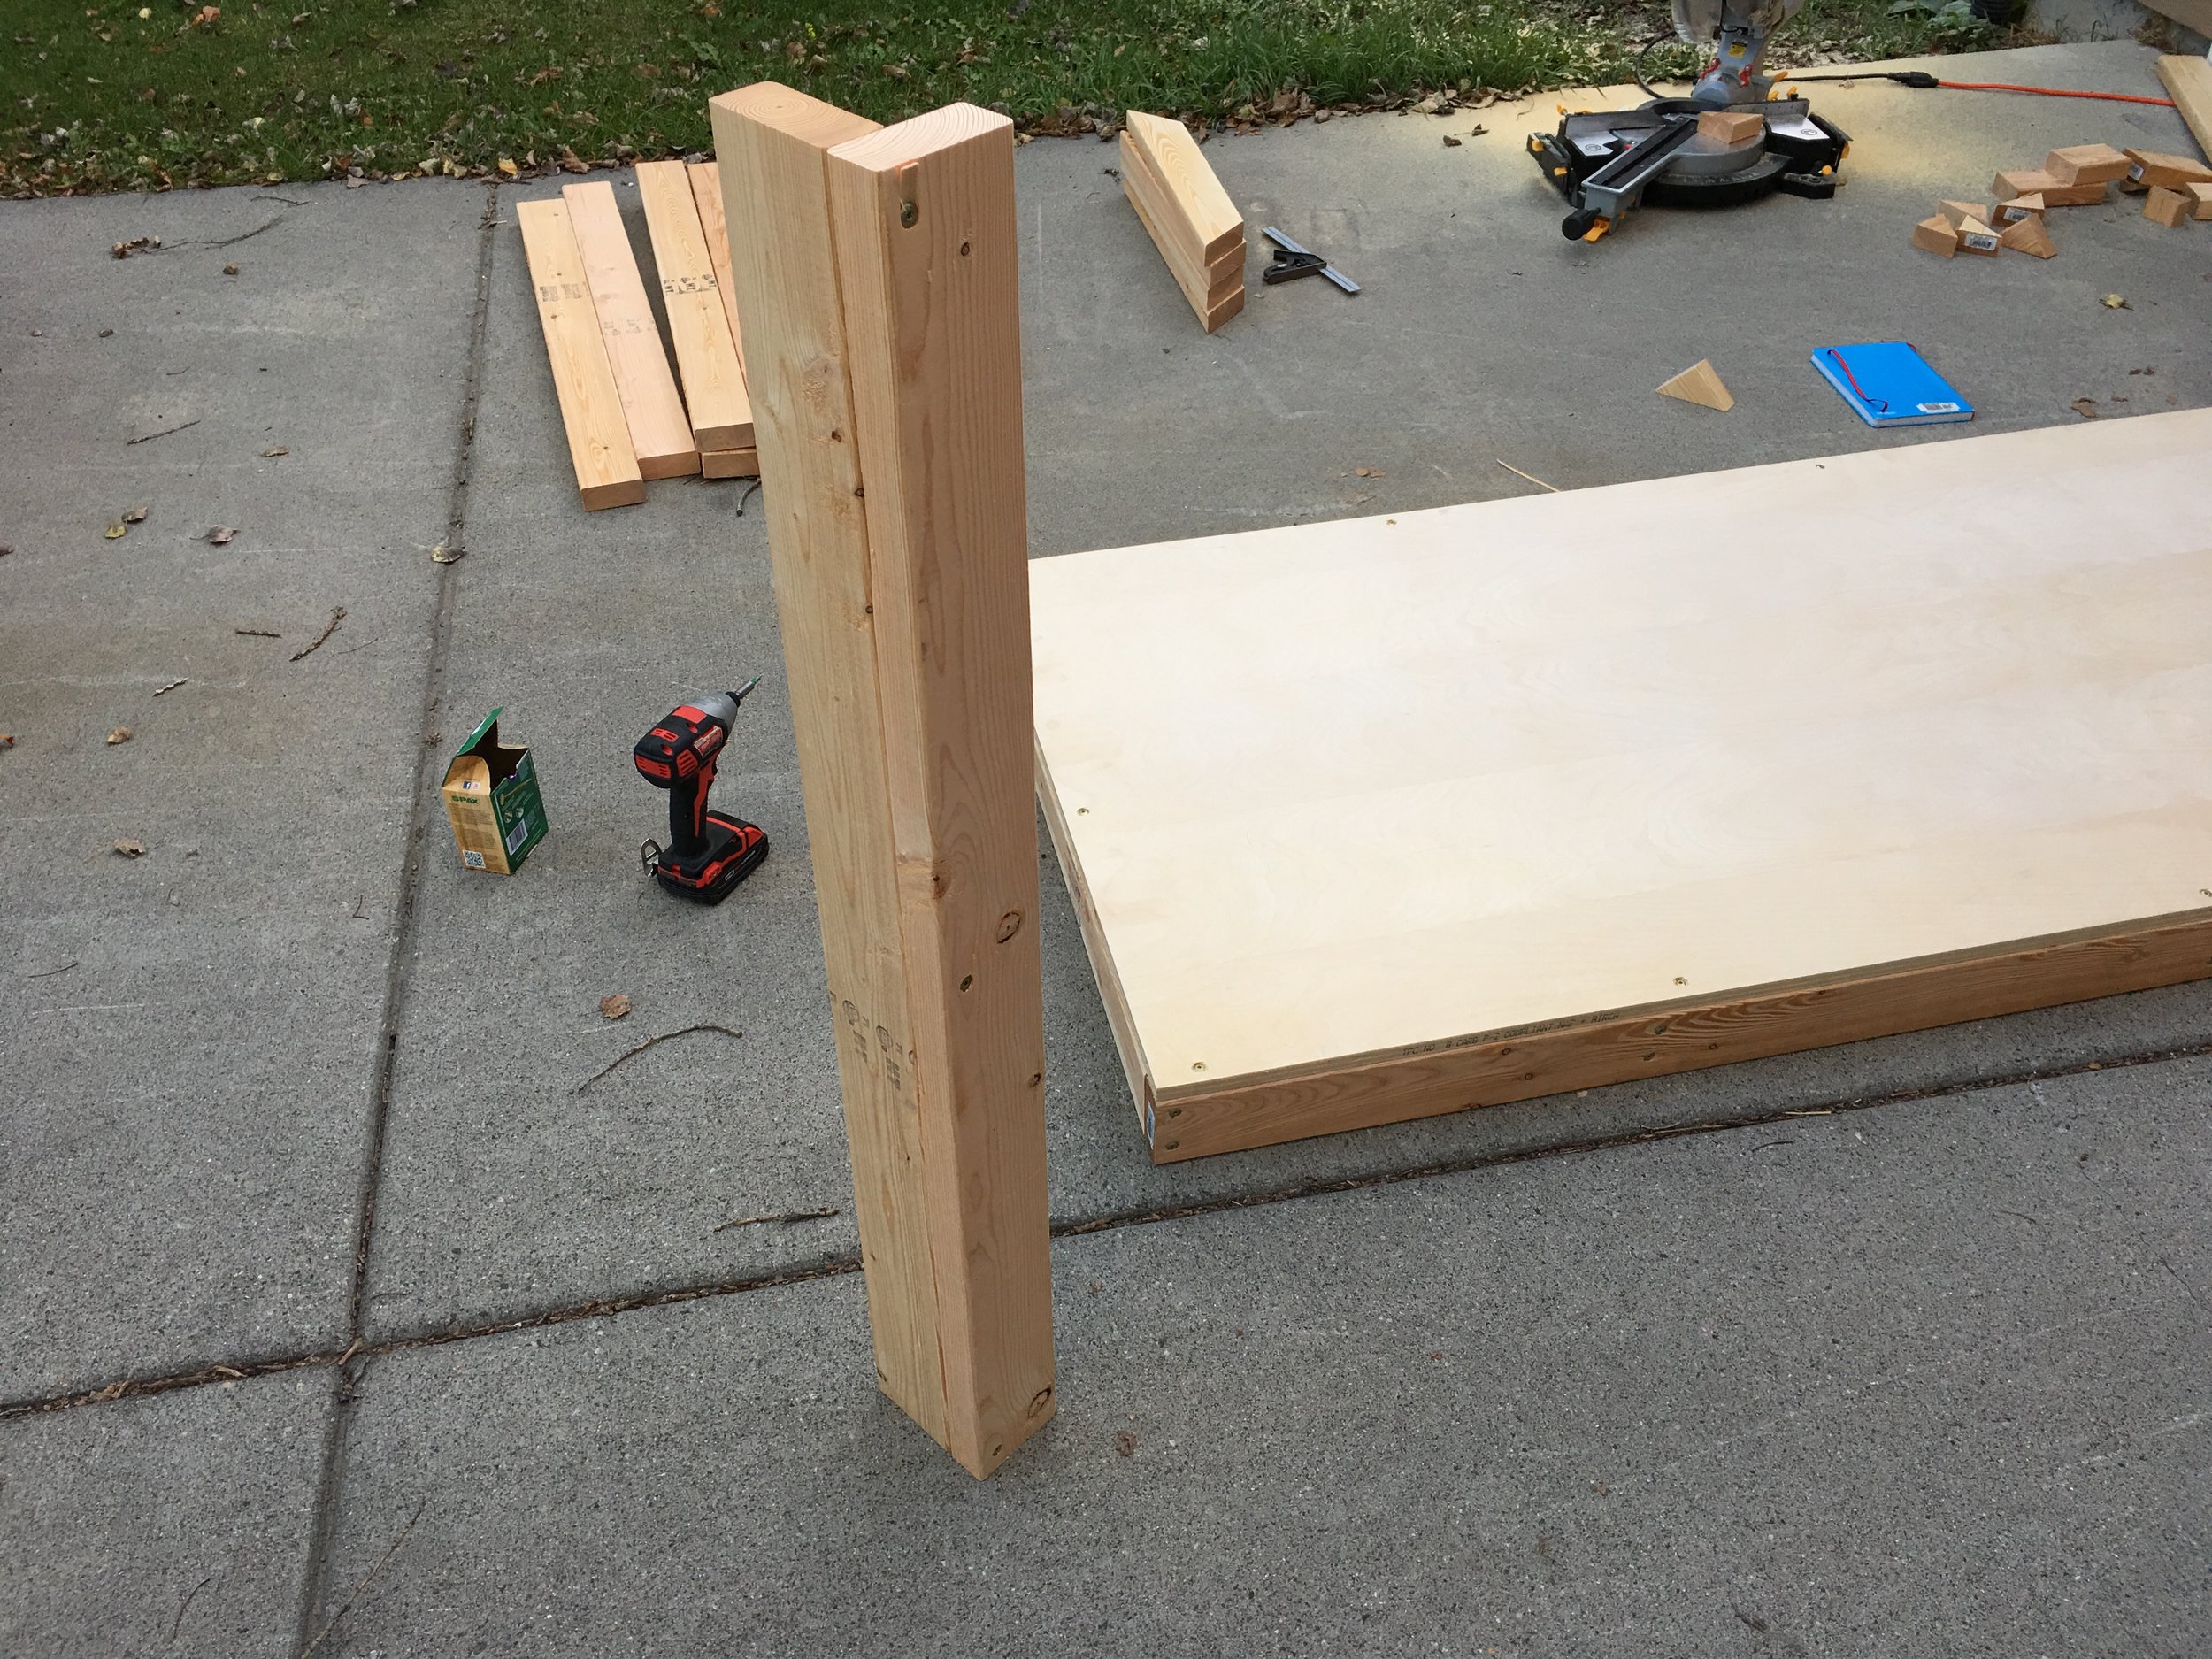
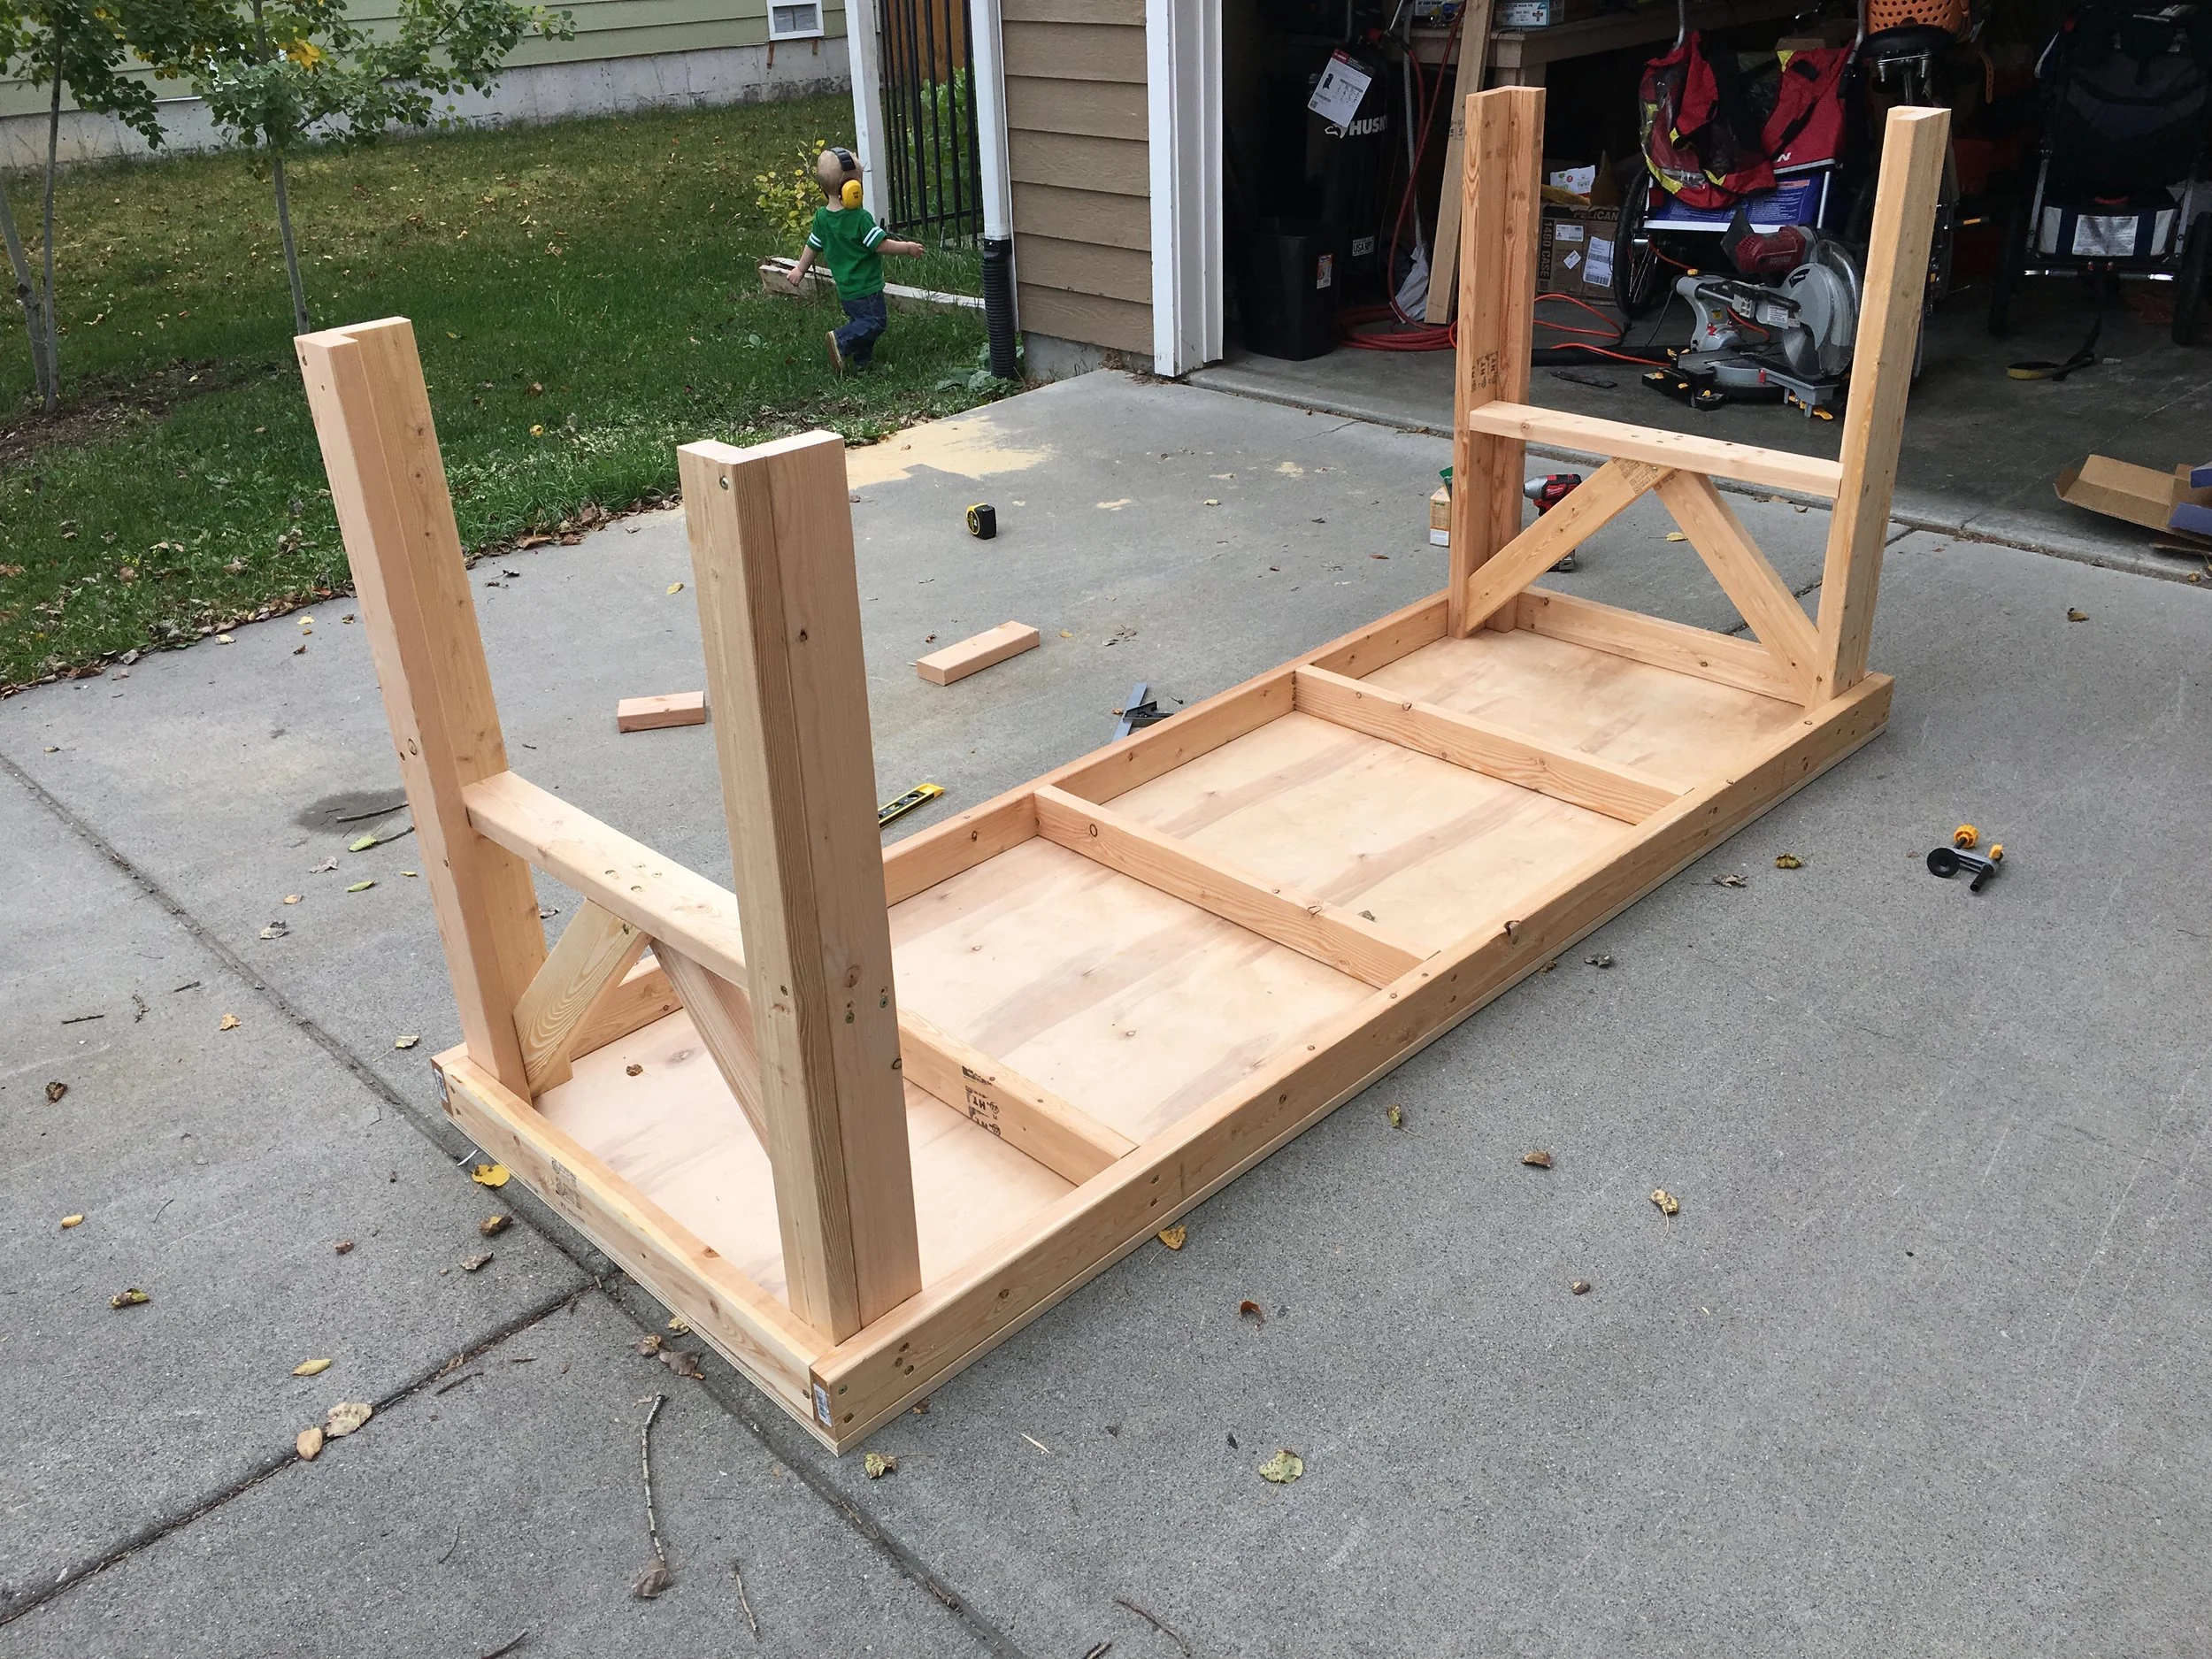
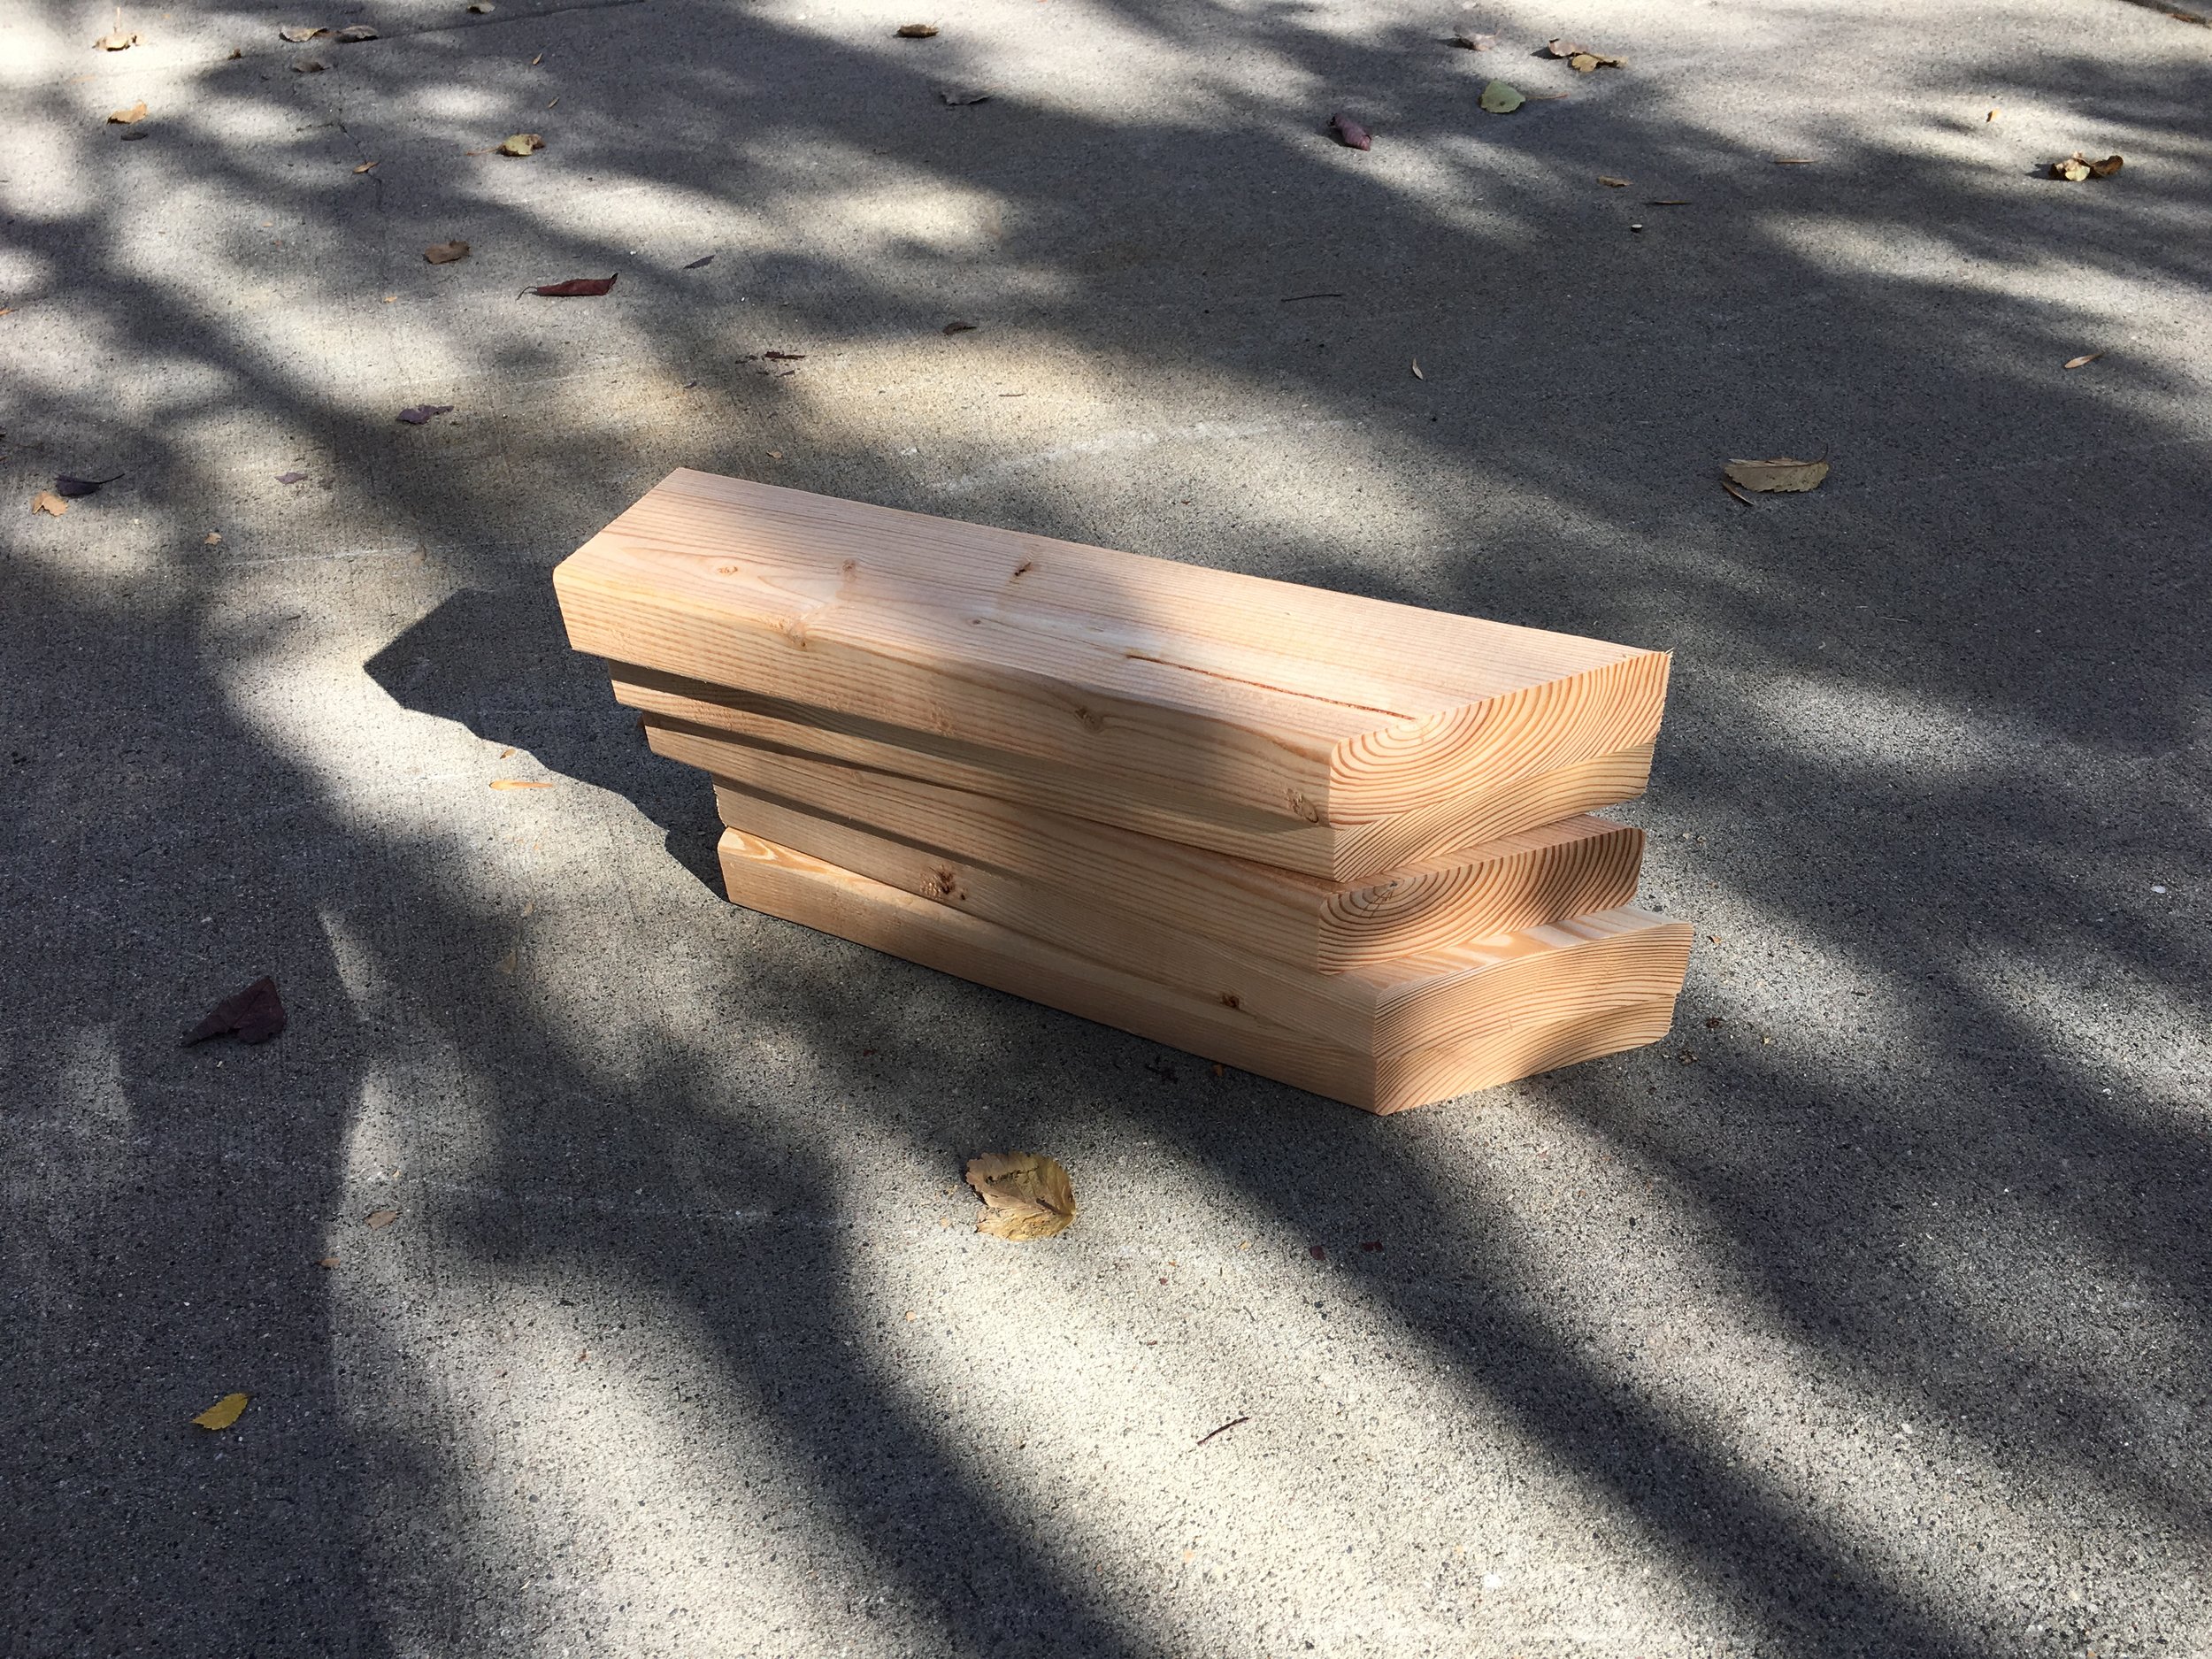
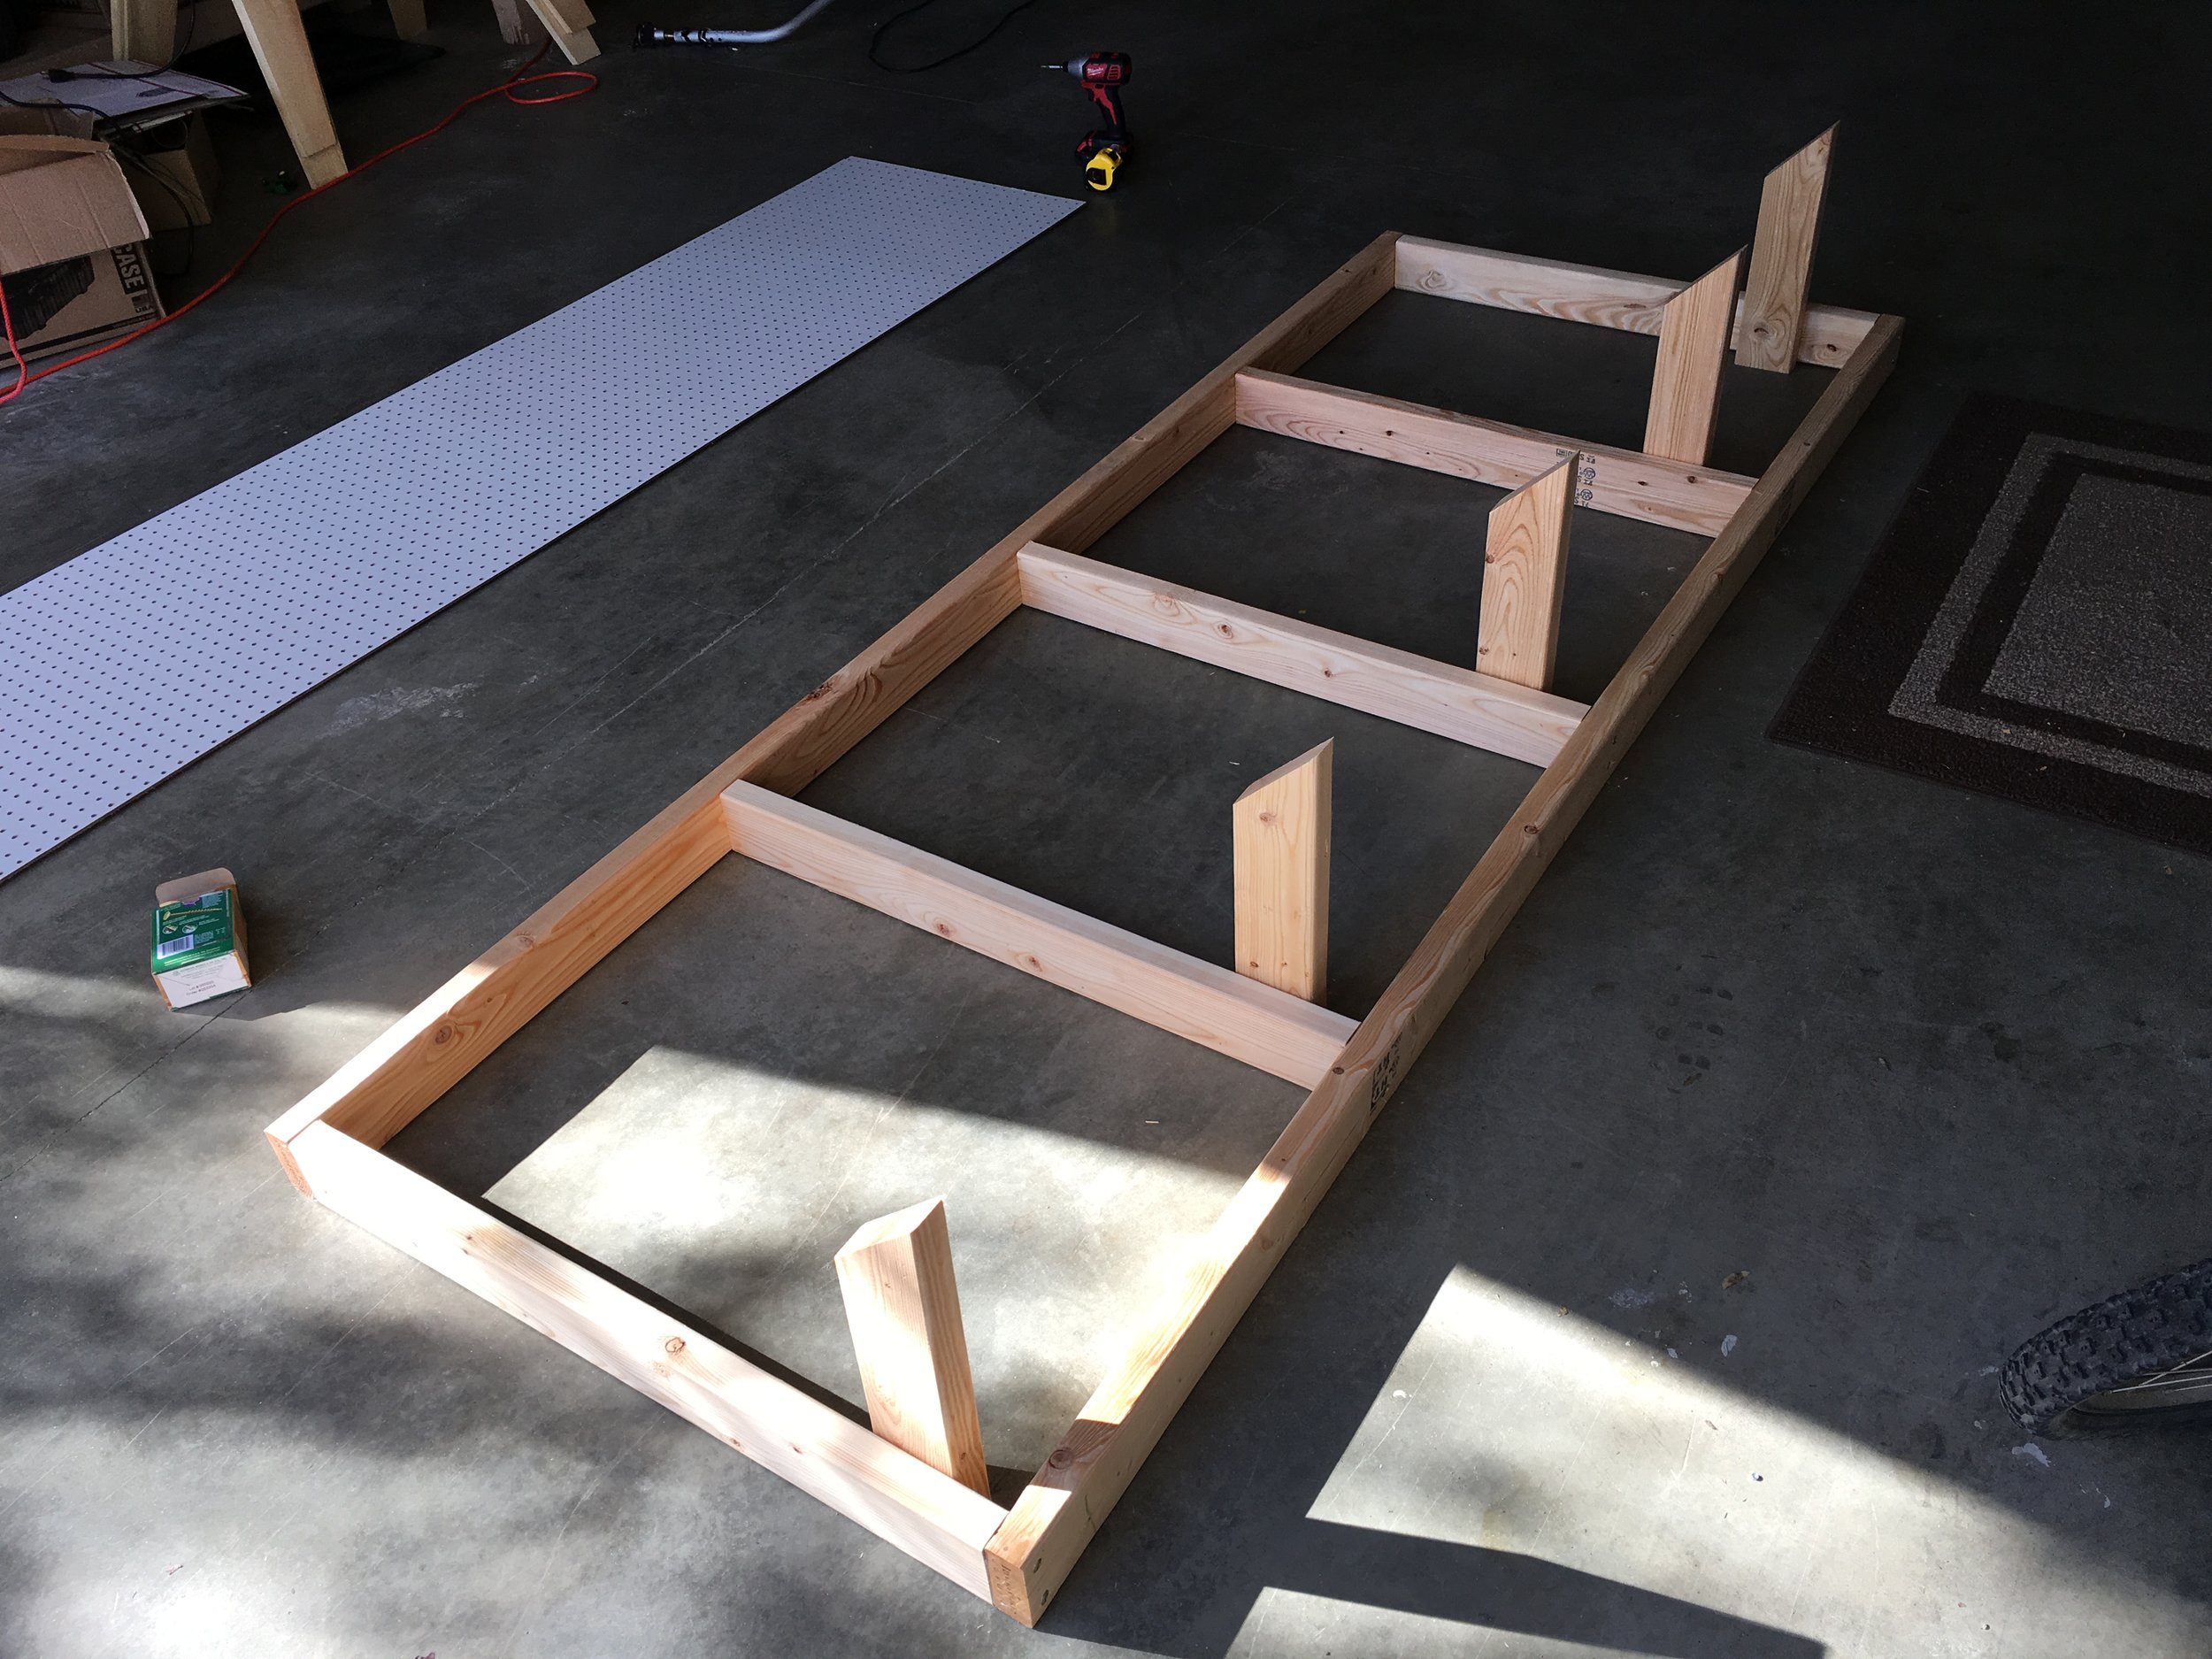
Next make each leg, by screwing together the 4 pairs of 2x4s labeled D using three 3" screws each. Flip the table top over, as we'll be attaching the legs with it upside down, but don't screw the legs in yet.
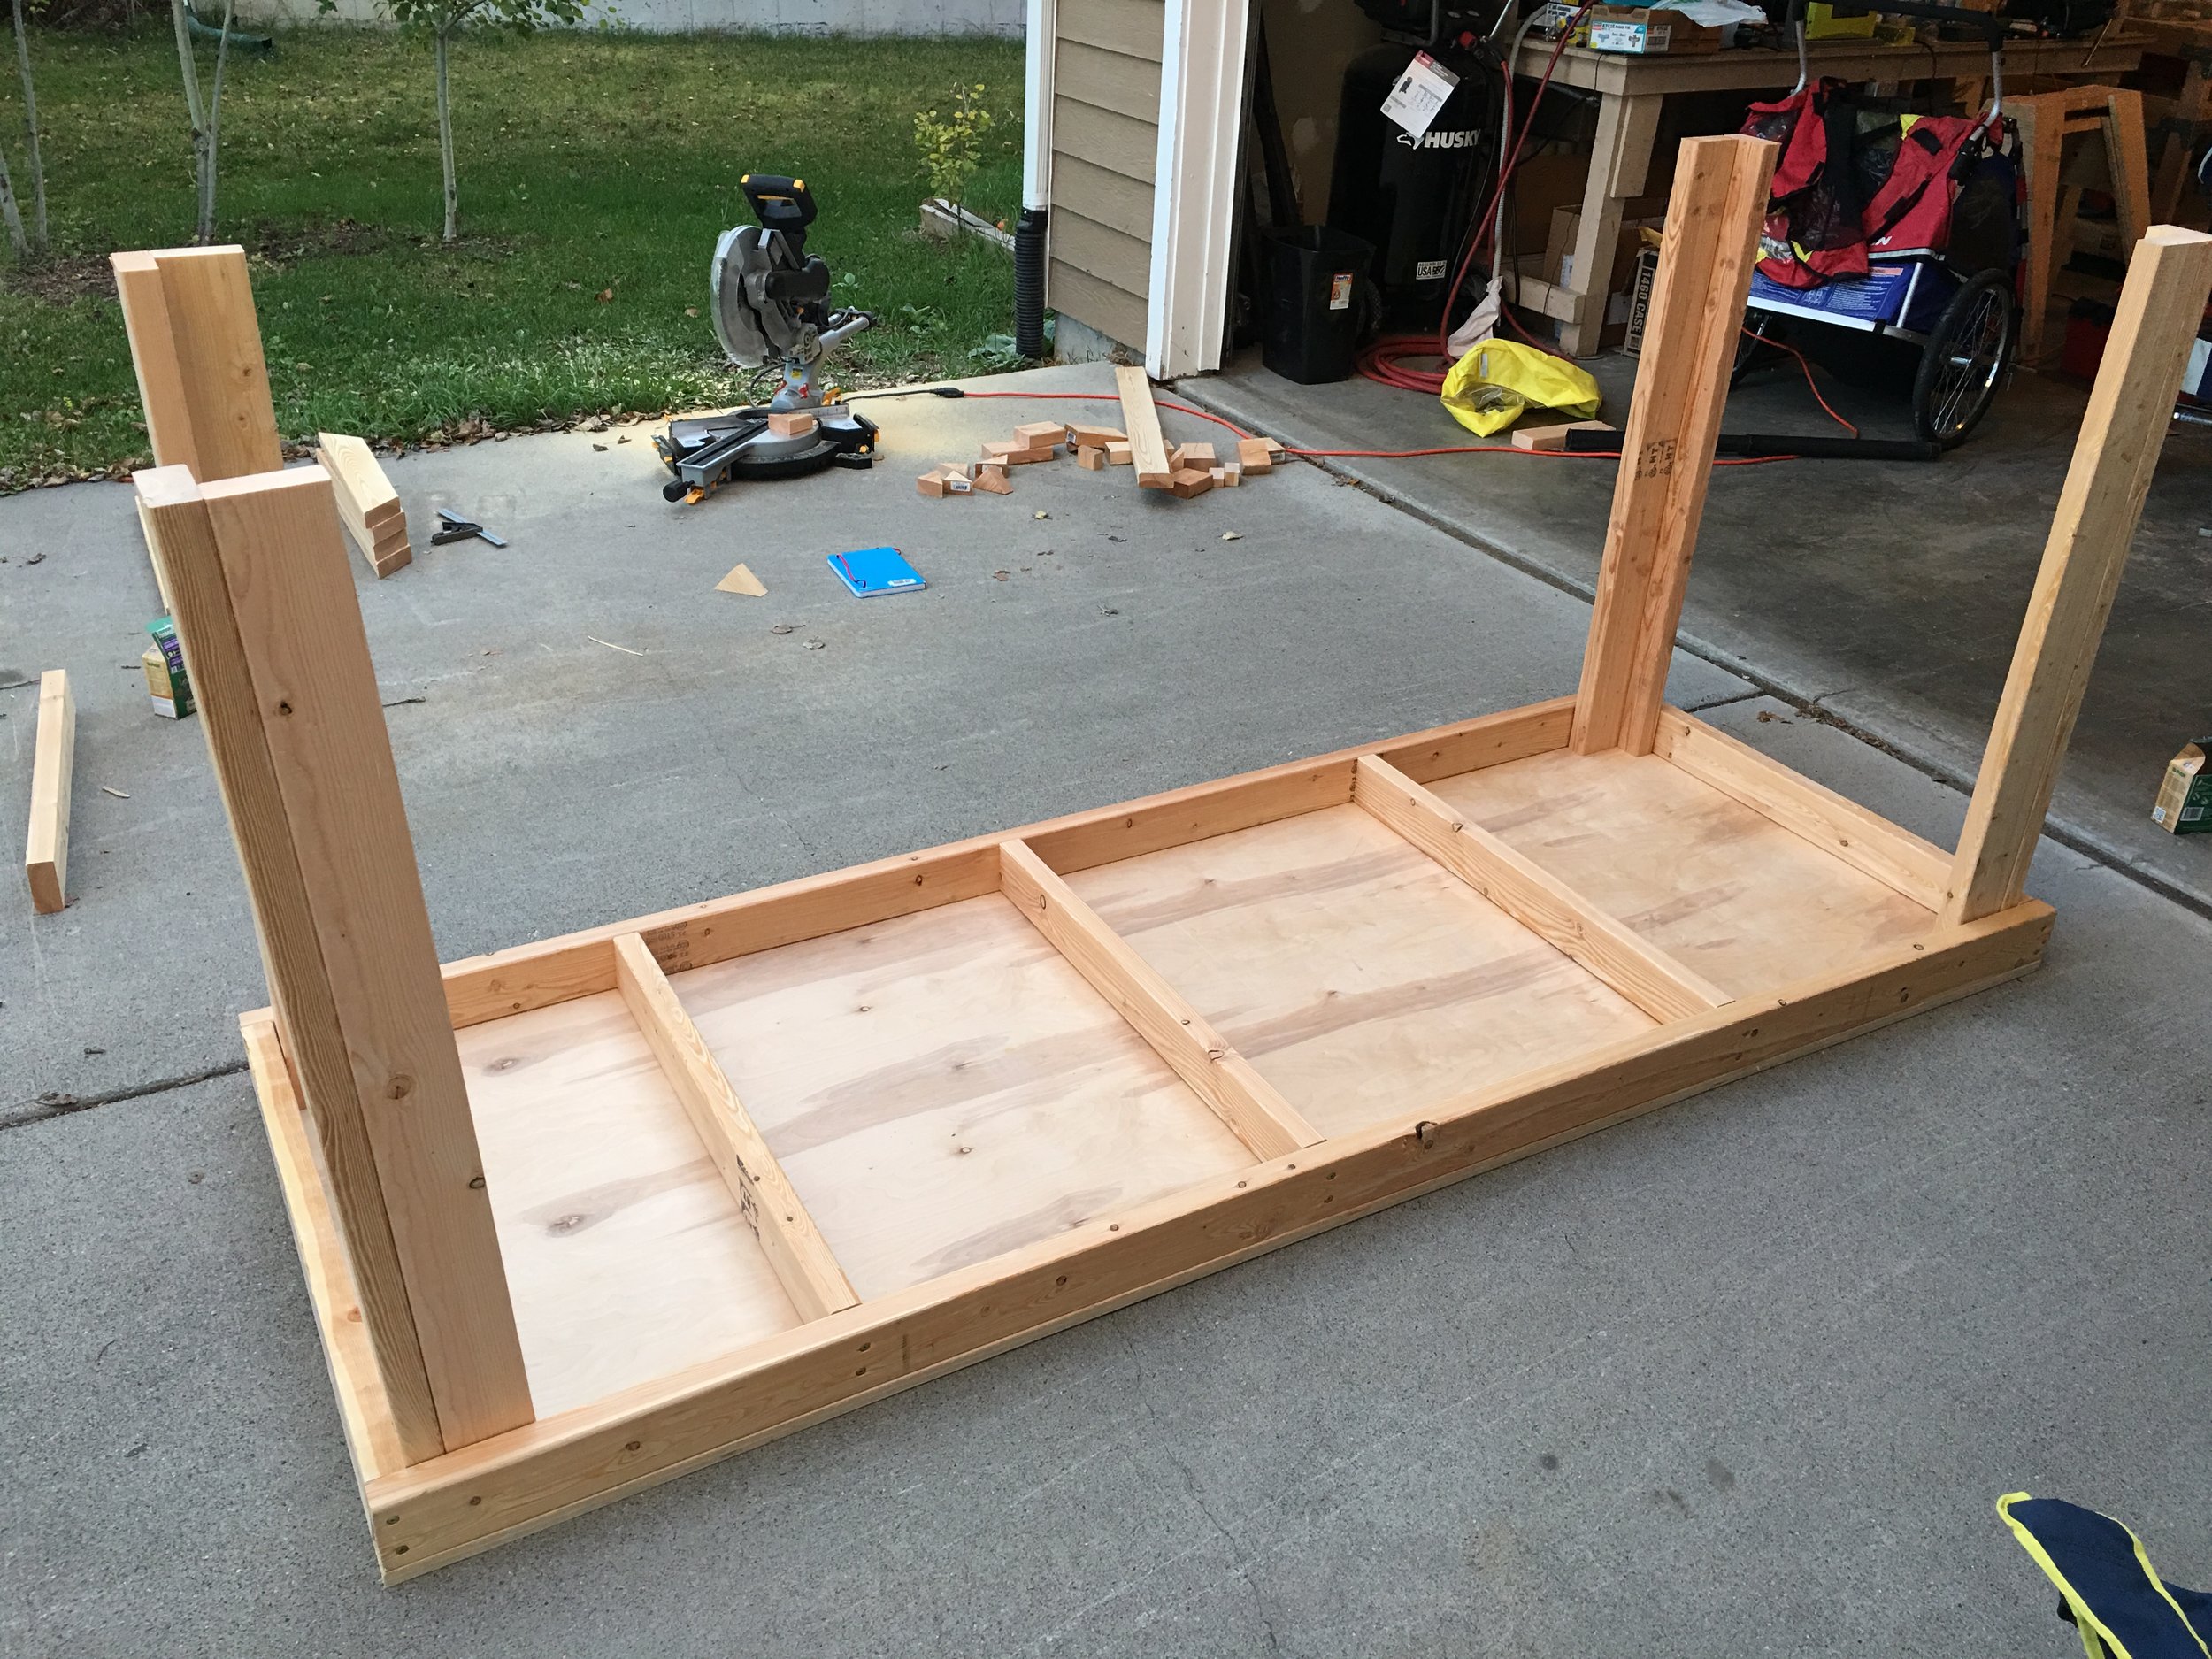
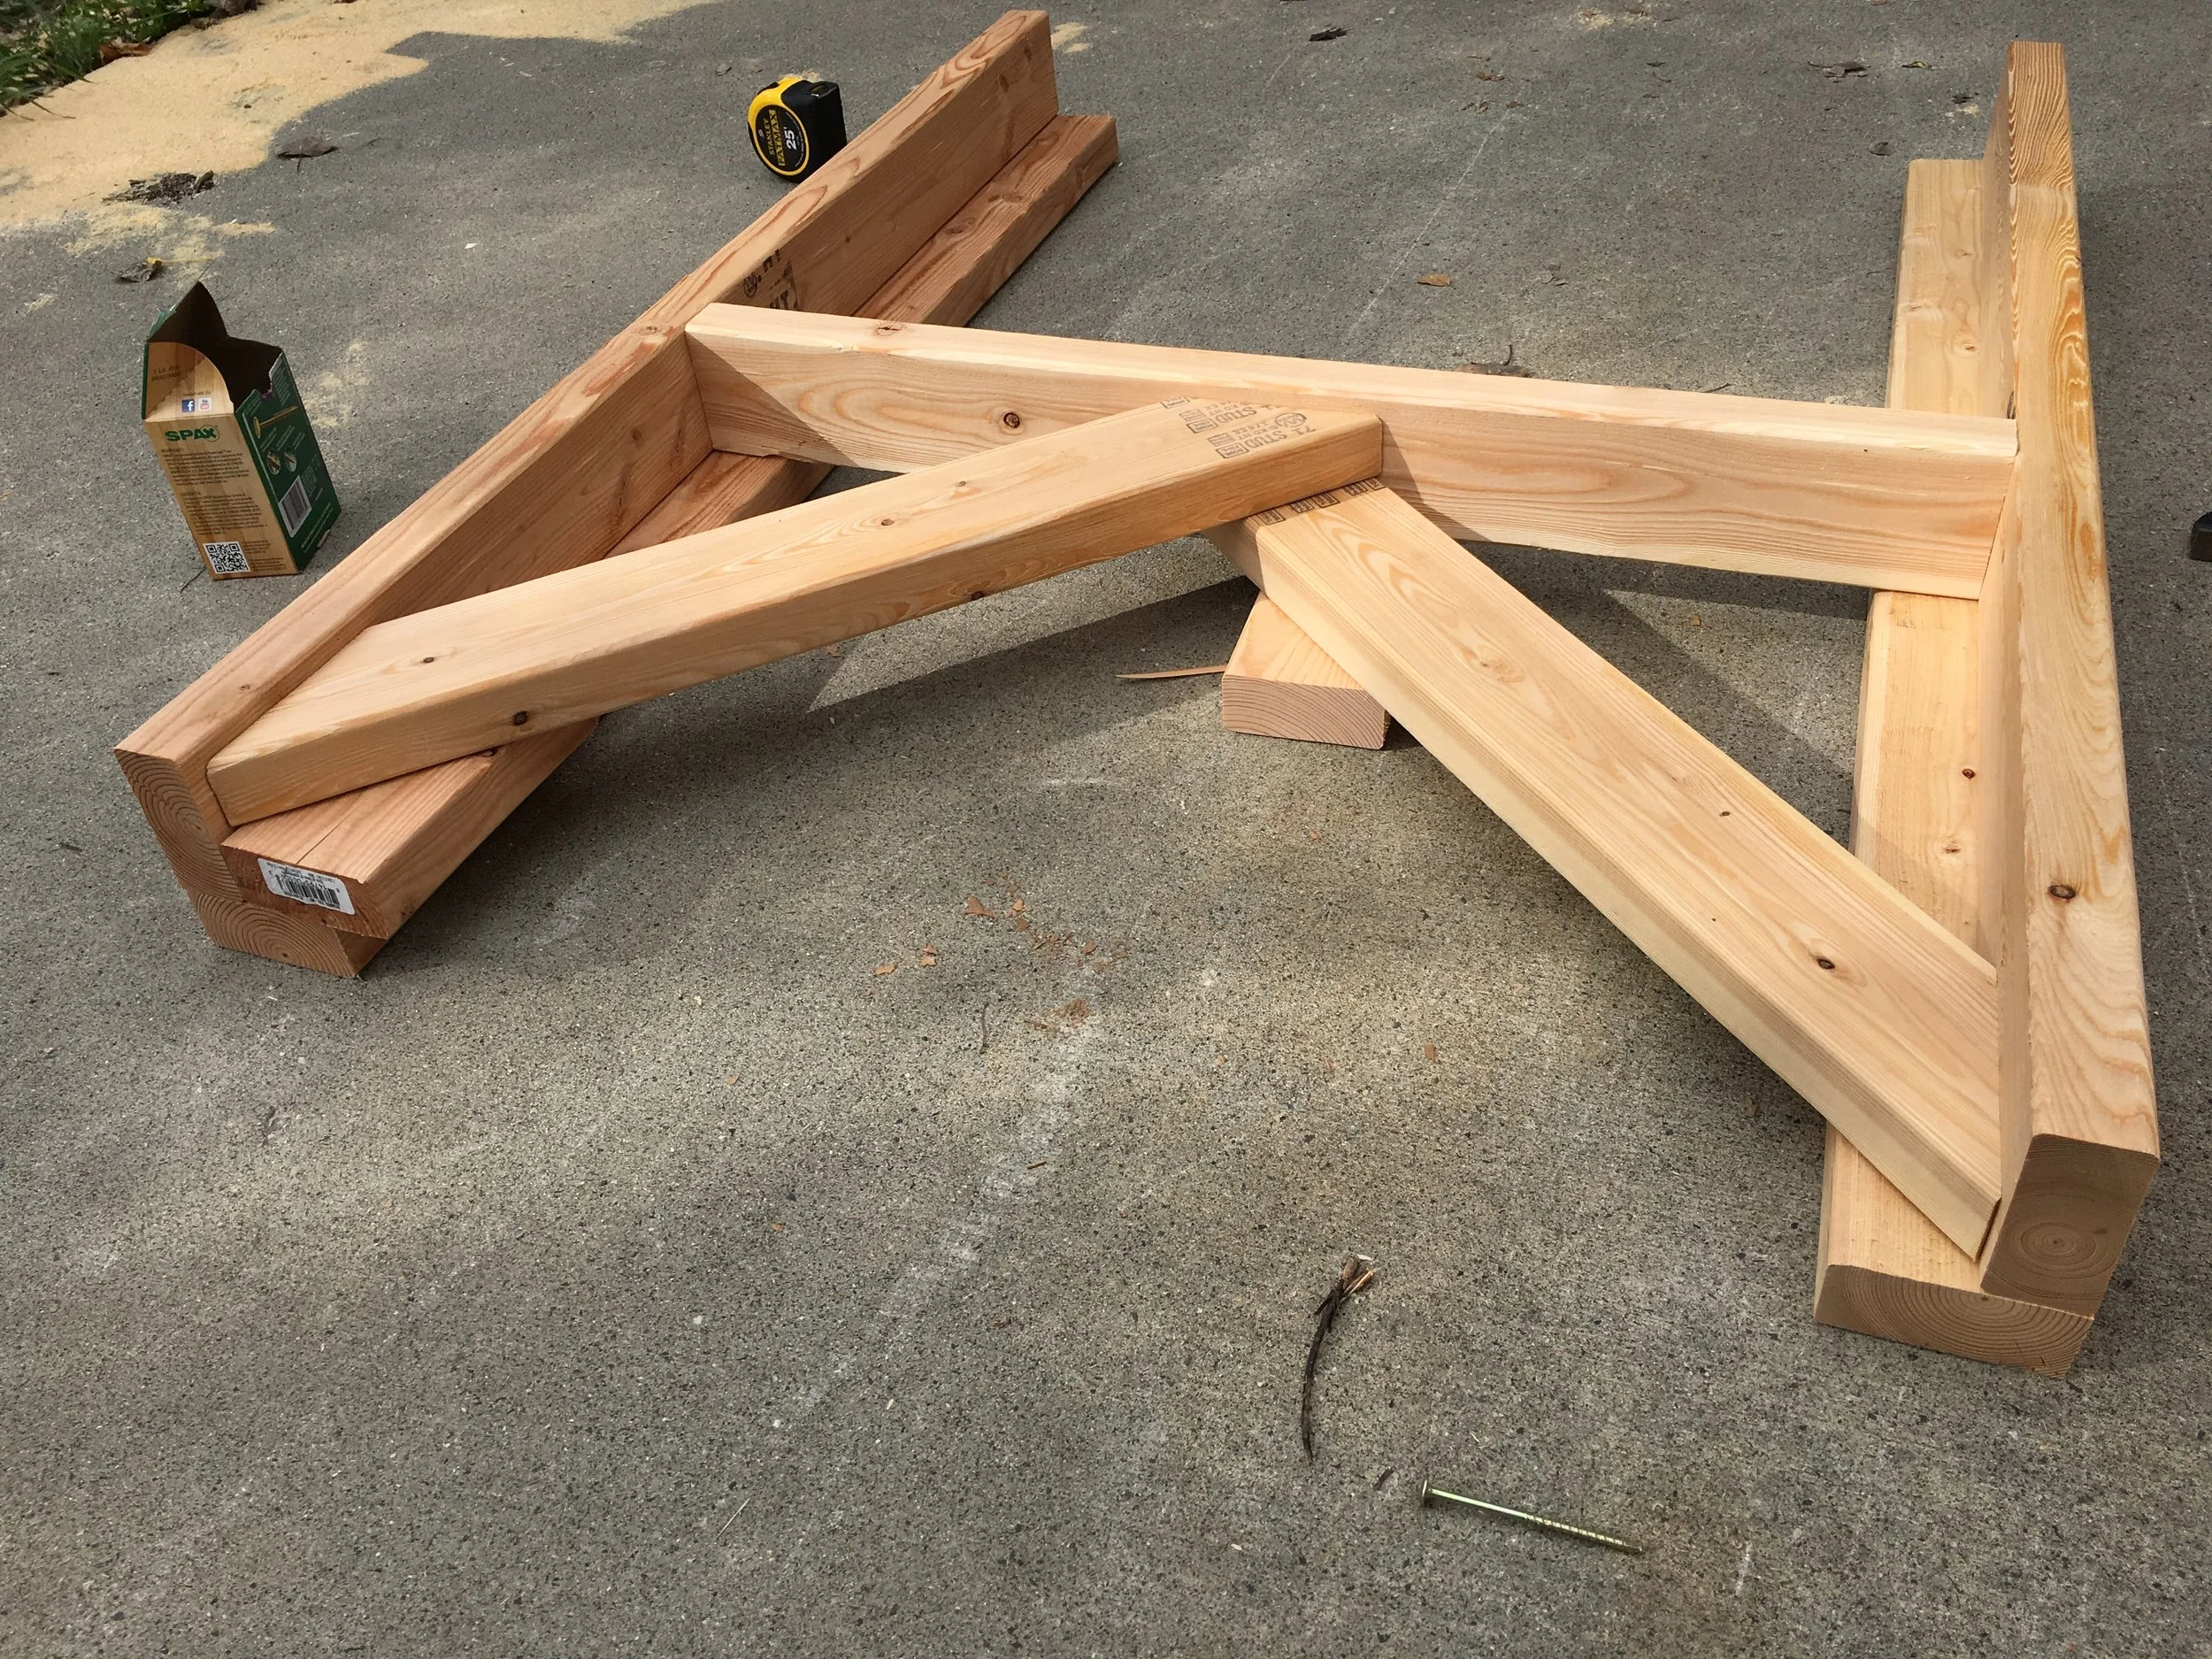
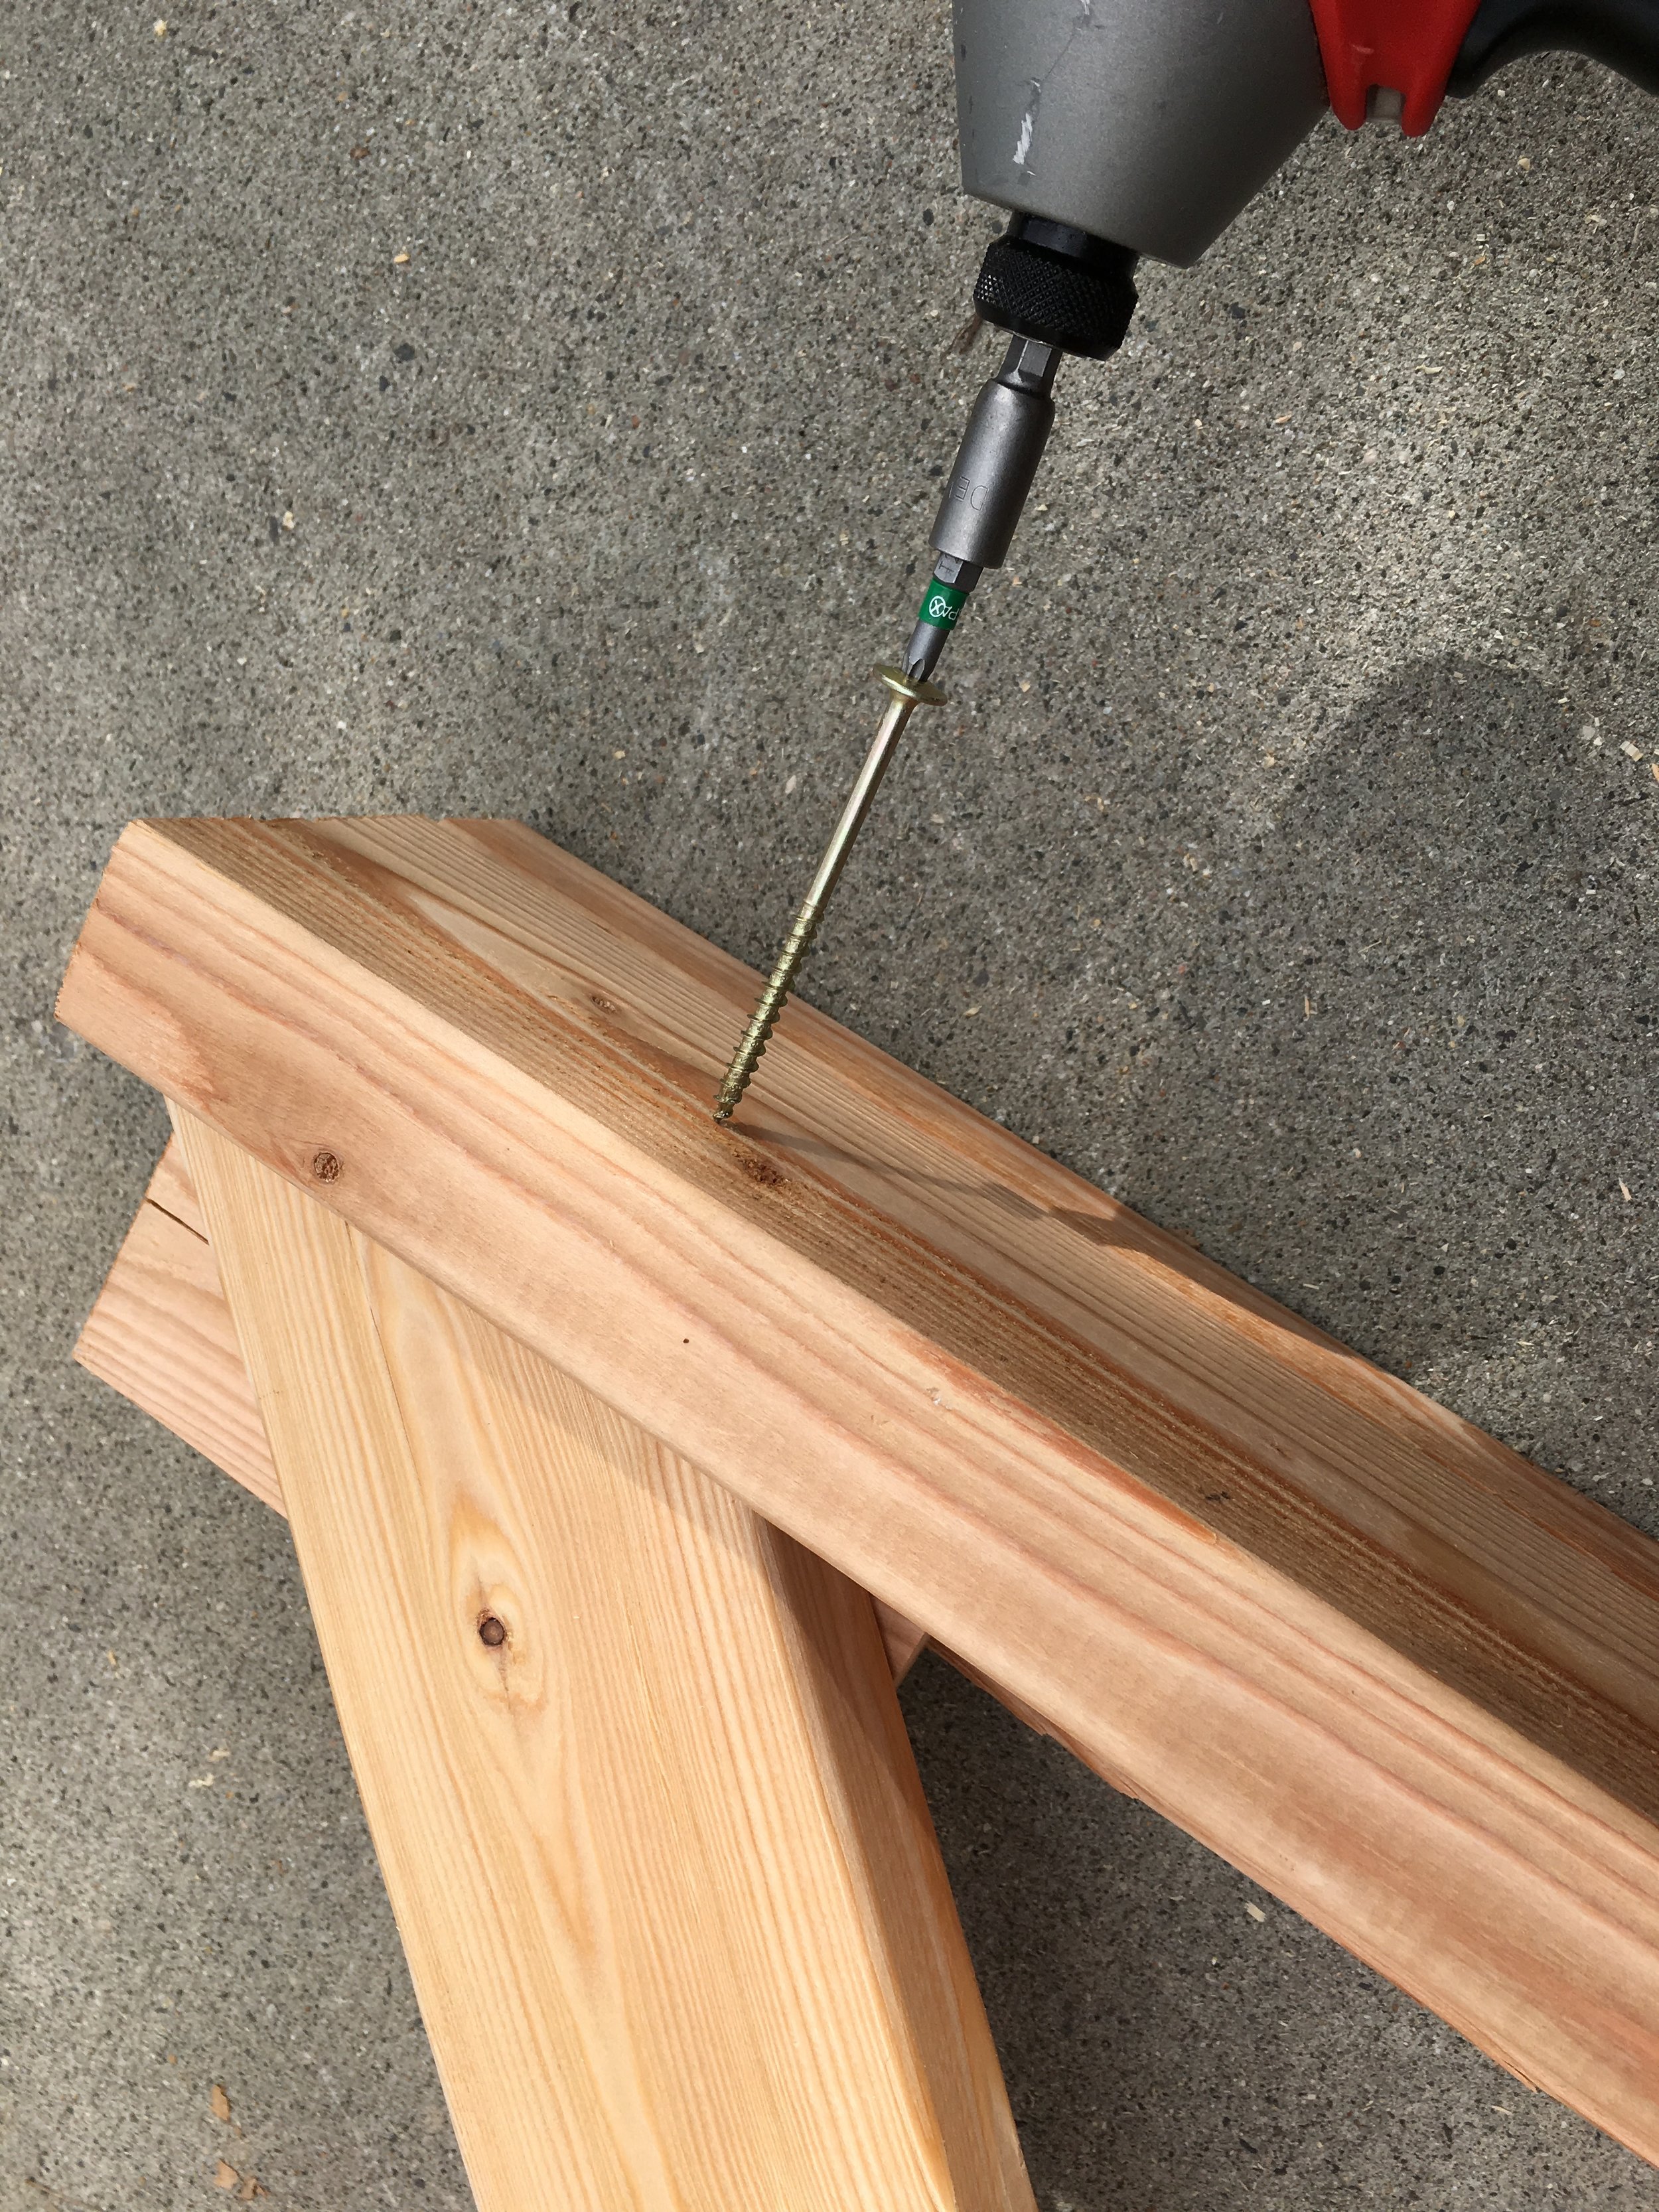
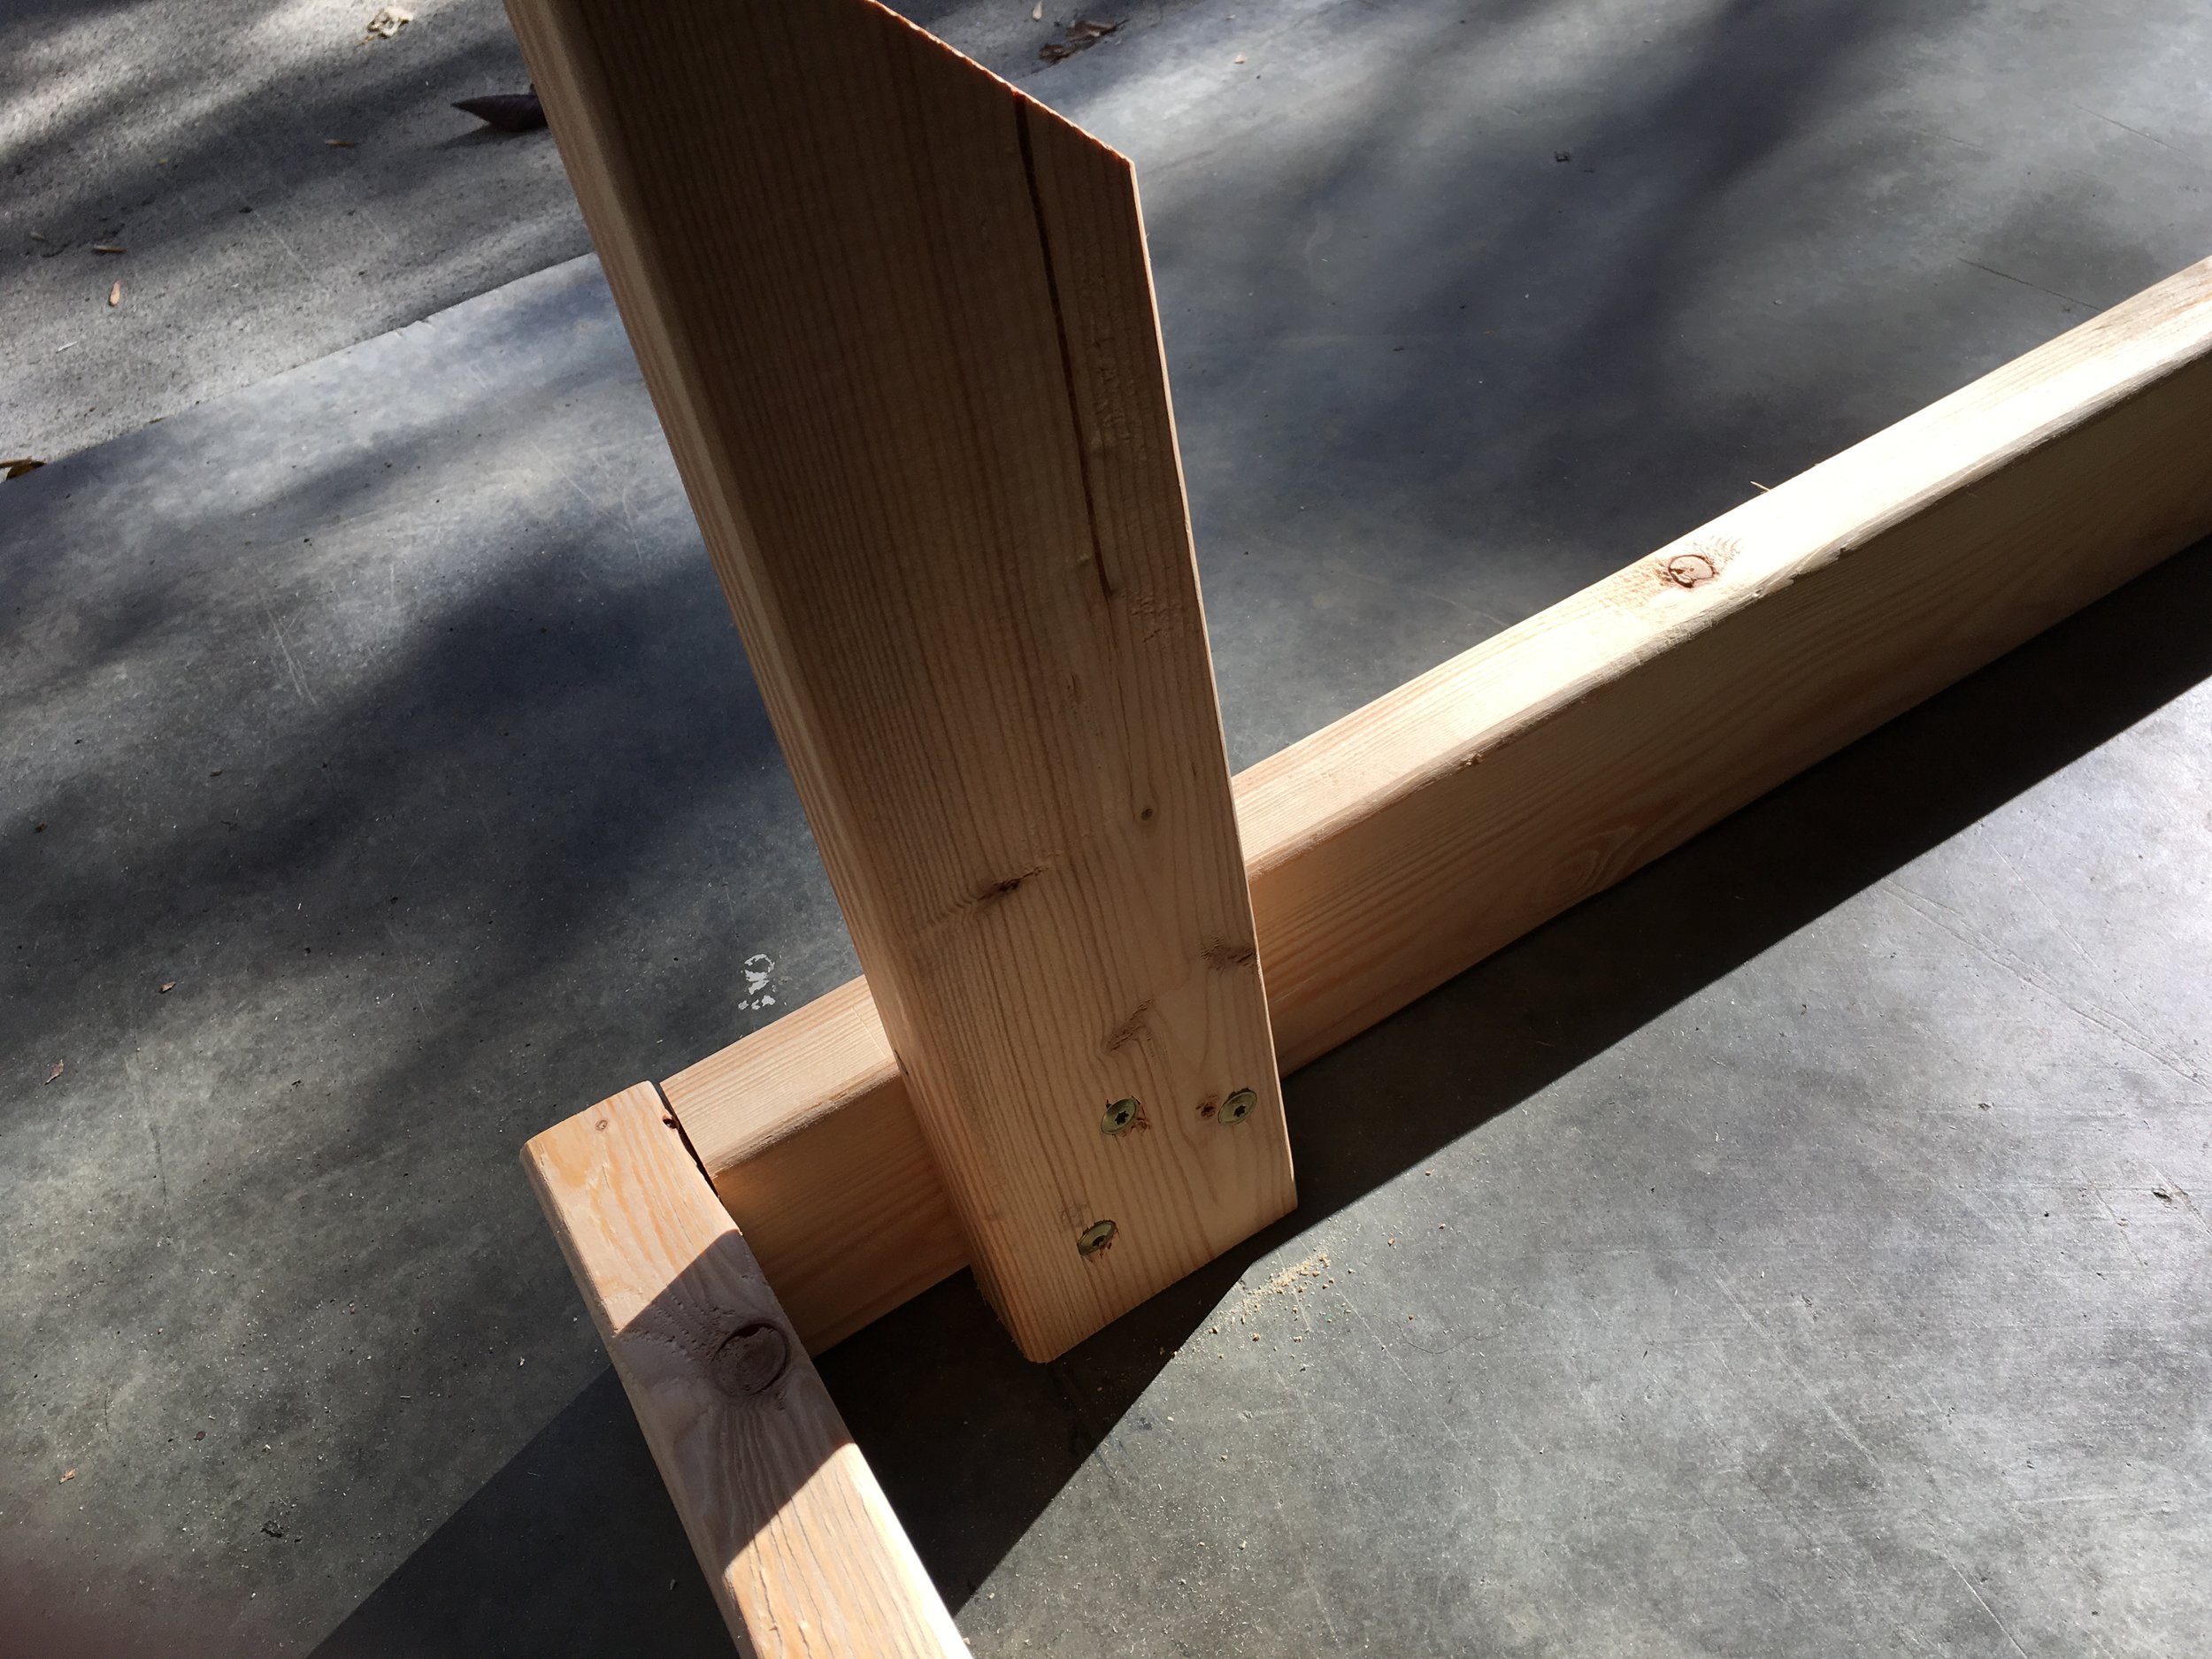
Before attaching the legs to the table top, we need to attach the crossing supports labeled E and F. Layout two legs, along with the cross supports as shown in the photo using spare pieces of 2x4 as spacers. The 45 degree cuts should be flush with the top of the leg. The top of the joist that the 45s attach to should match dimension II. Sink two 3" screws through the legs into the horizontal joist. Sink two screws through each leg into the 45s, one 2-1/2" and one 3" along. Attach each leg to the table with four 2-1/2" screws (2 on each side that the leg connects to the table). Once the legs have been fastened to the table, sink an addition 2-1/2" screw and 3" screw through the horizontal joist into each of the 45s. I made the mistake of fastening everything together before attaching the legs, and had to take out screws to fit the legs into the table top. The screws into the 45s, though, aren't accessible once the legs are in, so leave those in or use longer screws that can go through everything.
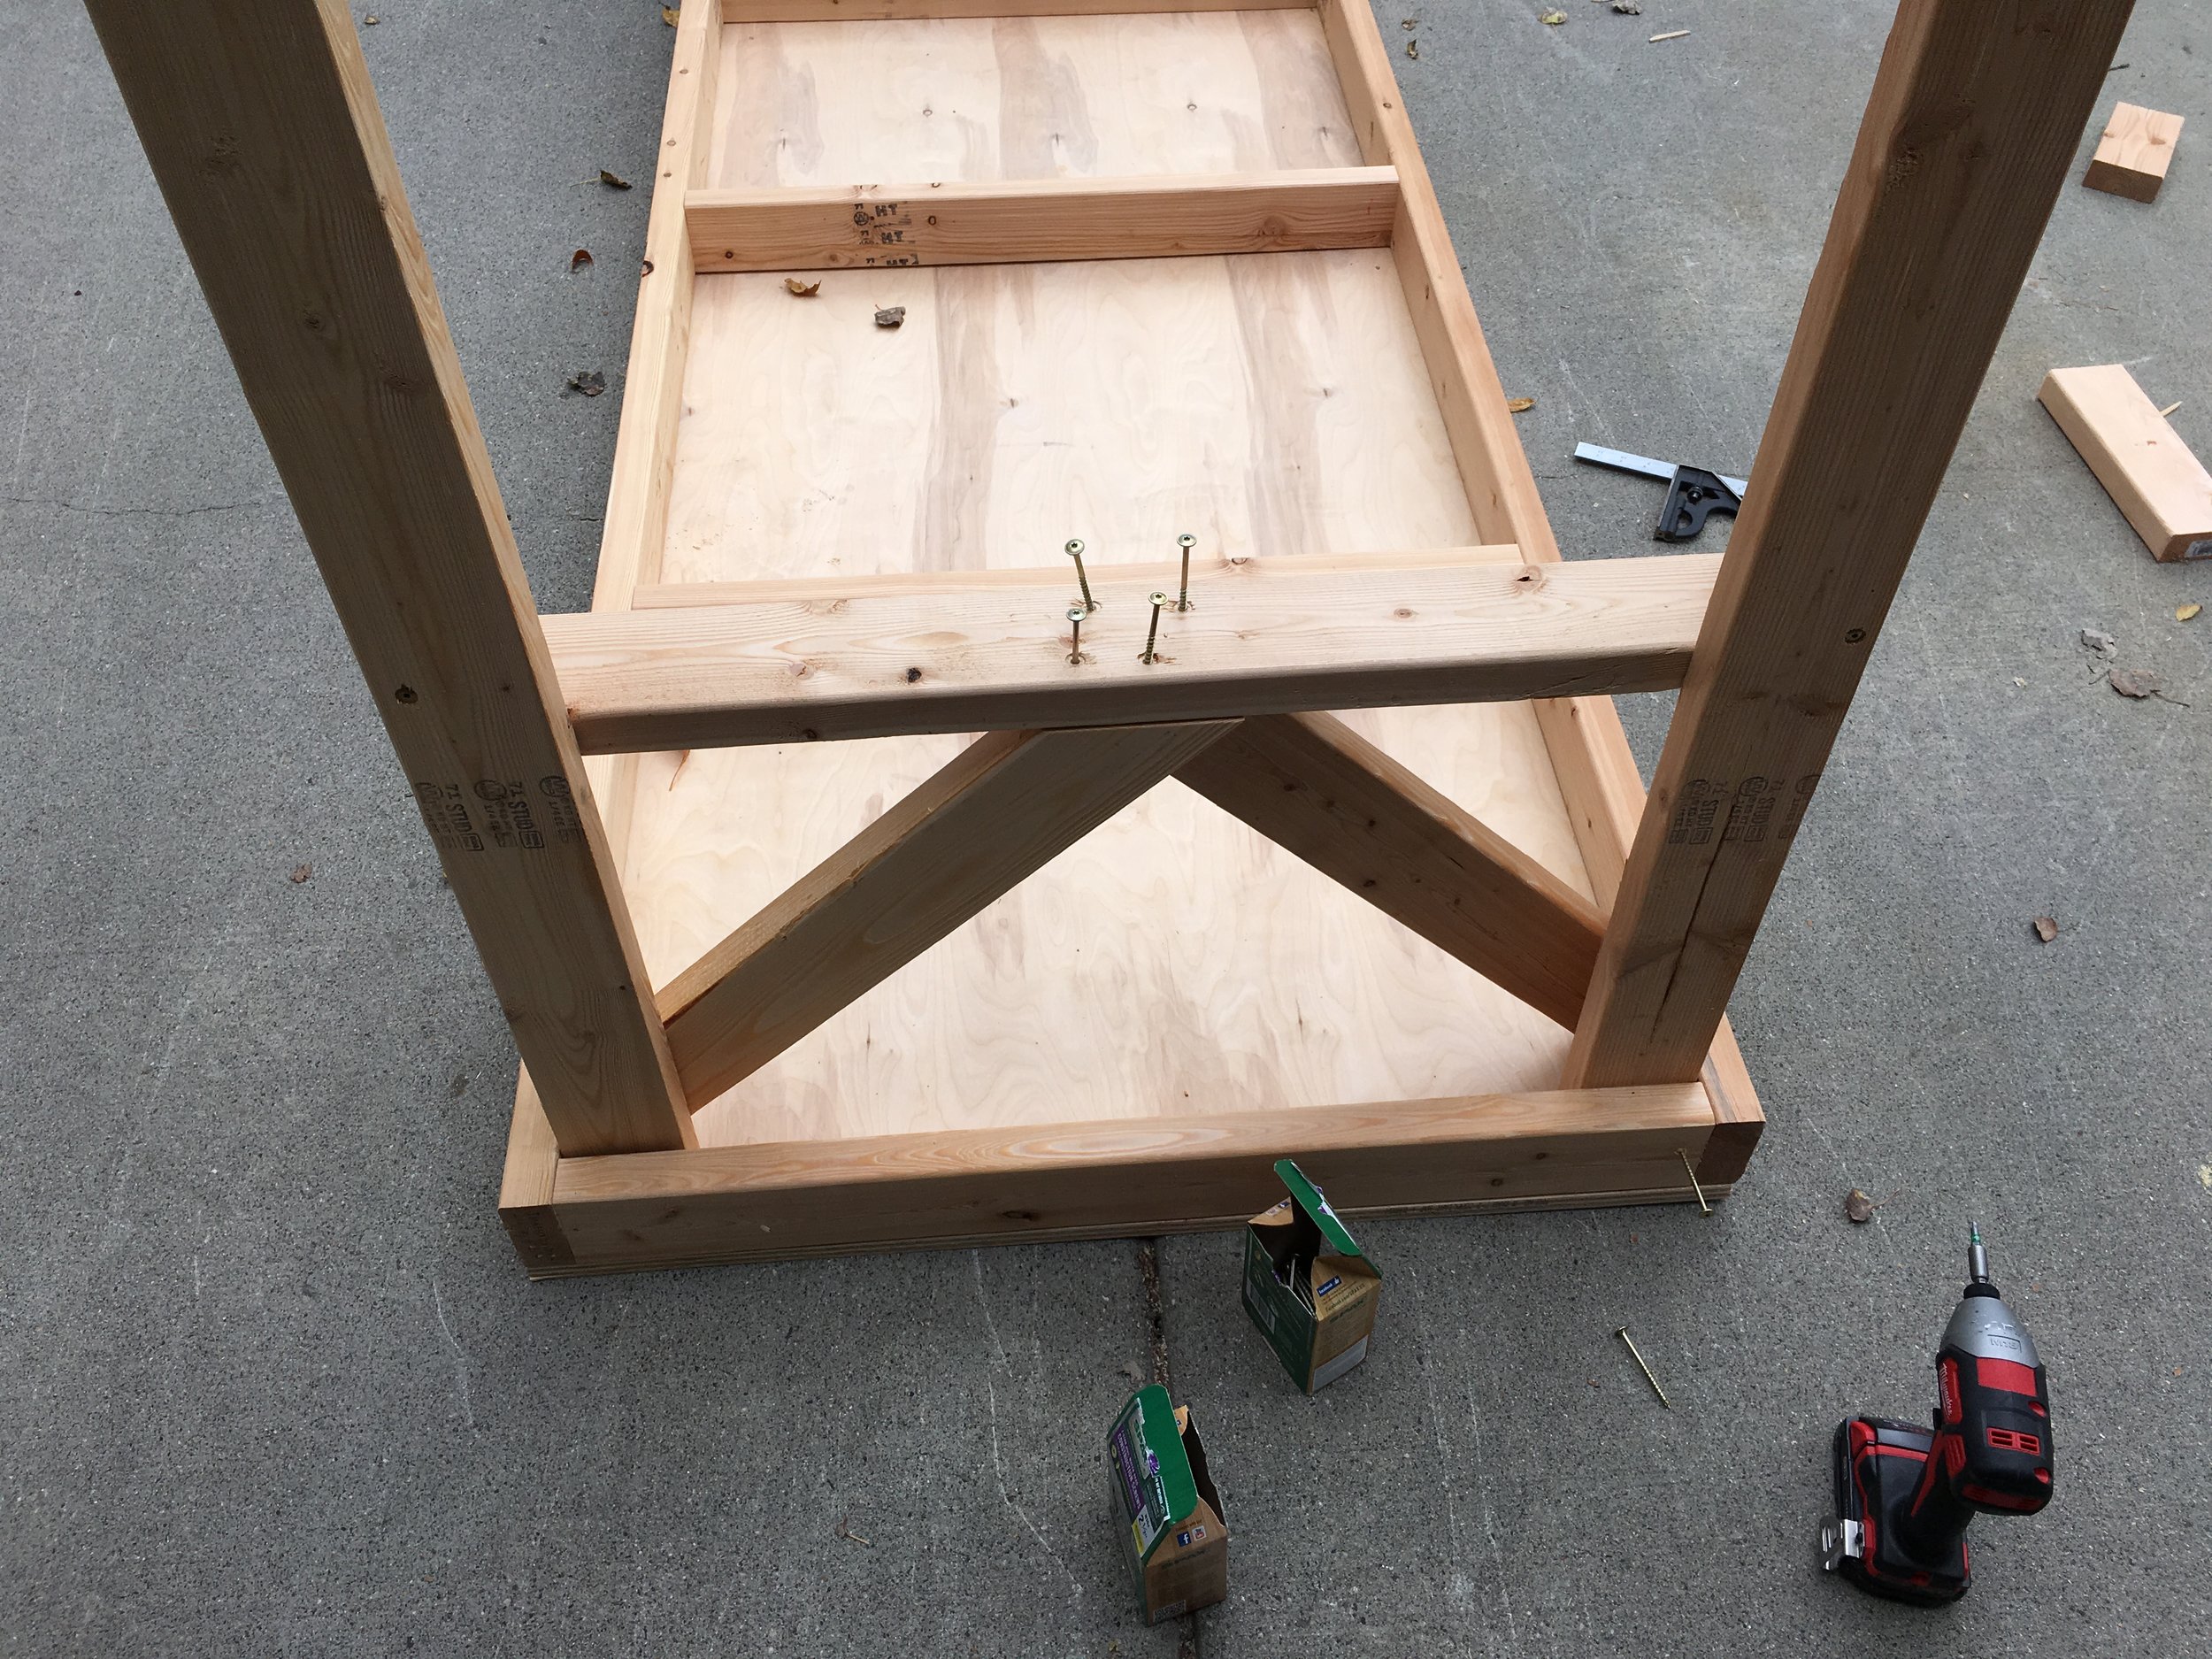
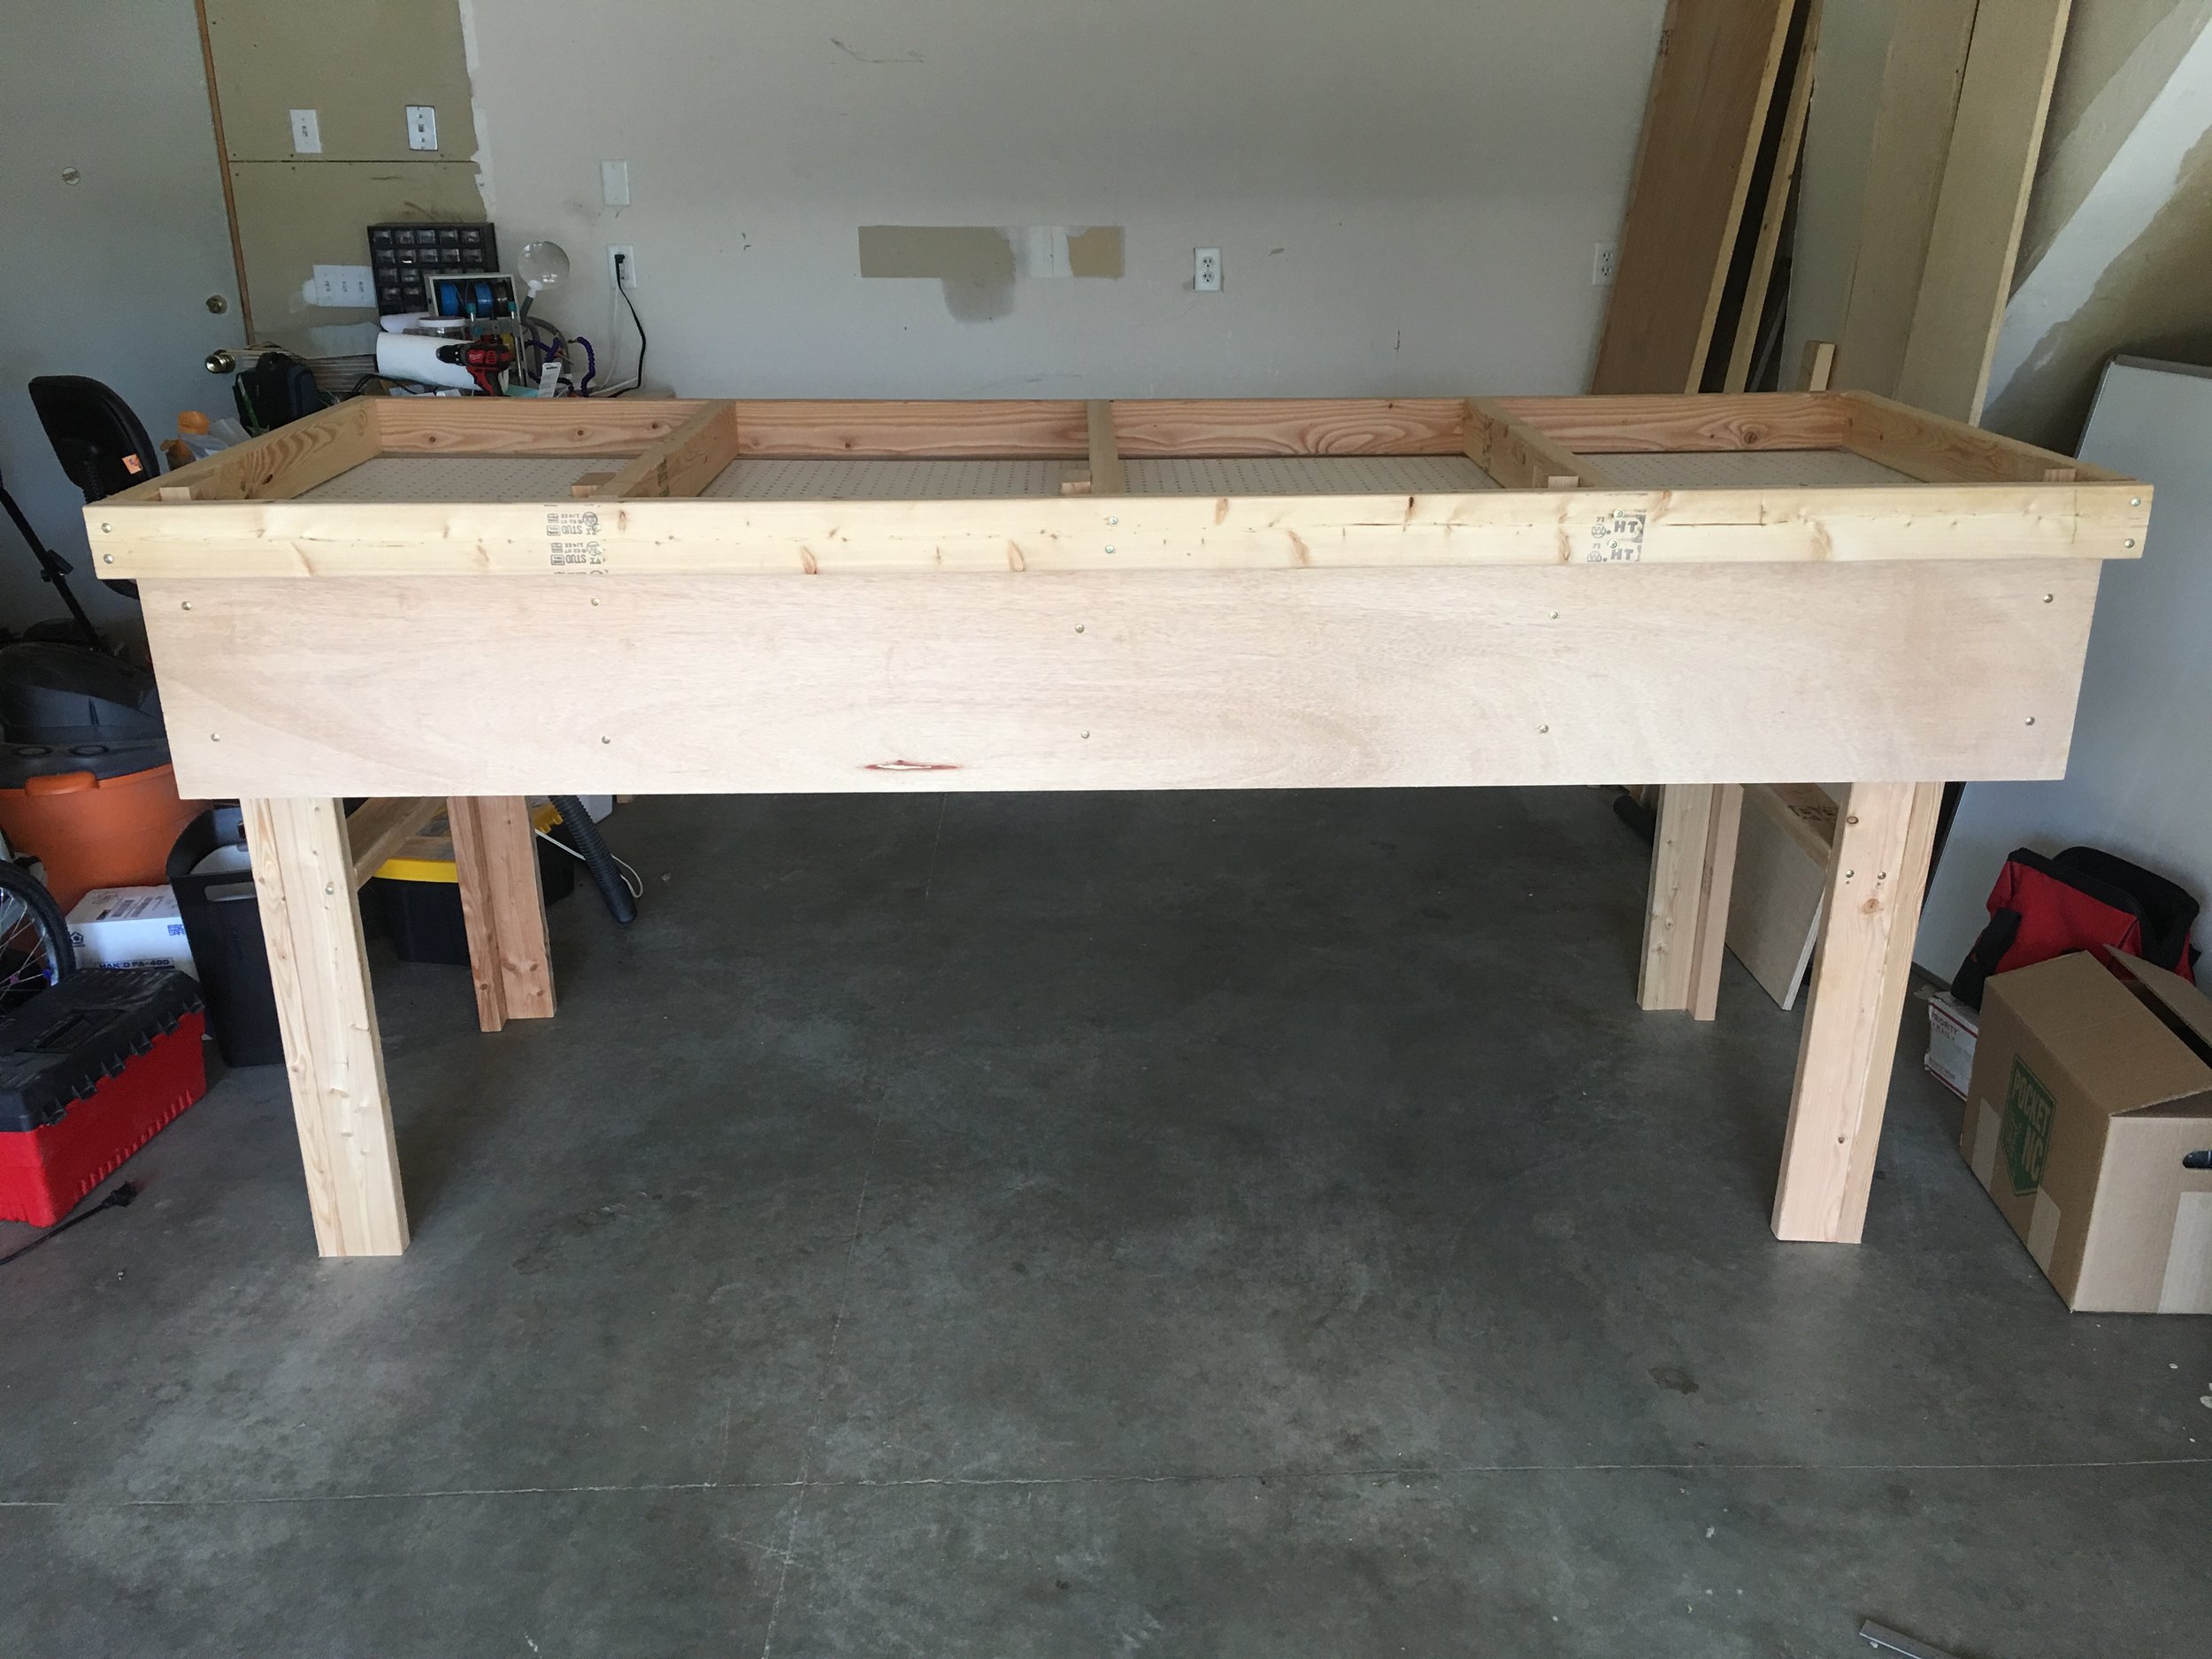
Do the same with the other side, flip your table over and you're done with the table!
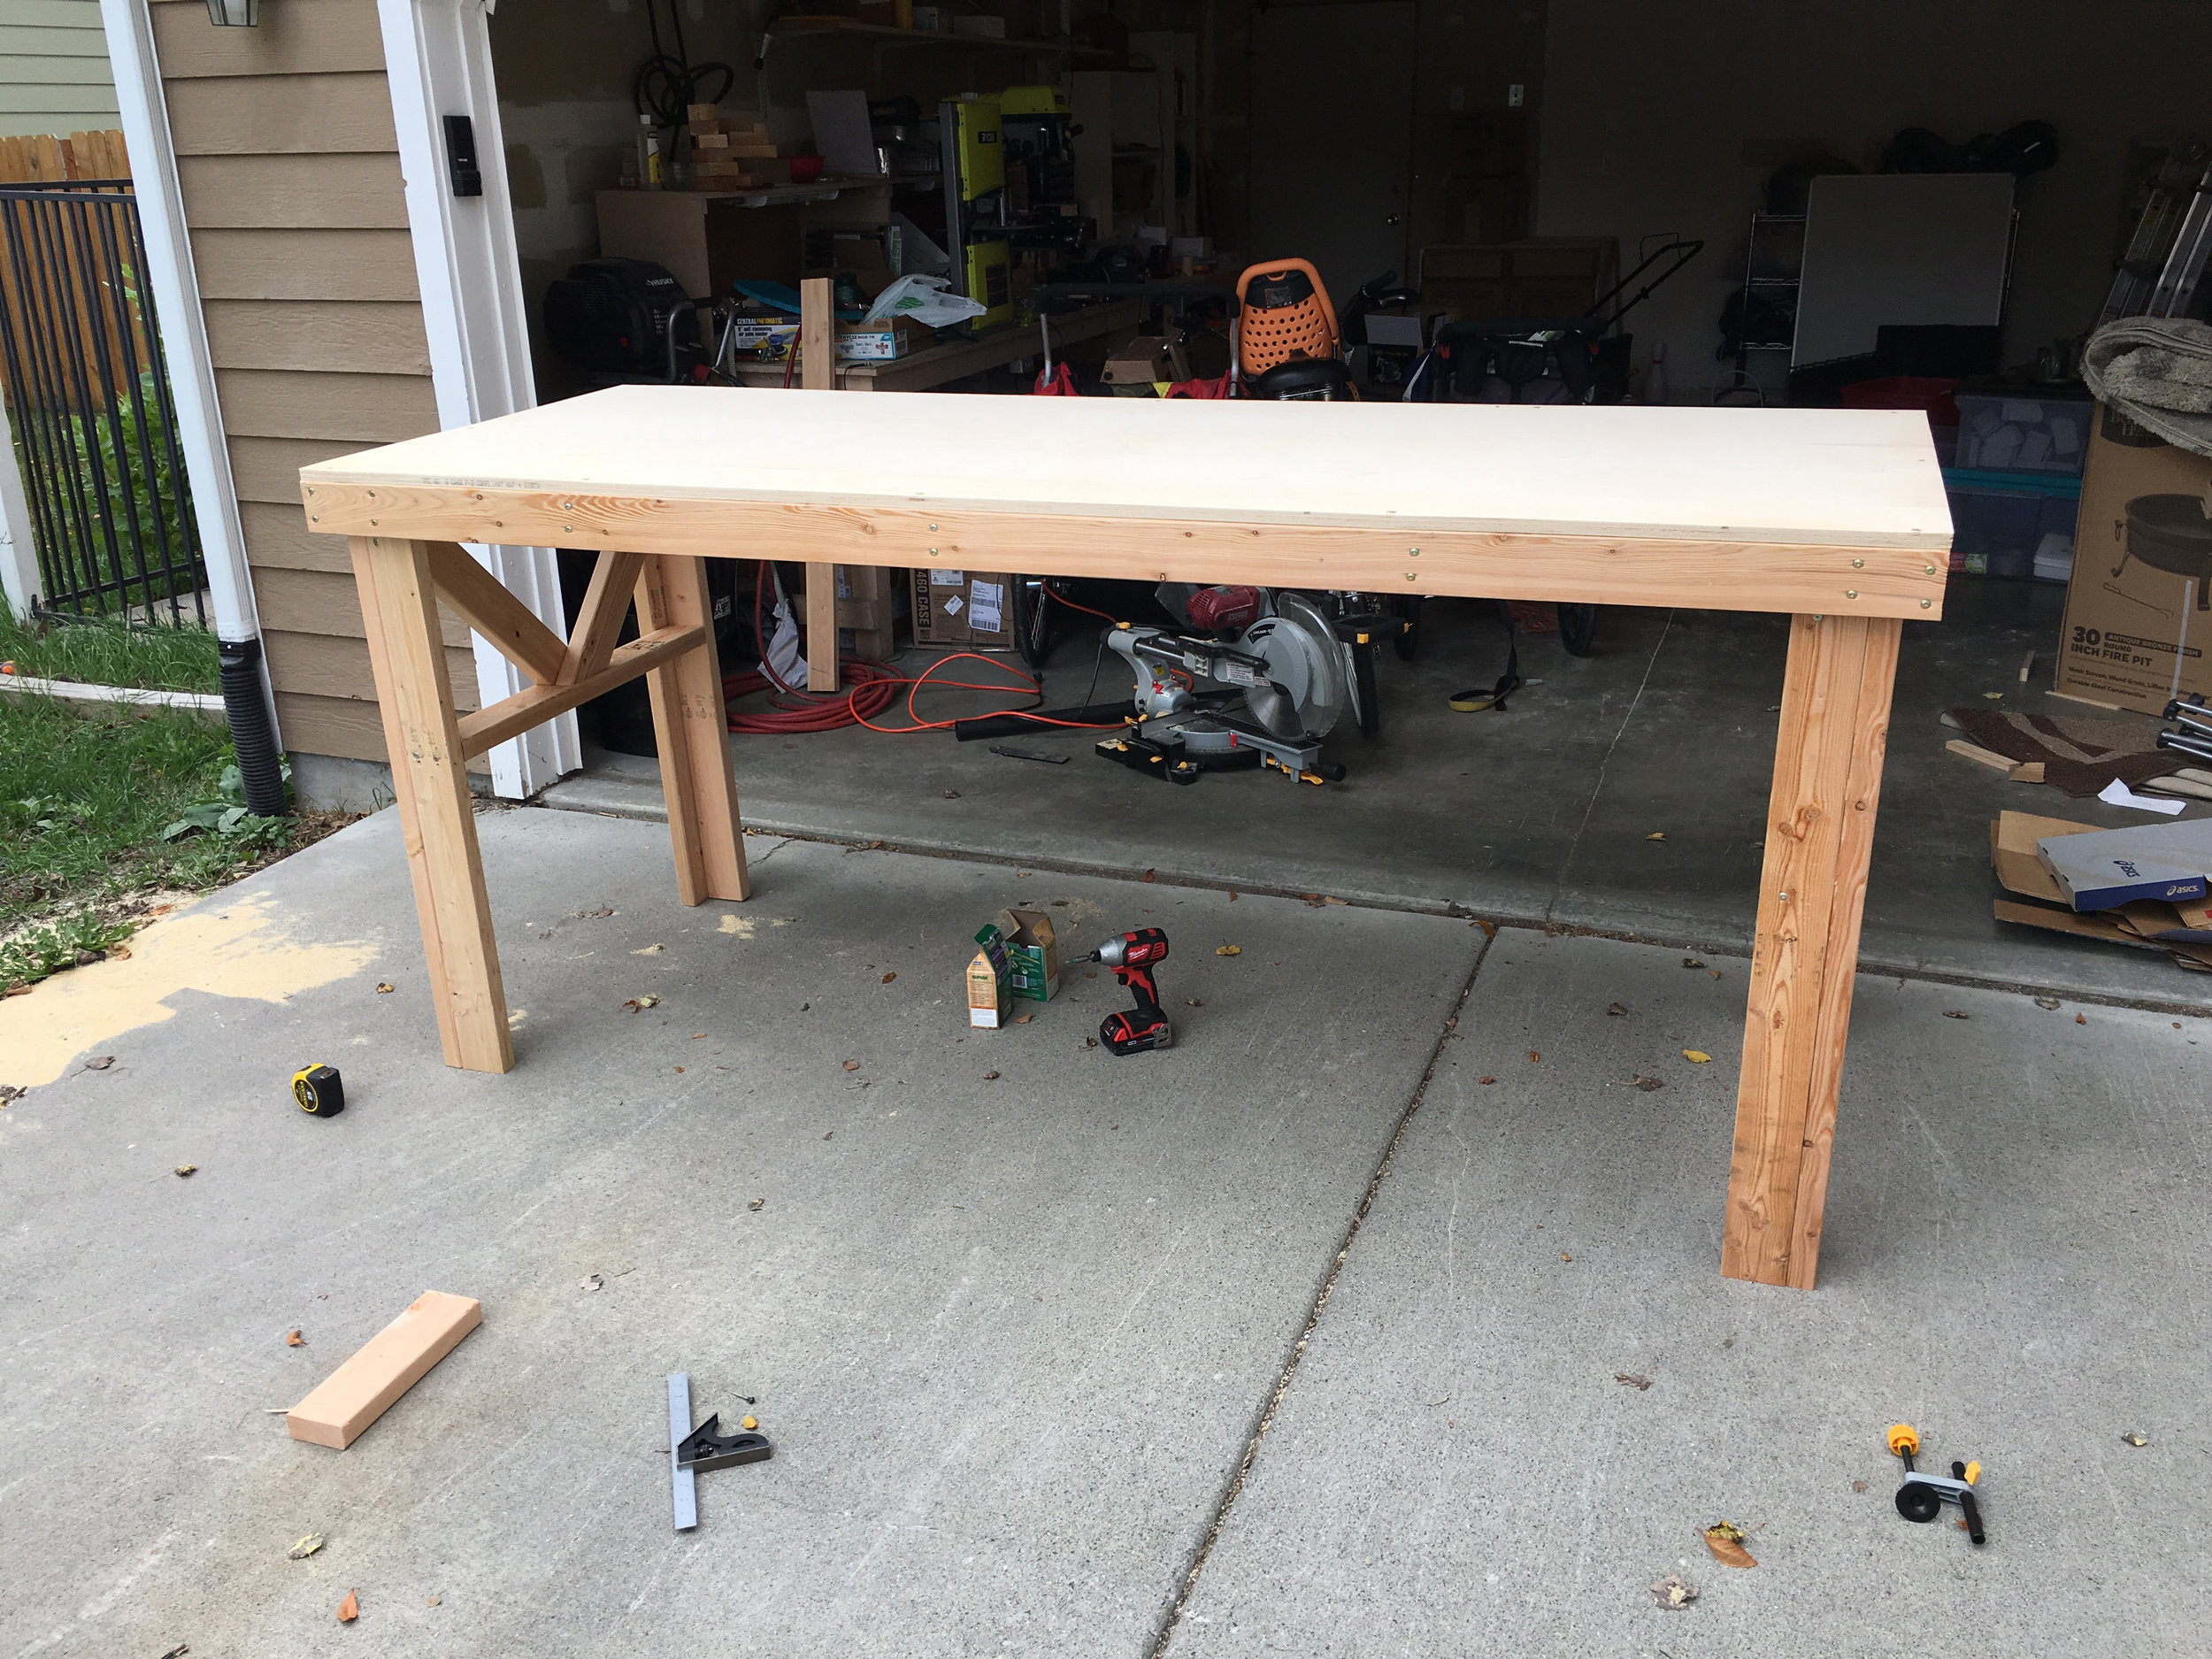
Done with the table.
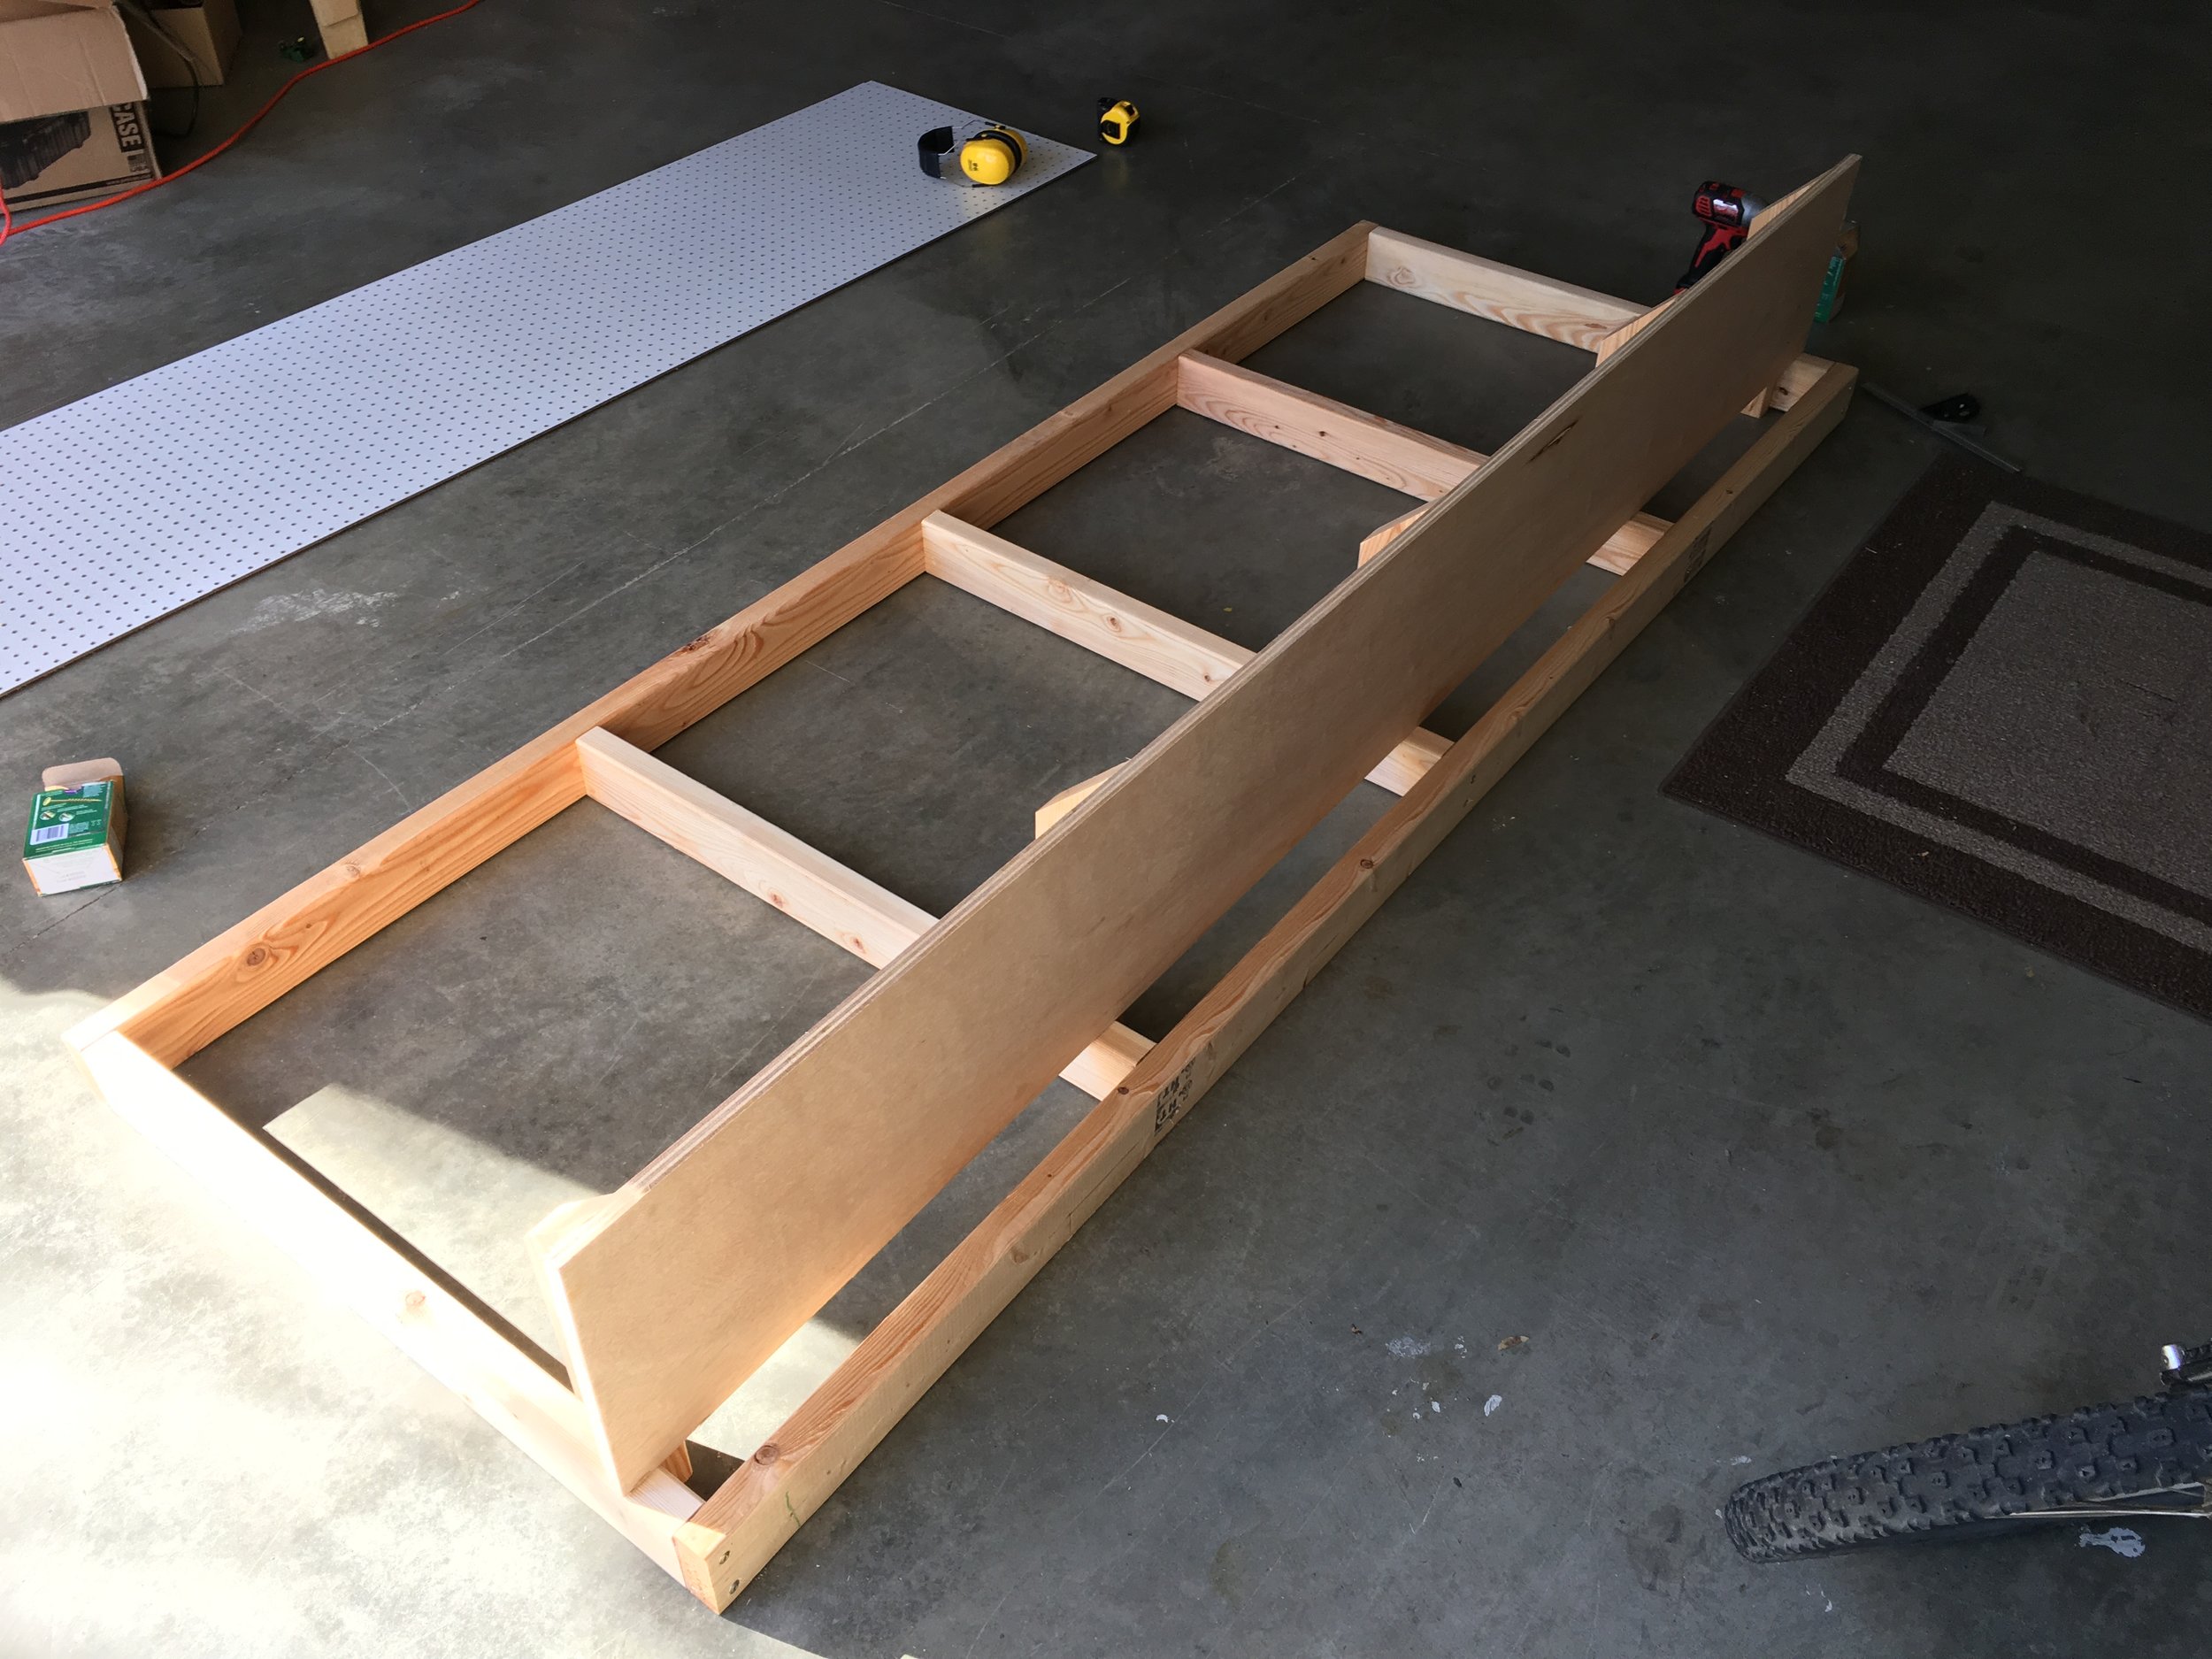
Now for the backboard. You'll need the 2x4s labeled G, H and I, plywood labeled J for the shelf and peg board labeled K.
Lay out your G and H 2x4s to start framing out the backboard. The space between the joists is evenly distributed and will be no more than 24" apart. Screw everything together, using 2 screws per stud. I used 3" screws.
Next, make 45 degree cuts off the end of your shelf supports (labeled I). Place them next to each joist that you just screwed together and attach them each with three 2-1/2" screws. The top of each shelf support should be 4-1/4" from the top of the frame. Once the plywood shelf is placed on top, there will be a 2" gap for power cords to fit through.

Set the plywood labeled J in place and attach it using two 2-1/2" screws per support. Then attach the pegboard labeled K, using three 2-1/2" screws per support.
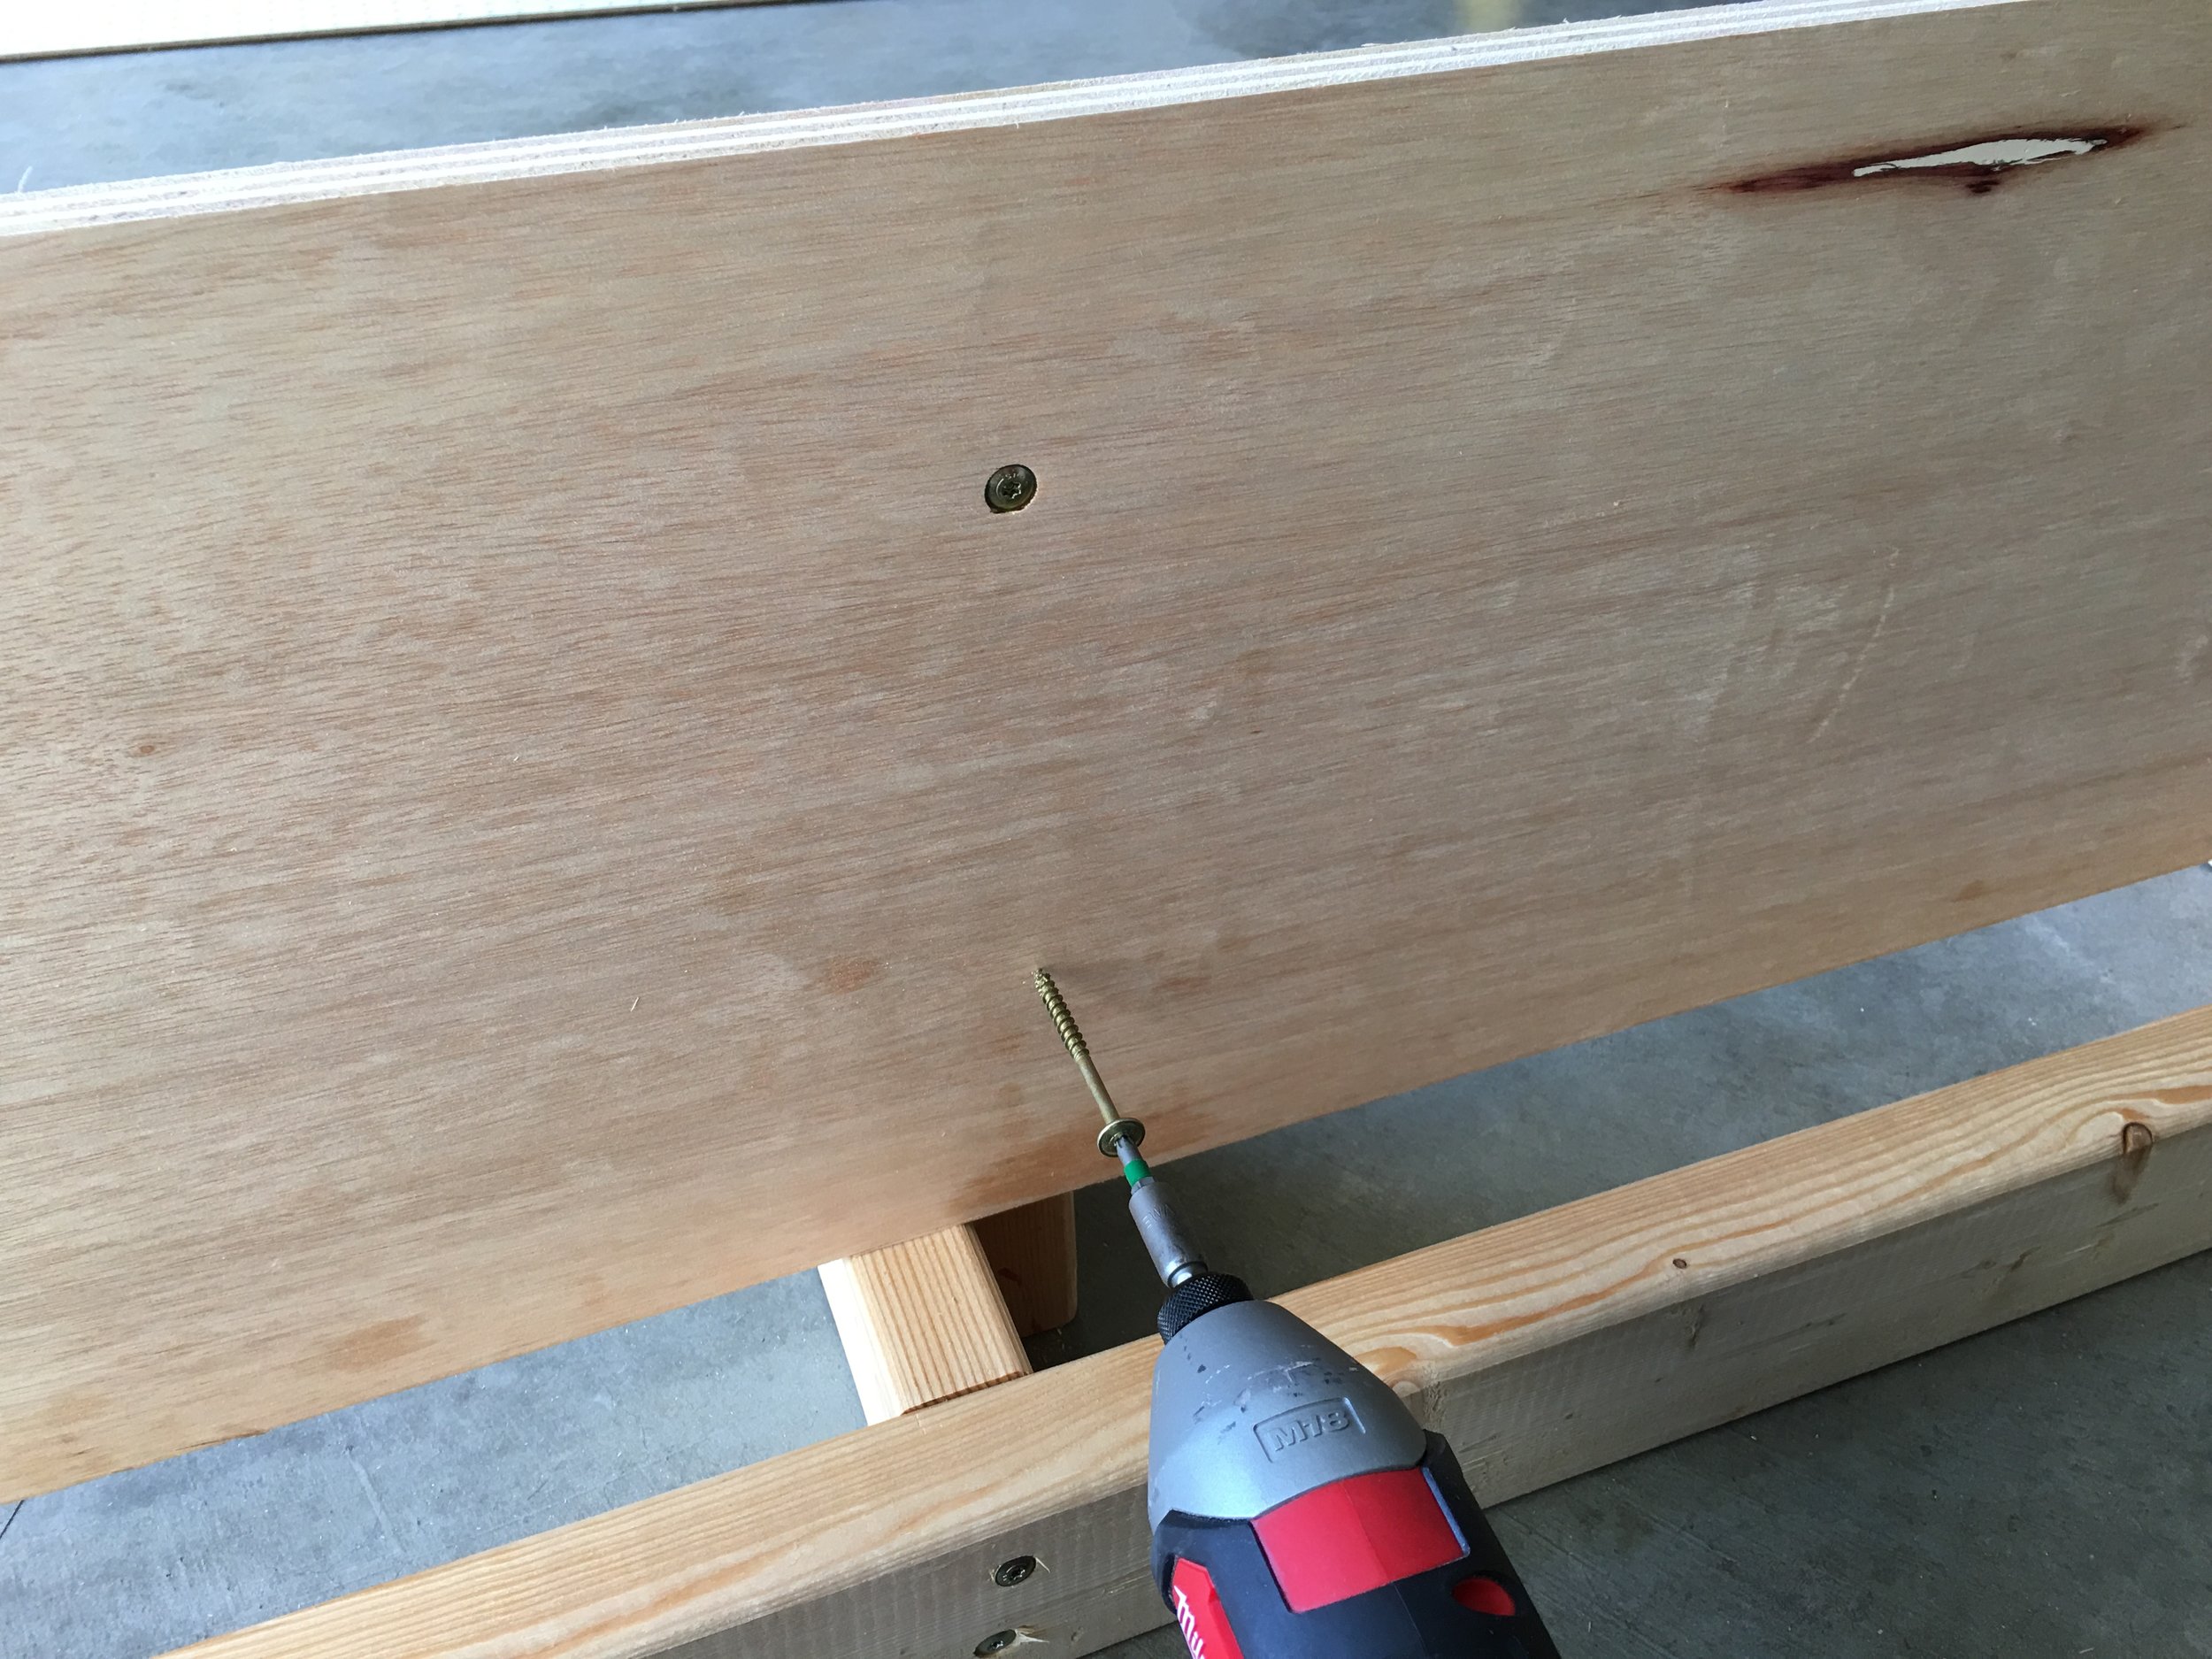
If you have a friend handy, this would be a good time to grab them. Lift the whole backboard assembly onto to table with the pegboard down and the shelf hanging off the edge. Tip the backboard up, and get it flush with the back of the table. Hold it in place while you tack it in place with a 4" screw in the middle. Place two 4" screws on either side of each support, angling on of them back so they both are secured into the table's back 2x4 or into one of the joists.

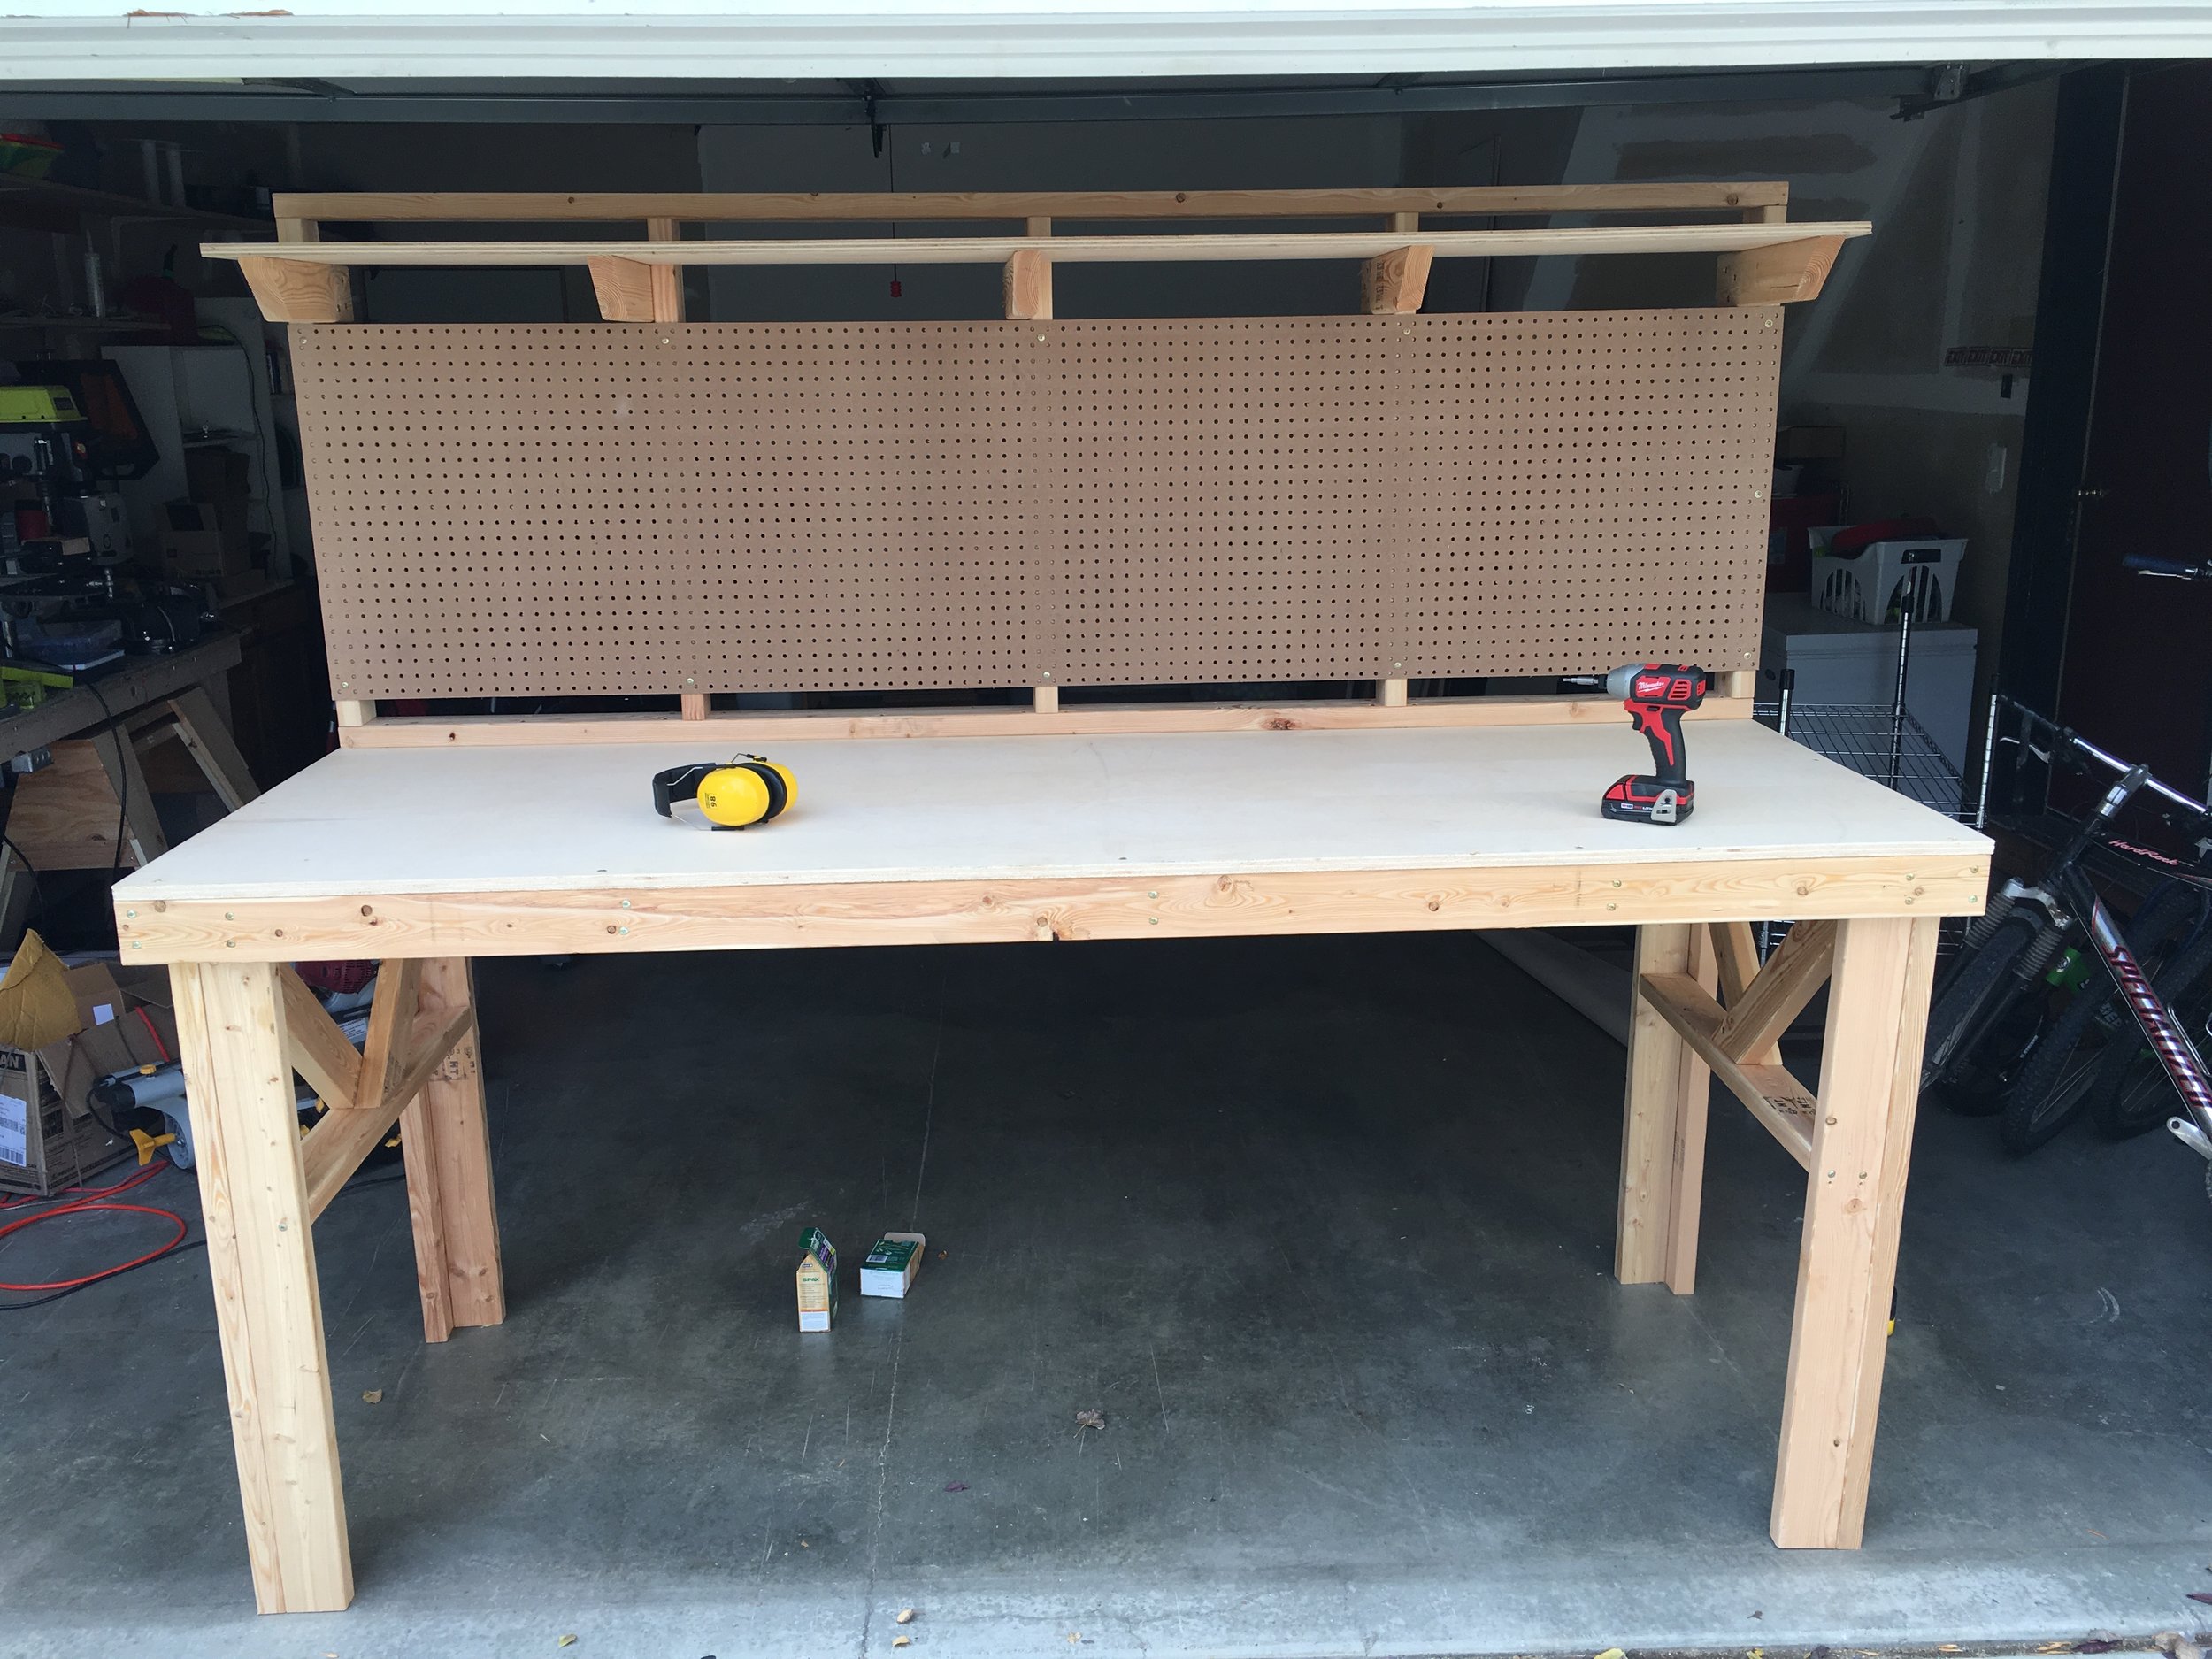
The last step is to fill your work bench up with tools! I also put two 4' power strips along the top, so it's easy to get to power anywhere on the bench. The chords can feed down through the gap in the shelf through the gap at the bottom to any devices on the table. Here's how mine turned out. This is the stool pictured below. It raises high enough to work well as a seat even with my 43" tall table top.

My completed work bench.