

My wife's family runs a vacation rental business called Paso Robles Vacation Rentals (PRVR). Over the years, I've used my programming expertise to help them out with various tasks. I was most involved when they were debating what they should do about their website. There are services that specialize in vacation rental marketing and website management and they were considering going with such a service. To save costs I recommended they manage their own website using WordPress and I would develop a plugin for them that would pull all the necessary information about their rentals and would handle booking through their vacation rental management software, Escapia. I developed Freakin' Sweet Vacation Rental Manager (FSVR Manager) and they've been using it ever since (my business is called Freakin' Sweet Apps). Most tasks that that they request from me these days are smaller. The most recent task that I took on they didn't even ask for. I overheard my wife talking about floor plans and vector graphics and it piqued my interest.
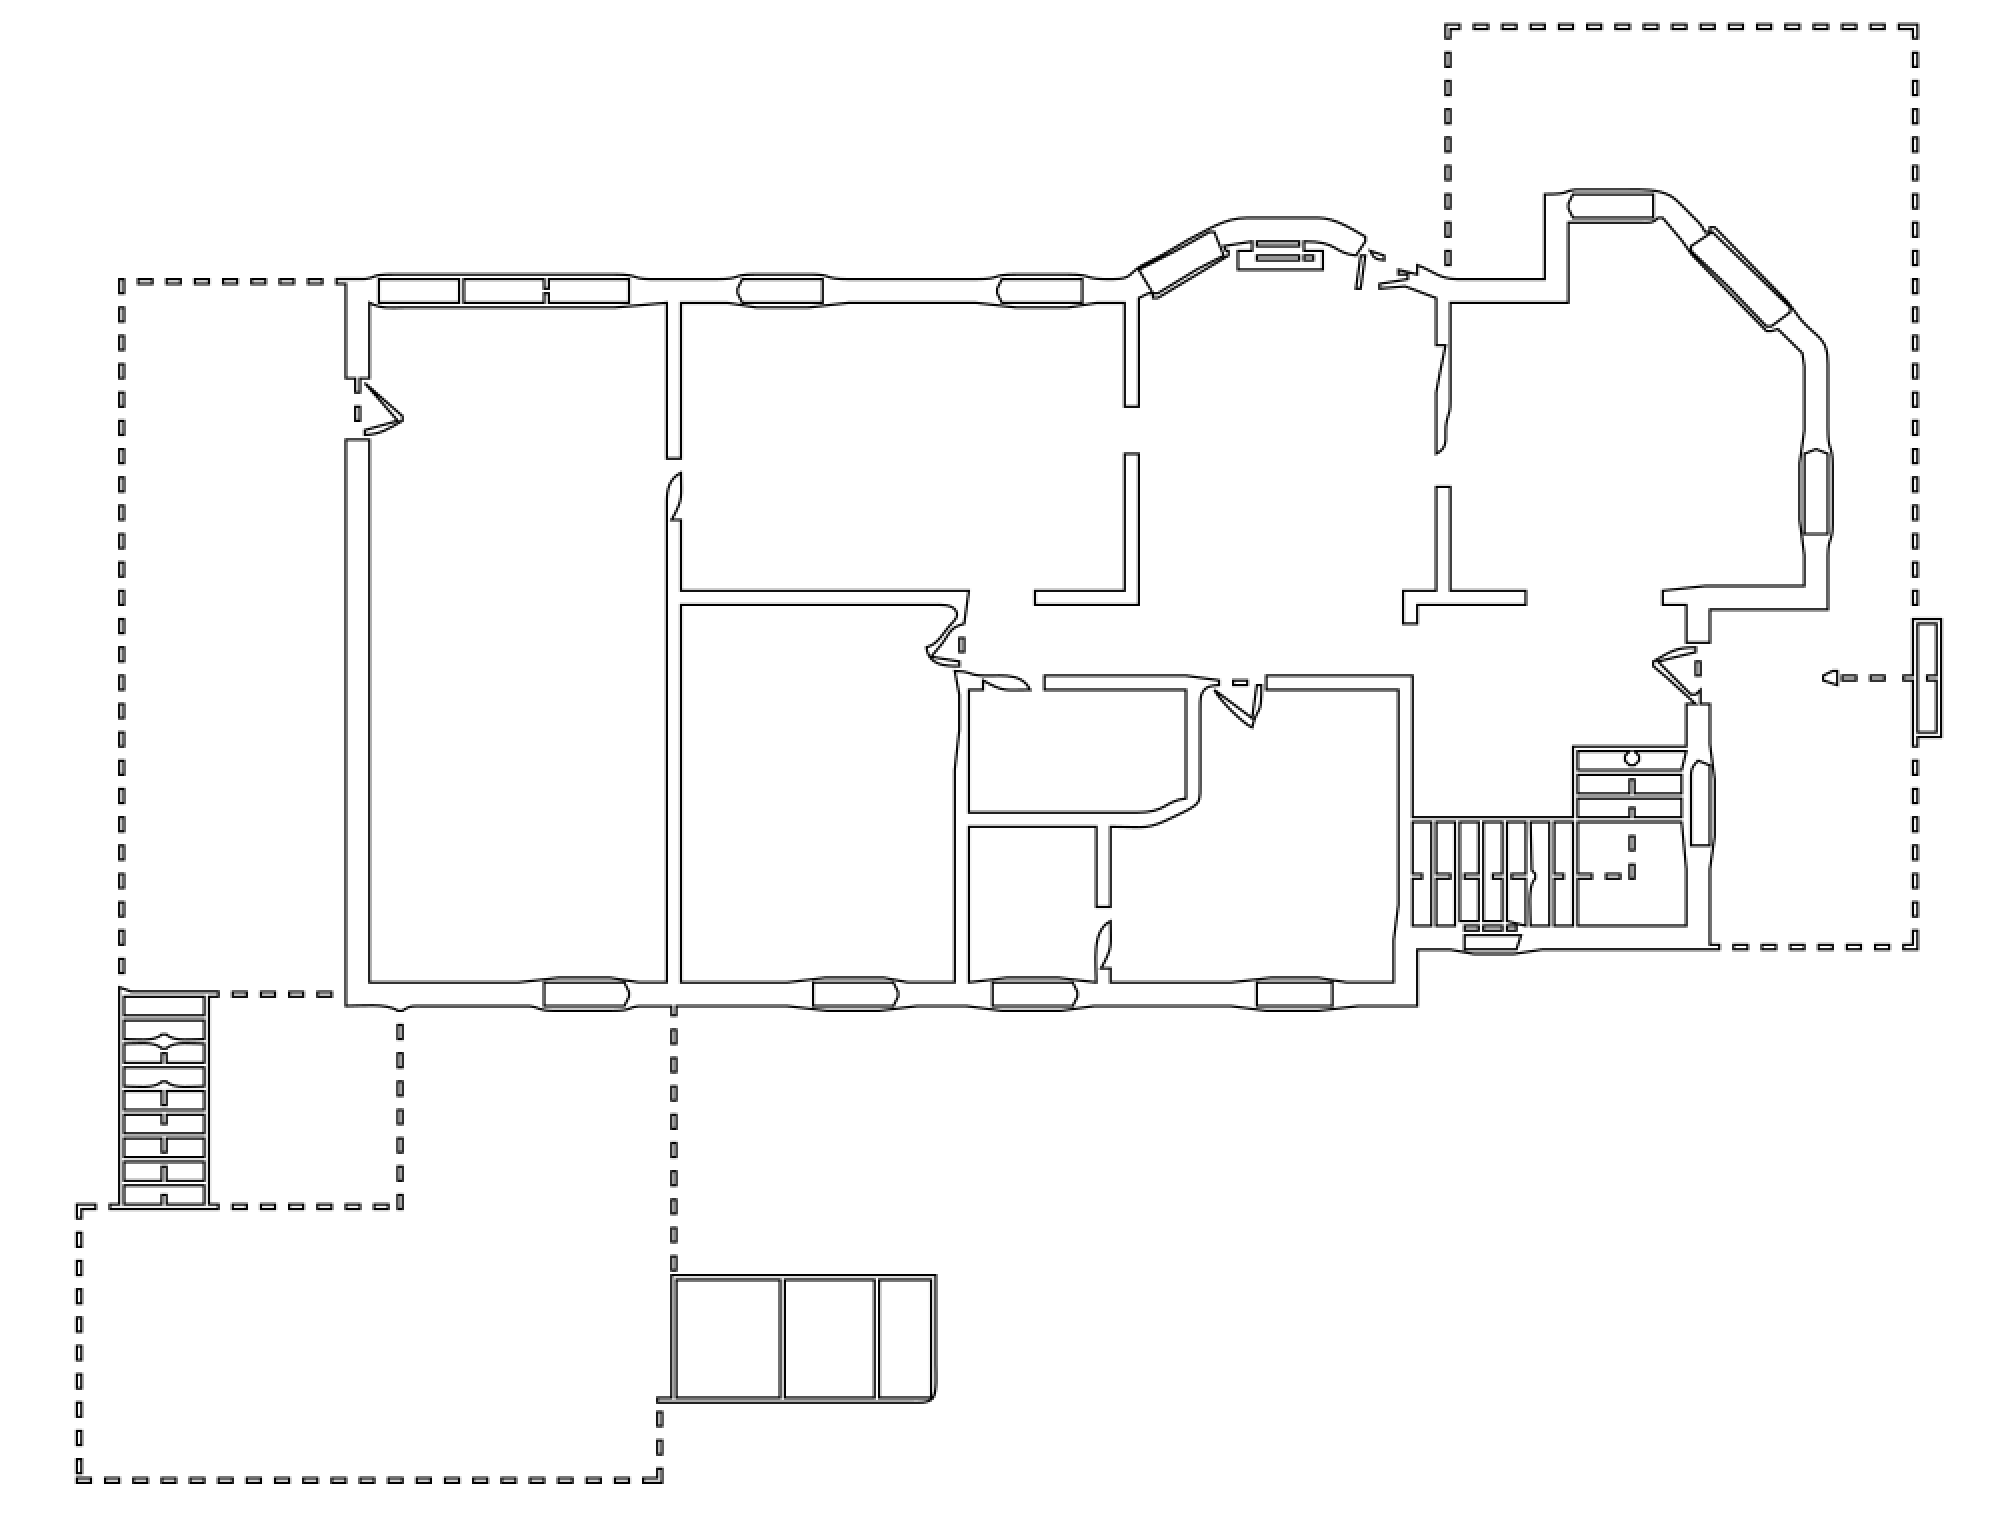
They use a service called TruPlace, which takes pictures and detailed measurements of vacation rentals then collates them into an interactive floor plan on their website. The floor plan gives potential visitors a good sense of what the rental will be like. TruPlace provides them with low resolution PNG images of the floor plan. The images don't have to be very big for the floor plan interface, but PRVR wanted to use them for other internal purposes, such as explaining to house keeping and service staff where in a house is the router, or breaker box or hot tub controls (all the miscellaneous things that they always have to explain over the phone). Because of the low resolution, the TruPlace images aren't readily suited for such an application. What PRVR wanted was to convert them to vector graphics that could be scaled to any size and possibly printed and given to staff members. The task that I decided to take on was performing that conversion, from a low resolution PNG to a vector graphic (SVG) file.
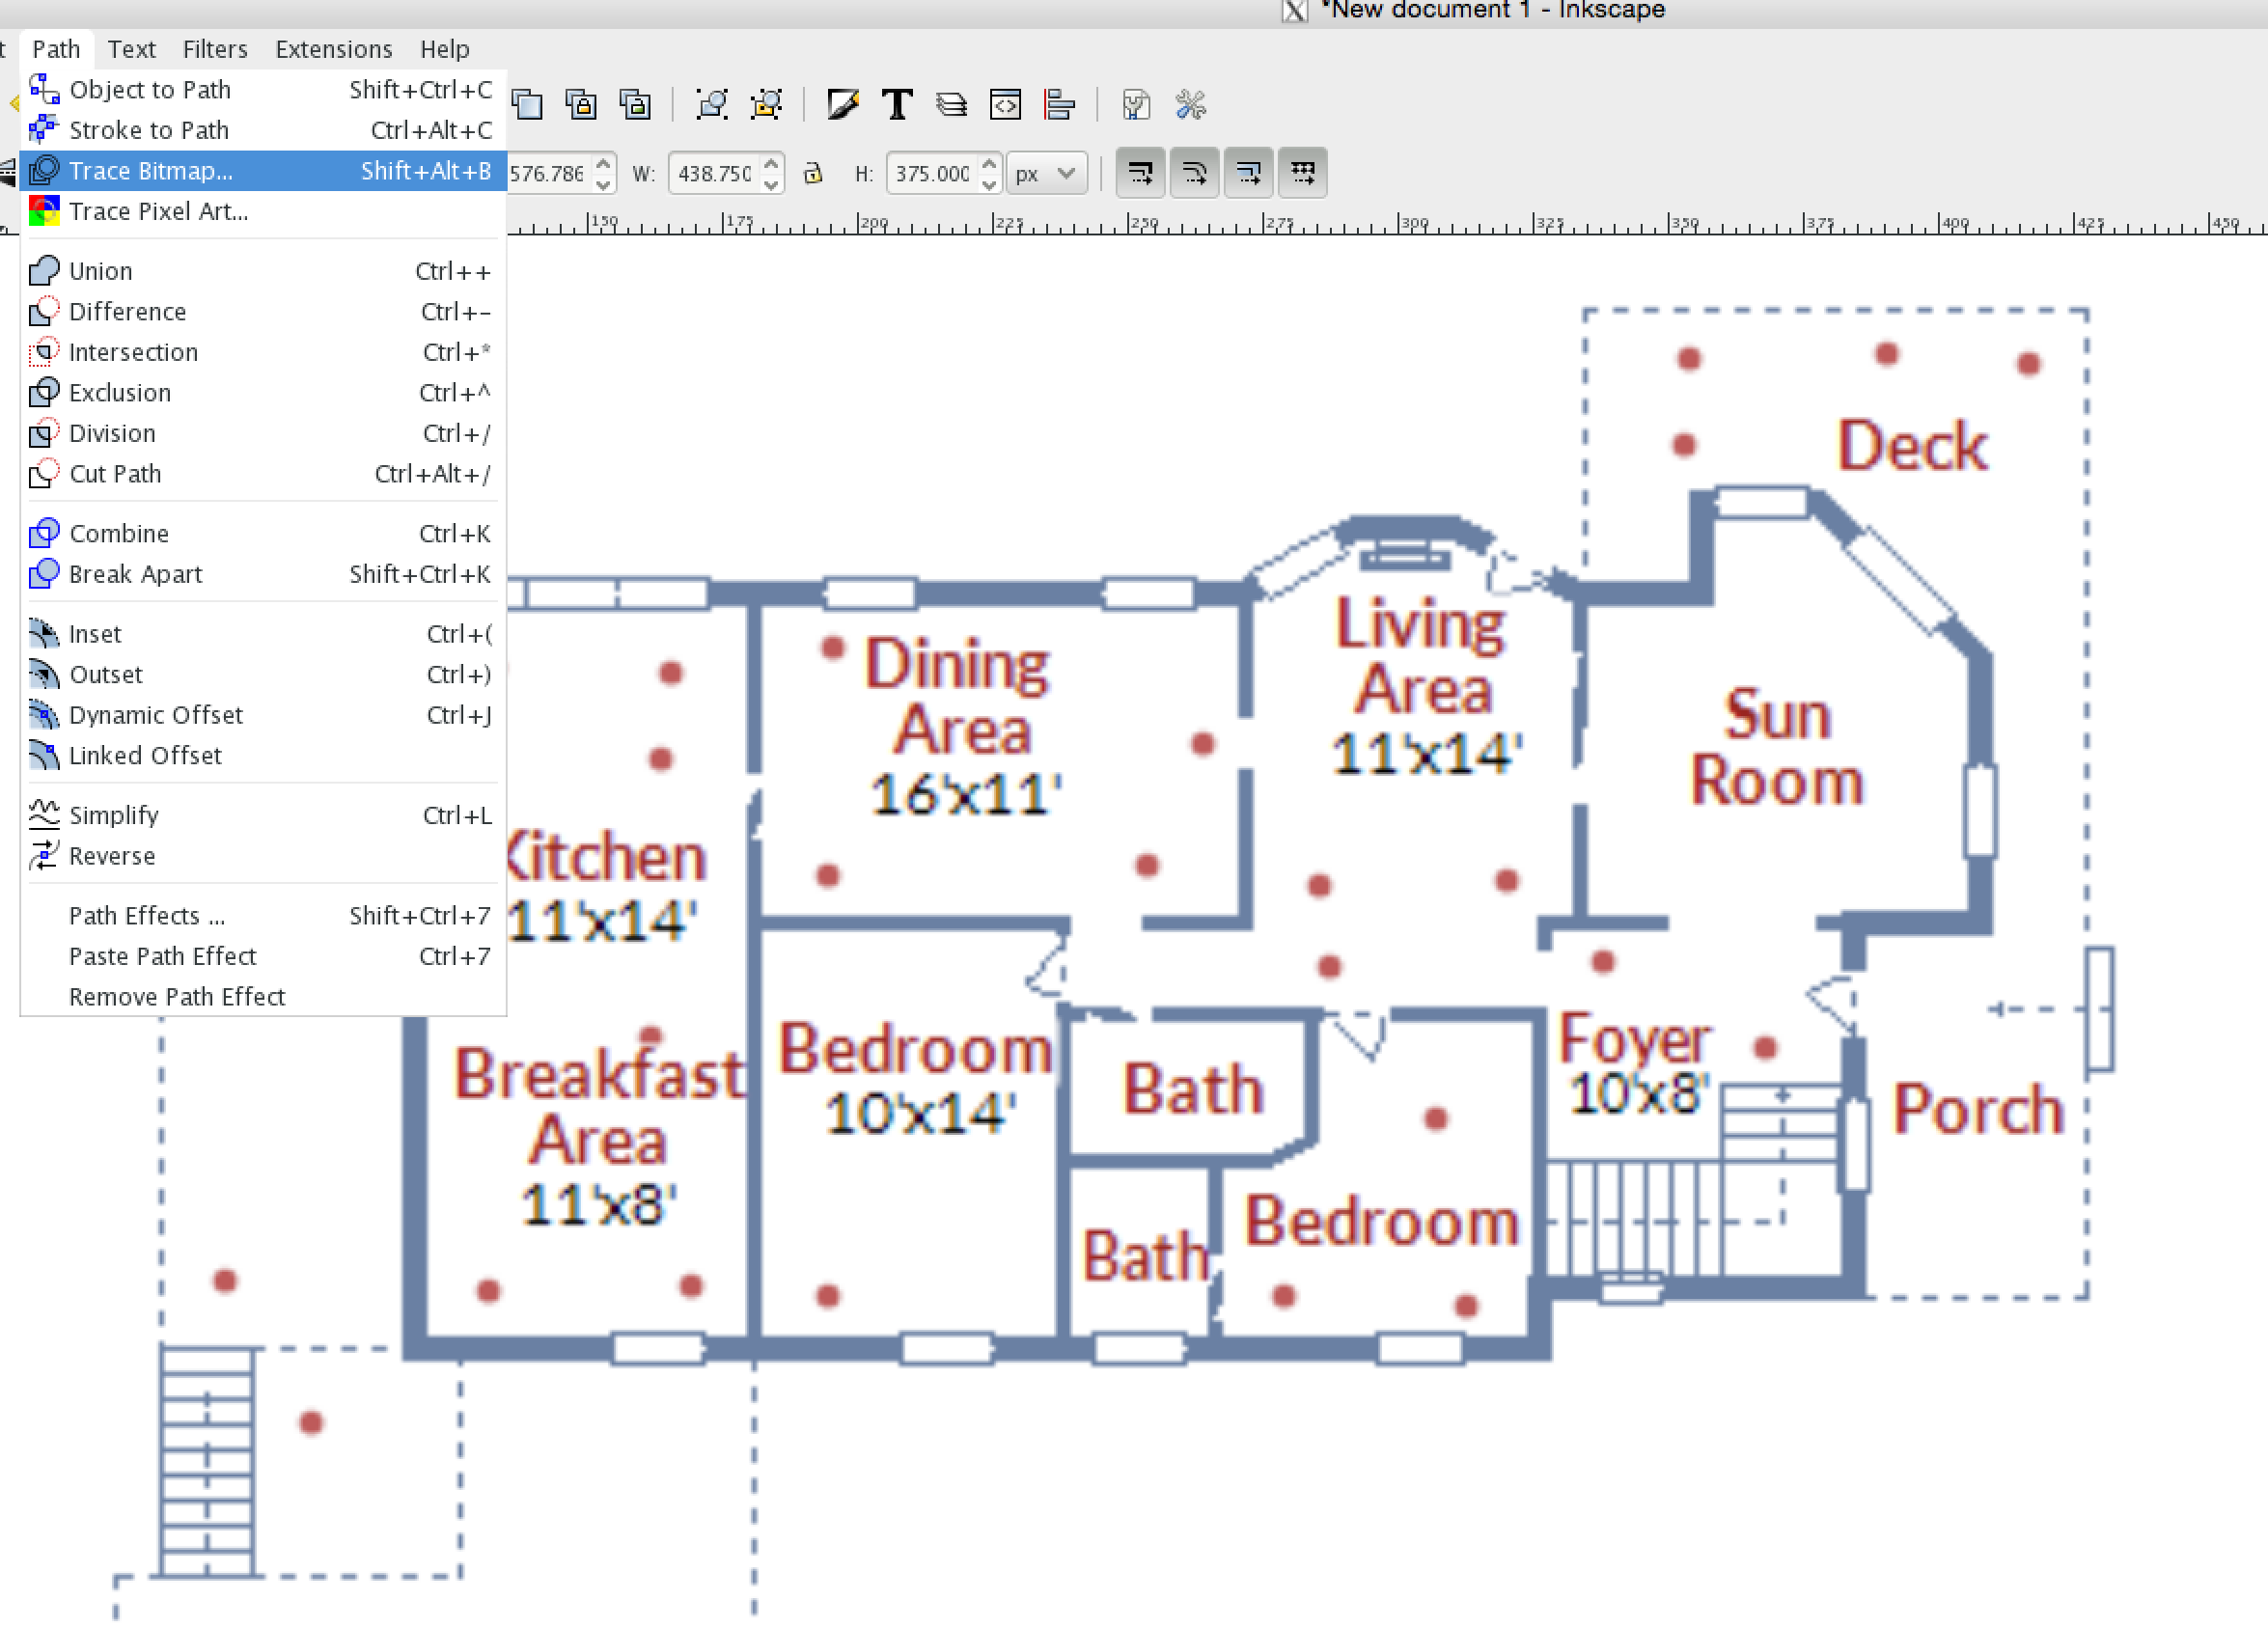
They manage 70+ properties, many with multiple stories, so there were over 100 floor plan images to convert. The task seemed like something that could be scripted and the couple hours it would take me to figure it out would potentially save them tens of hours manually creating the vector graphics. First, I had to figure out a process that worked and could be scripted. I started looking at Inkscape, the open source, vector graphics editing software. It has a 'Trace Bitmap' operation that can be applied to imported raster images (such as a PNG, JPG or BMP). I was quickly able to get some decent results, but I couldn't figure out how to separate the text from the floor plan.
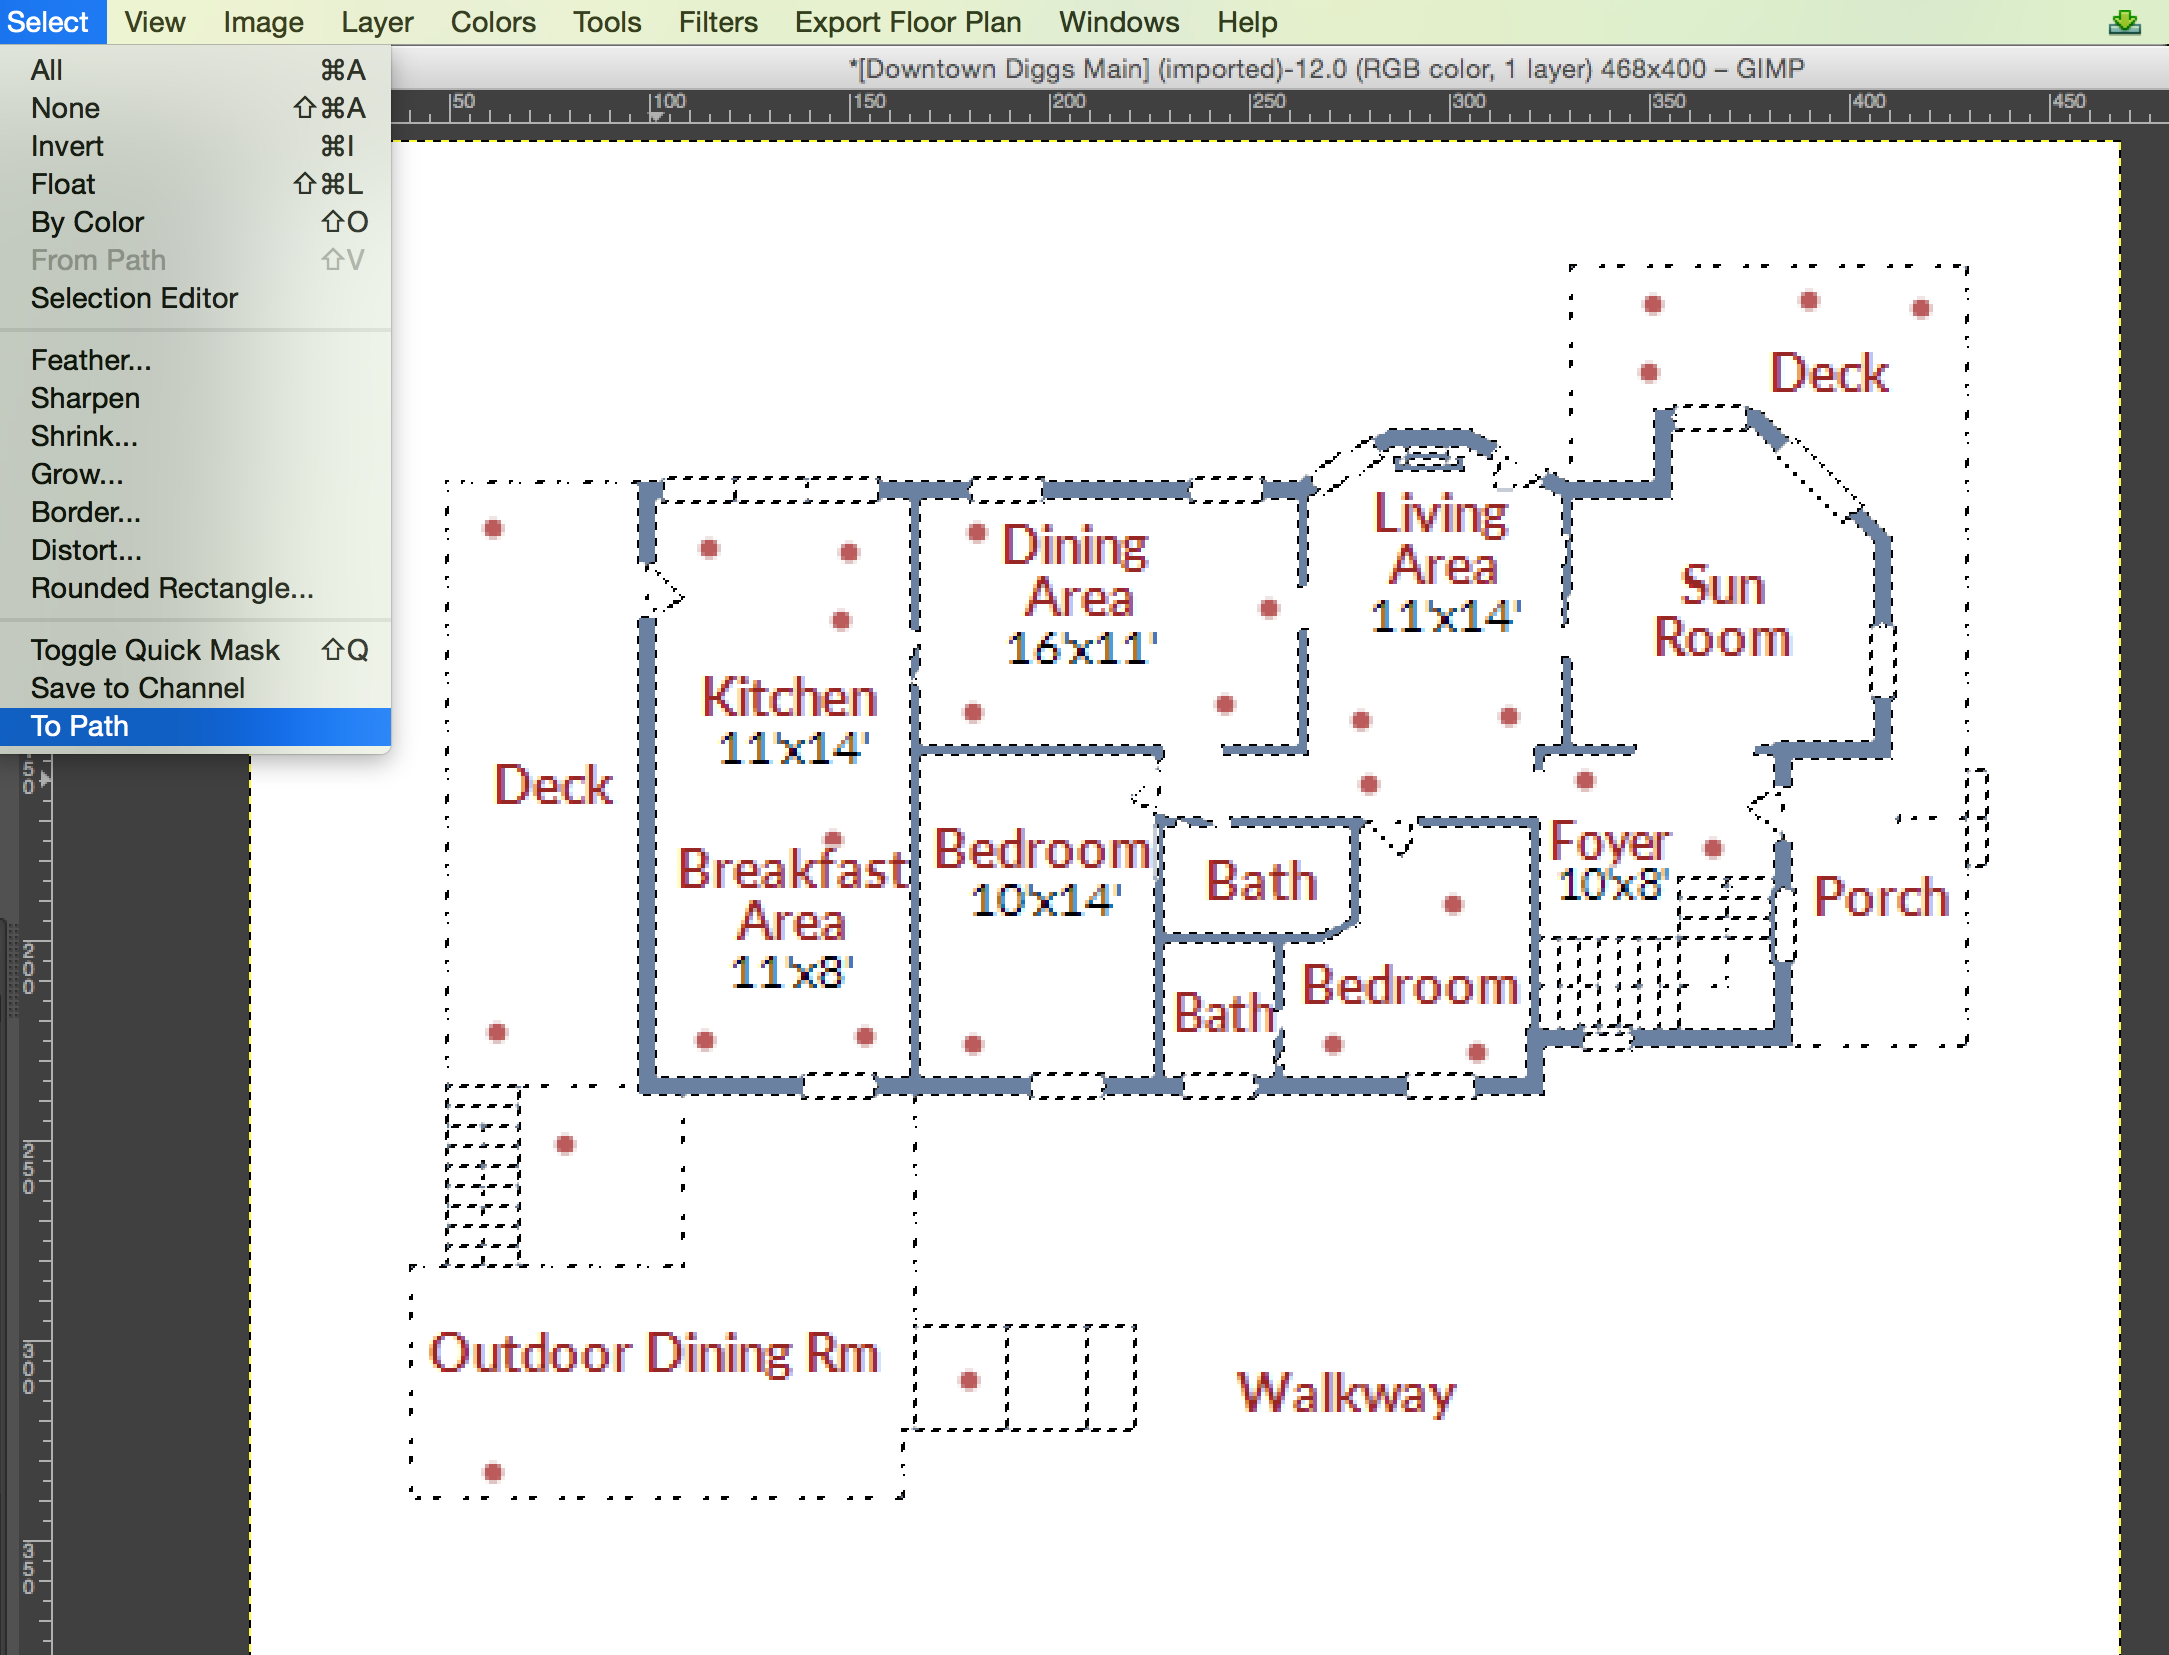
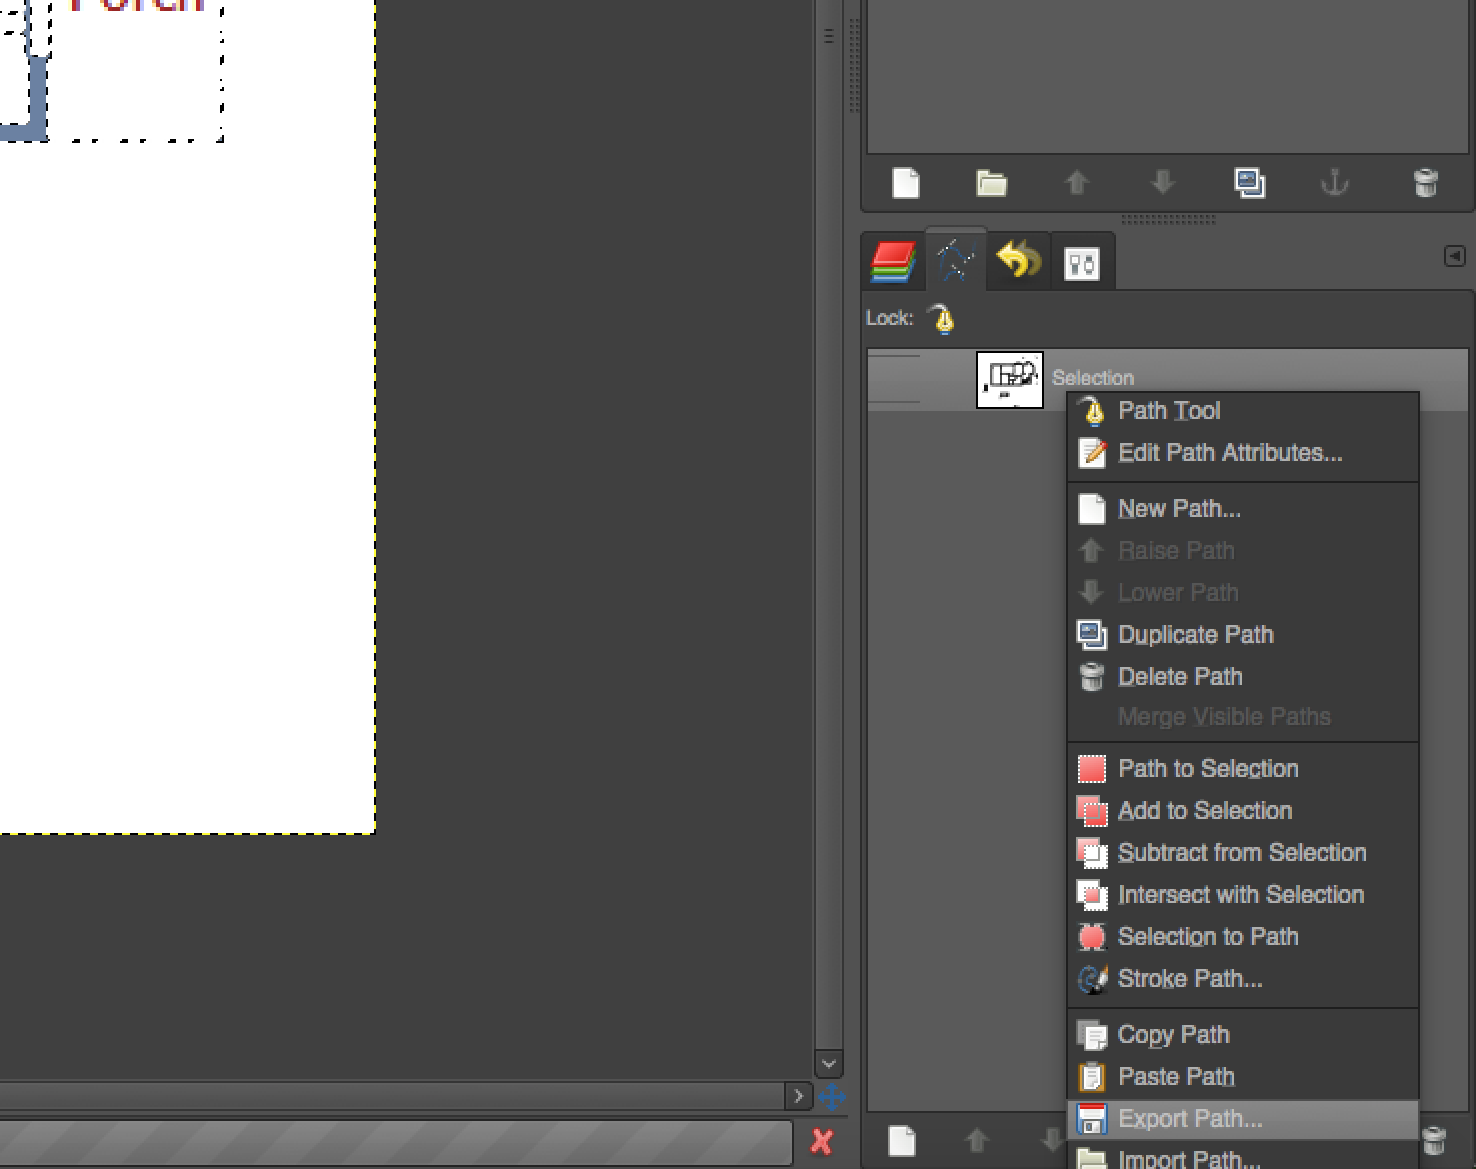
The floor plan itself was the most important piece, and I figured the text would need to be replaced because the resolution of the image was so low, so I wanted to remove the text from the final image (PRVR later asked for the low resolution text to be added so they wouldn't have to reference the originals to add the text back in, but it was added as a separate layer so it could easily be deleted when finished). I decided that I would have better control over the conversion process if I used the GIMP, another open source image editing application, but specifically for raster images (Inkscape is to Adobe Illustrator as the GIMP is to Adobe Photoshop). In the GIMP, I could easily make selections based on color, adjust brightness and contrast, convert selections to paths and then export them as SVG files. All the floor plans use the same blue for the floor plan and a mix of colors for the text. Using the select by color tool, I was immediately able to select just the floor plan. The selection can then be converted to a path and exported as an SVG.
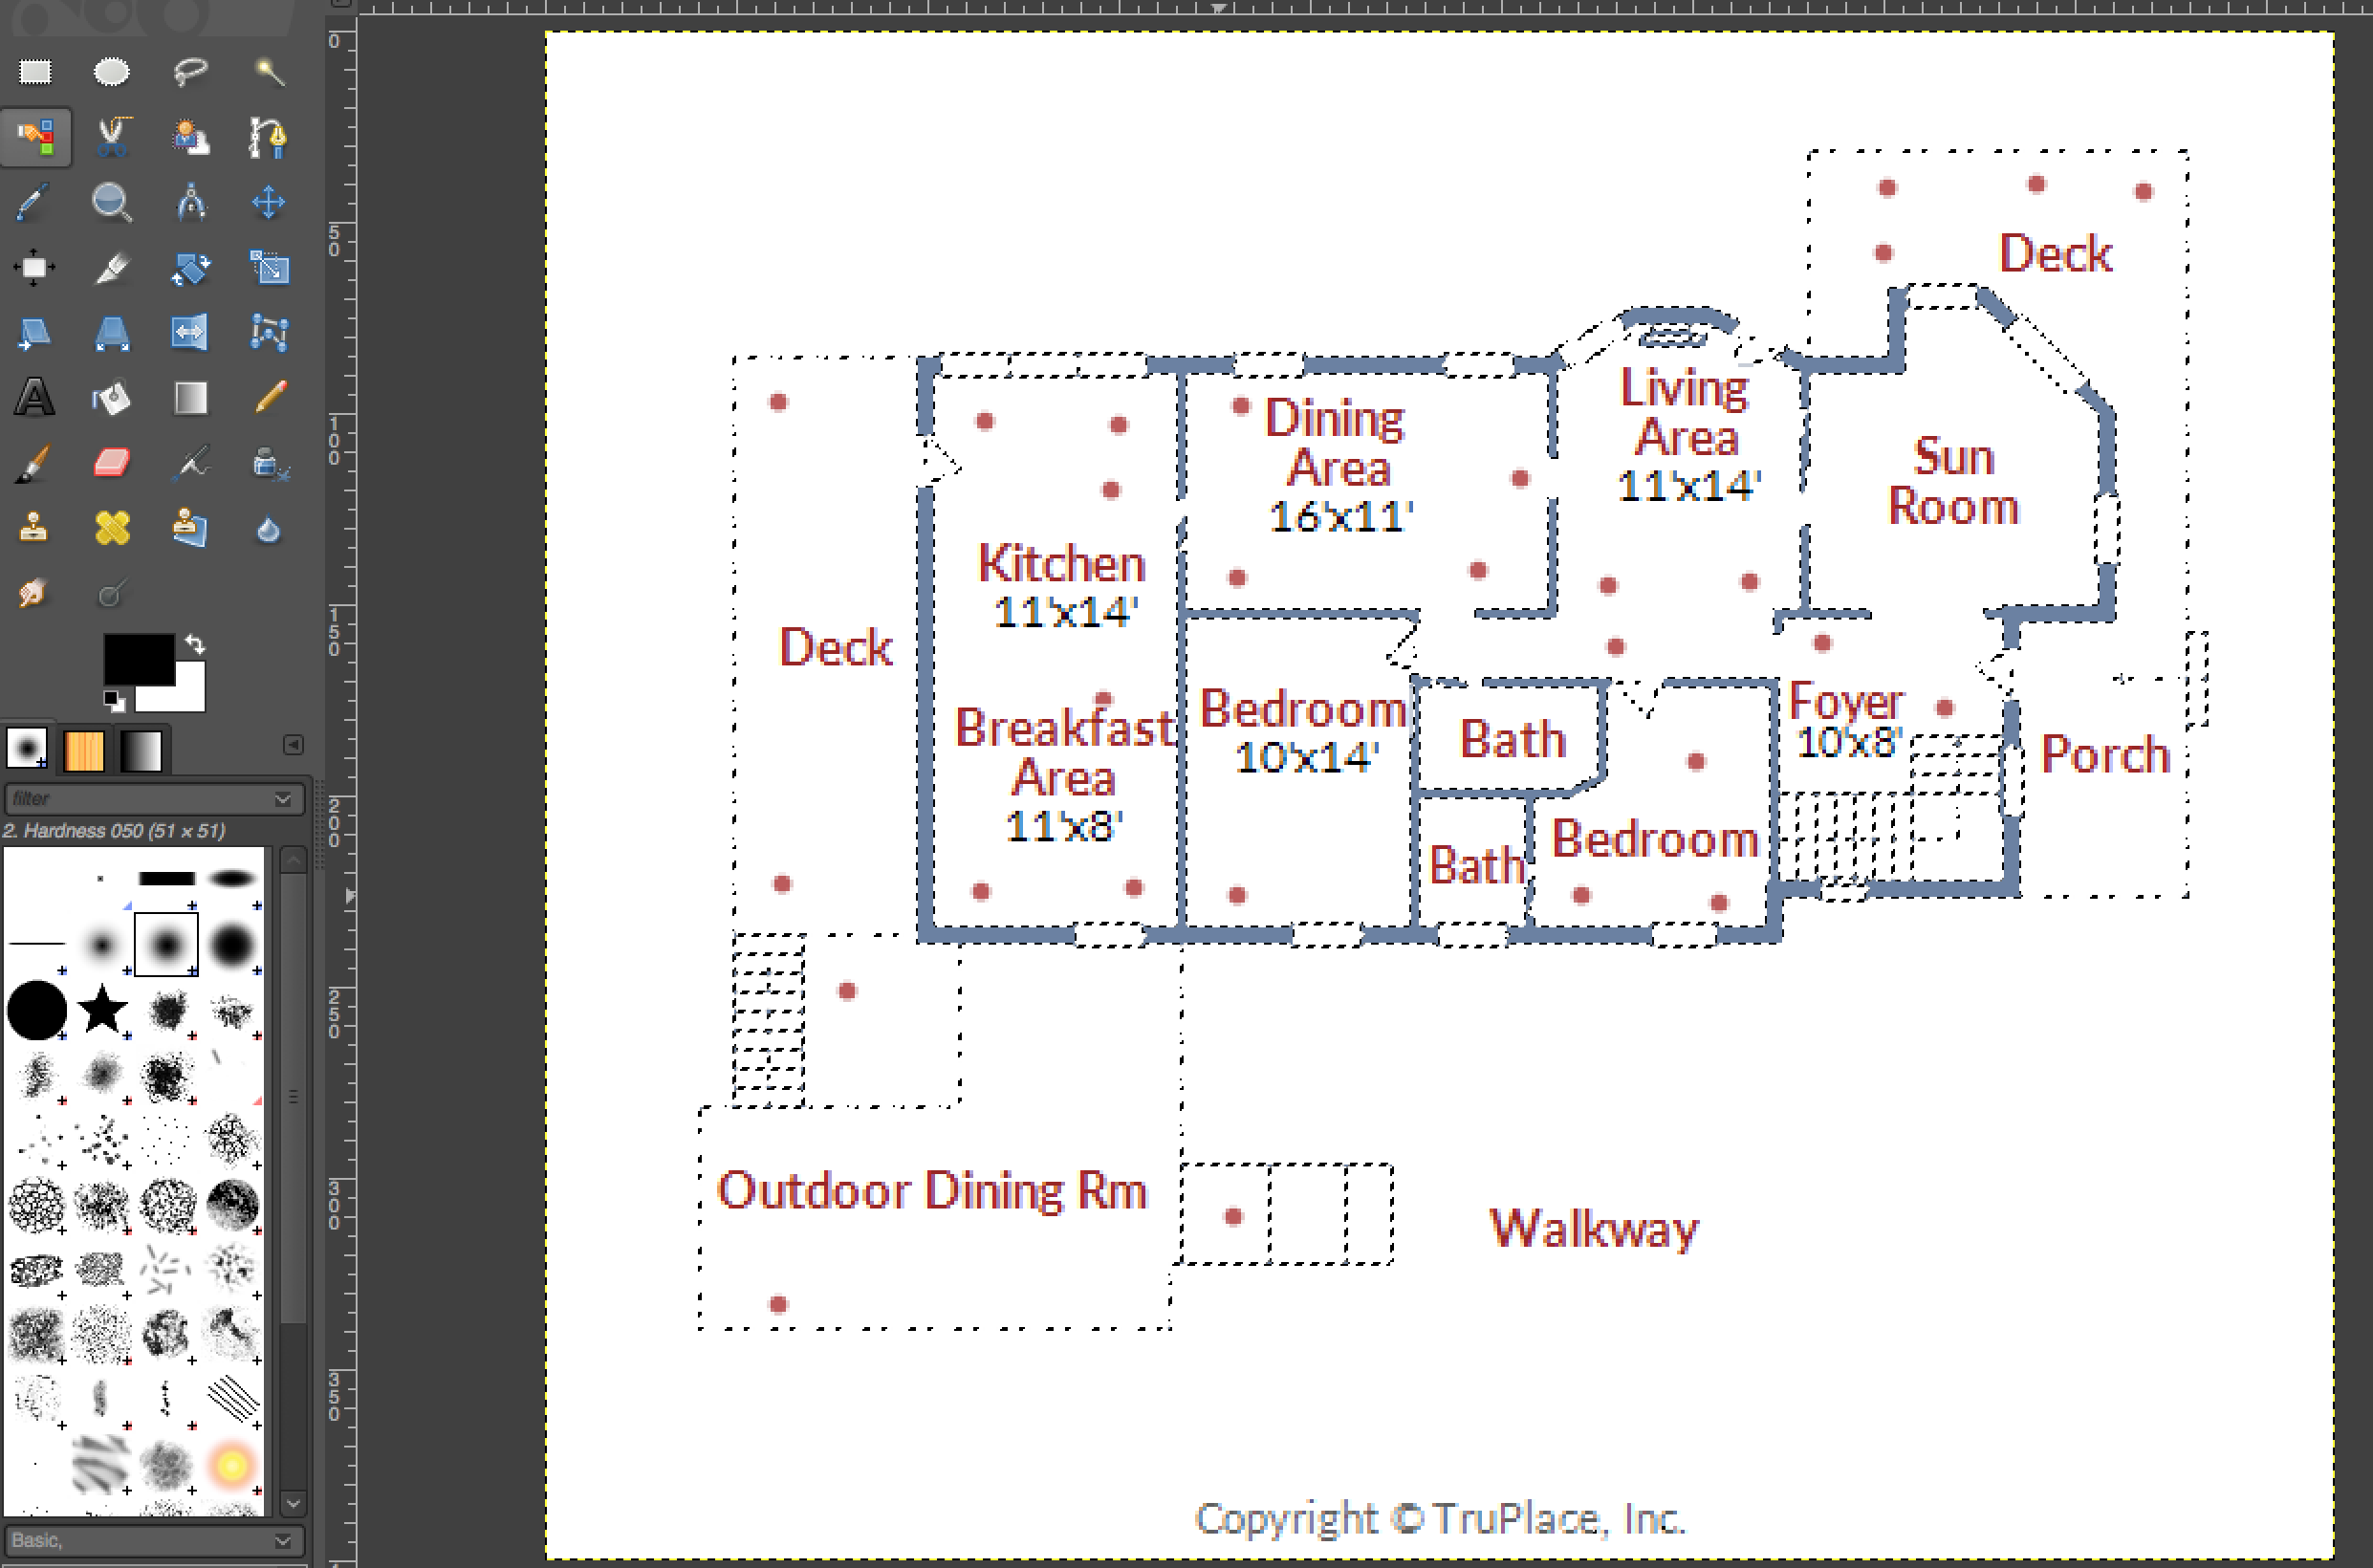
The results were promising, but far from acceptable.
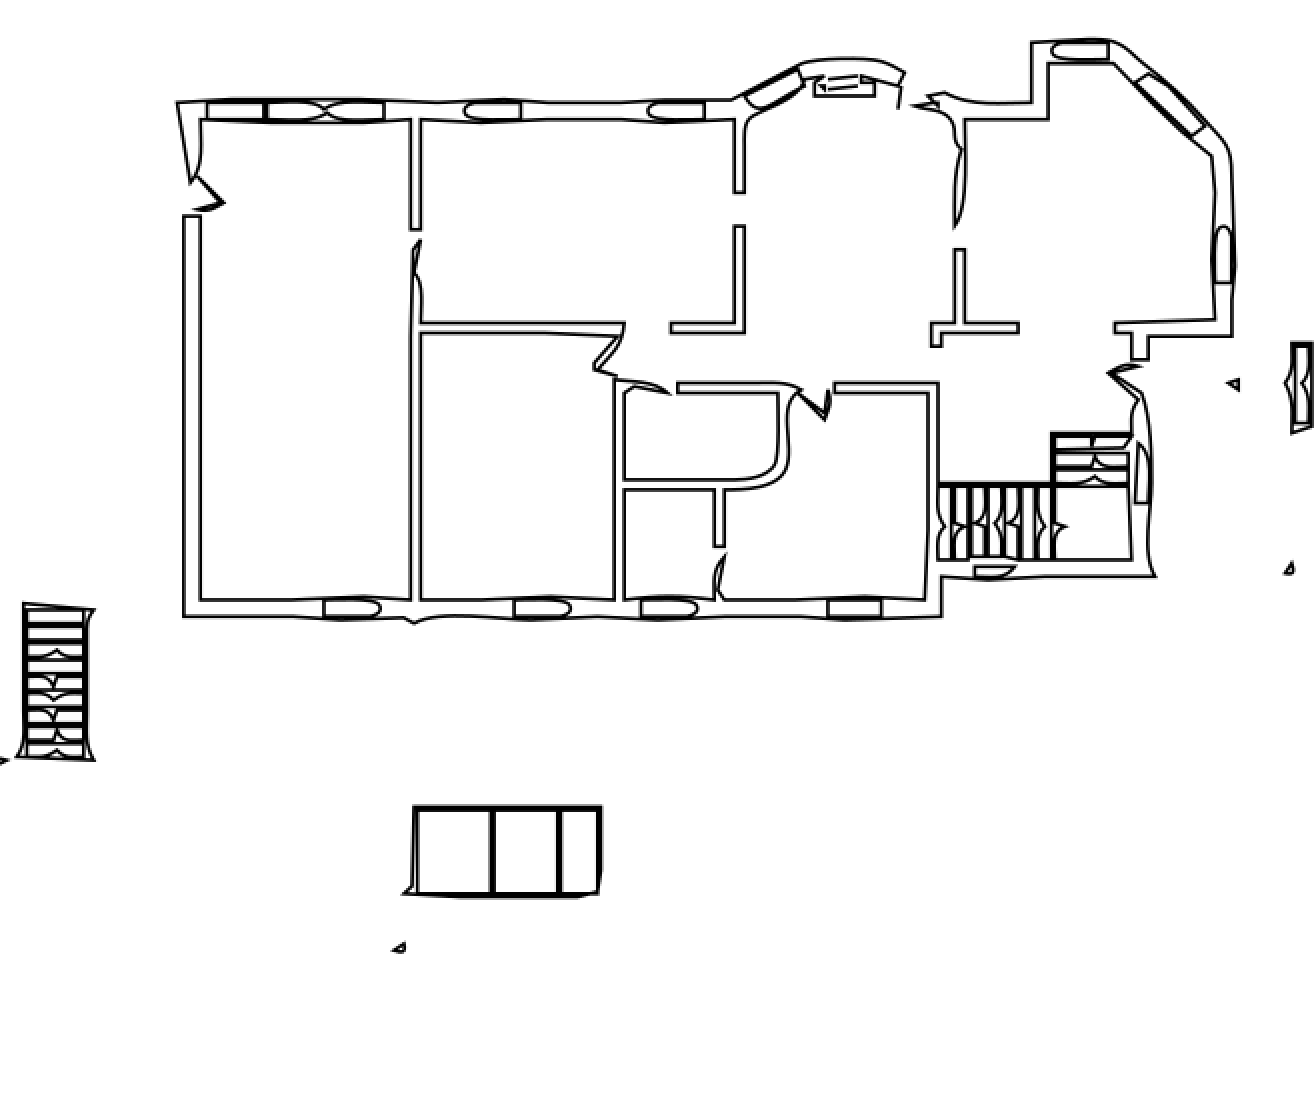
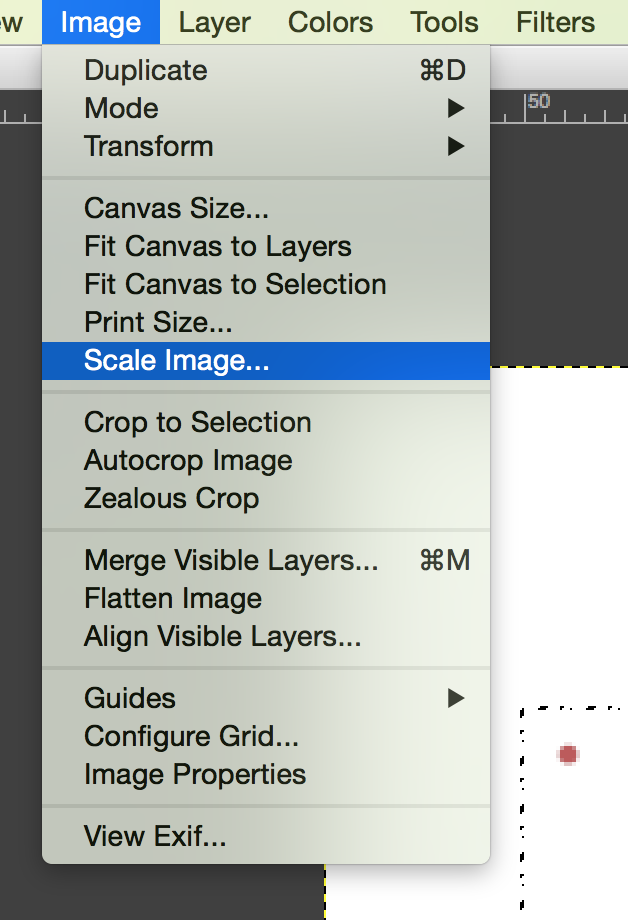
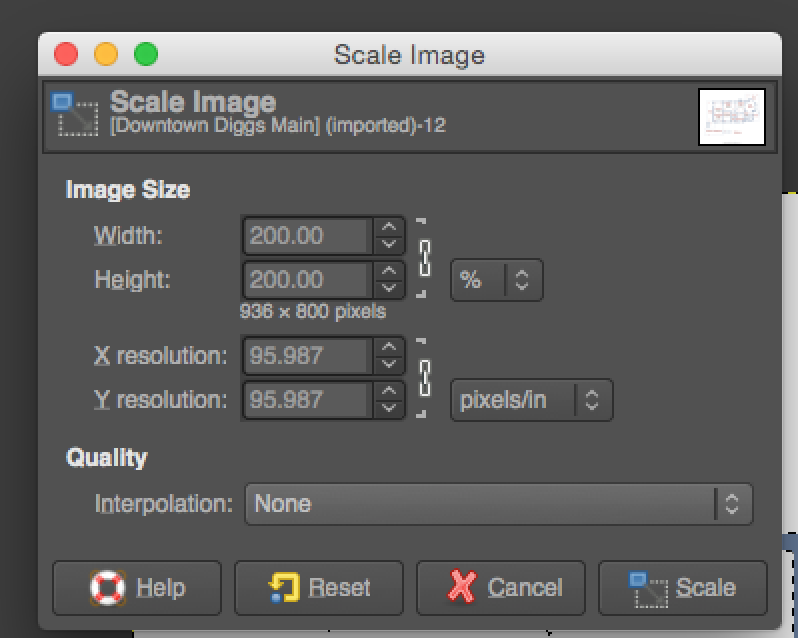
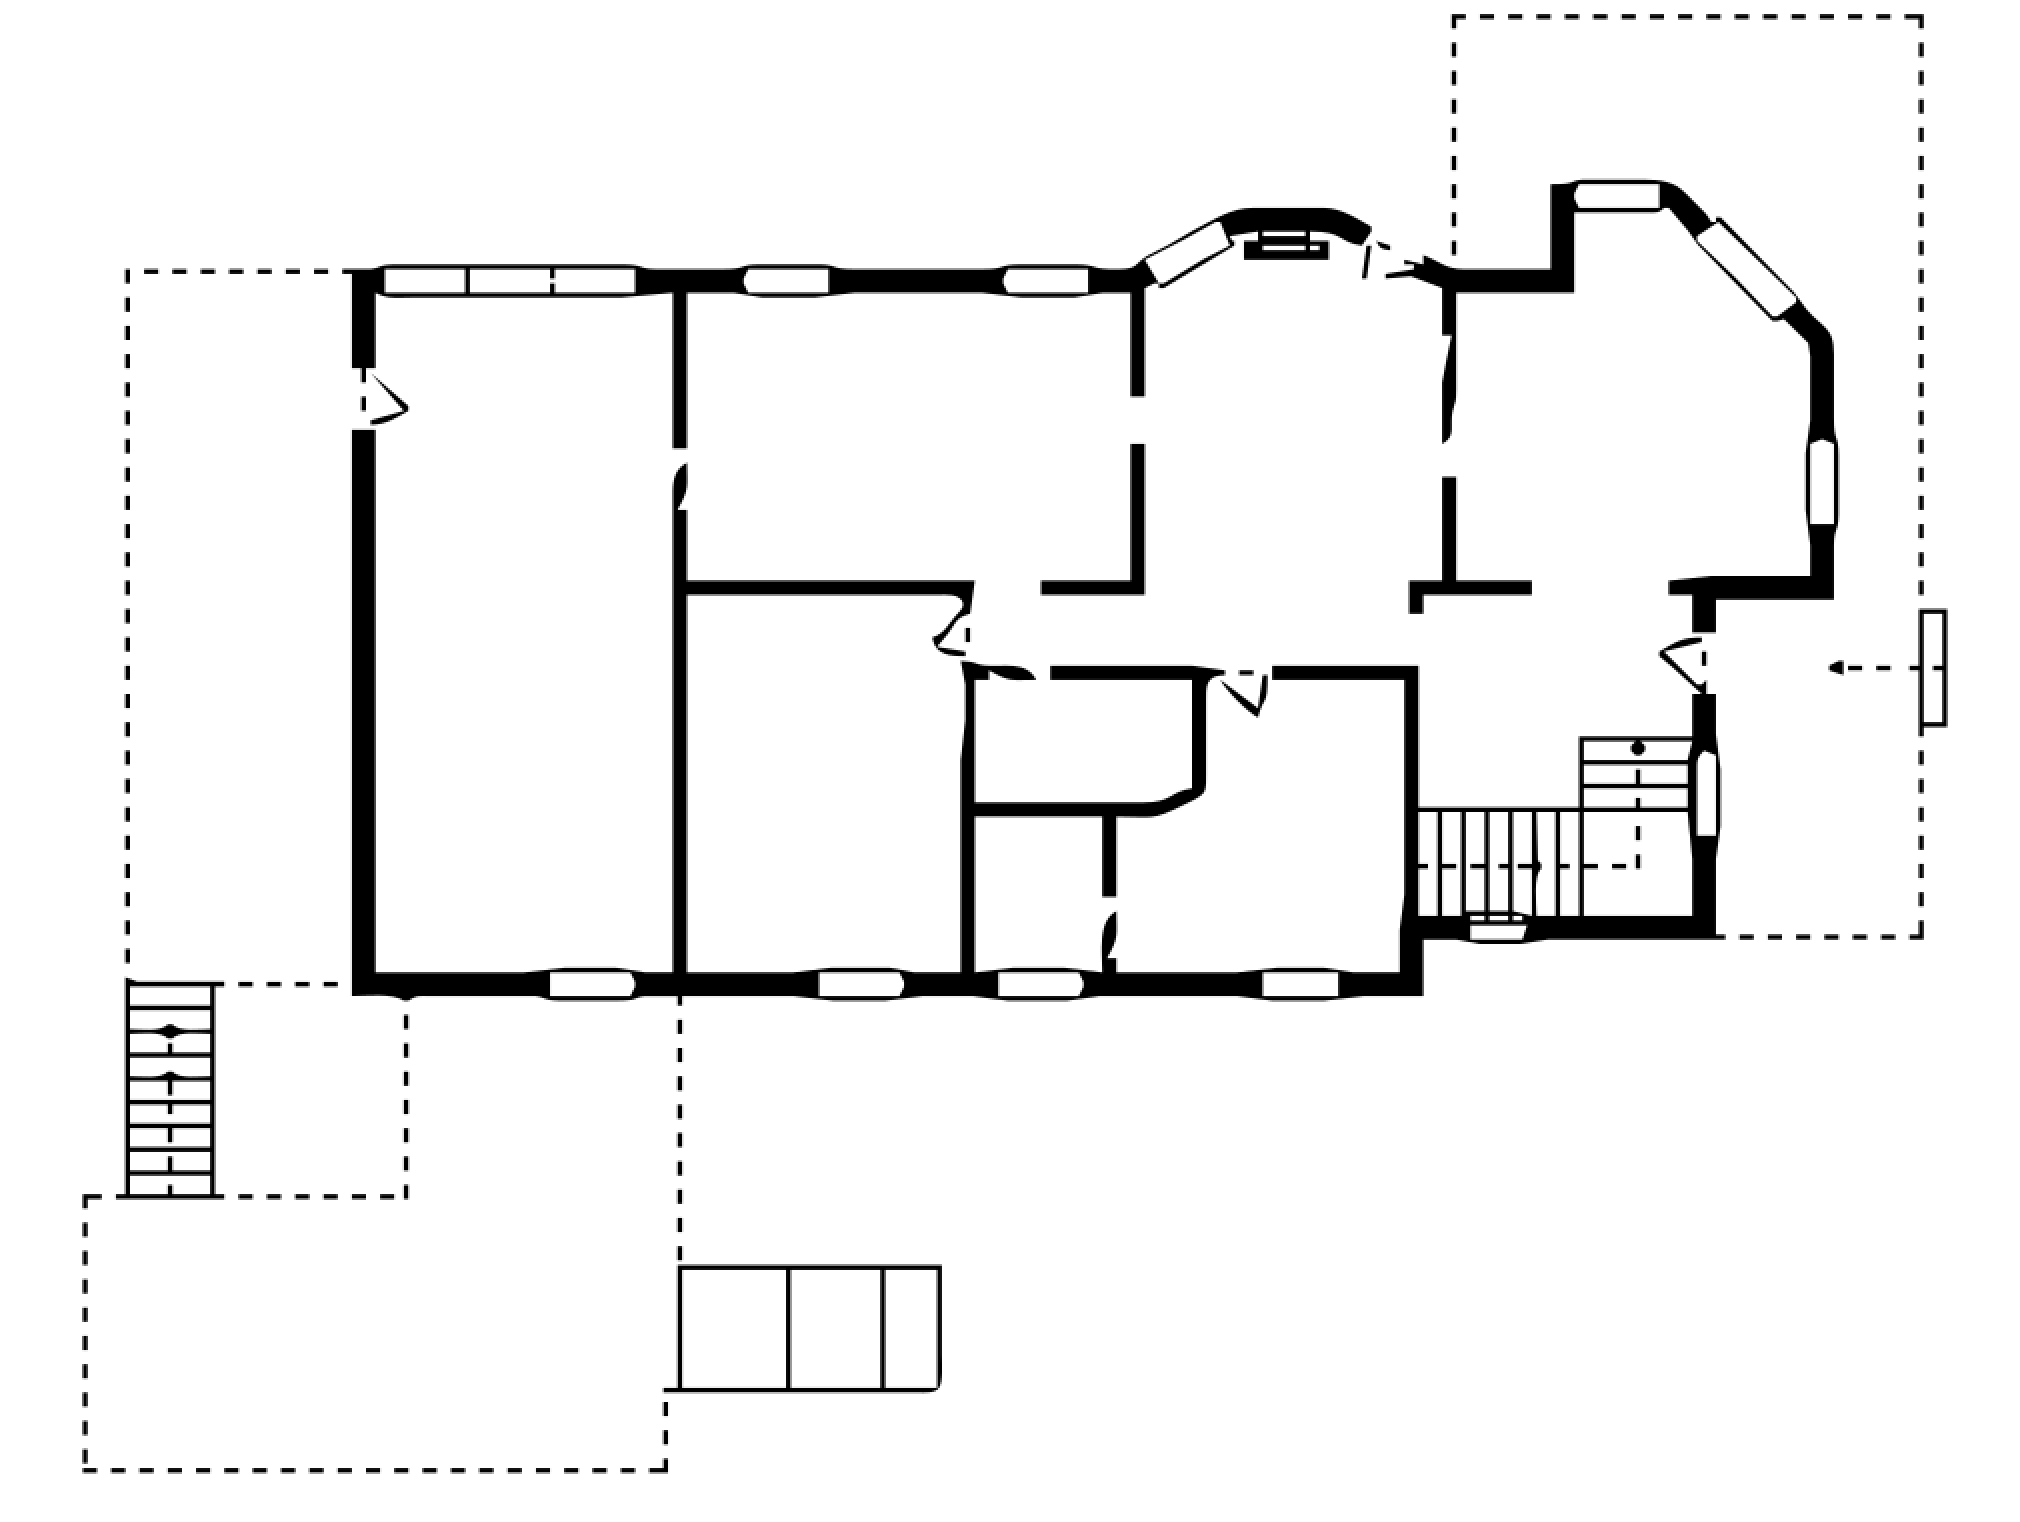
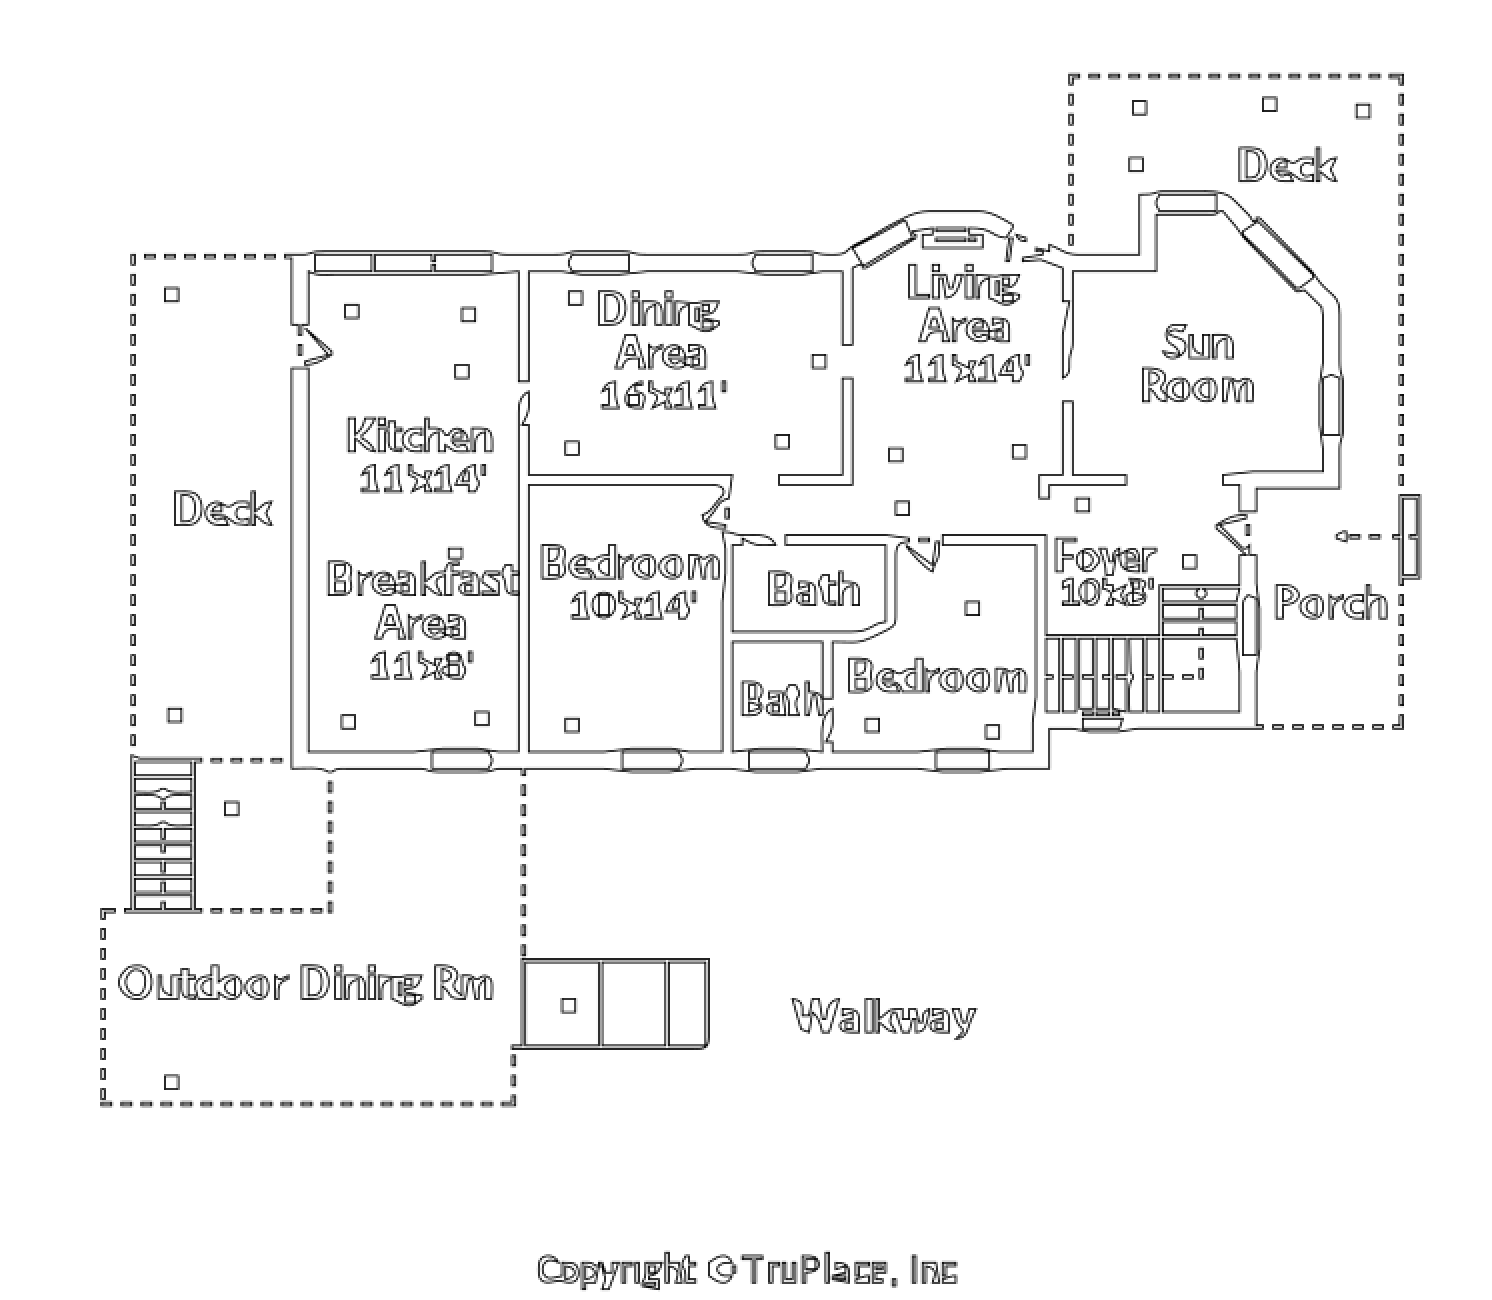
For starters, the finer details such as the dotted lines didn't come out. Also, the windows tended to have a very curved side to them. It seemed like the GIMP was overly simplifying the selection conversion. There were some advanced options, that I played with briefly, but decided to just try scaling the image up and trying again. Scaling the image up without any interpolation worked great. Make sure interpolation is set to None to avoid blurring out the image. I doubled the width and height of the image, selected by color, converted to a path and exported it as an SVG.
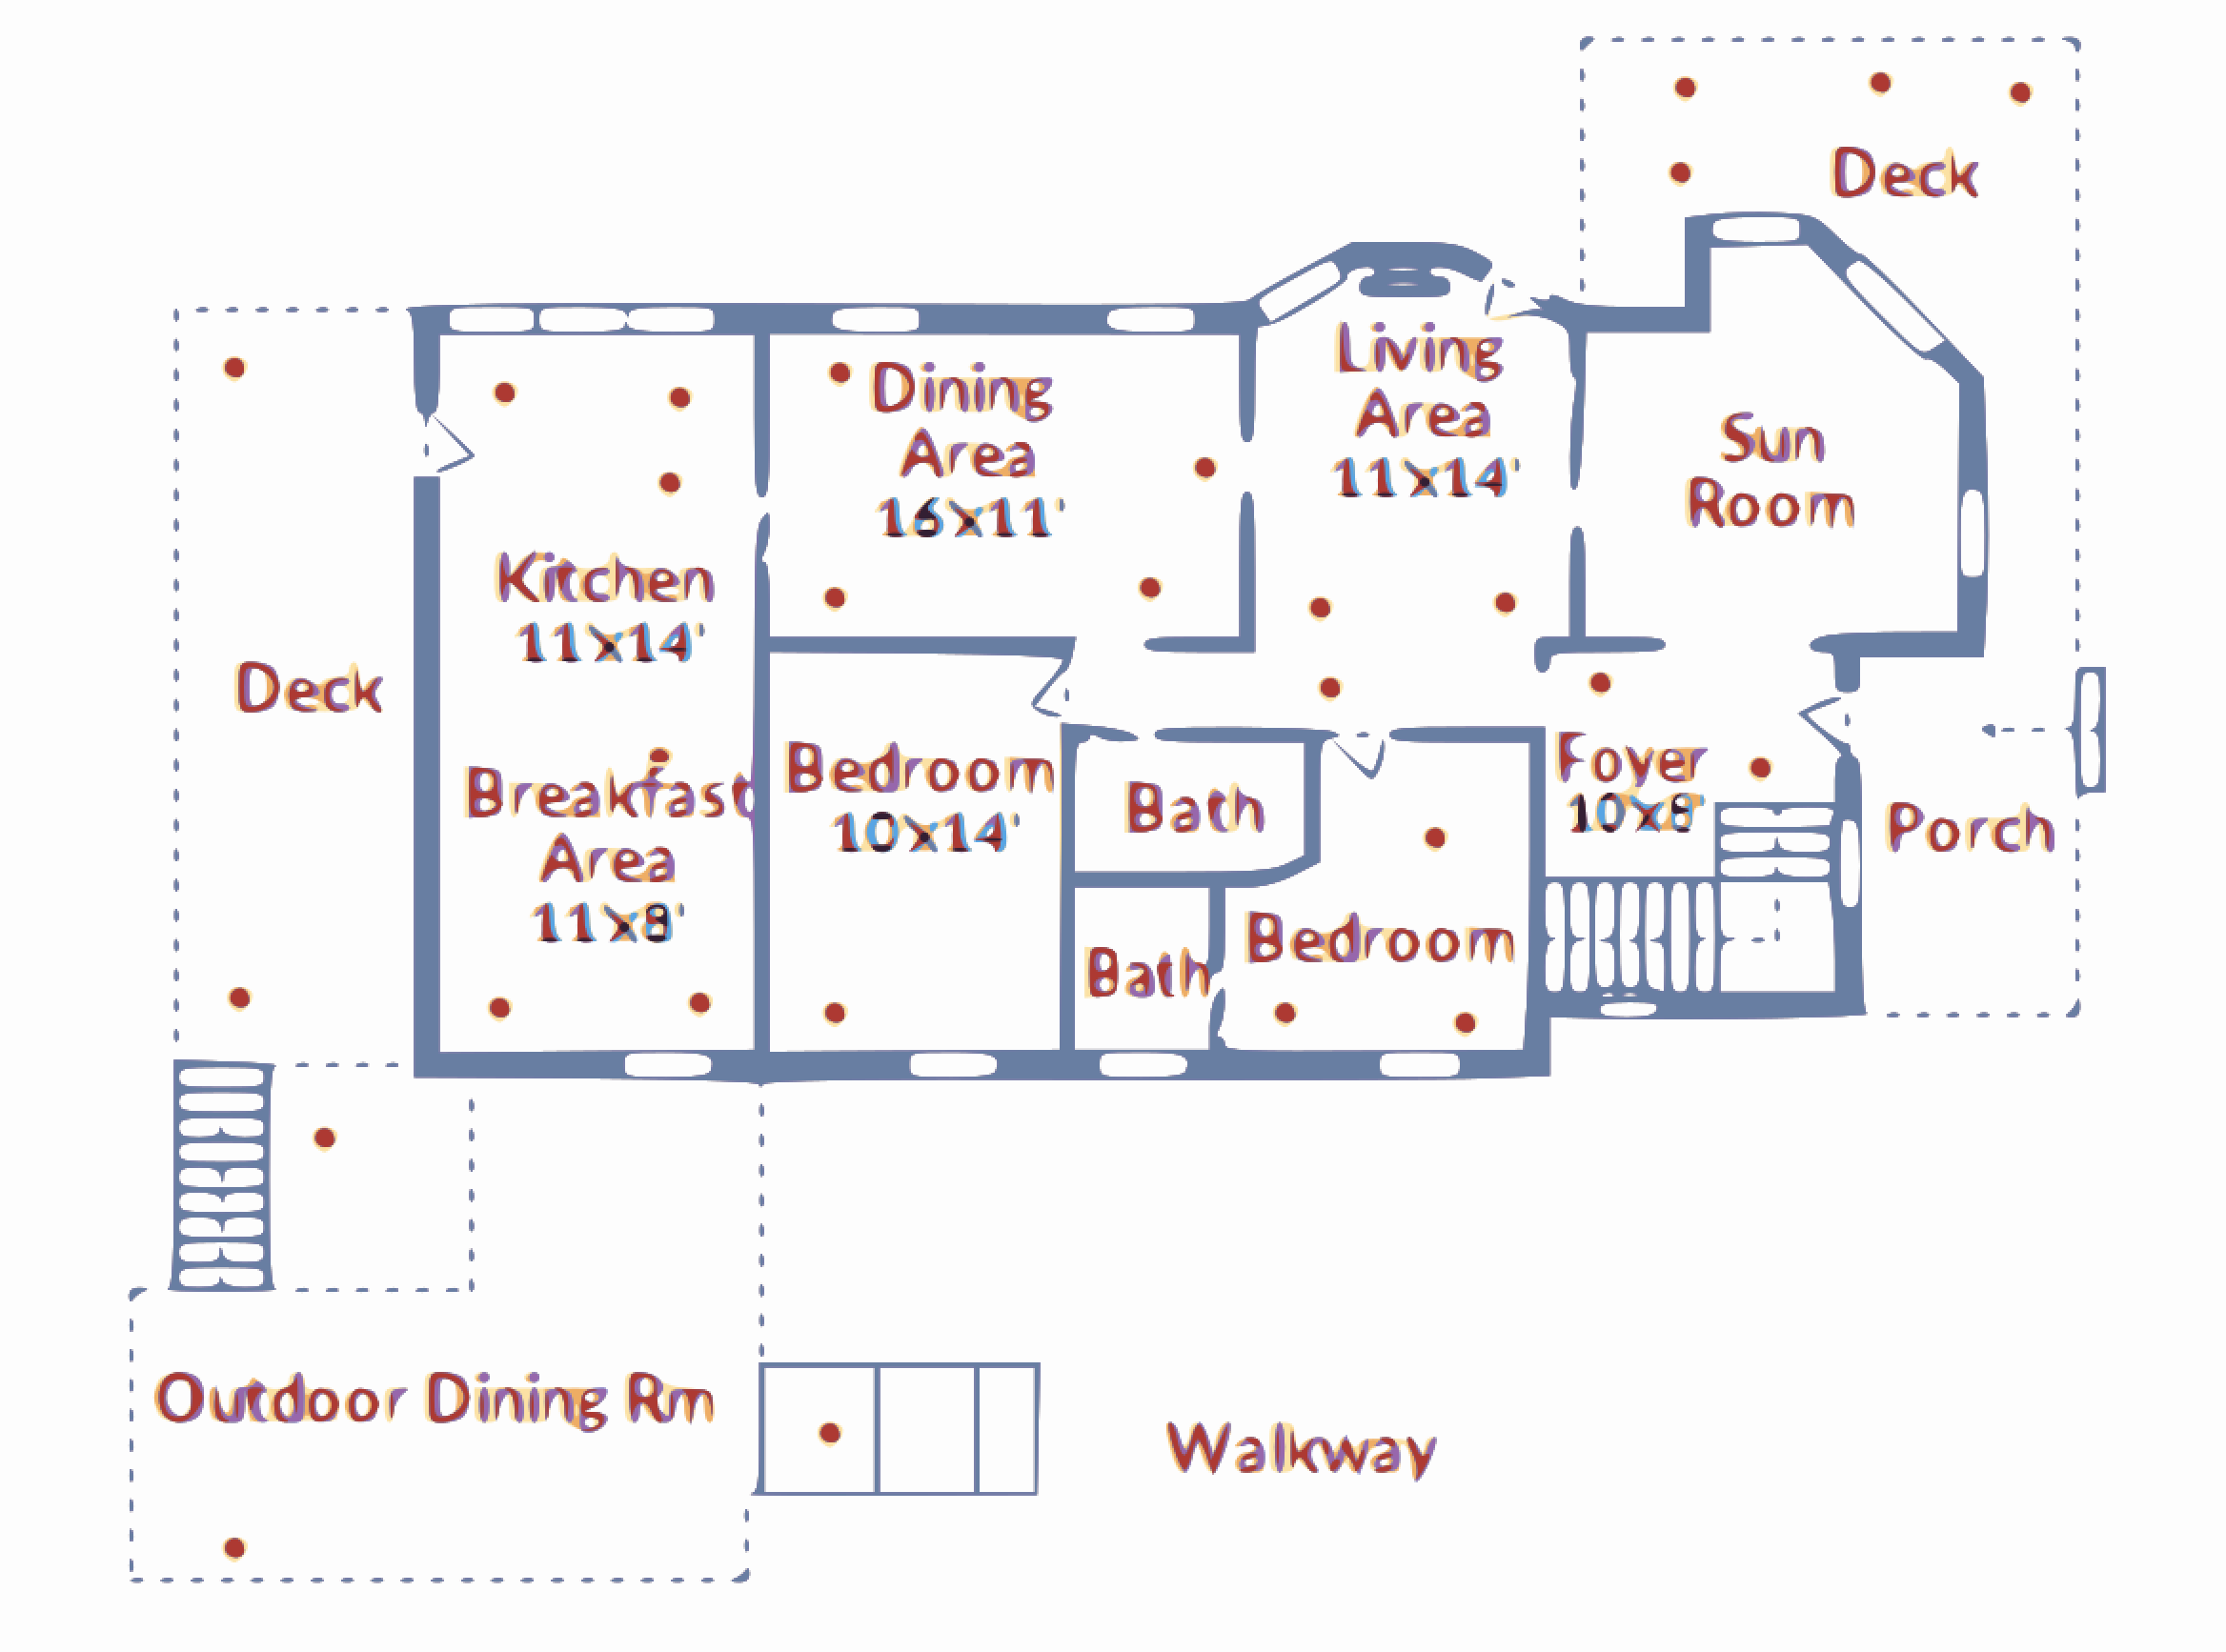
This time it came out great! The doors were a little strange looking, but it was better than I hoped for given the low quality image, and they could be manually adjusted later if desired. The SVG that is exported is just the outline of the floor plan, but in vector graphics its just a matter of telling it to use 'fill' rather than 'stroke' (I did this manually in Inkscape, initially).
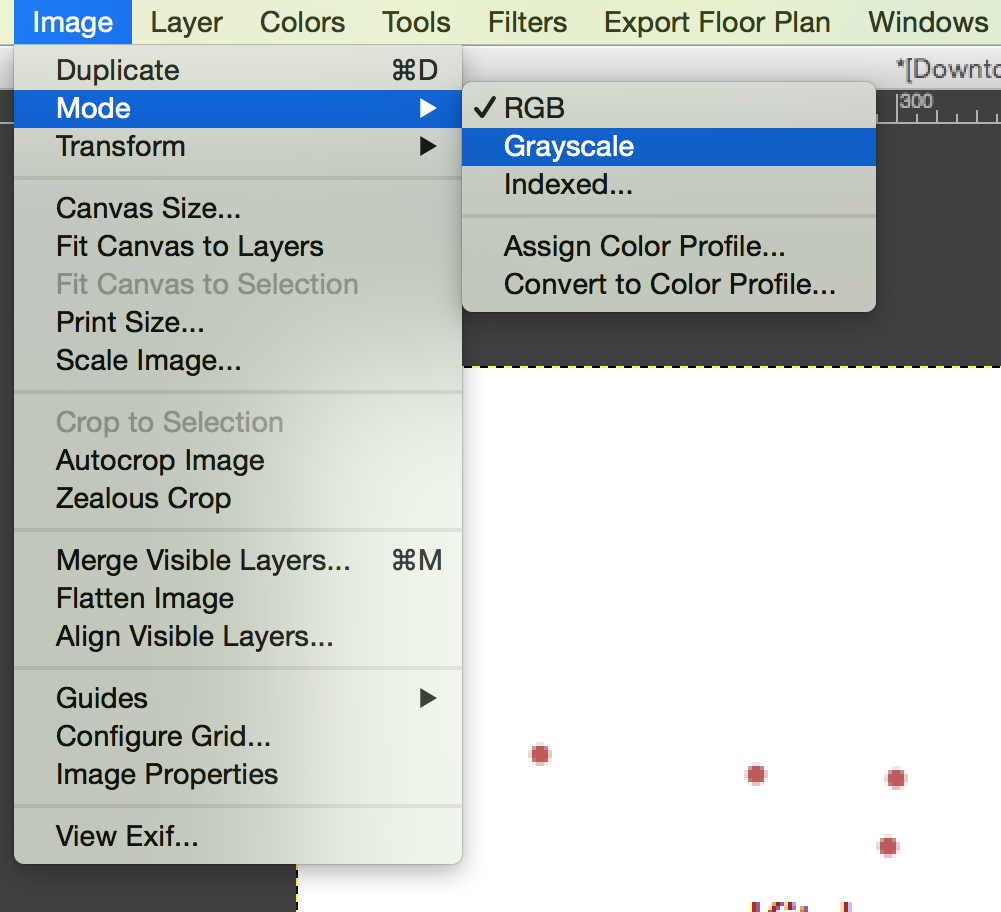
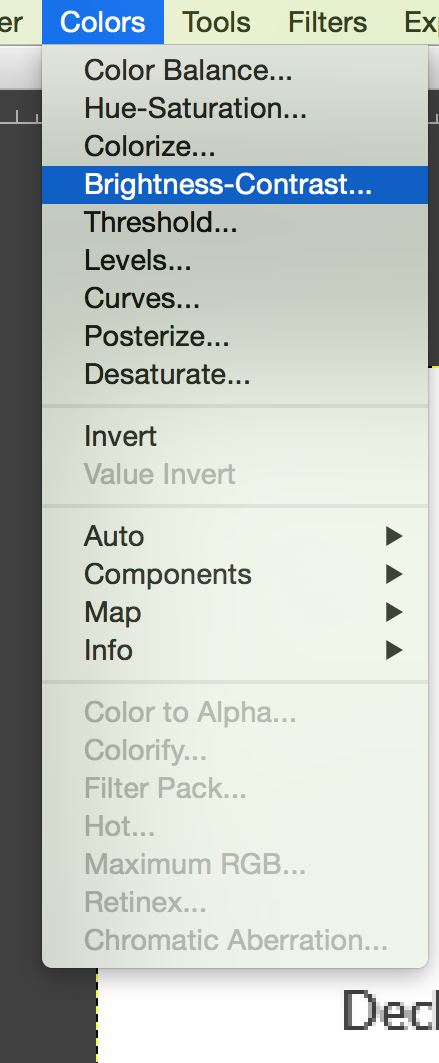
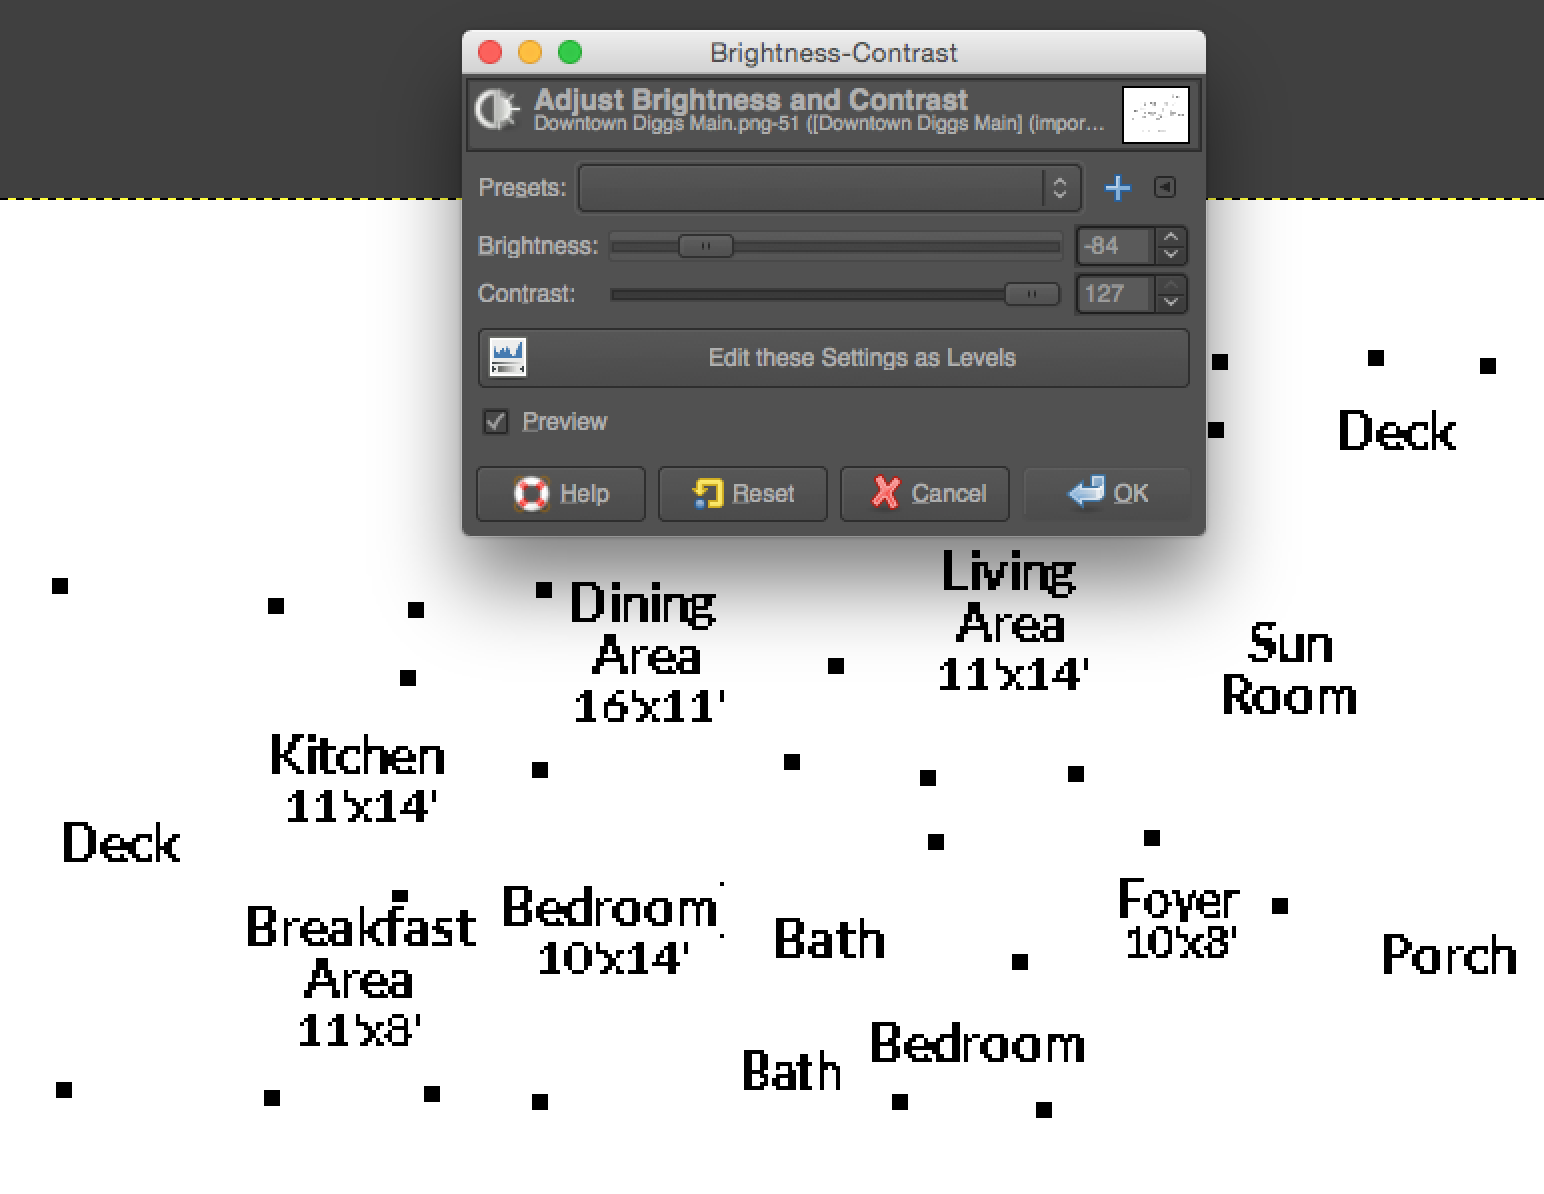
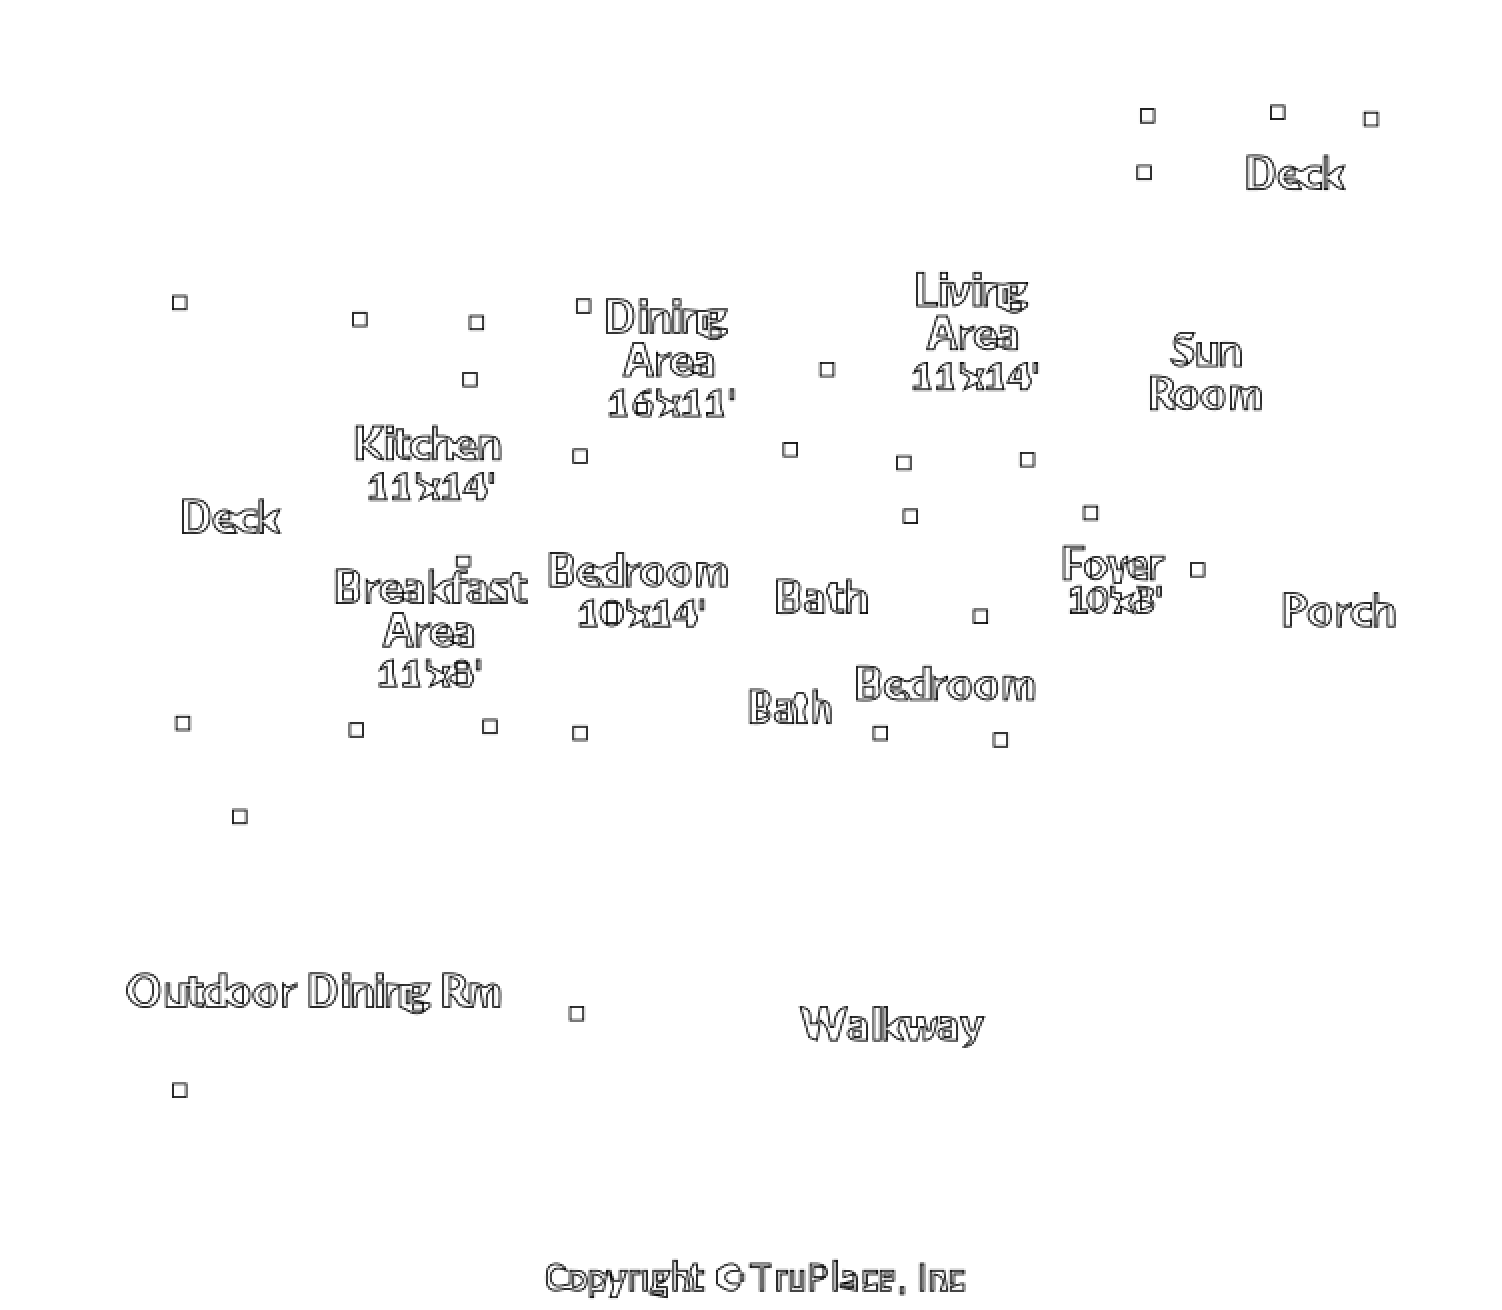
Now for adding the text. It wasn't as straight forward to select the text using select by color. The lettering seemed to be a mix of different colors, some red lettering with bluish shadowing. I started by deleting the floor plan using the selection that we just exported, so I could isolate the text. Then I converted the image to grayscale and adjusted the brightness and contrast to get decent lettering (I really just wanted to make sure it was readable, not necessarily pretty). Instead of selecting the text directly, I selected the white background, inverted the selection and exported that for the text.
Again, I had to change the fill and stroke properties. The text came out readable, so I was happy.

Now I just needed to combine the two SVGs. I knew that I was going to script the whole thing, so I didn't worry about combining them manually. Instead, I searched for a python module that was capable of combining SVG files. I found svgutils. It seemed pretty basic, but that's all I was looking for.
import svgutils.transform as svg

floor_plan = svg.fromfile("test.svg")
text = svg.fromfile("text.svg")

floor_plan.append(text.getroot())
floor_plan.save("combined.svg")
It correctly combined the two files, but the shapes were still outlined, rather than filled.
The svgutils library didn't seem capable of doing this, but the underlying XML library it was implemented with was. After a little digging, I was able to find the necessary objects and methods to set what I needed:
import svgutils.transform as svg

floor_plan = svg.fromfile("test.svg")
text = svg.fromfile("text.svg")

floor_plan.root.getchildren()[0].set("fill", "black")
floor_plan.root.getchildren()[0].set("stroke", "none")

text.root.getchildren()[0].set("fill", "black")
text.root.getchildren()[0].set("stroke", "none")

floor_plan.append(text.getroot())
floor_plan.save("combined.svg")
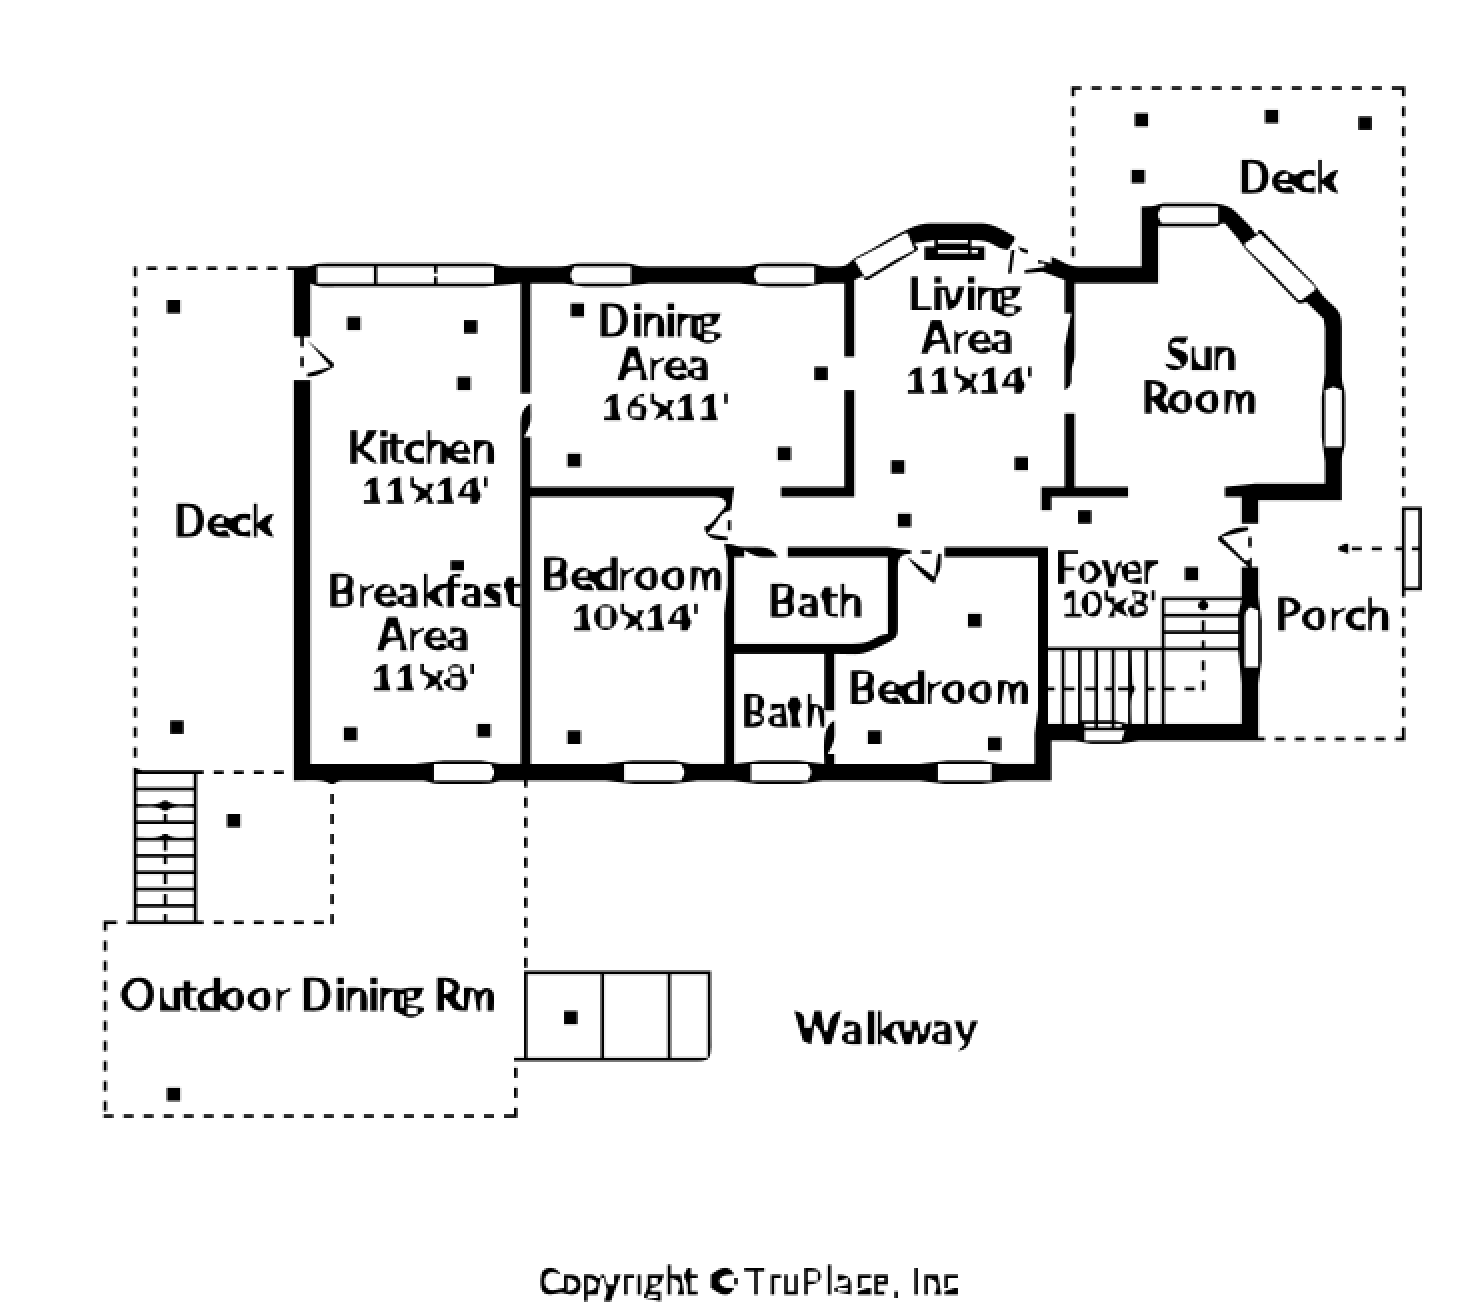
And that did it!
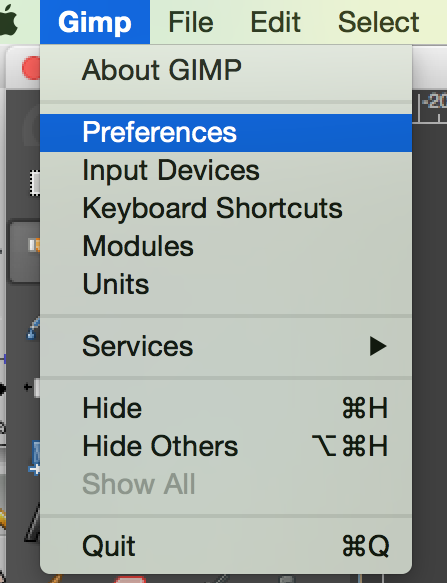
I now had a rough plan for what my script needed to do. All I needed to figure out was how to write a Python Fu GIMP plugin that would put all these pieces together. It's tricky to find good documentation for writing Python Fu scripts, but I managed to track down enough leads to get what I needed. I started with some boilerplate Python Fu code and built it up from there. It wasn't even straight forward figuring out where to put my script, but to figure it out you can go into the GIMP preferences, then go to Folders, Plug-Ins. There will be a list of folders that you can place your plug-ins. I didn't try it, but it looks like you can even add folders to that list.
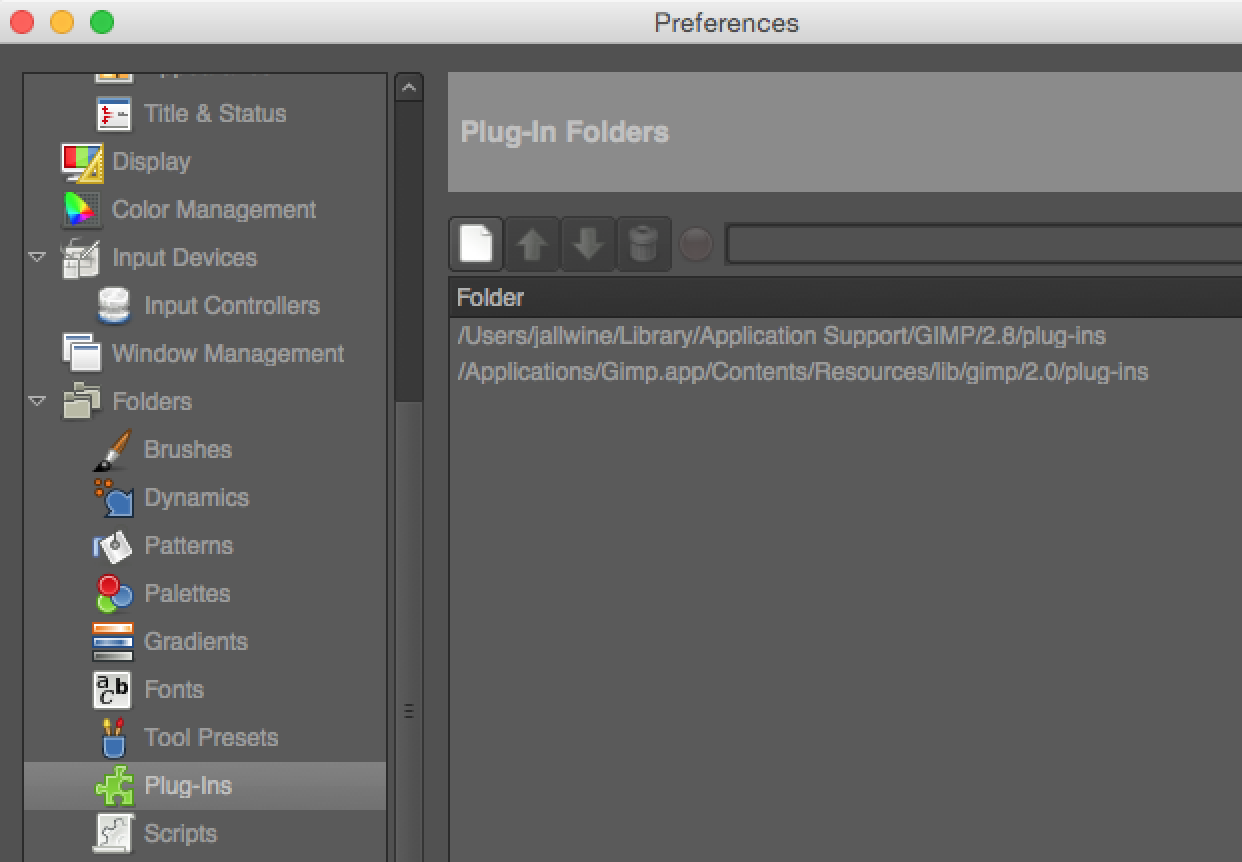
I placed my script into the ~/Library/Application Support/GIMP/2.8/plug-ins directory. Every Python Fu script needs some basic boilerplate code to register their plugin with the GIMP. Here's what I started with:
#!/usr/bin/env python

from gimpfu import *

def export_floor_plan(img, layer):
    pdb.gimp_message("Hello World!")

register(
    "export_floor_plan",
    "Export TruPlace Floor Plan",
    "Exports a TruePlace Floor Plan as a vector graphic",
    "John Allwine",
    "Open source (BSD 3-clause license)",
    "2017",
    "<Image>/Filters/Export Floor Plan/Export Floor Plan",
    "*",
    [],
    [],
    export_floor_plan)

main()
The parameters for the register function are documented here, but I'll go over them briefly. The first 6 are the name, short description, long description, author, license and date for your plugin. These are used in the GIMP to generate a help page for the plugin in the Procedure Browser (we'll talk more about this in a bit). Next comes the menu location. This can begin with either <Image> if you want your plugin to work on the currently open image, or <Toolbox> if you want it to be available to run without an image open. I've started with a menu structure under <Image> as I tested this on a single floor plan that I had open. Eventually, I'll switch to a menu structure that starts with <Toolbox> as the script will run on a whole directory of images which it will be responsible for opening rather than working on a single open image. The 8th parameter is what file types the script accepts. It will start as "*", but change to "" when we no longer need an image to be open. The 9th parameter is a list of parameters that the plugin needs. We'll add one later on, but for now we'll leave it empty. The 10th parameter is a list of return values, which I never used. The last parameter is the function that will run your script. The function that you use must accept any parameters that you specified in the parameters list and if your plugin operates on an image, it must accept an image and a layer object as the first two arguments. Put the script in one of the folders listed in the Preferences window, then restart the GIMP. You should be able to access your script from the Filters - Export Floor Plan menu. You can now make changes to the script without having to restart the GIMP as a new python process is spawned and the script is read from disk each time.
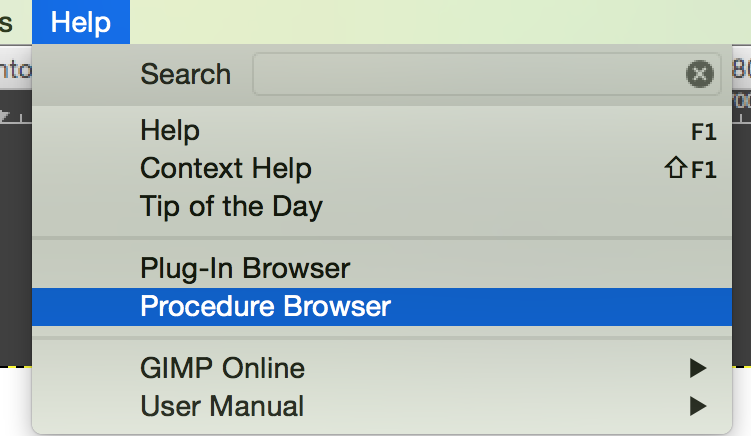
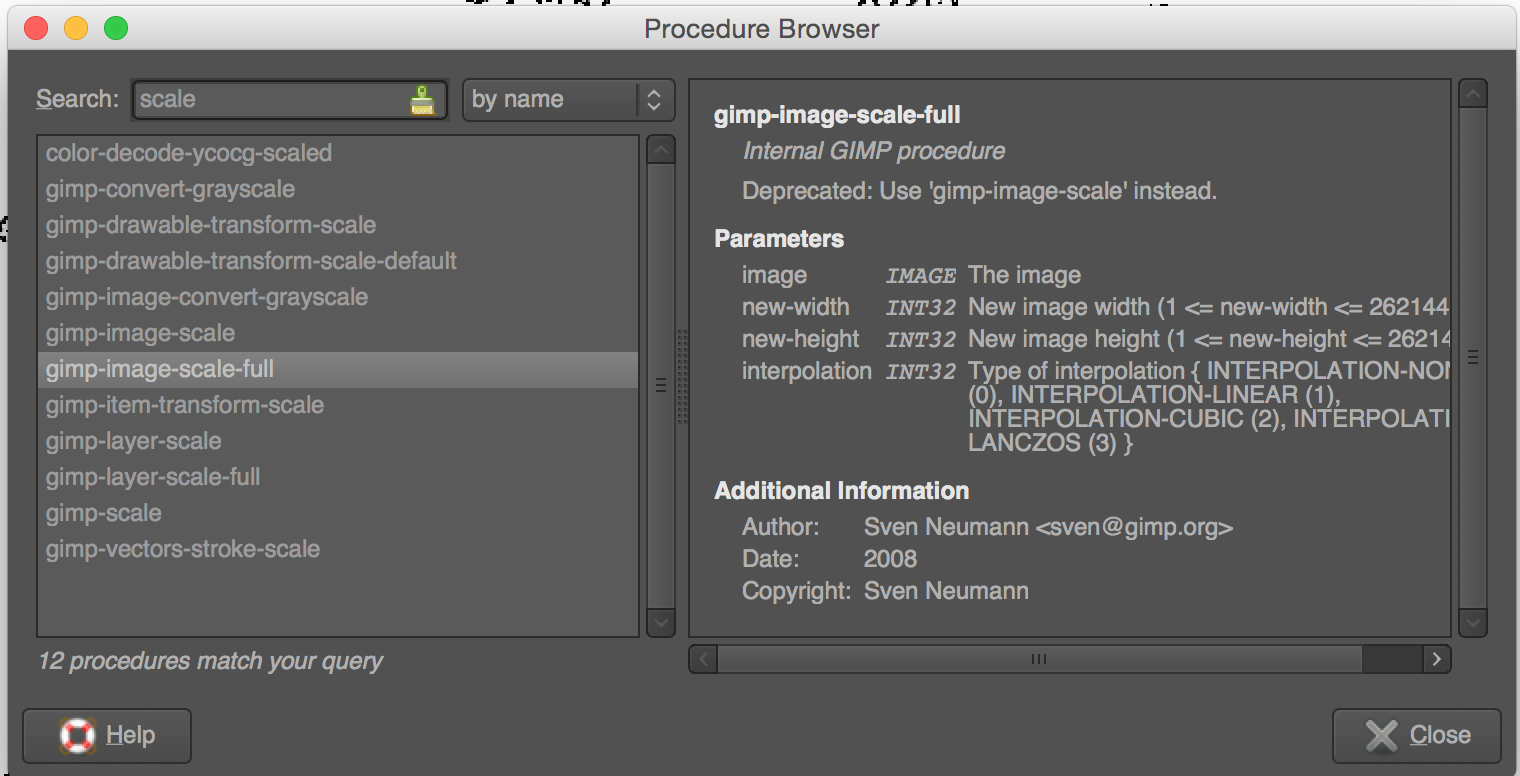
Right now our script just prints out a message to the error console using the pdb variable (procedural database). All plug-ins and menu options in the GIMP are registered in the procedural database, and we can call them using the pdb object (even our new script can be called using the pdb object). We'll use the Procedure Browser, under the Help menu, to find the procedures we need to run.
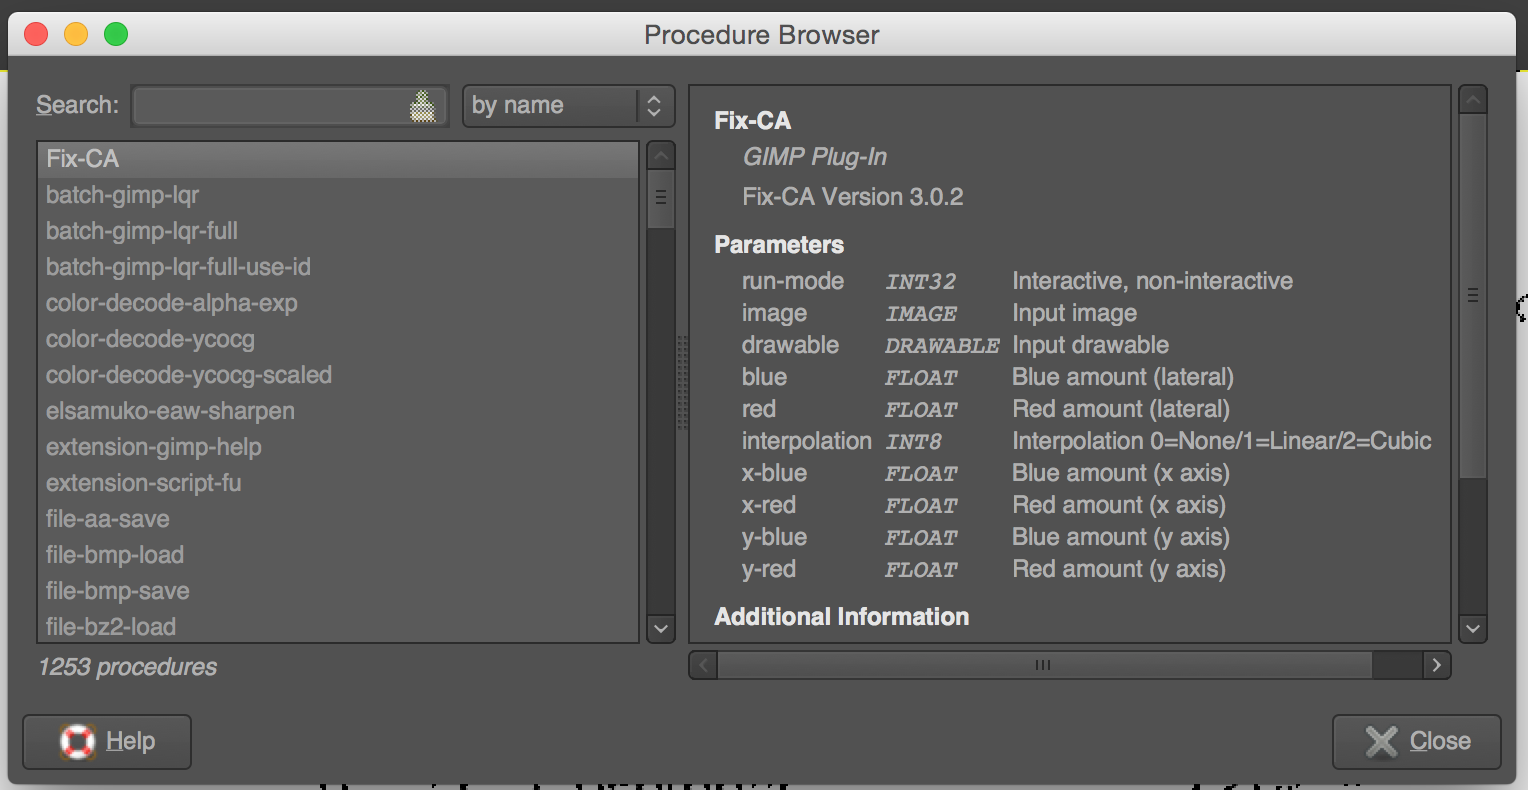
The Procedure Browser allows us to type in a search box to look for procedures we need. The first operation I need to perform is to scale up the image, so I typed scale in the search box. It comes up with a short list of options and I quickly narrowed down what I needed to gimp-image-scale-full, which provides an interpolation type as an option (remember we wanted no interpolation).
The Procedure Browser lists them how you would call them if you were writing a Script Fu plugin, which is implemented in Scheme. To use the same procedure in python you swap all the dashes (-) with underscores (_), and use it as a method on the pdb object (more specifically gimpfu.pdb, but we imported everything in the gimpfu module into the global namespace). In this case it would be:
pdb.gimp_image_scale_full(img, img.width*2, img.height*2, 0)
The first parameter that the gimp_image_scale method requires is an image object. The current image object is passed in as the first argument to your plugin's main function. We'll create our own image objects later on when we start reading multiple image files, but for now we'll use the one that is passed in. The next two arguments are the width and height, so we use 2x what the image currently is. The last argument is 0 to indicate we want no interpolation.
Note: What is interpolation? When you scale an image up or down you're adding pixels to or eliminating pixels from the image. To figure out what color the added pixels are (when scaling up) or how to combine multiple pixels into a single pixel (when scaling down) we use Interpolation to combine colors from surrounding pixels. Since we're scaling up, interpolation would result in blended colors making everything very blurry. This blurriness can be acceptable in more organic, natural looking images. In our case, we have very sharp corners and lines that we want to maintain. To maintain sharp edges, no interpolation is used and instead the nearest pixel color is used rather than blending with multiple nearby pixel colors.
You can run the script now and see that it indeed scales up the image you currently have open. If you're going to run the script multiple times, I recommend scaling it back down in between runs so you don't end up with an overly enormous image. The next operations that we need to implement in our script is select by color and convert the selection to a path. I used the color picker to find the color of the walls, "#6a80a3" and found the gimp_image_select_color and plug_in_sel2path procedures.
# Select floor plan and convert to path
pdb.gimp_image_select_color(img, 2, layer, "#6a80a3")
pdb.plug_in_sel2path(img,layer)
Then, we delete the floor plan, convert to grayscale, adjust brightness and contrast, select white, invert selection and again convert the selection to a path.
# Clear the floor plan, leaving just the text
pdb.gimp_edit_clear(layer)
pdb.gimp_selection_none(img)

# Convert text to grayscale
pdb.gimp_image_convert_grayscale(img)

# Brightness/contrast adjustment to bring out text detail
pdb.gimp_brightness_contrast(layer, -84, 127)

# Select white and invert to get all text
pdb.gimp_image_select_color(img, 2, layer, "white")
pdb.gimp_selection_invert(img)

# Convert text selection to path
pdb.plug_in_sel2path(img, layer)
As I continued developing my script, it became difficult to debug issues that I was having. If I had a typo somewhere, or passed the wrong number of arguments to a method, the plugin would just silently crash. There may be a log file somewhere, but I wasn't able to track it down. It seems strange to me that errors aren't trapped and put in the GIMP's error console, but I figured I could do that myself using a try-except block, and some stack trace code I lifted off the Python documentation. It helped catch a number of errors. With the try-except, and additional procedures our script now looks like this:
#!/usr/bin/env python

from gimpfu import *
import sys
import traceback

def export_floor_plan(img, layer):
    try:
        # Scale up image
        pdb.gimp_image_scale_full(img, img.width*2, img.height*2, 0)

        # Select floor plan and convert to path
        pdb.gimp_image_select_color(img, 2, layer, "#6a80a3")
        pdb.plug_in_sel2path(img,layer)

        # Clear the floor plan, leaving just the text
        pdb.gimp_edit_clear(layer)
        pdb.gimp_selection_none(img)

        # Convert text to grayscale
        pdb.gimp_image_convert_grayscale(img)

        # Brightness/contrast adjustment to bring out text detail
        pdb.gimp_brightness_contrast(layer, -84, 127)

        # Select white and invert to get all text
        pdb.gimp_image_select_color(img, 2, layer, "white")
        pdb.gimp_selection_invert(img)

        # Convert selection to path
        pdb.plug_in_sel2path(img, layer)
    except Exception as e:
        exc_type, exc_value, exc_traceback = sys.exc_info()
        pdb.gimp_message("\n".join(traceback.format_exc().splitlines()))


register(
    "export_floor_plan",
    "Export TruPlace Floor Plan",
    "Exports a TruePlace Floor Plan as a vector graphic",
    "John Allwine",
    "Open source (BSD 3-clause license)",
    "2017",
    "<Image>/Filters/Export Floor Plan/Export Floor Plan",
    "*",
    [],
    [],
    export_floor_plan)

main()
Now we need to export the paths to a combined SVG file. This required the svgutils module. When I attempted to include it, the plugin stopped working. I opened up the interactive Python console within GIMP (Filters - Python Fu - Console), tried importing it and got an error stating it didn't know anything about svgutils. I had installed svgutils using pip on my system, so the GIMP must have been using a different version of Python. I needed to figure out how to tell the GIMP to use my system's version of Python. There may be a recommended way to do this, but I did some experimenting of my own and it seemed to work. In the Preferences window, under Folders, there's an Interpreters section and it lists a couple folders. In one of those folders, /Applications/Gimp.app/Contents/Resources/lib/gimp/2.0/interpreters, I found a file called pygimp.interp. I backed up the file, then changed the paths that it listed to the path to my system's python executable (you can use 'which python' in a terminal to find it):
python=/usr/local/bin/python
/usr/bin/python=/usr/local/bin/python
:Python:E::py::python:
I restarted the GIMP, opened the Python Fu console and successfully imported svgutils. Woohoo! Now let's combine our SVG files.
I found the procedure that exported the SVG to a string rather than saving to disk (gimp_vectors_export_to_string), as well as a method in svgutils to construct an svg object from a string (svg.fromstring) so I could avoid writing them out to disk. In the script, I loop over every path, convert it to an SVG string, extract the root group node from that SVG, set the fill to black and stroke to none, and append it to an SVG object that I created. At the end I save out the SVG, using the same filename as the current image with the last 3 characters changed to svg (I knew that all the images would end in png; this wouldn't work as well if you were working with .jpeg extensions).
file = svg.SVGFigure("%spx" % img.width, "%spx" % img.height)
for path in img.vectors:
    svg_string = pdb.gimp_vectors_export_to_string(img, path)
    path_svg = svg.fromstring(svg_string)
    g = path_svg.getroot()
    g.root.getchildren()[0].set("fill", "black")
    g.root.getchildren()[0].set("stroke", "none")
    file.append(g)
pdb.gimp_message("saving svg...")
filename = "%ssvg" % img.filename[:-3]
file.save(filename)
Now we can convert a raster image to a vector graphic using a script. The whole script is here:
#!/usr/bin/env python

from gimpfu import *
import svgutils.transform as svg
import sys
import traceback

def export_floor_plan(img, layer) :
    try:
        # Scale up image
        pdb.gimp_image_scale_full(img, img.width*2, img.height*2, 0)

        # Select floor plan and export to path
        pdb.gimp_image_select_color(img, 2, layer, "#6a80a3")
        pdb.plug_in_sel2path(img,layer)

        # Clear the floor plan, leaving just the text
        pdb.gimp_edit_clear(layer)
        pdb.gimp_selection_none(img)

        # Convert text to grayscale
        pdb.gimp_image_convert_grayscale(img)

        # Brightness/contrast adjustment to bring out text detail
        pdb.gimp_brightness_contrast(layer, -84, 127)

        # Select white and invert to get all text
        pdb.gimp_image_select_color(img, 2, layer, "white")
        pdb.gimp_selection_invert(img)

        pdb.gimp_message( "selection to path2...")
        pdb.plug_in_sel2path(img, layer)
        file = svg.SVGFigure("%spx" % img.width, "%spx" % img.height)
        for path in img.vectors:
            svg_string = pdb.gimp_vectors_export_to_string(img, path)
            path_svg = svg.fromstring(svg_string)
            g = path_svg.getroot()
            g.root.getchildren()[0].set("fill", "black")
            g.root.getchildren()[0].set("stroke", "none")
            file.append(g)
        pdb.gimp_message("saving svg...")
        filename = "%ssvg" % img.filename[:-3]
        file.save(filename)
    except Exception as e:
        exc_type, exc_value, exc_traceback = sys.exc_info()
        pdb.gimp_message(traceback.format_exc())


register(
    "export_floor_plan",
    "Export TruPlace Floor Plan",
    "Exports a TruePlace Floor Plan as a vector graphic",
    "John Allwine",
    "Open source (BSD 3-clause license)",
    "2017",
    "<Image>/Filters/Export Floor Plan/Export Floor Plan",
    "*",
    [],
    [],
    export_floor_plan)

main()
There are only a couple changes we need to make to run this on all the floor plans. First, we want this script to run on every image in a given directory, rather than the image we currently have open. We have to change our register function and function parameters to allow for that. Notice how the menu structure changed from starting with <Image> to starting with <Toolbox>, the image type is now "", and we have an argument in the parameters list. I had to hardcode the path to my images, as the directory browser GUI seemed to crash the plugin when I tried to select something else (could be a Mac thing, or could just be a general bug in the GIMP).
register(
    "batch_export_floor_plan",
    "Batch Export TruPlace Floor Plan",
    "Exports TruePlace Floor Plans as a vector graphics",
    "John Allwine",
    "Open source (BSD 3-clause license)",
    "2017",
    "<Toolbox>/Export Floor Plan/Batch Export Floor Plan",
    "",
    [ (PF_DIRNAME, "input_path", "Input Path", "/path/to/images")],

    [],
    batch_export_floor_plan)
Our function parameters changed as well. There is no need for img or layer anymore and we added our own parameter, so that's all that gets passed to our function. Now we need to construct a list of files to perform our operations on, loop over those files and define an img and layer variable so everything still works. Here's the full batch export script:
#!/usr/bin/env python

from gimpfu import *
import svgutils.transform as svg
import sys
import traceback
import os
from glob import glob

def batch_export_floor_plan(input_path):
    try:
        pngs = [ y for x in os.walk(input_path) for y in glob(os.path.join(x[0], '*.png')) ]
        for image_file in pngs:
            img = pdb.gimp_file_load(image_file, "file.png")
            layer = img.layers[0]

            # Scale up image
            pdb.gimp_image_scale_full(img, img.width*2, img.height*2, 0)

            # Select floor plan and export to path
            pdb.gimp_image_select_color(img, 2, layer, "#6a80a3")
            pdb.plug_in_sel2path(img,layer)

            # Clear the floor plan, leaving just the text
            pdb.gimp_edit_clear(layer)
            pdb.gimp_selection_none(img)

            # Convert text to grayscale
            pdb.gimp_image_convert_grayscale(img)

            # Brightness/contrast adjustment to bring out text detail
            pdb.gimp_brightness_contrast(layer, -84, 127)

            # Select white and invert to get all text
            pdb.gimp_image_select_color(img, 2, layer, "white")
            pdb.gimp_selection_invert(img)

            pdb.plug_in_sel2path(img, layer)
            file = svg.SVGFigure("%spx" % (2*width), "%spx" % (2*height))
            for path in img.vectors:
                svg_string = pdb.gimp_vectors_export_to_string(img, path)
                path_svg = svg.fromstring(svg_string)
                g = path_svg.getroot()
                g.root.getchildren()[0].set("fill", "black")
                g.root.getchildren()[0].set("stroke", "none")
                file.append(g)
            filename = "%ssvg" % img.filename[:-3]
            pdb.gimp_message("saving %s..." % filename)
            file.save(filename)
    except Exception as e:
        exc_type, exc_value, exc_traceback = sys.exc_info()
        pdb.gimp_message(traceback.format_exc())


register(
    "batch_export_floor_plan",
    "Batch Export TruPlace Floor Plan",
    "Exports TruePlace Floor Plans as a vector graphics",
    "John Allwine",
    "Open source (BSD 3-clause license)",
    "2017",
    "<Toolbox>/Export Floor Plan/Batch Export Floor Plan",
    "",
    [ (PF_DIRNAME, "input_path", "Input Path", "/Users/jallwine/work/AllwineDesigns/Blog/FloorPlans/FloorPlans")],

    [],
    batch_export_floor_plan)

main()
The script certainly isn't the fastest to run (a few seconds per image), but it gives us plenty of control over the process and is very fast compared to doing it manually! If you have any suggestions for improvement, let me know in the comments. If you like reading about projects like this, please consider signing up for my newsletter using the subscribe button below.