

A couple years ago I designed a custom gear shifter knob for my VW golf. I first printed it on my MakerBot and drove around with it until it broke.

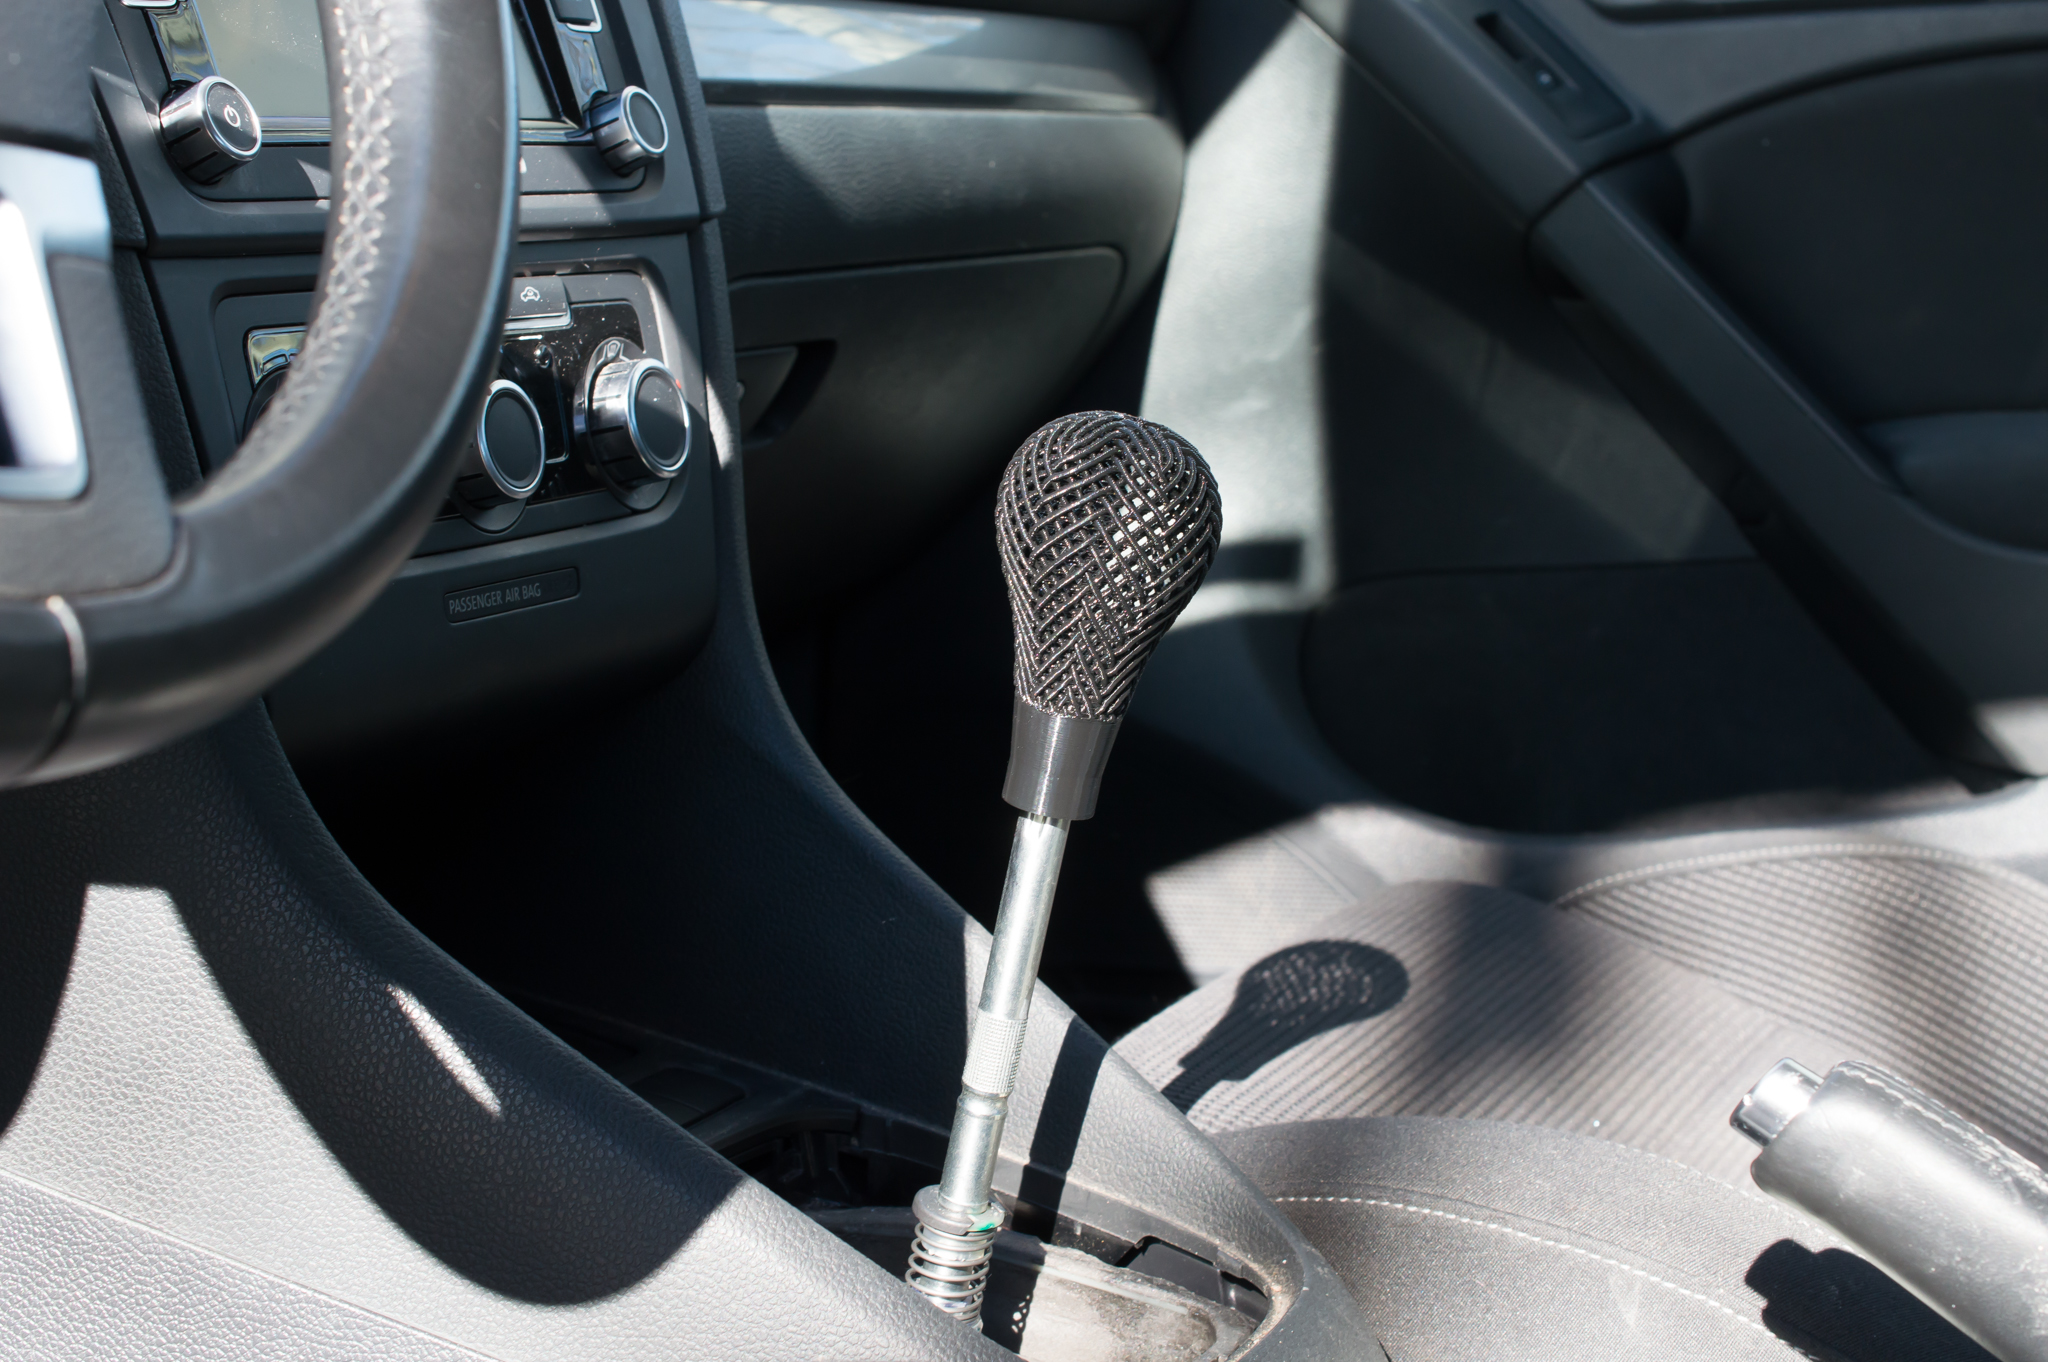

After it broke I decided to have it 3D printed by Shapeways in stainless steel. The manufacturing process involves laying down layers of steel powder with glue deposited where it should be solid. After being glued together the loose powder is removed, and the piece is infused with bronze to replace the glue. It comes out as a very strong, 3D printed steel product. Here's what it looks like:

My VW golf had an odd way of attaching its shifter knob. I expected that it was attached by screwing it onto a threaded shaft, but that isn't the case. Instead the shifter rod was straight with semi circular shape. The knob fit around the semi circular shape which prevented it from rotating. There was also a knurled surface on the shaft where a crimp ring clamped the knob to the shifter.
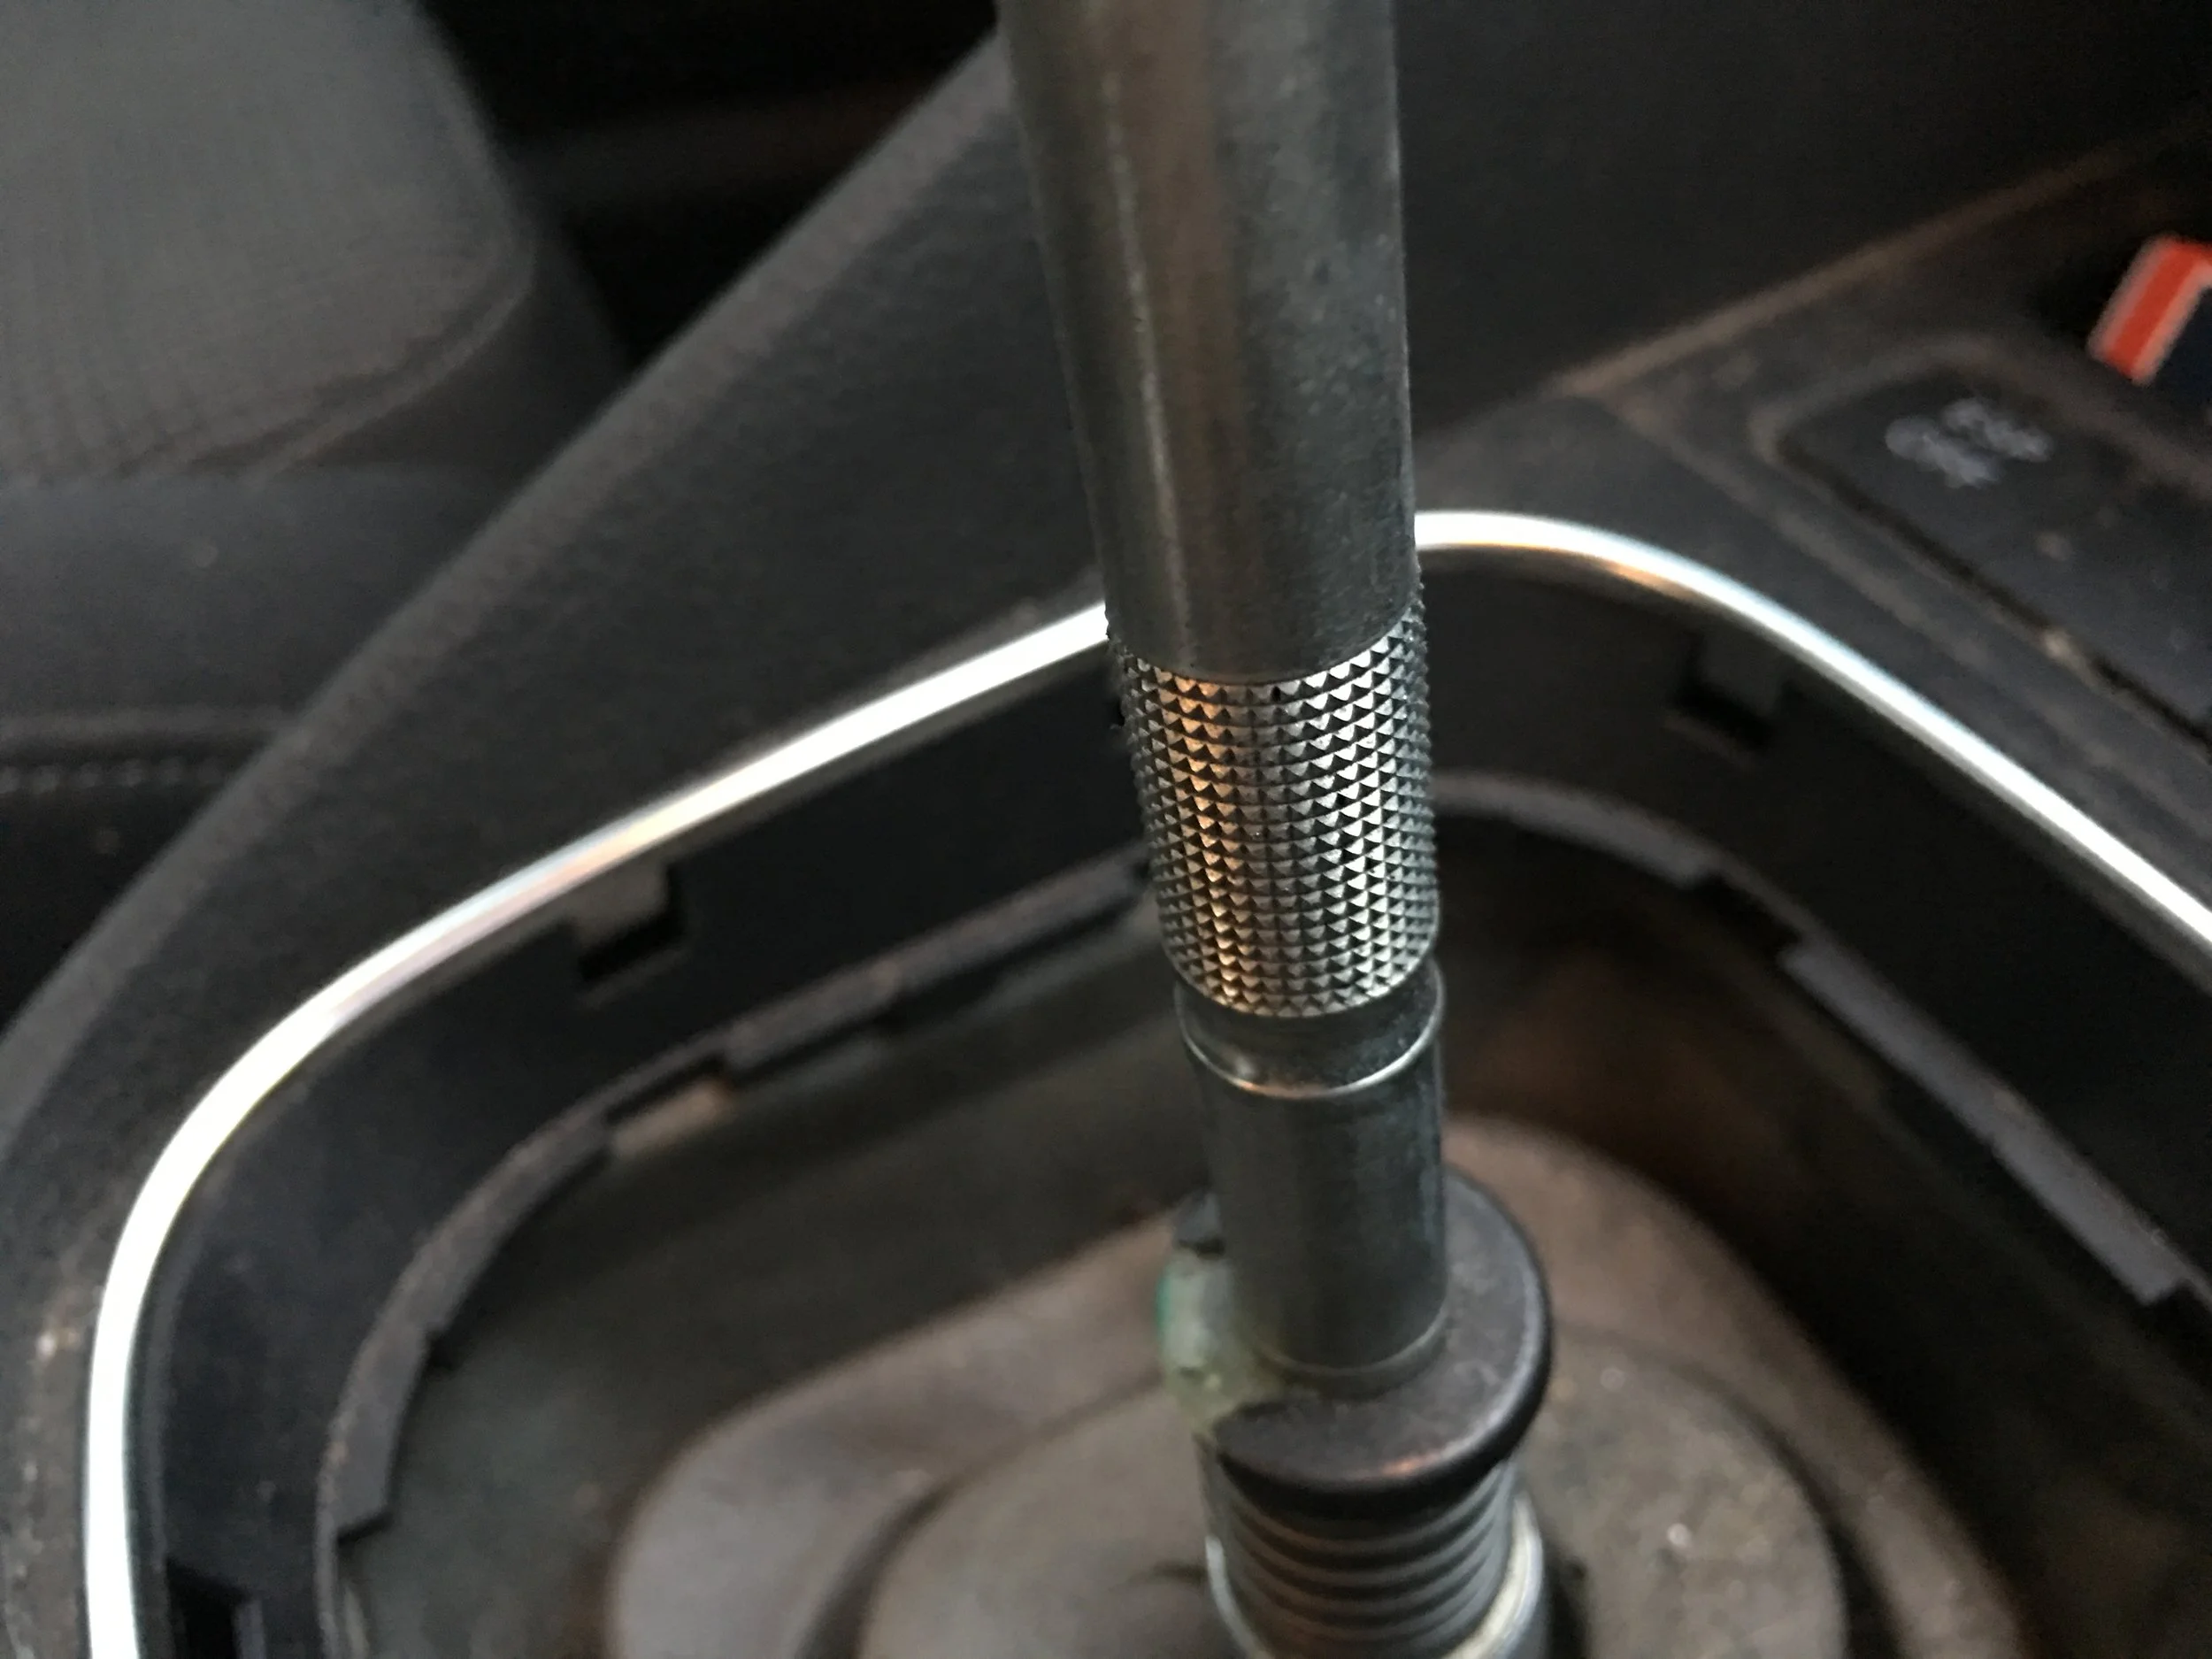
Knurled portion of my gear shifter.
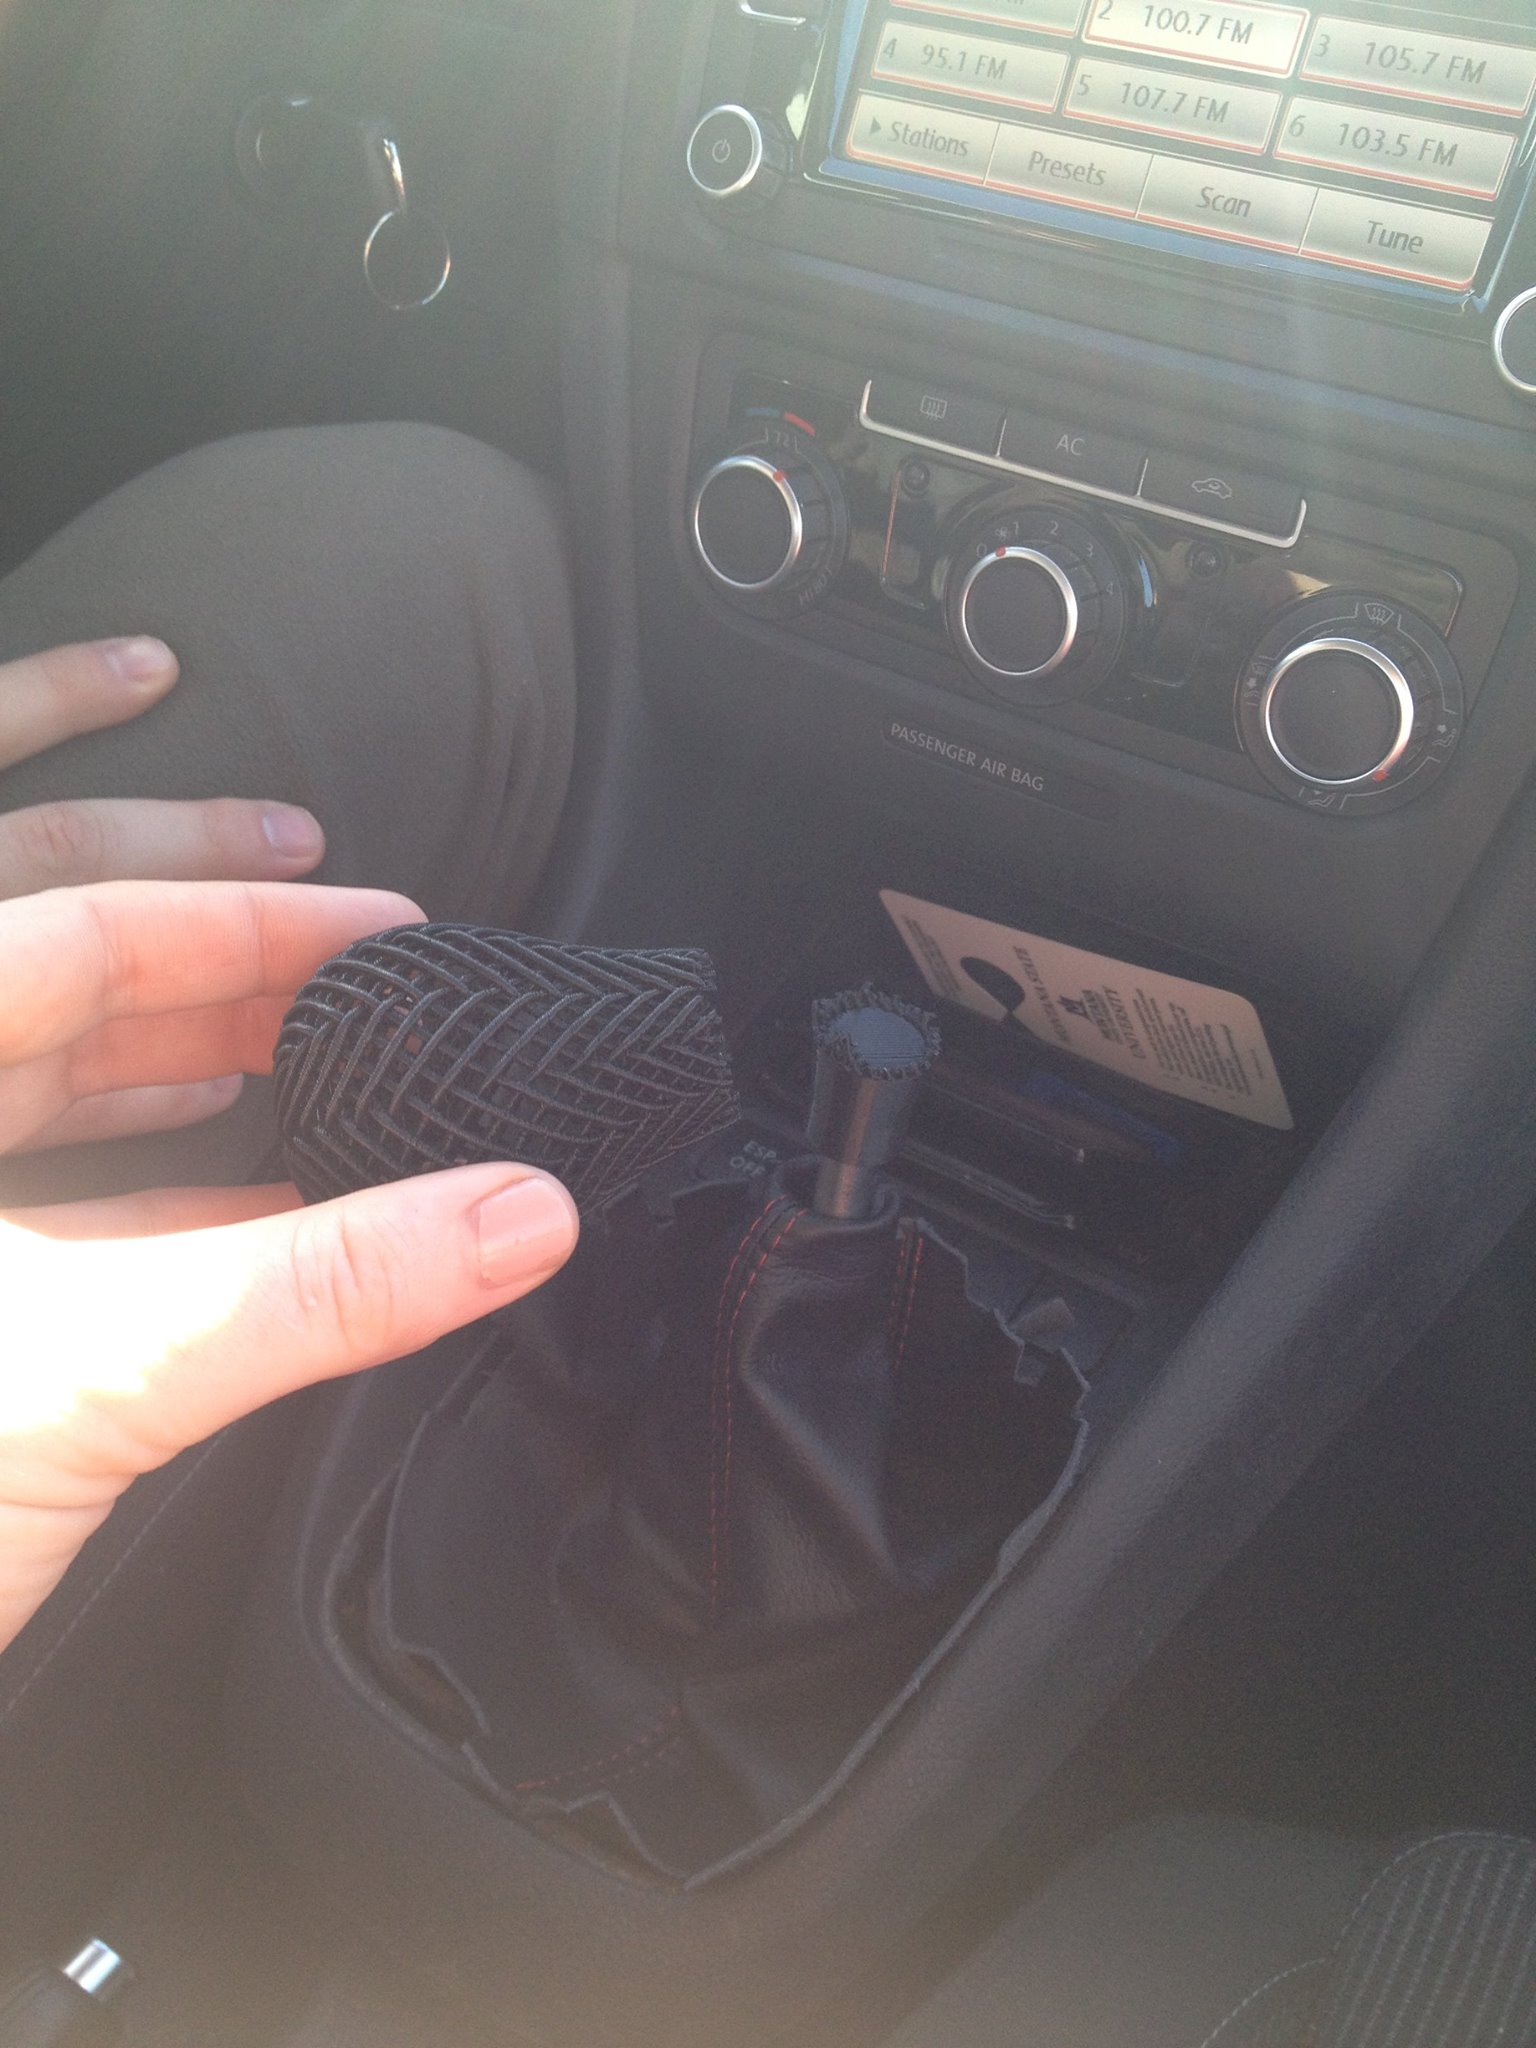
I ended up creating my own connector scheme, which involved hollowing out part of the base of the knob and 3D printing a piece that fit up into it and permanently clip in. I then clamped the 3D printed part to the shifter like the original VW one was. It worked for a while, but the 3D printed part just didn't hold up well because it had to be really thin to fit in the small base of the shifter. I read about someone having success chasing 1/2" threads onto the semi circular shaft. I decided that would be a better approach. I purchased a tap and die set, but didn't get any further until recently.
About a year ago, an engineer from a high end 3D printing company contacted me. He had seen my shifter and wanted to make one himself on his company's DMLS (direct metal laser sintering) printer when there was room for it in one of their print jobs. 3D printing takes a long time so companies want to maximize how many products are printed in a single job. Sometimes there is extra room, so something can be placed in the job without too much overhead. The engineer wanted me to send him the model of my gear shifter knob, so he could include it in one of their 3D printed titanium print jobs. I proposed that in exchange for the model he would also make one for me. He agreed, and I sent him over the model of the gear shifter knob with threads included in the base instead of the connector scheme I had previously made. Over the past year he checked in with me a couple times about print failures and other delays, but the other day this arrived in the mail:
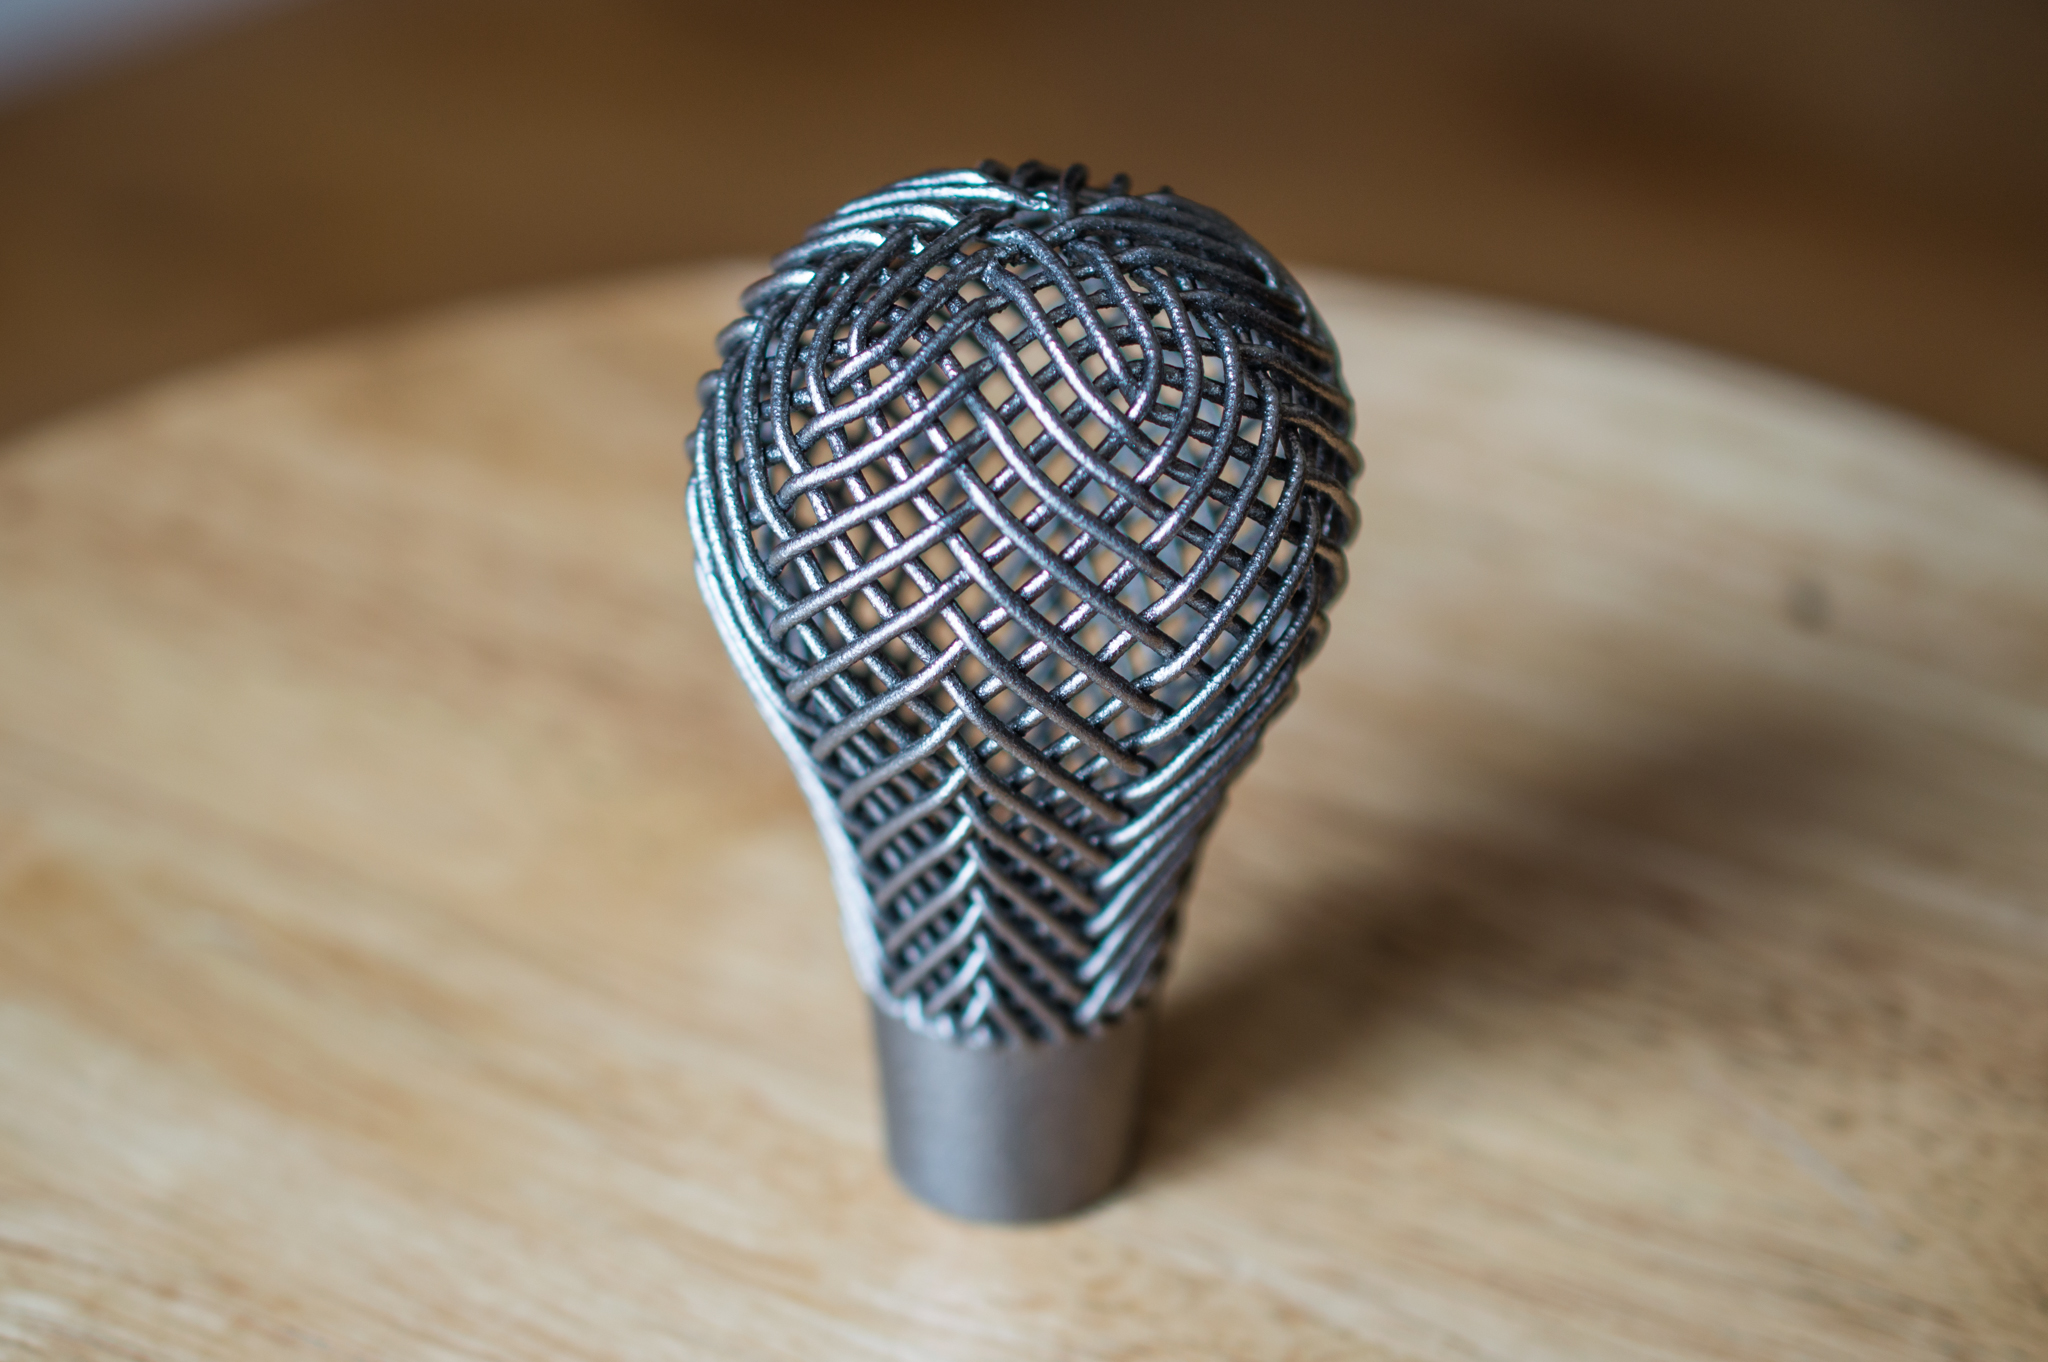
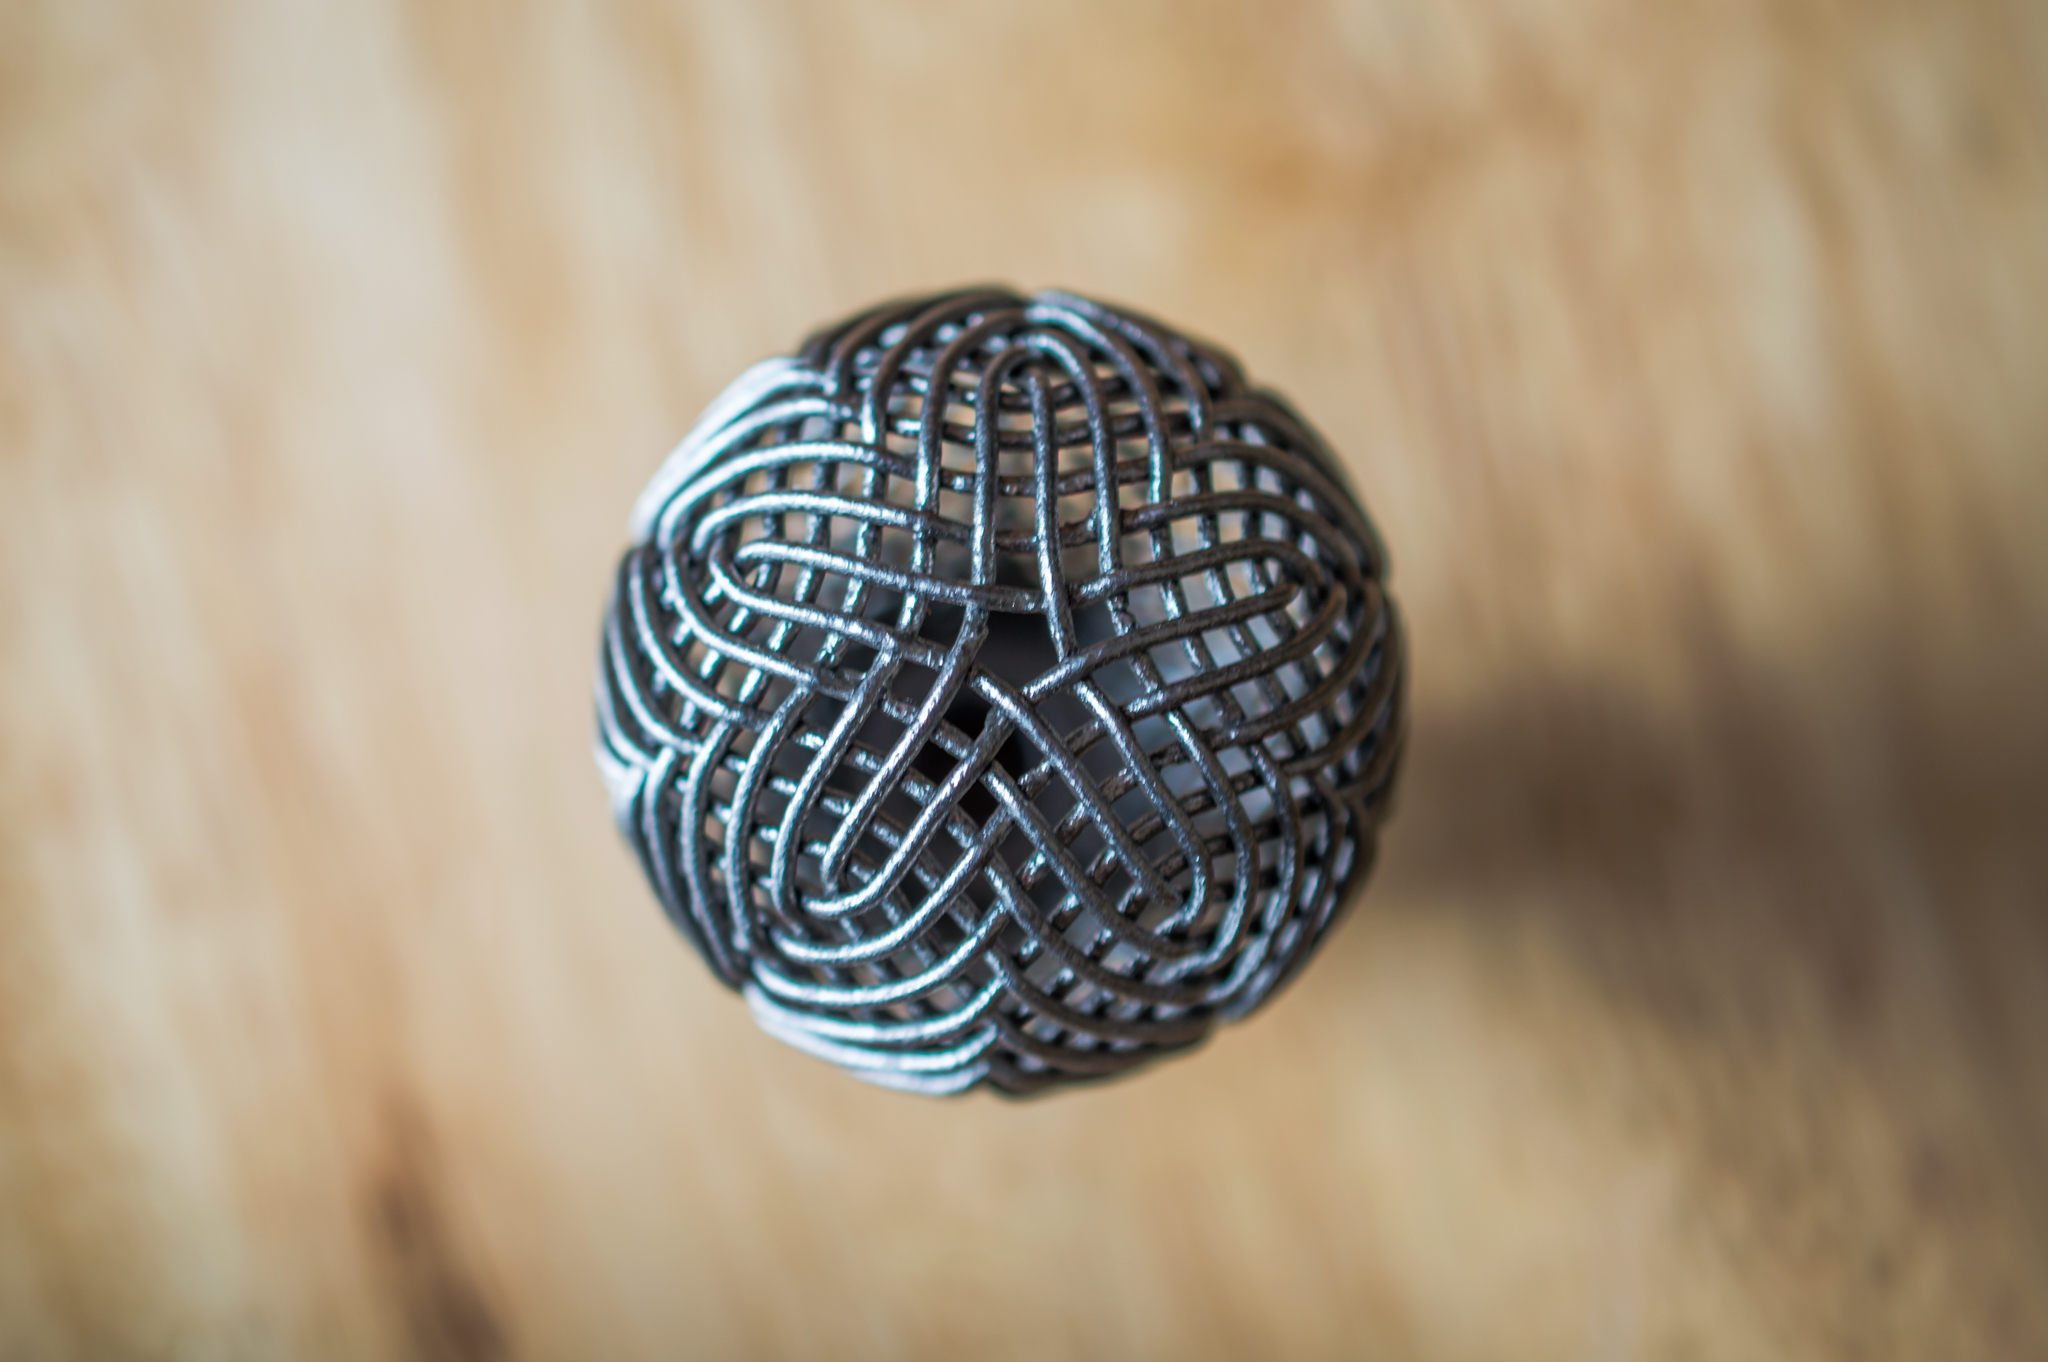
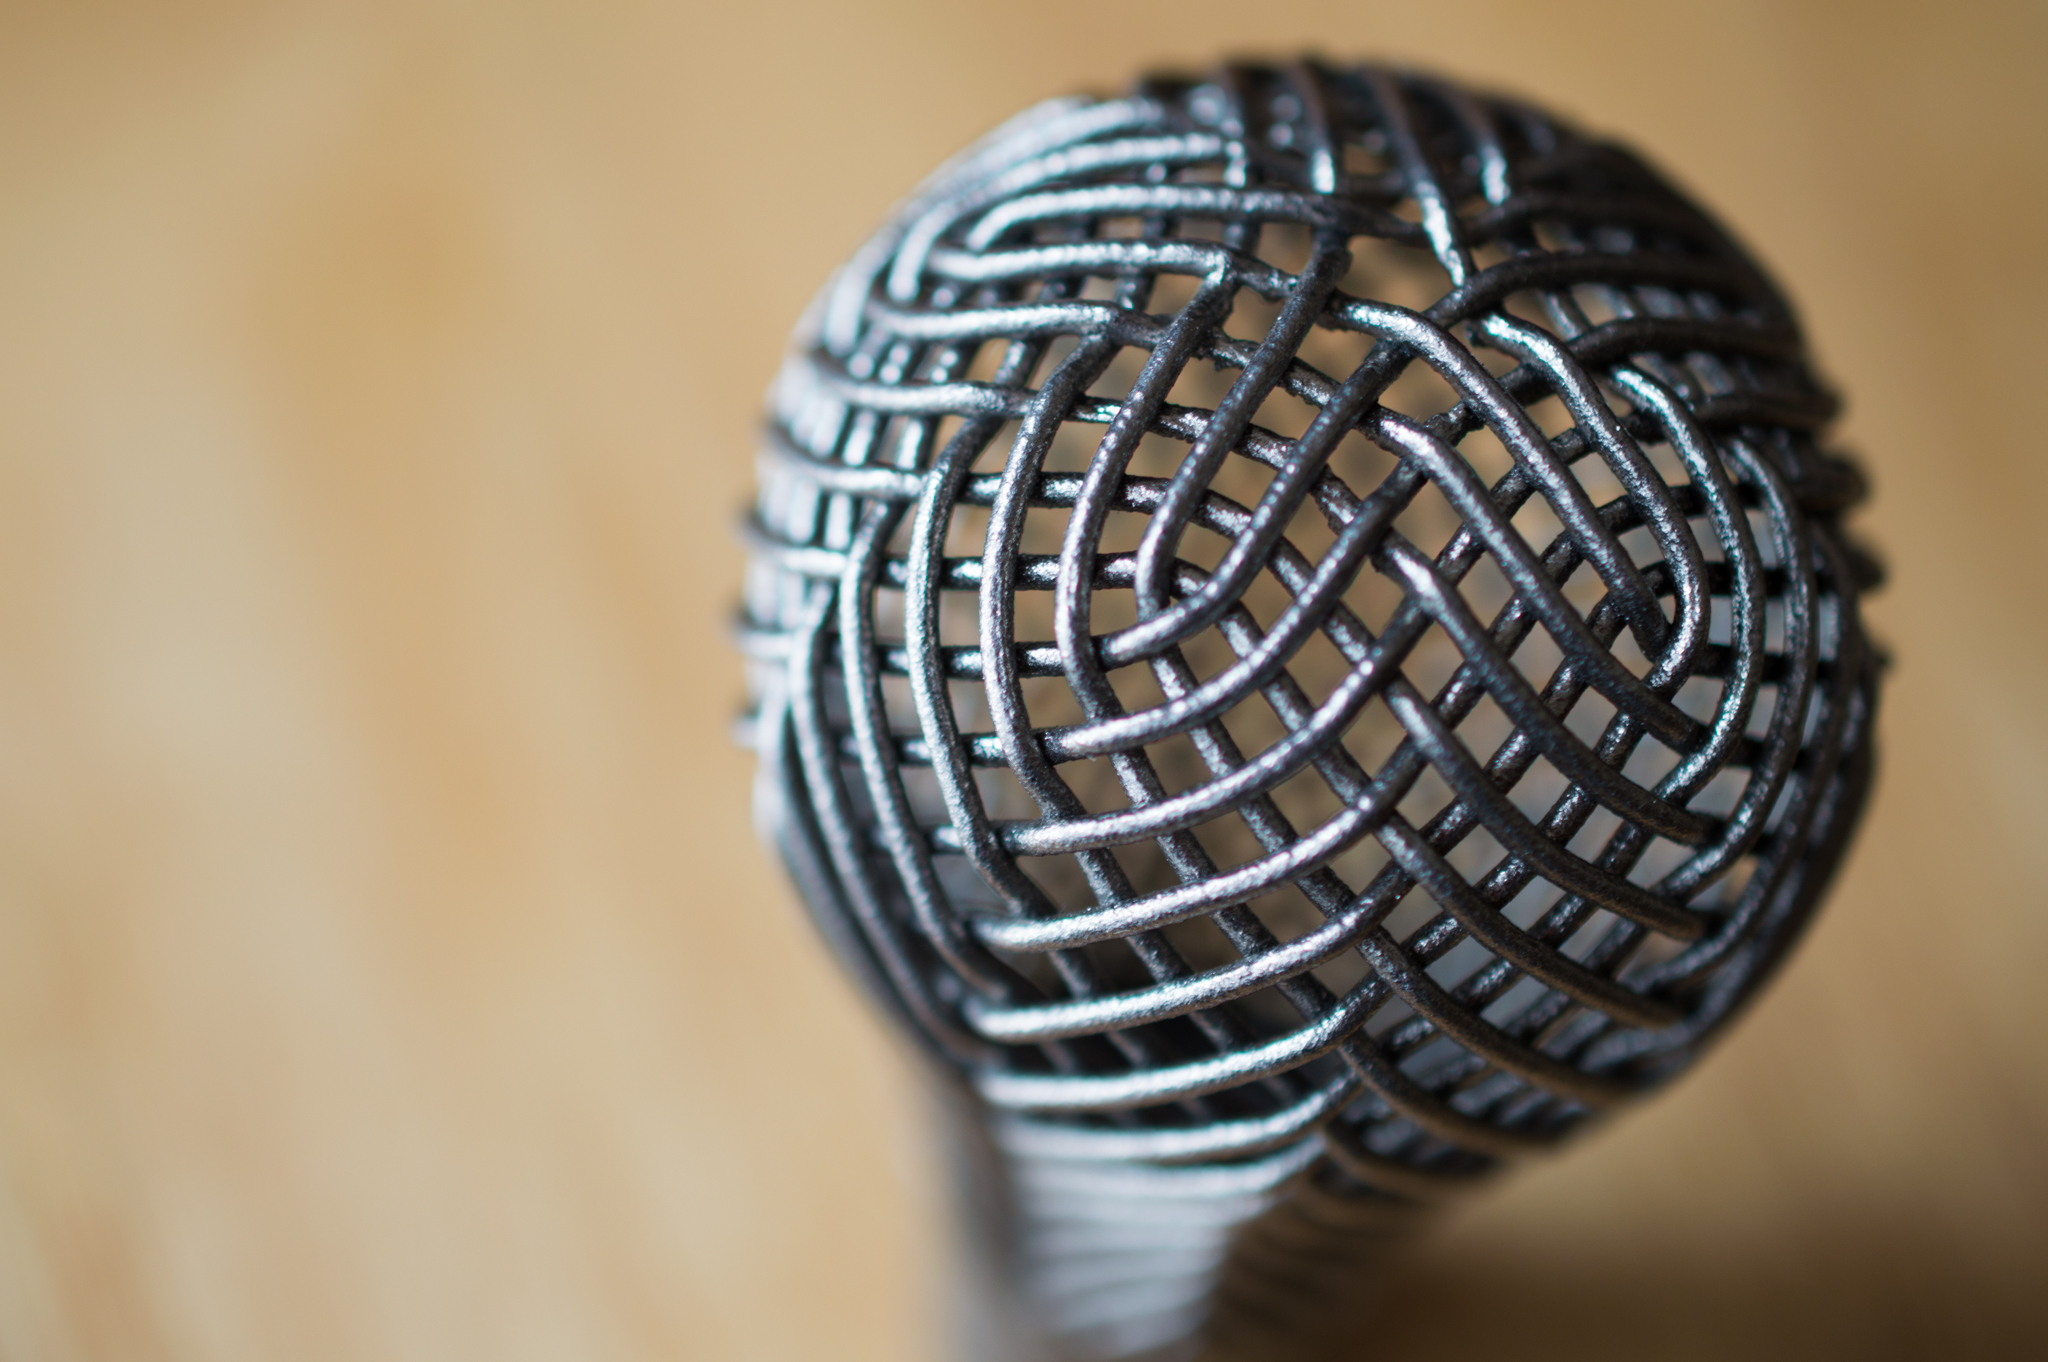
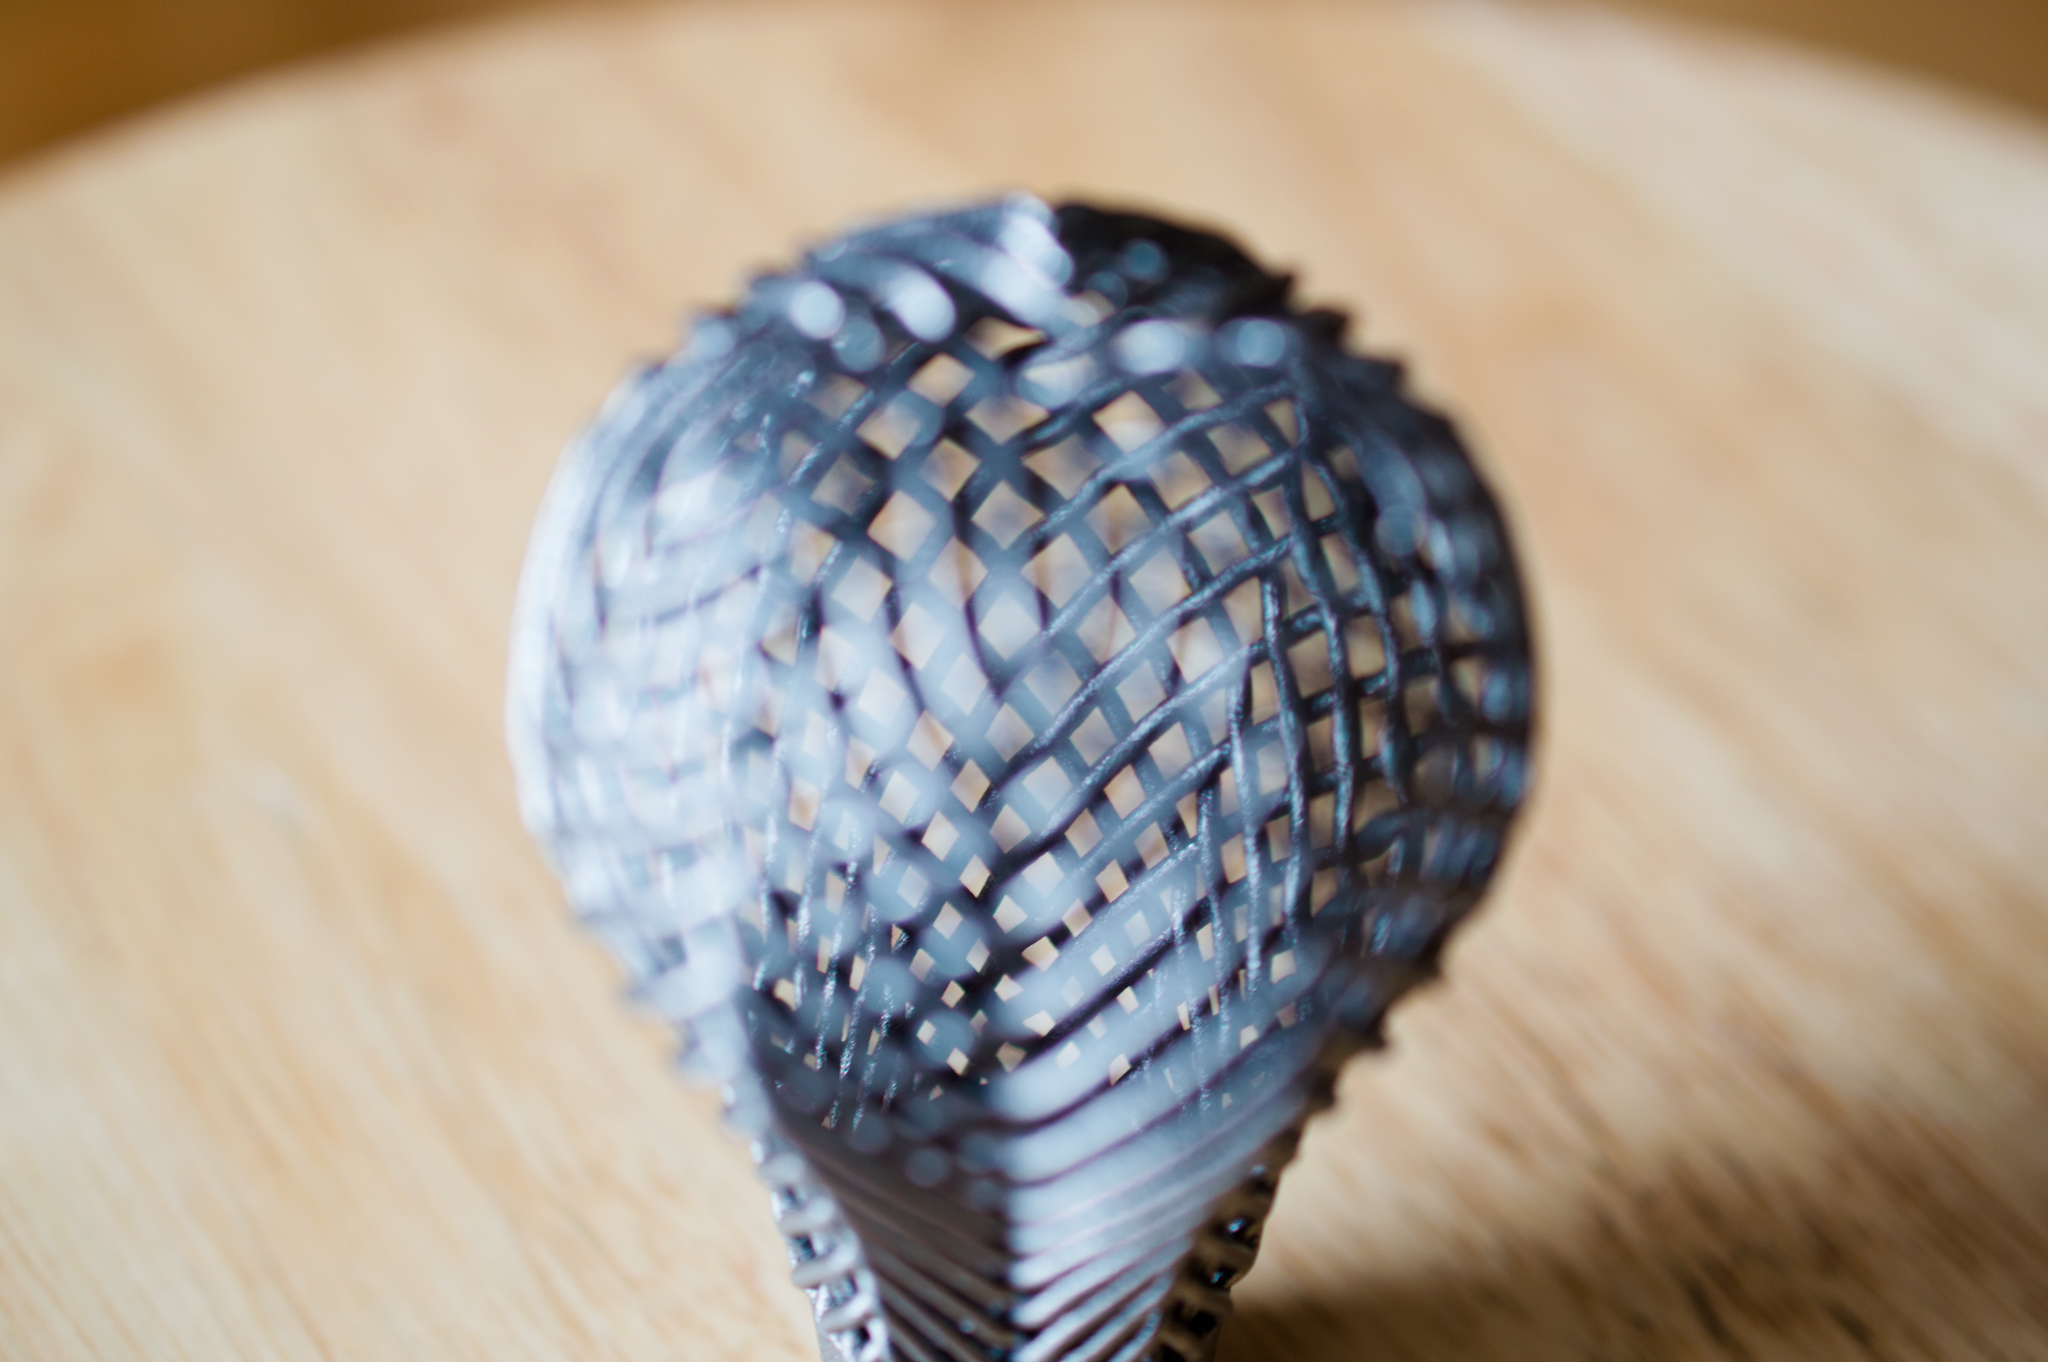
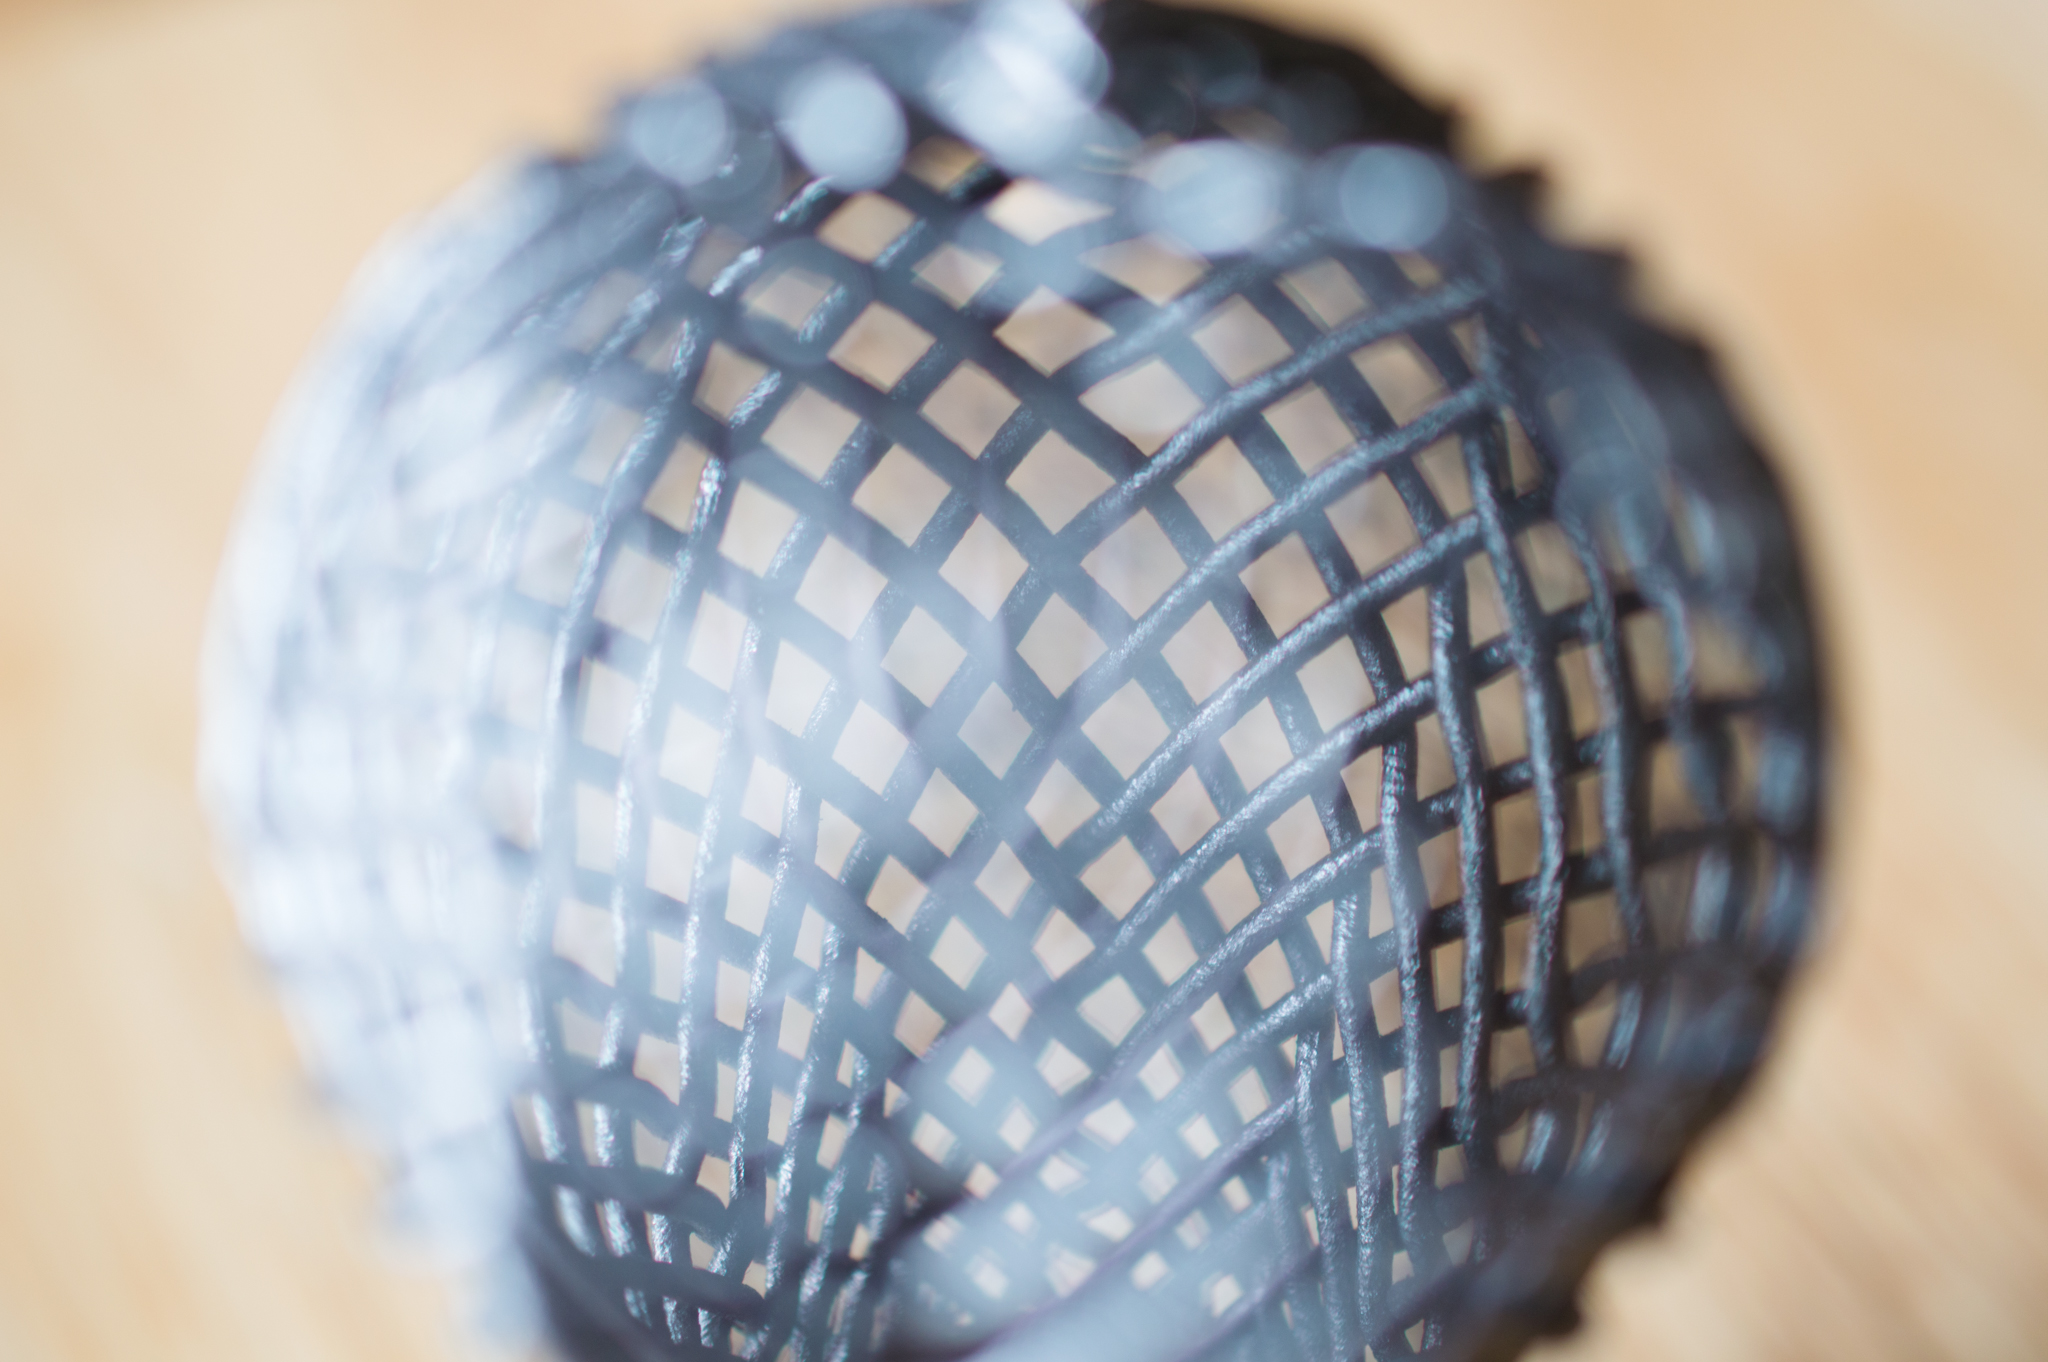
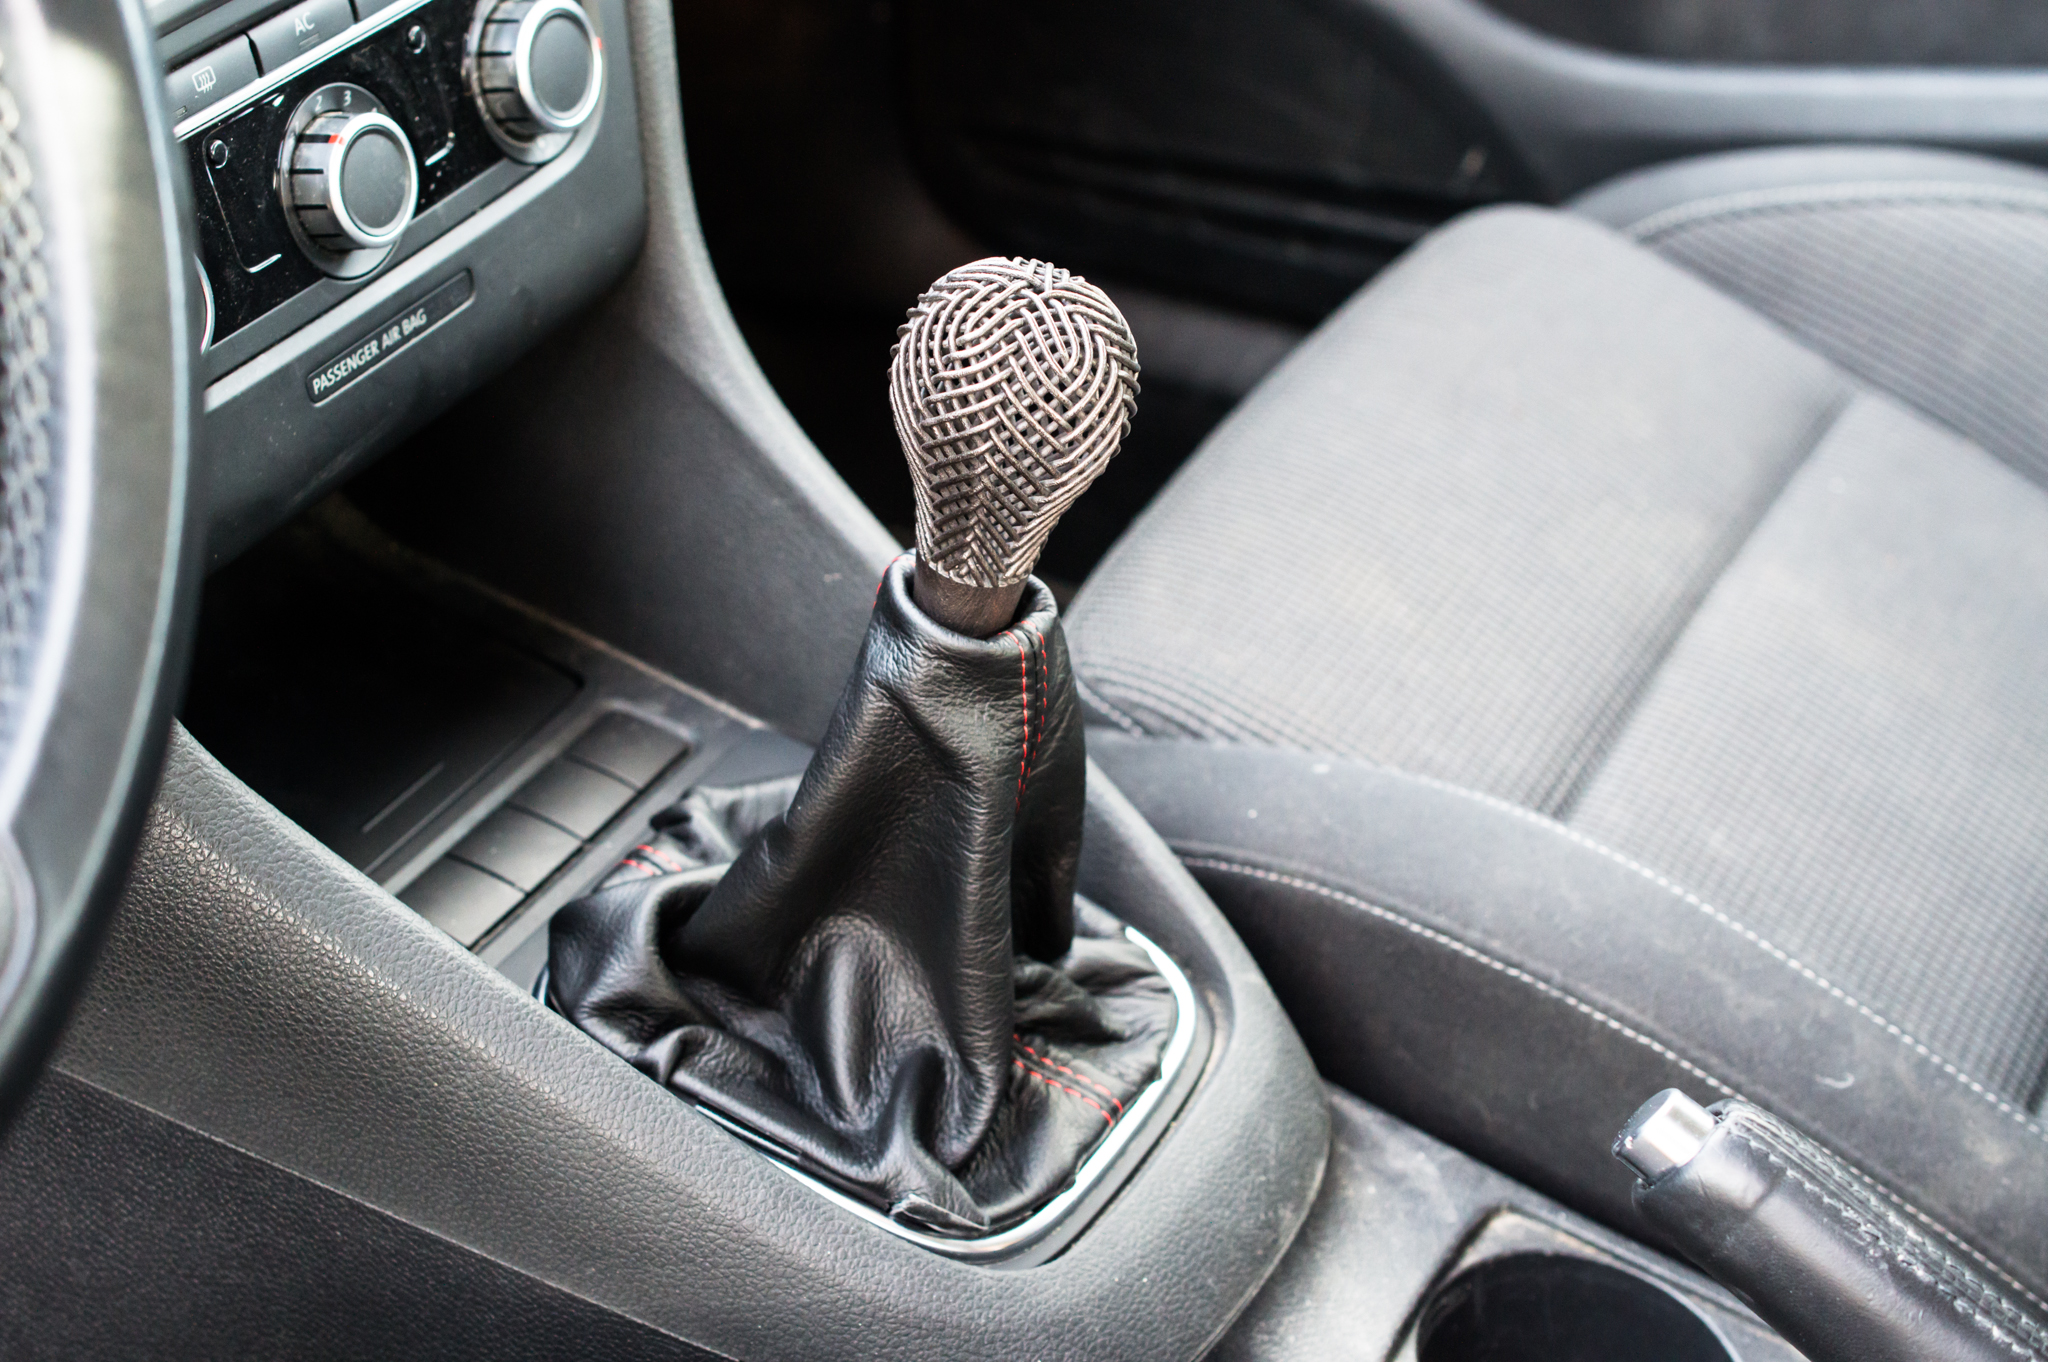
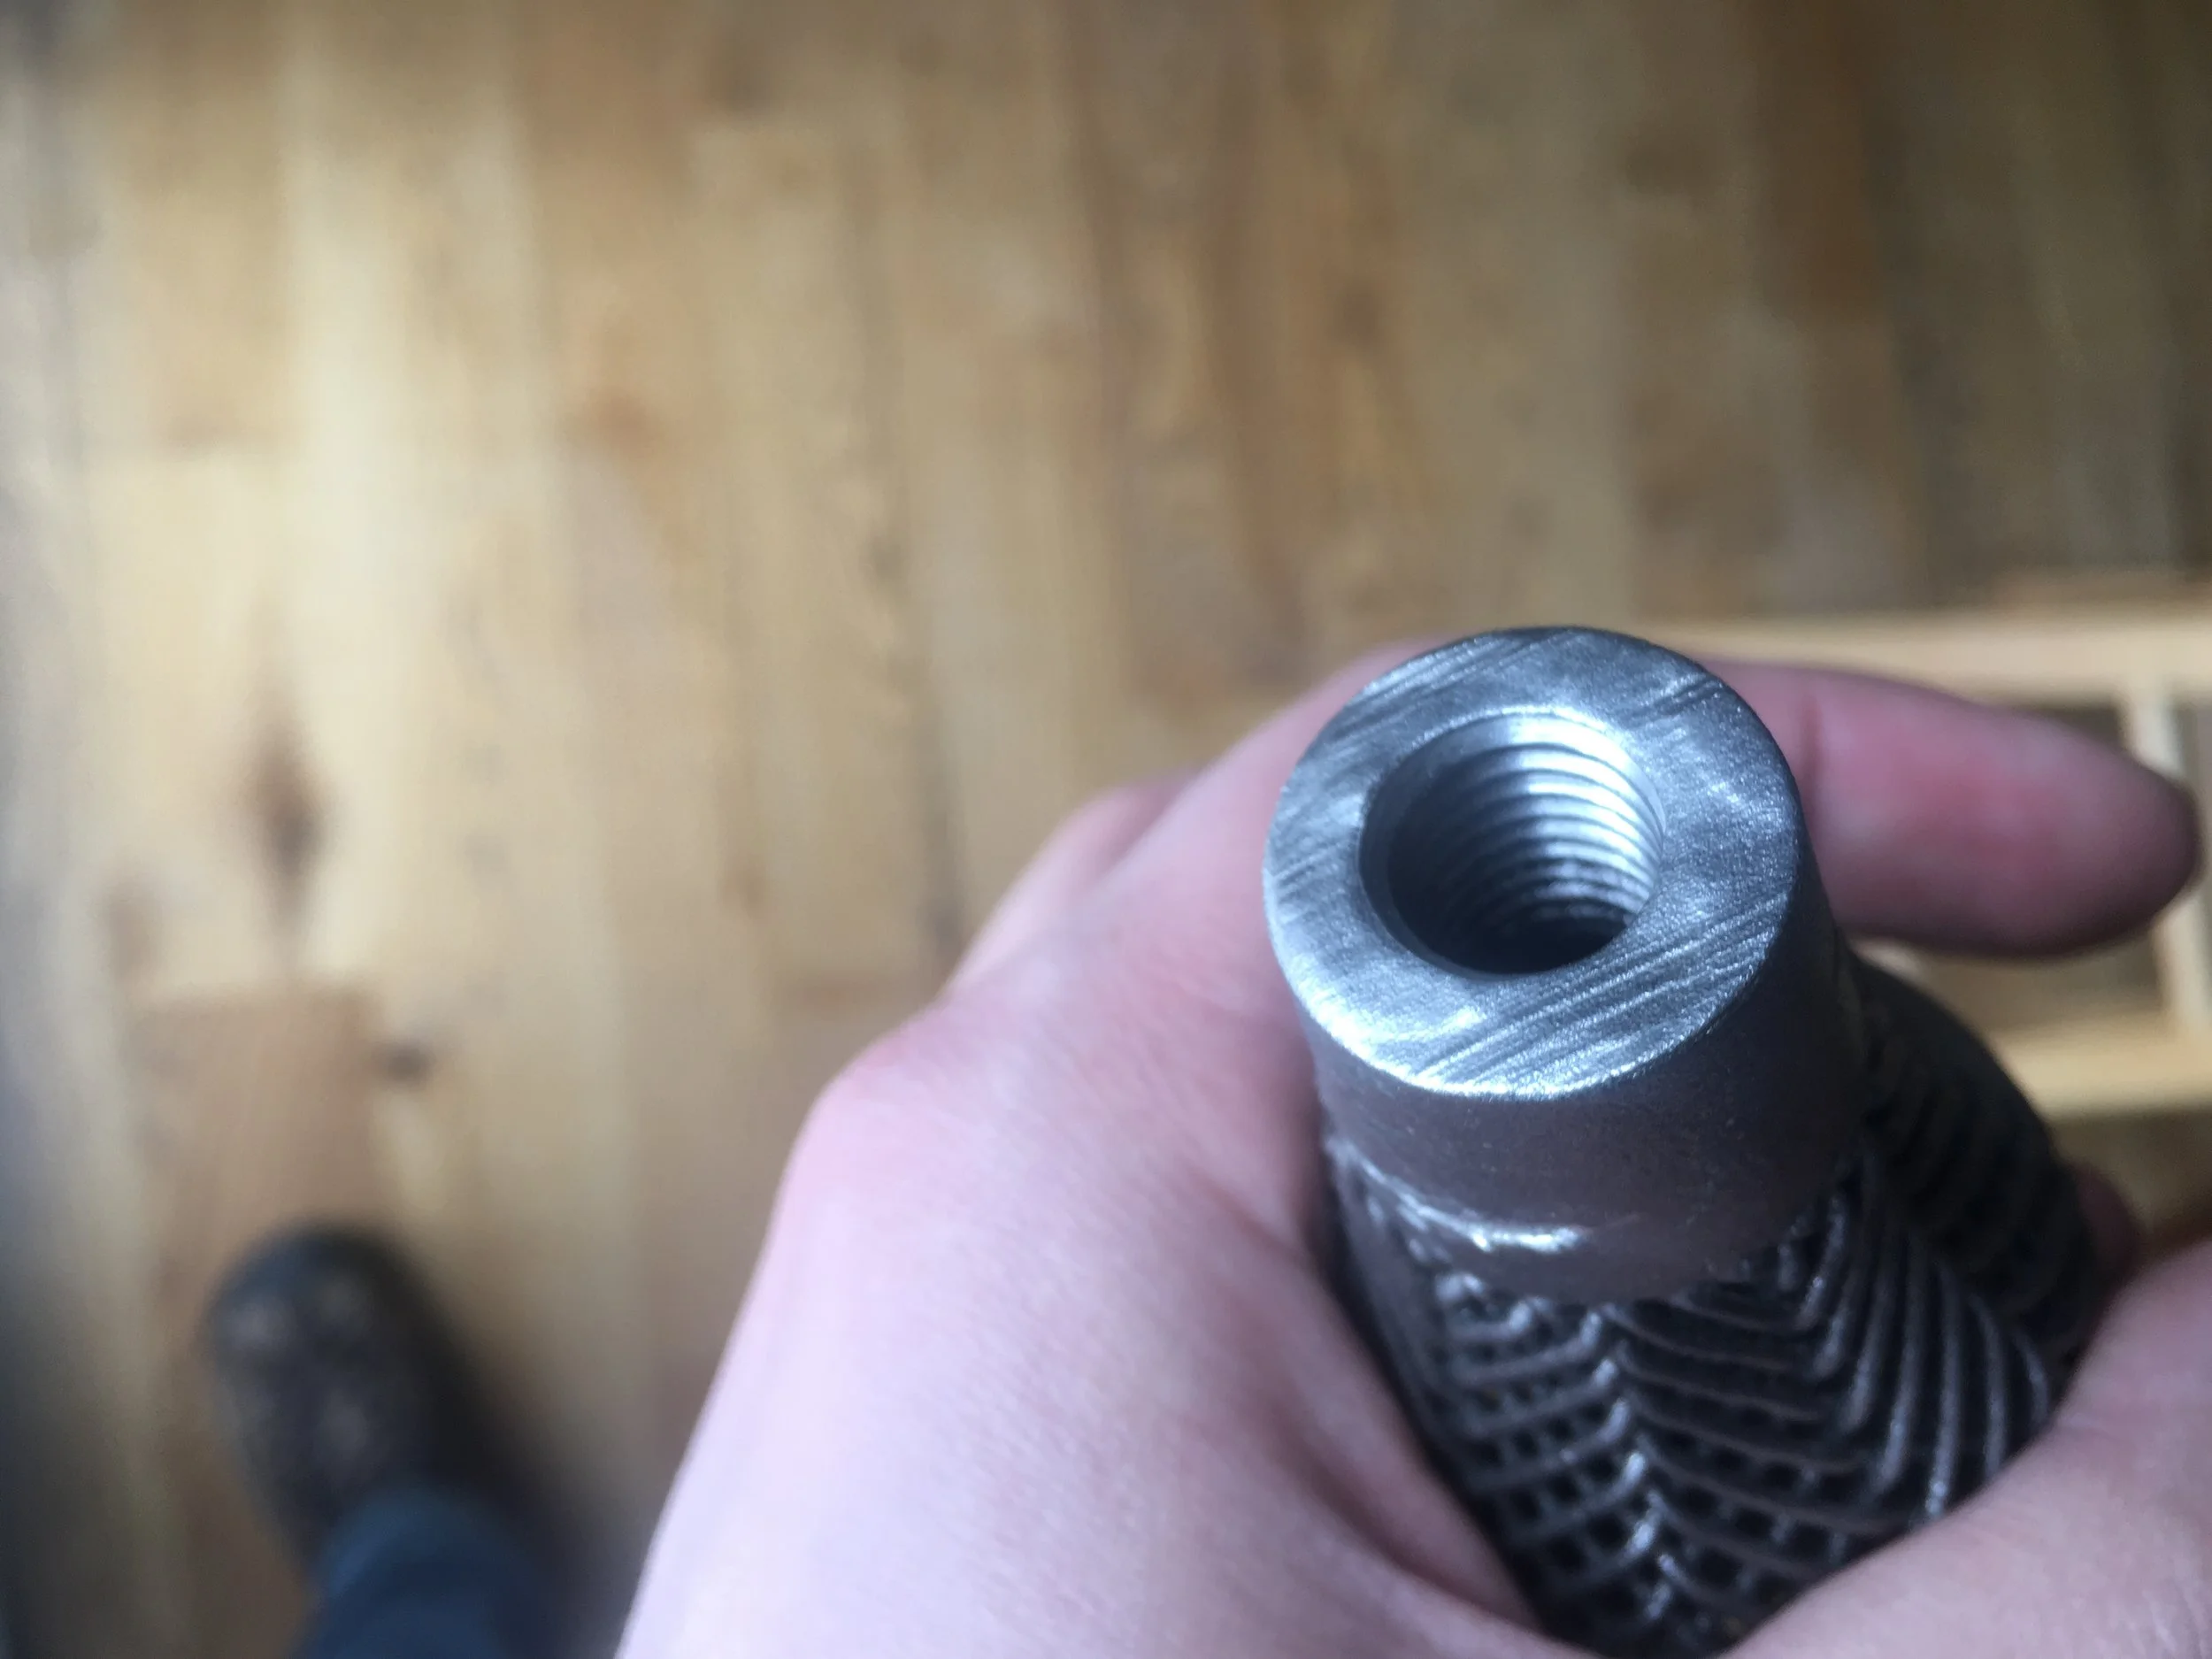
A gear shifter knob made out of titanium!! The threads were printed in the base, but I still had to tap them to get clean threads. I hoped it wouldn't be too bad considering the threads were mostly shaped. There was just a little extra material due to the tolerances of 3D printing. Have you ever tapped titanium? I sure hadn't. I did have a tap, though. The engineer recommended I use tapping oil. I wasn't sure what that was, but I had some lube for my 3D printer so I just used that. Next time I'll probably pick up some tapping oil.
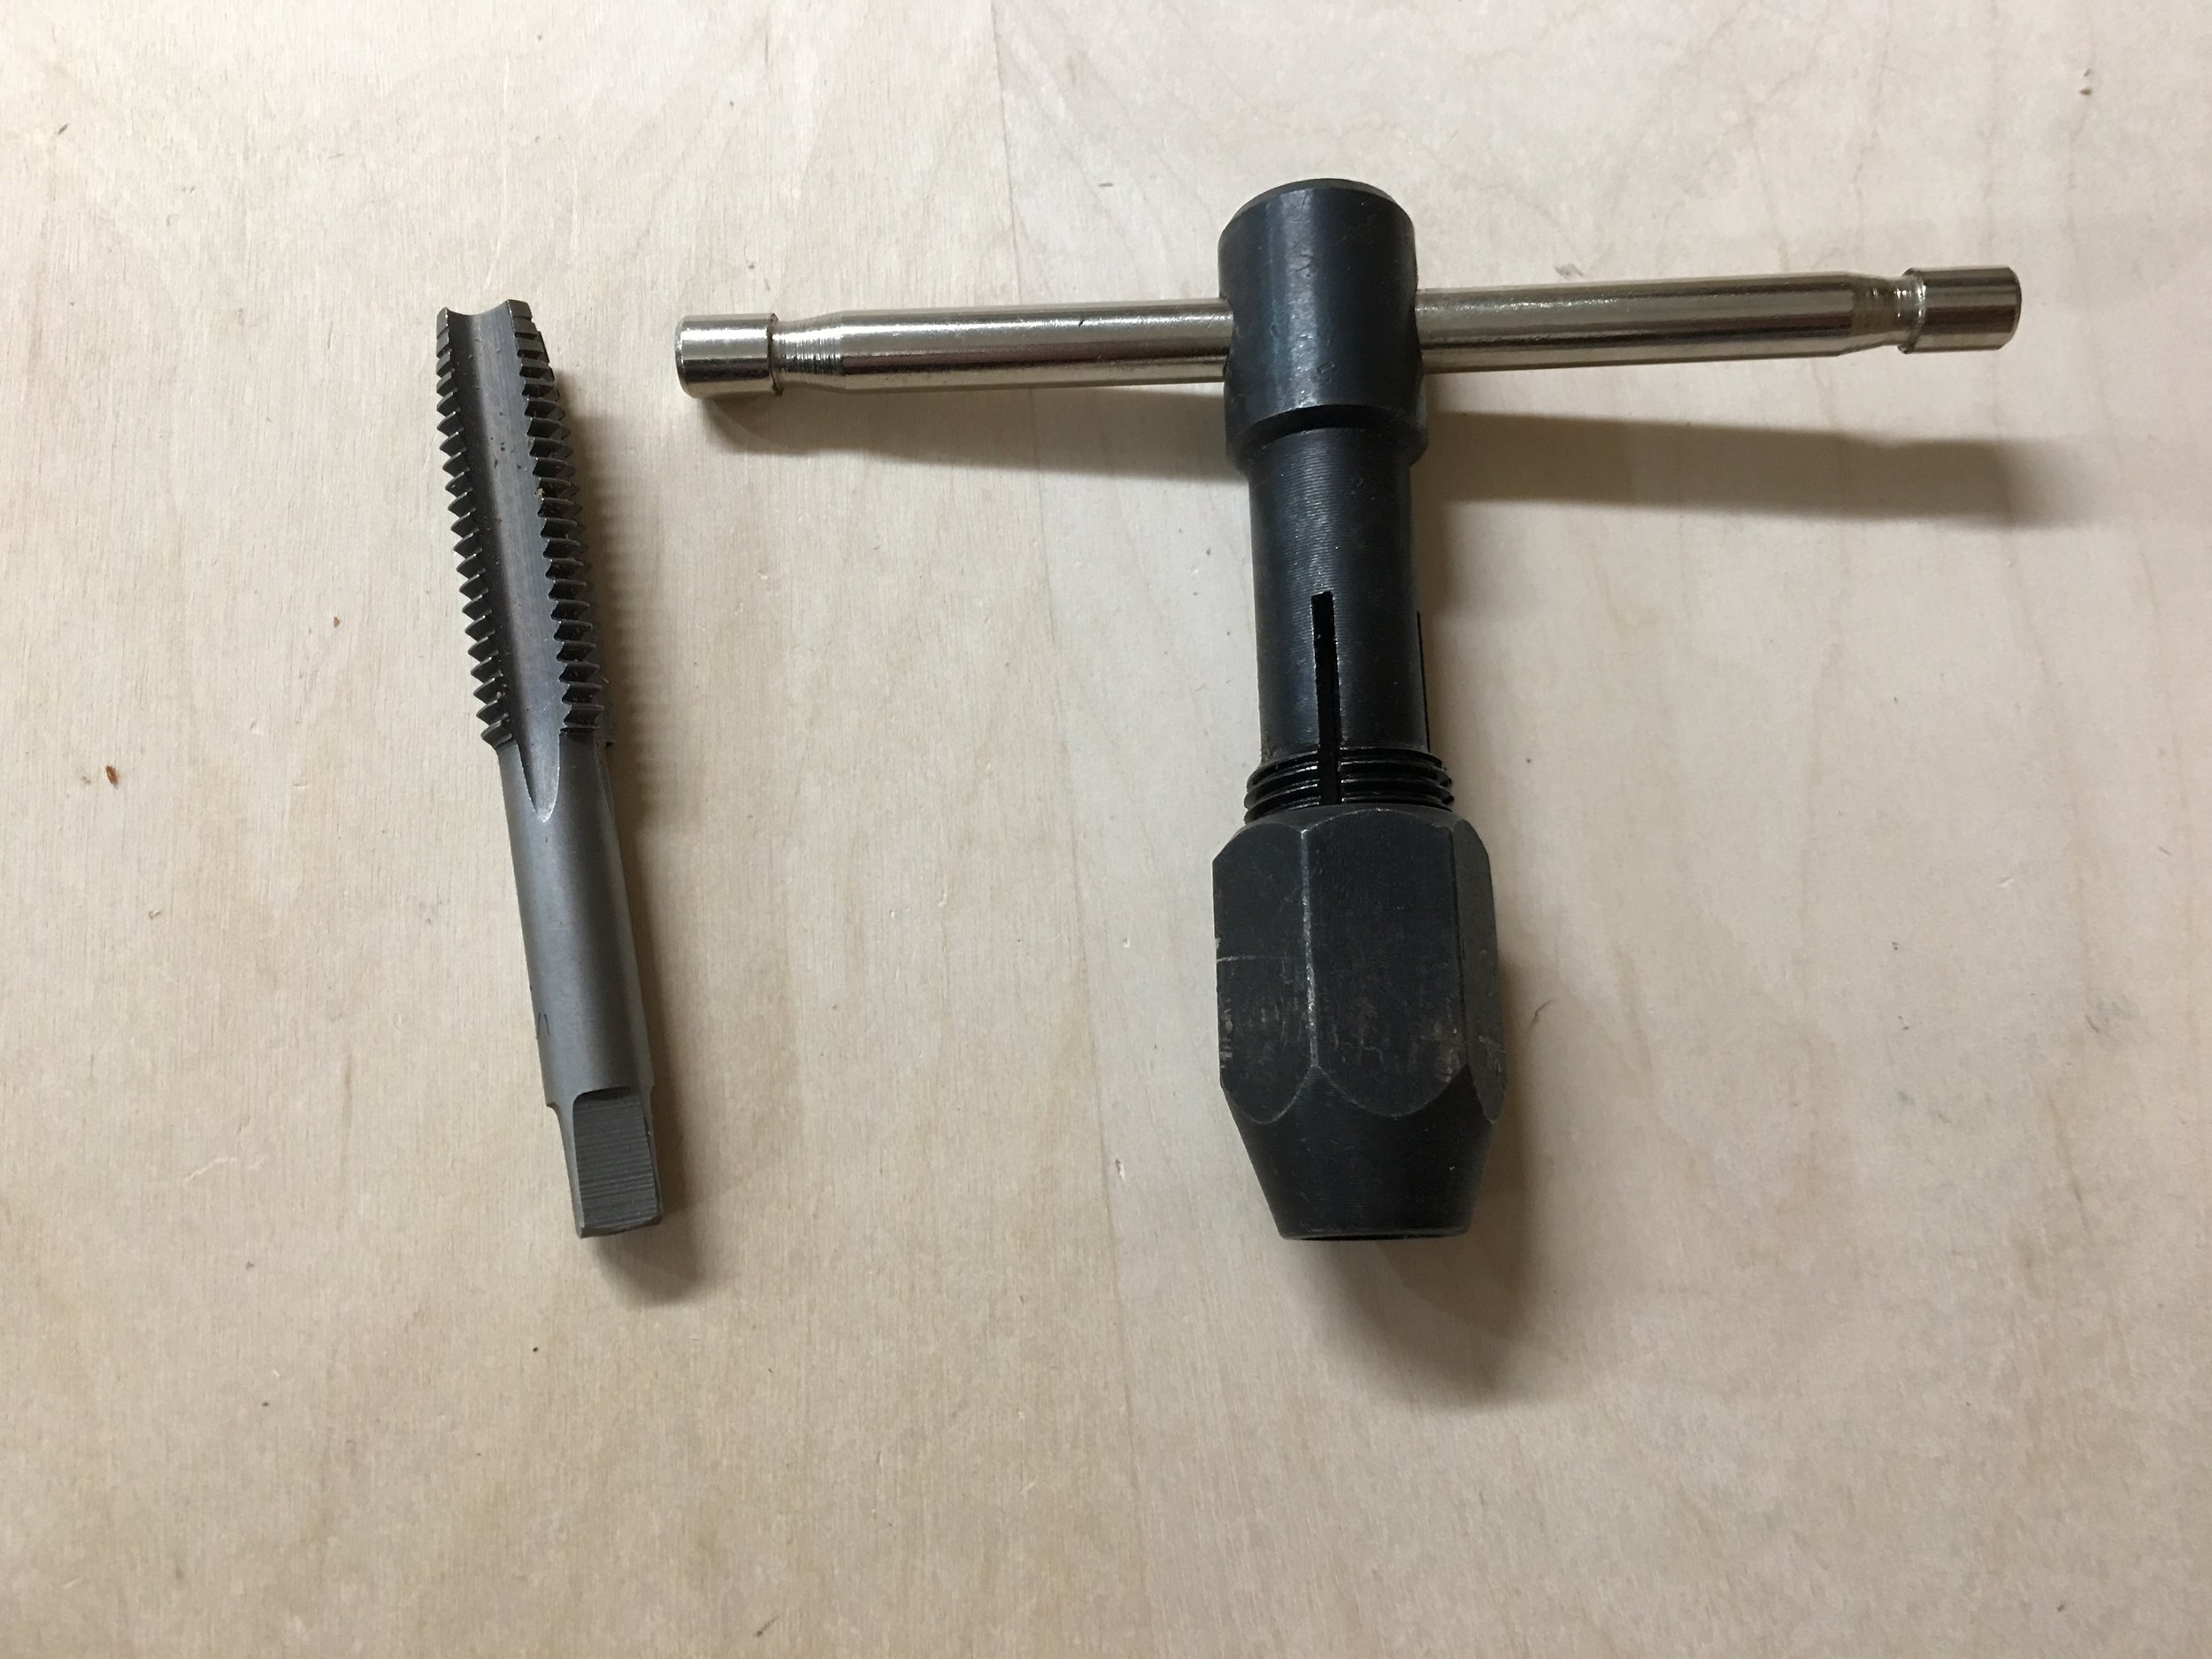
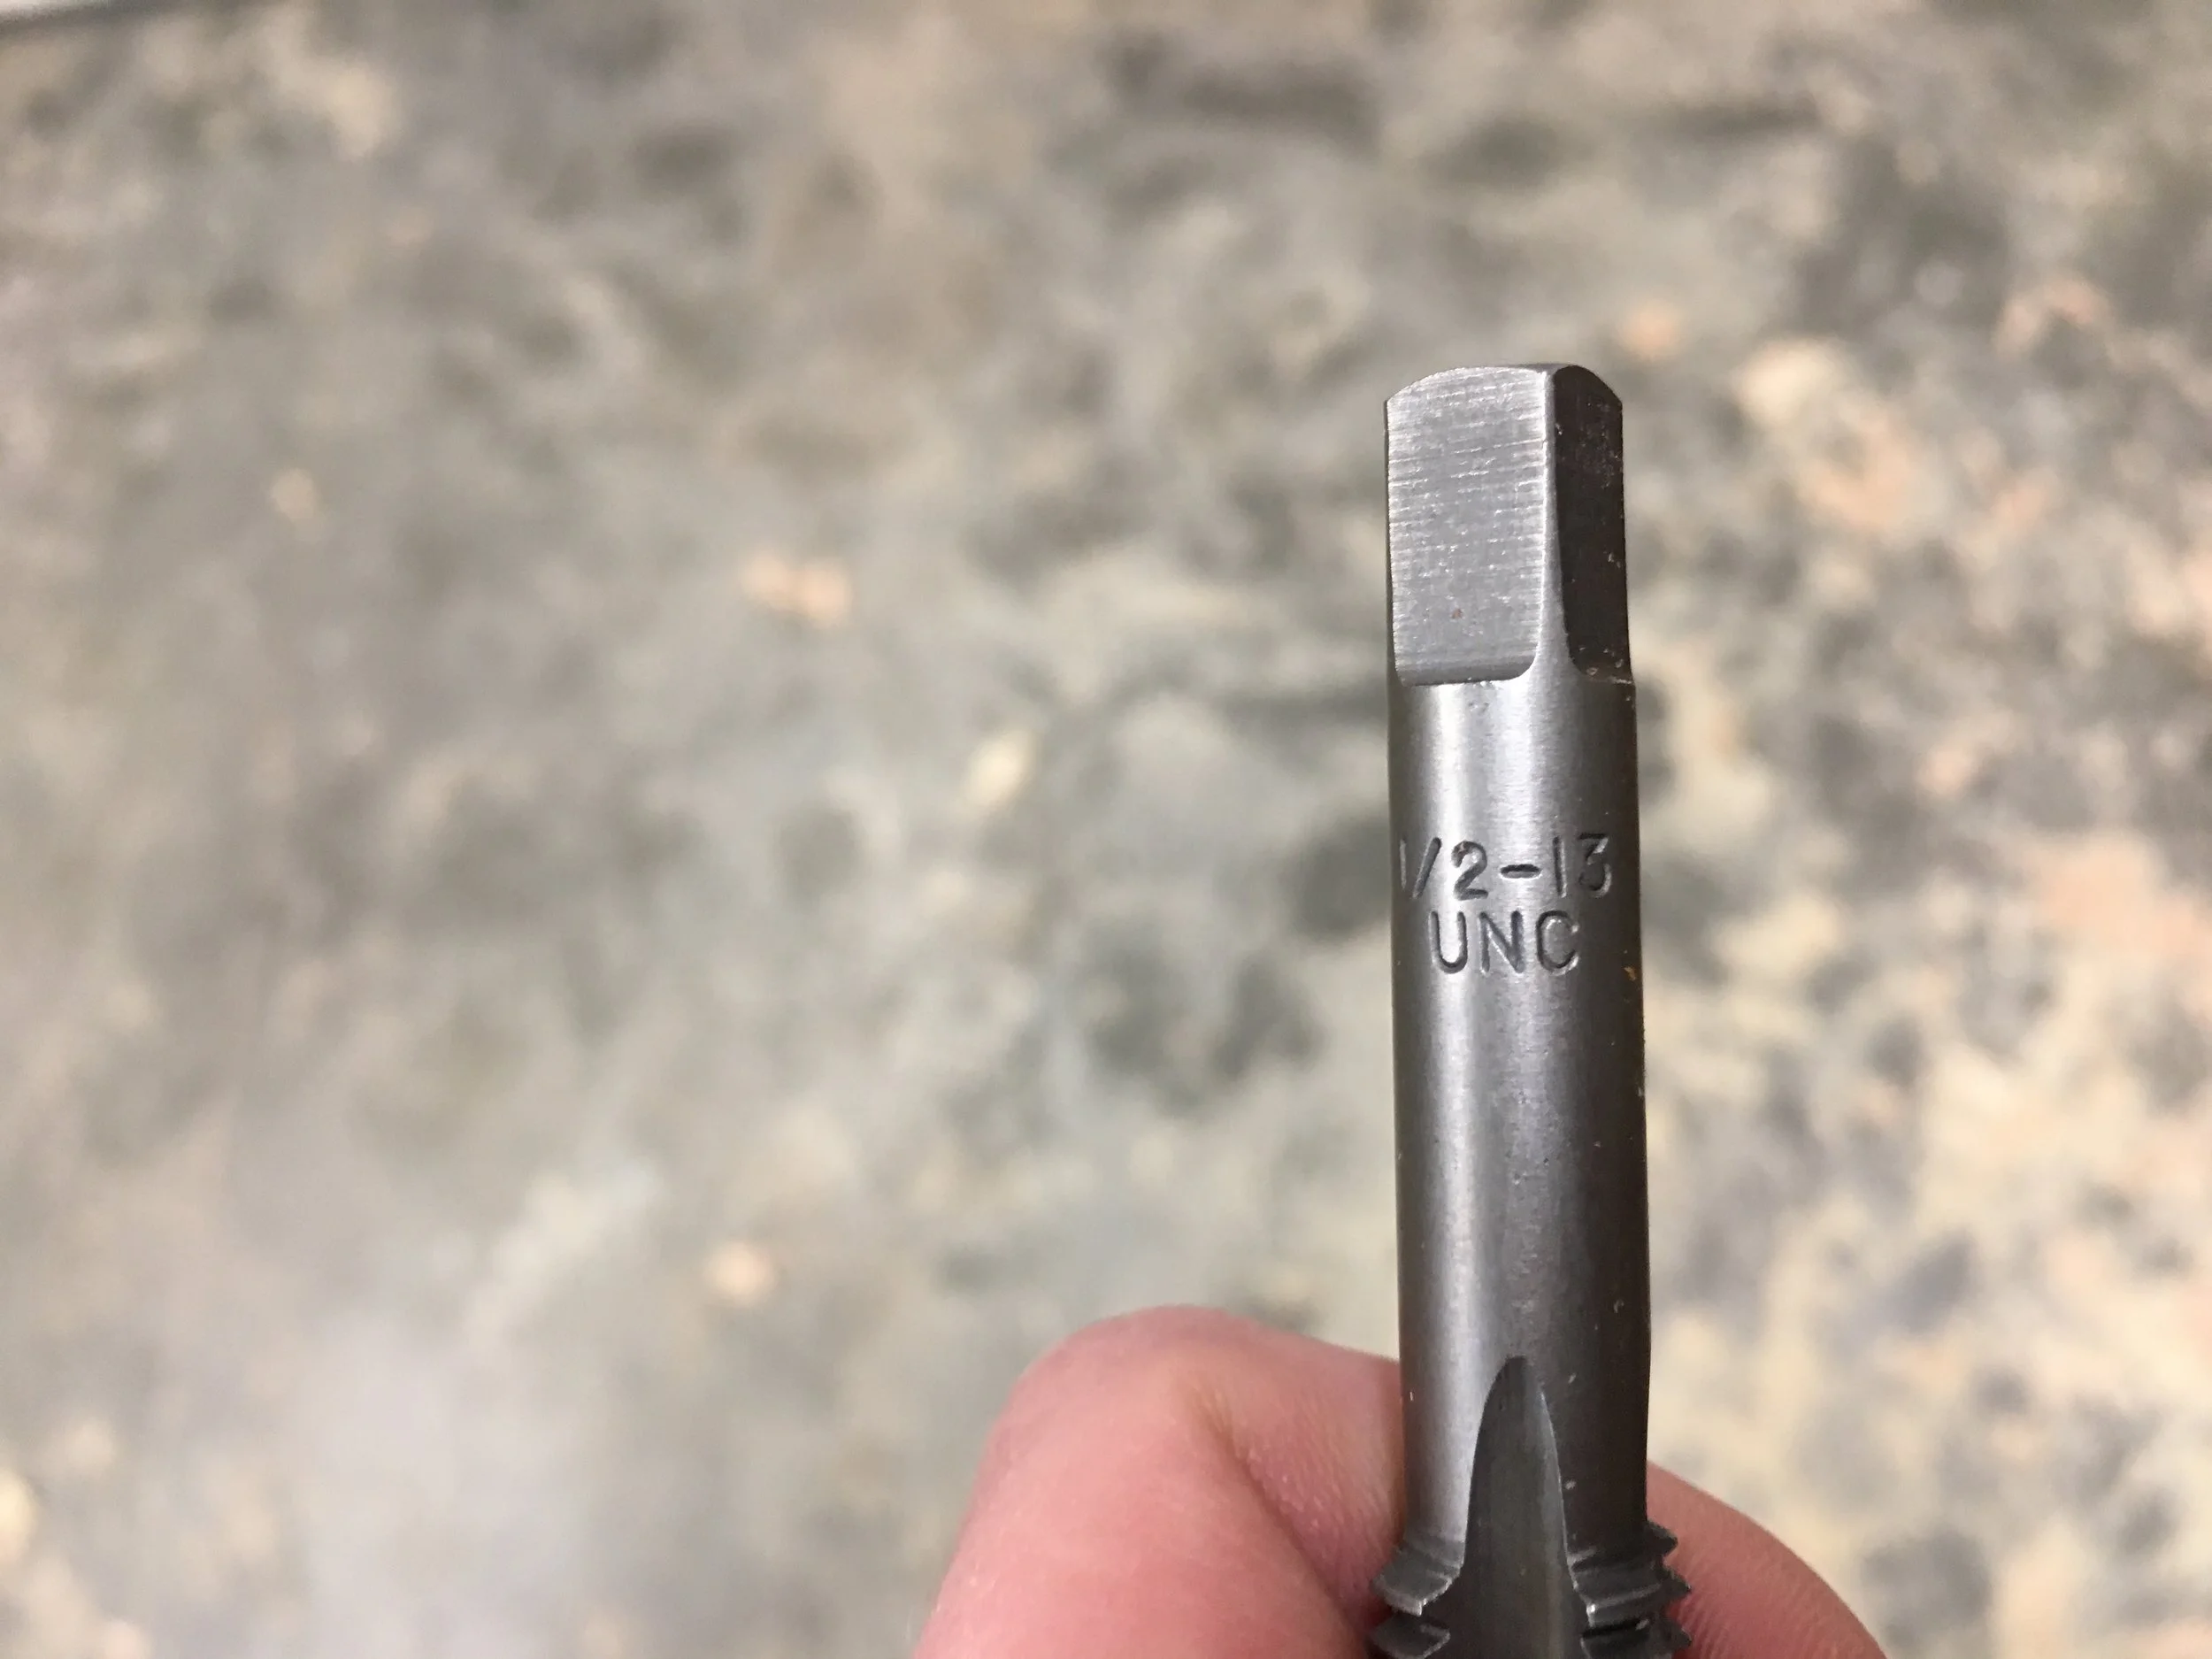
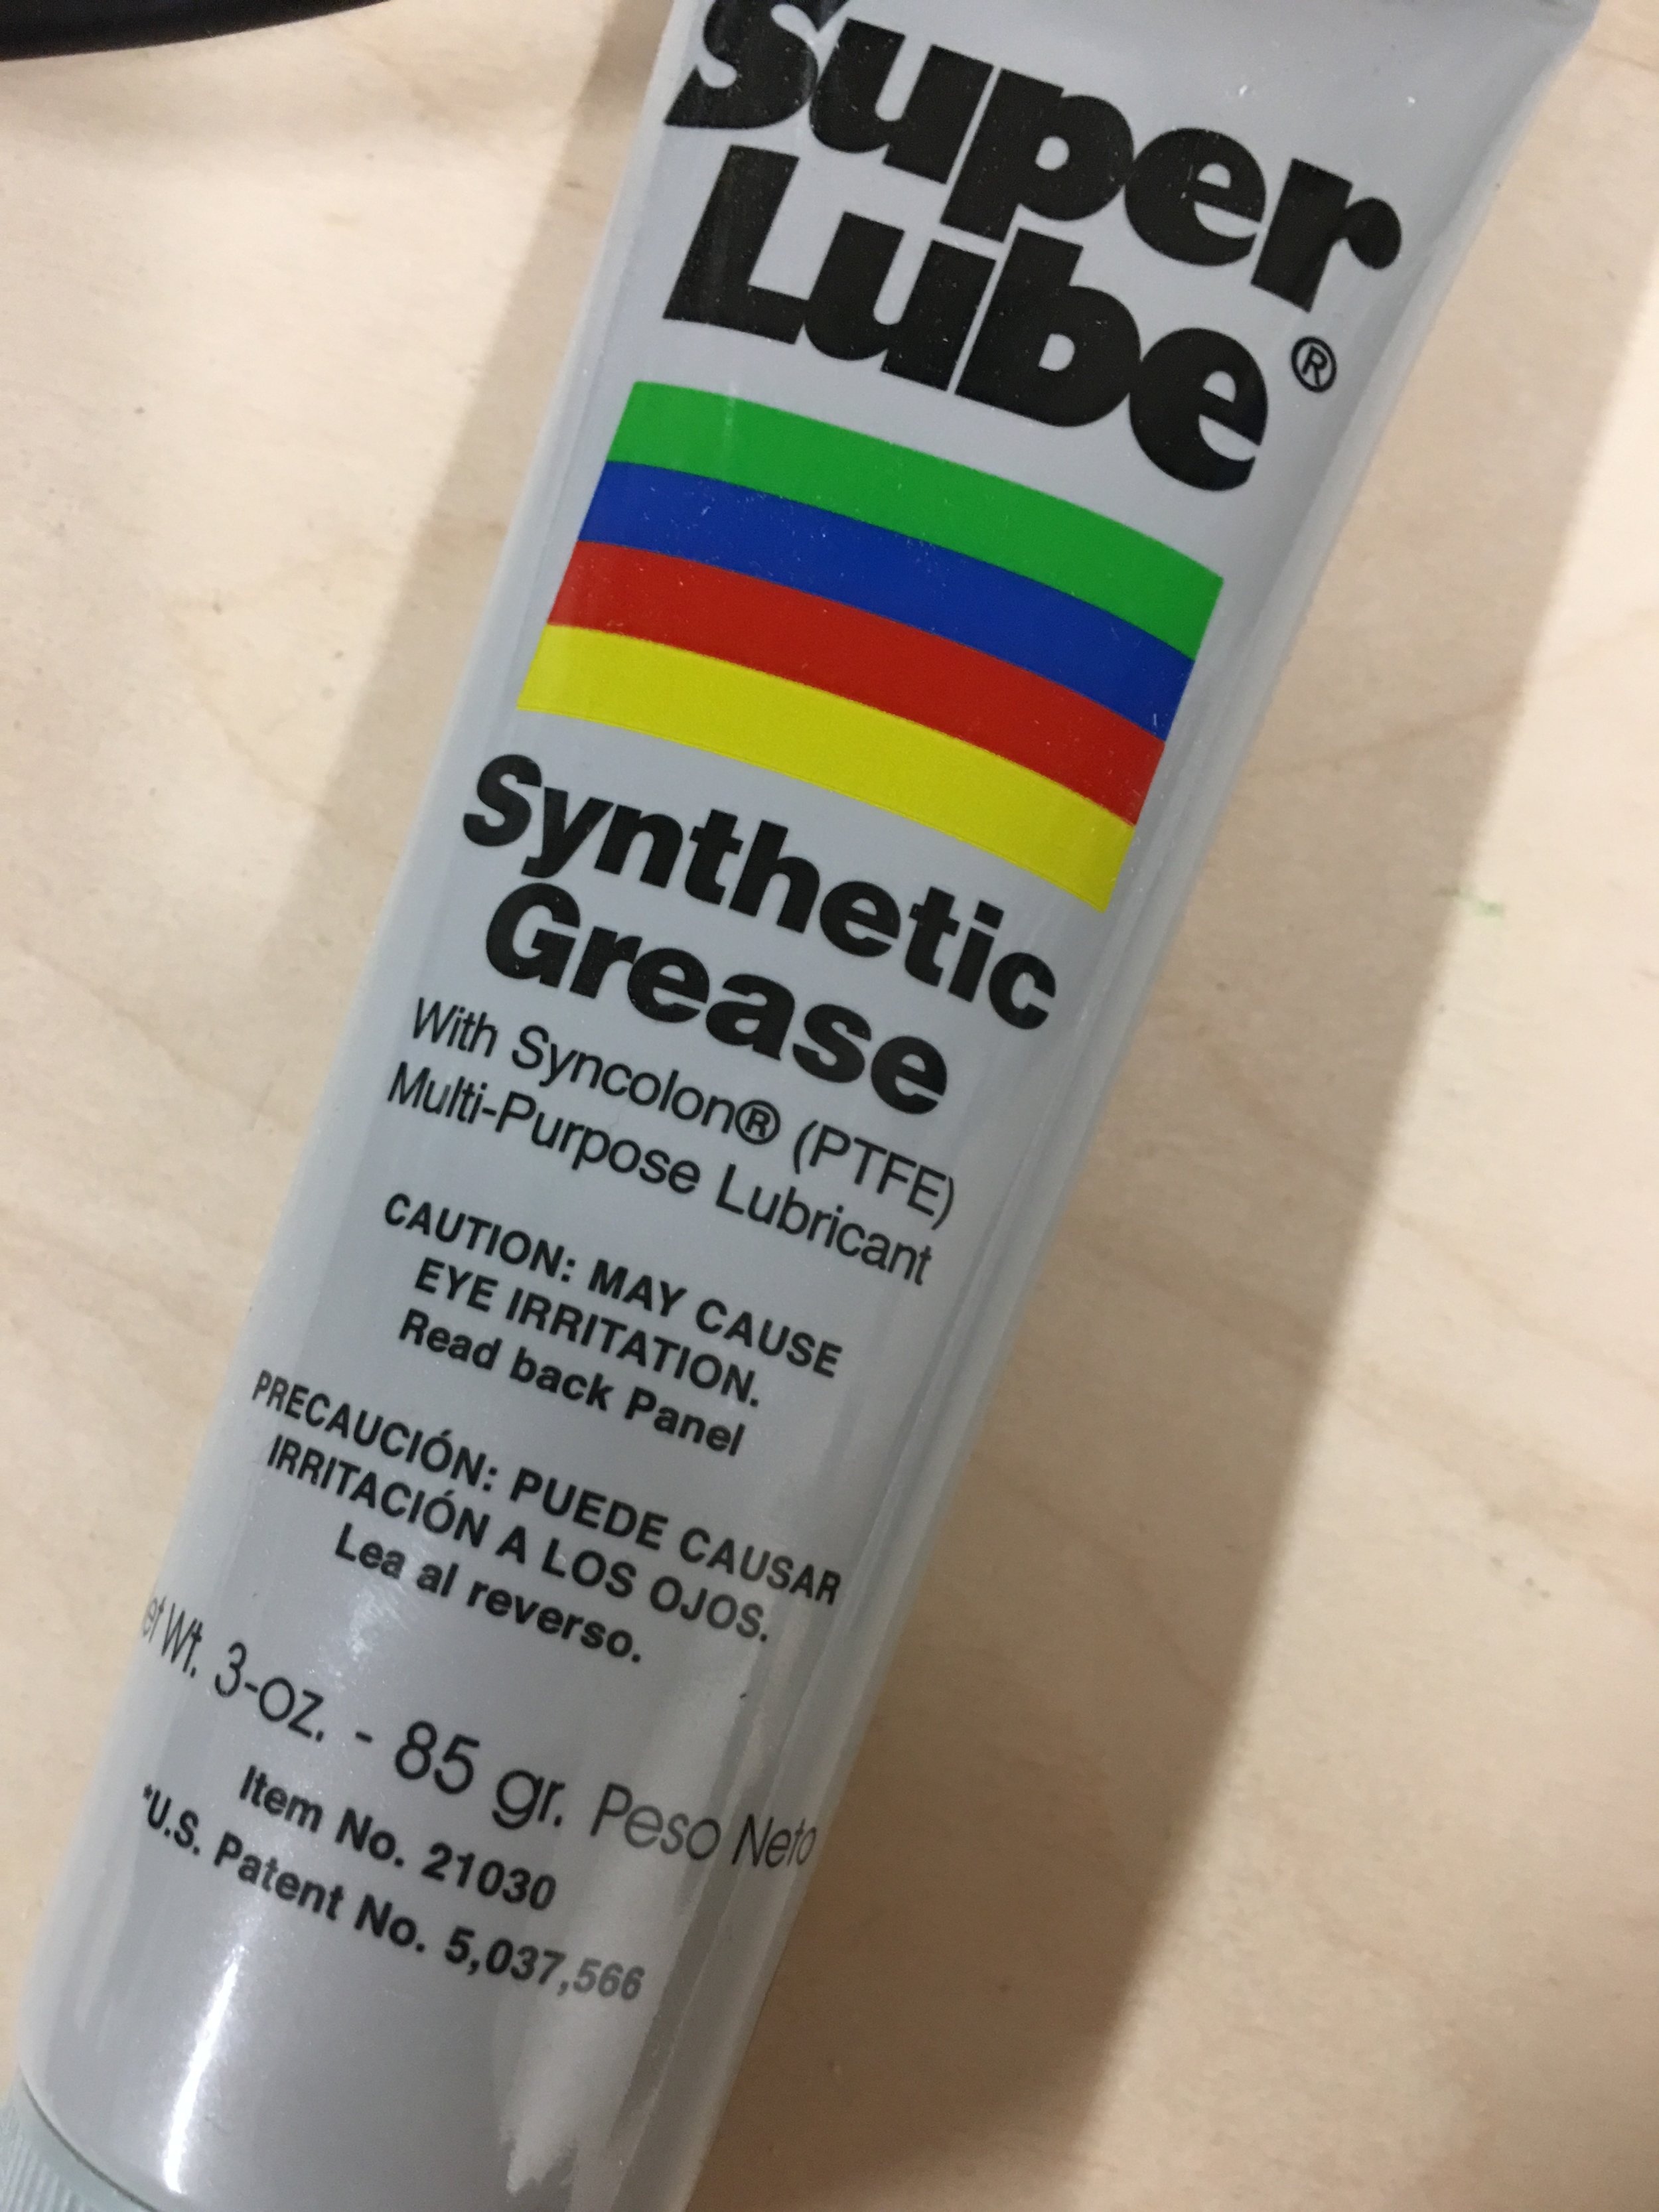
I'll take you through my experience tapping the threads below. If you want to give it a go, you can pick up taps (1/2" - 13 TPI or threads per inch), a tap wrench and some tapping oil from Amazon (it's probably better to use the real stuff rather than what I used):
You can purchase a stainless steel knob from my Shapeways shop:
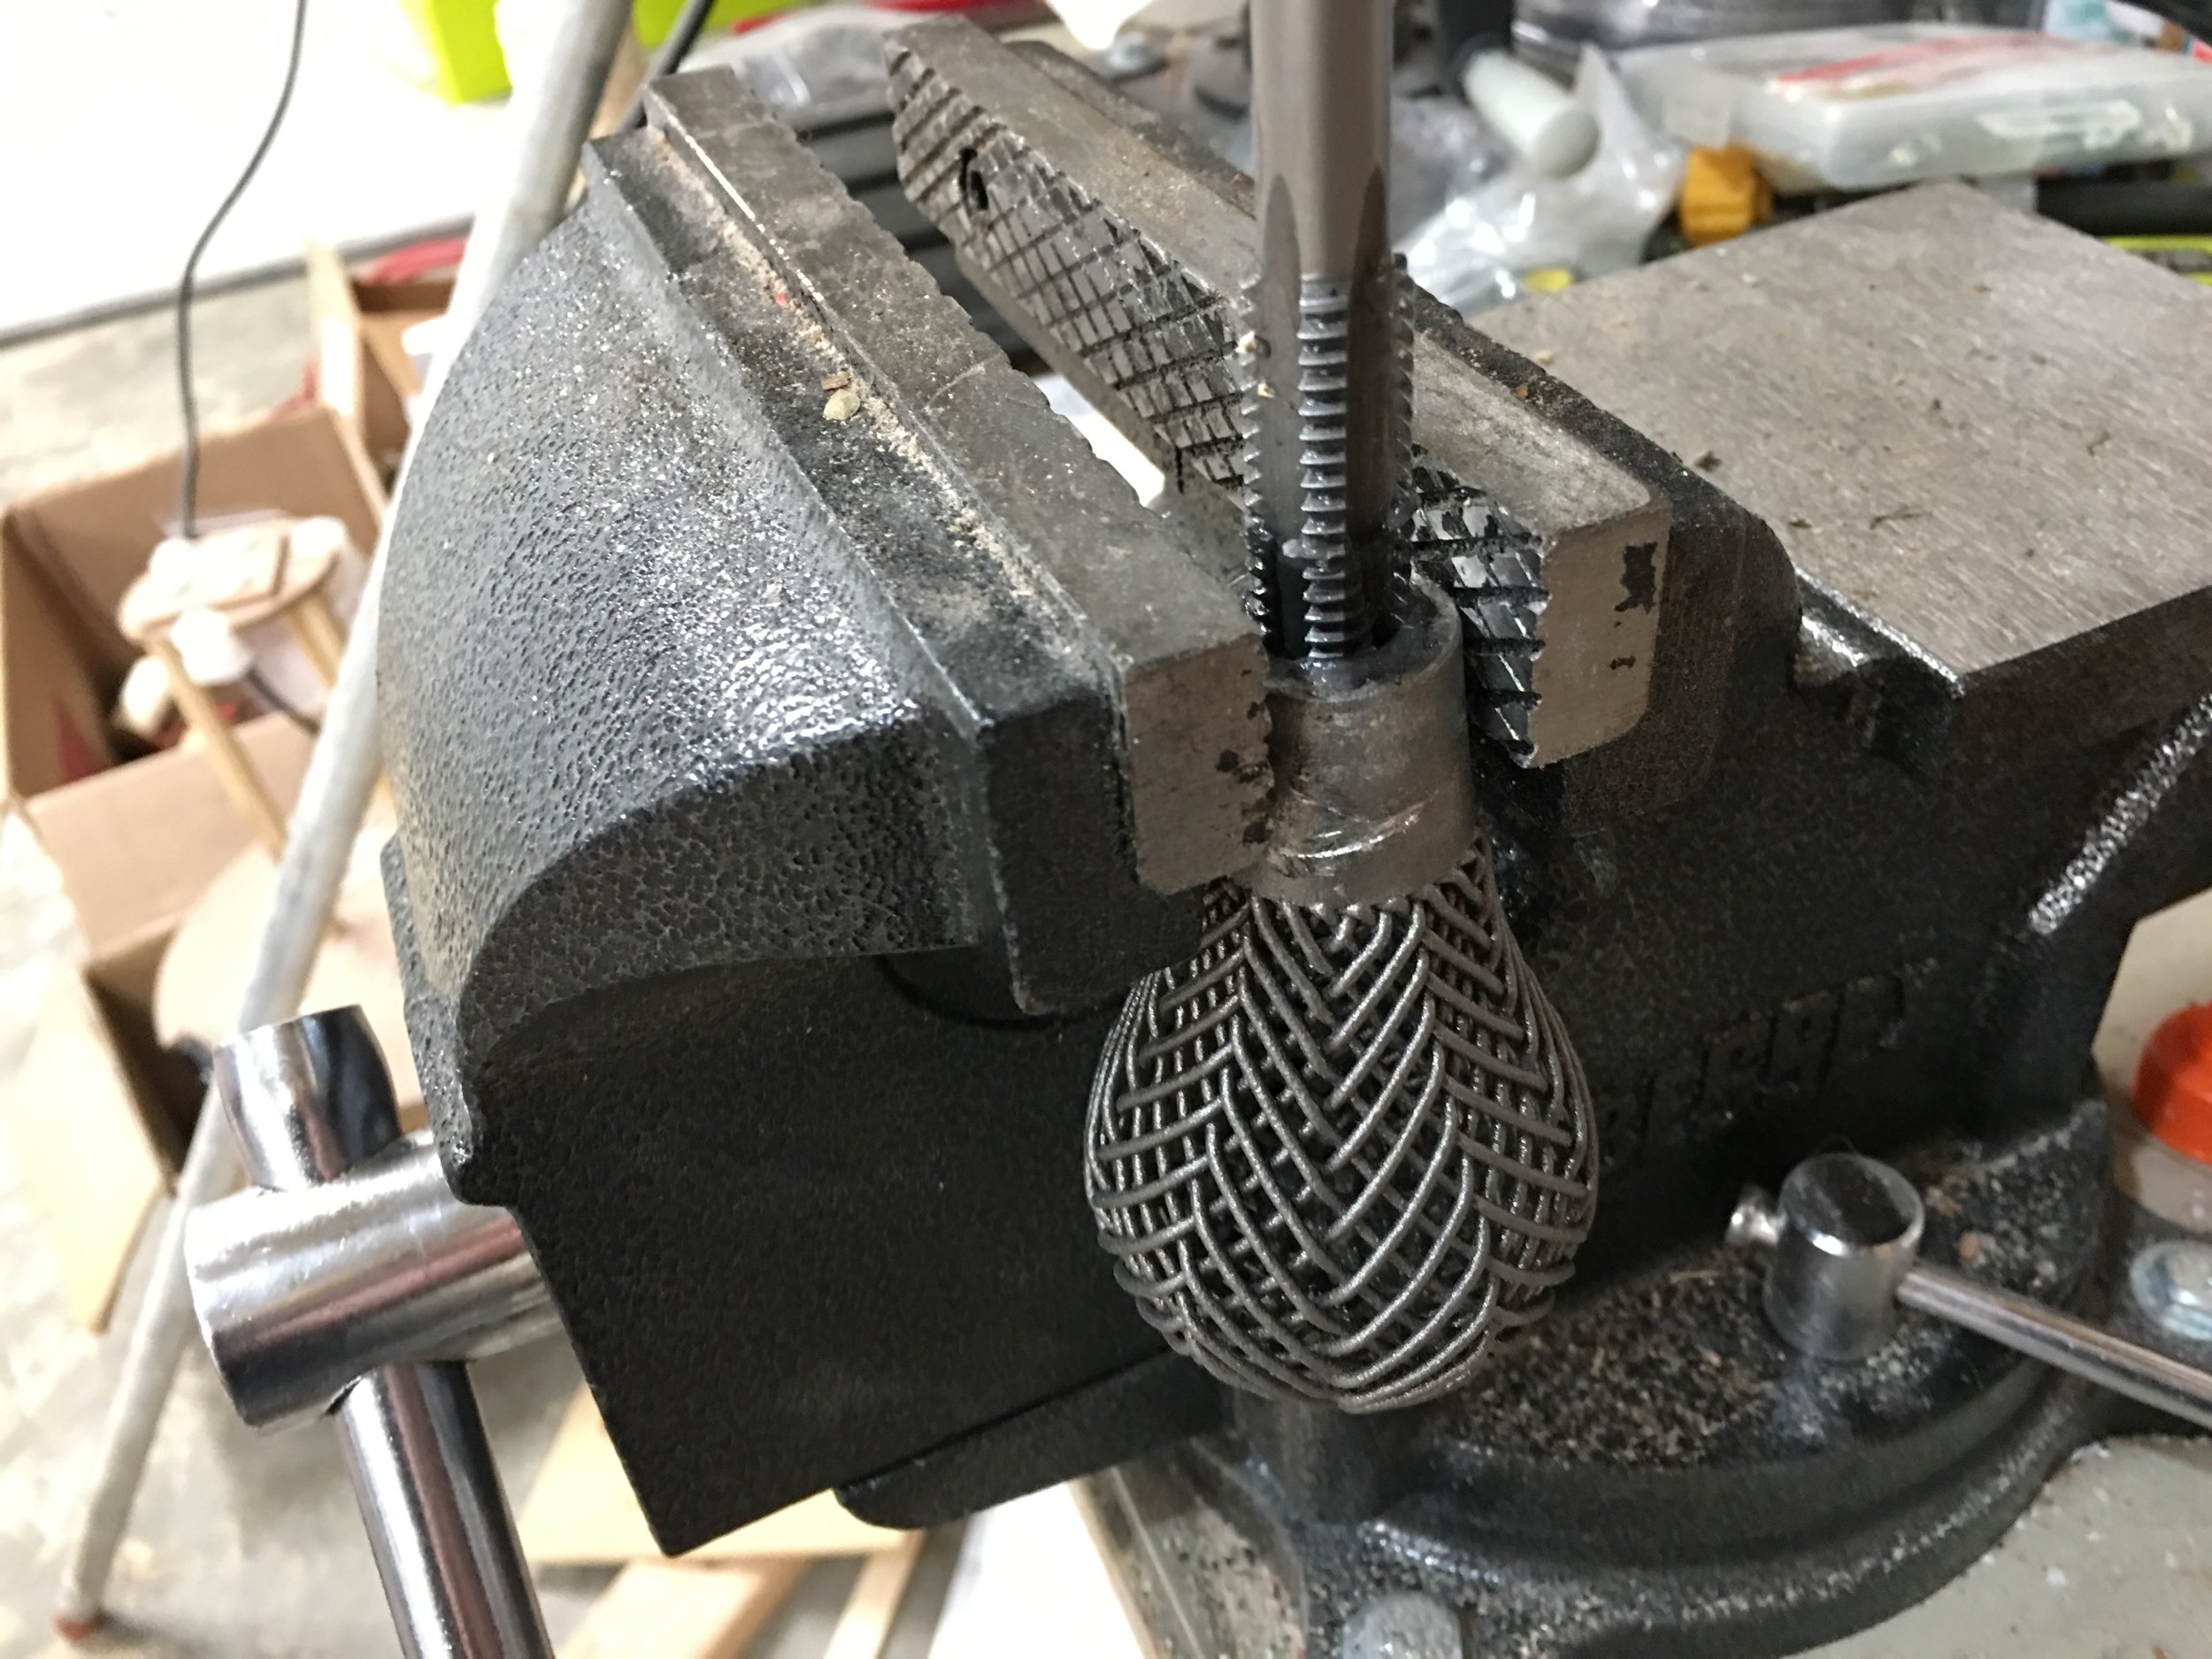
The trickiest part was clamping the knob firm enough to be able to turn the tap. It was difficult because of its organic shape. There were no flat faces to clamp. Even though it was made out of titanium, I didn't want to risk clamping and deforming the woven bulb, so I did my best to clamp the base in my vise. I used two paint stirrers to hopefully prevent any marring. I'm sure some plastic vise jaws would work better.
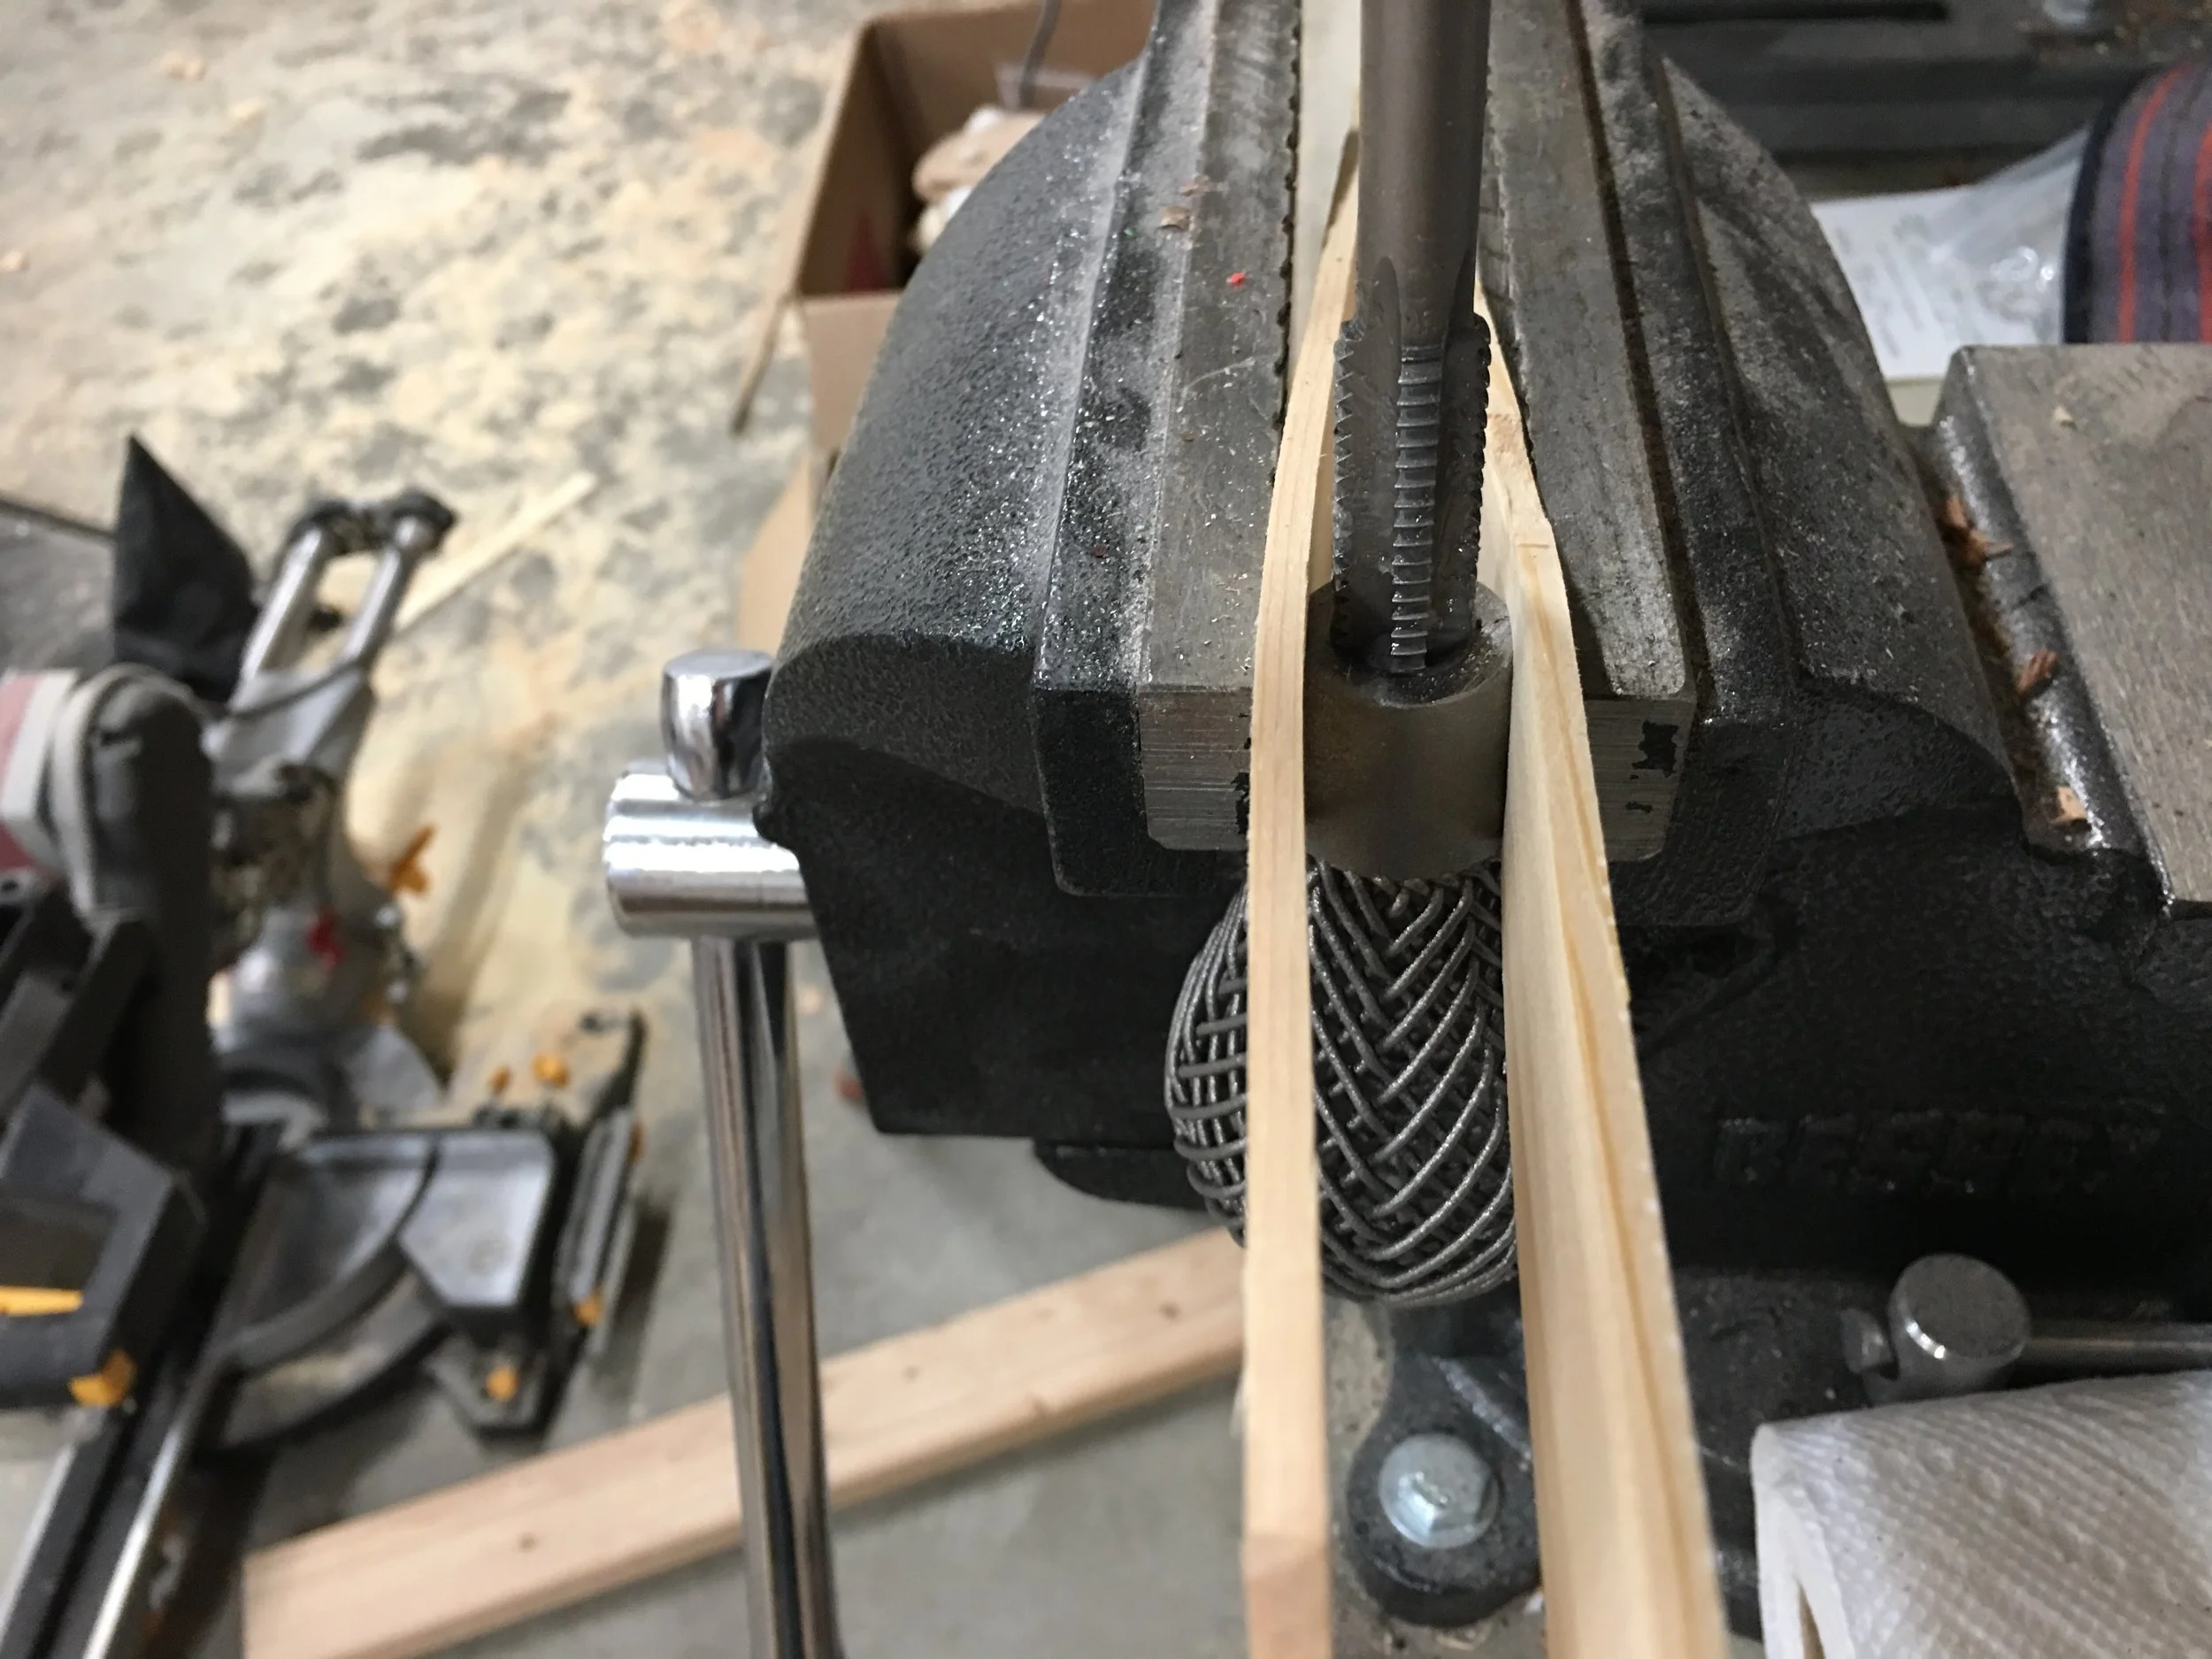
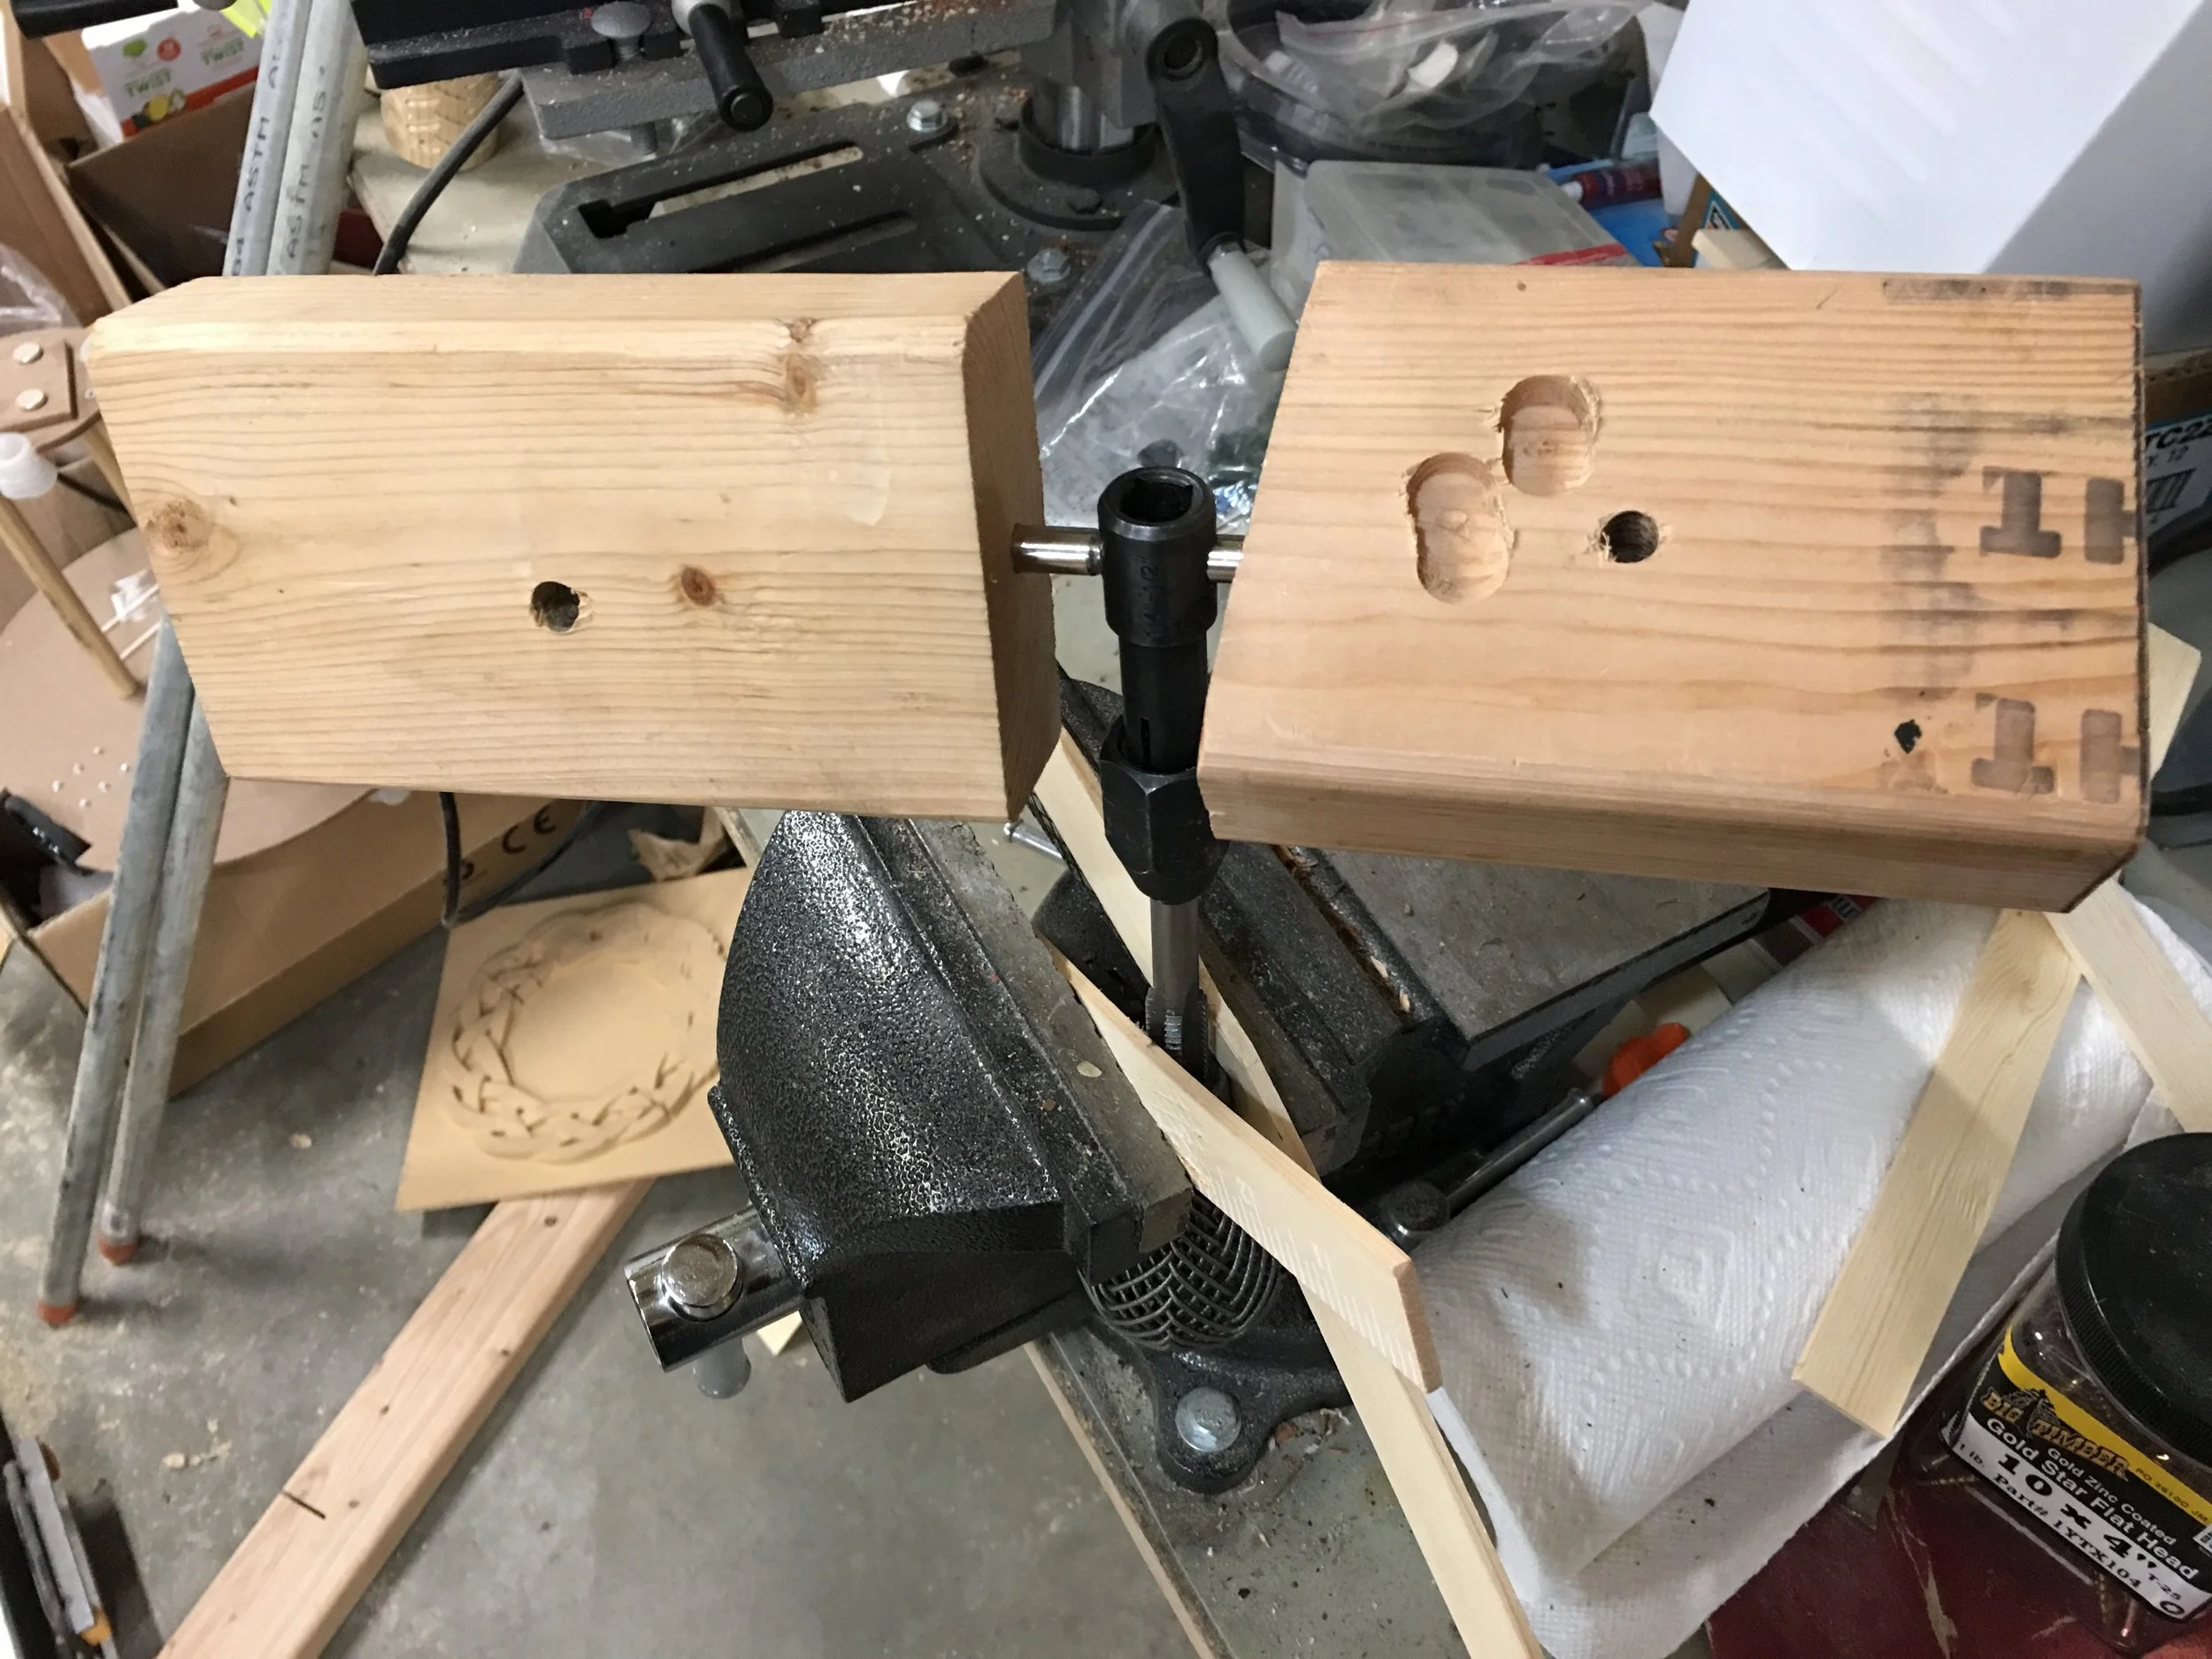
I tightened the vice a little more than snug, then started tapping. After a couple turns it twisted free. I tightened it more and after a couple turns it twisted free again. I tightened it as tight as I could get it by hand, really putting my weight into it. After a couple more turns, it still twisted free. I ended up using a steel pipe to lengthen the vise's handle to really torque it down. That seemed to work well, and it seemed like the paint stirrers were doing their job. The little handle on the tap wrench started getting a little hard to turn, though. I drilled some 5/16" holes in some scrap 2x4s to give me some extra length and a bigger handle to grip. I ended up bending the handle, but it still did its job.
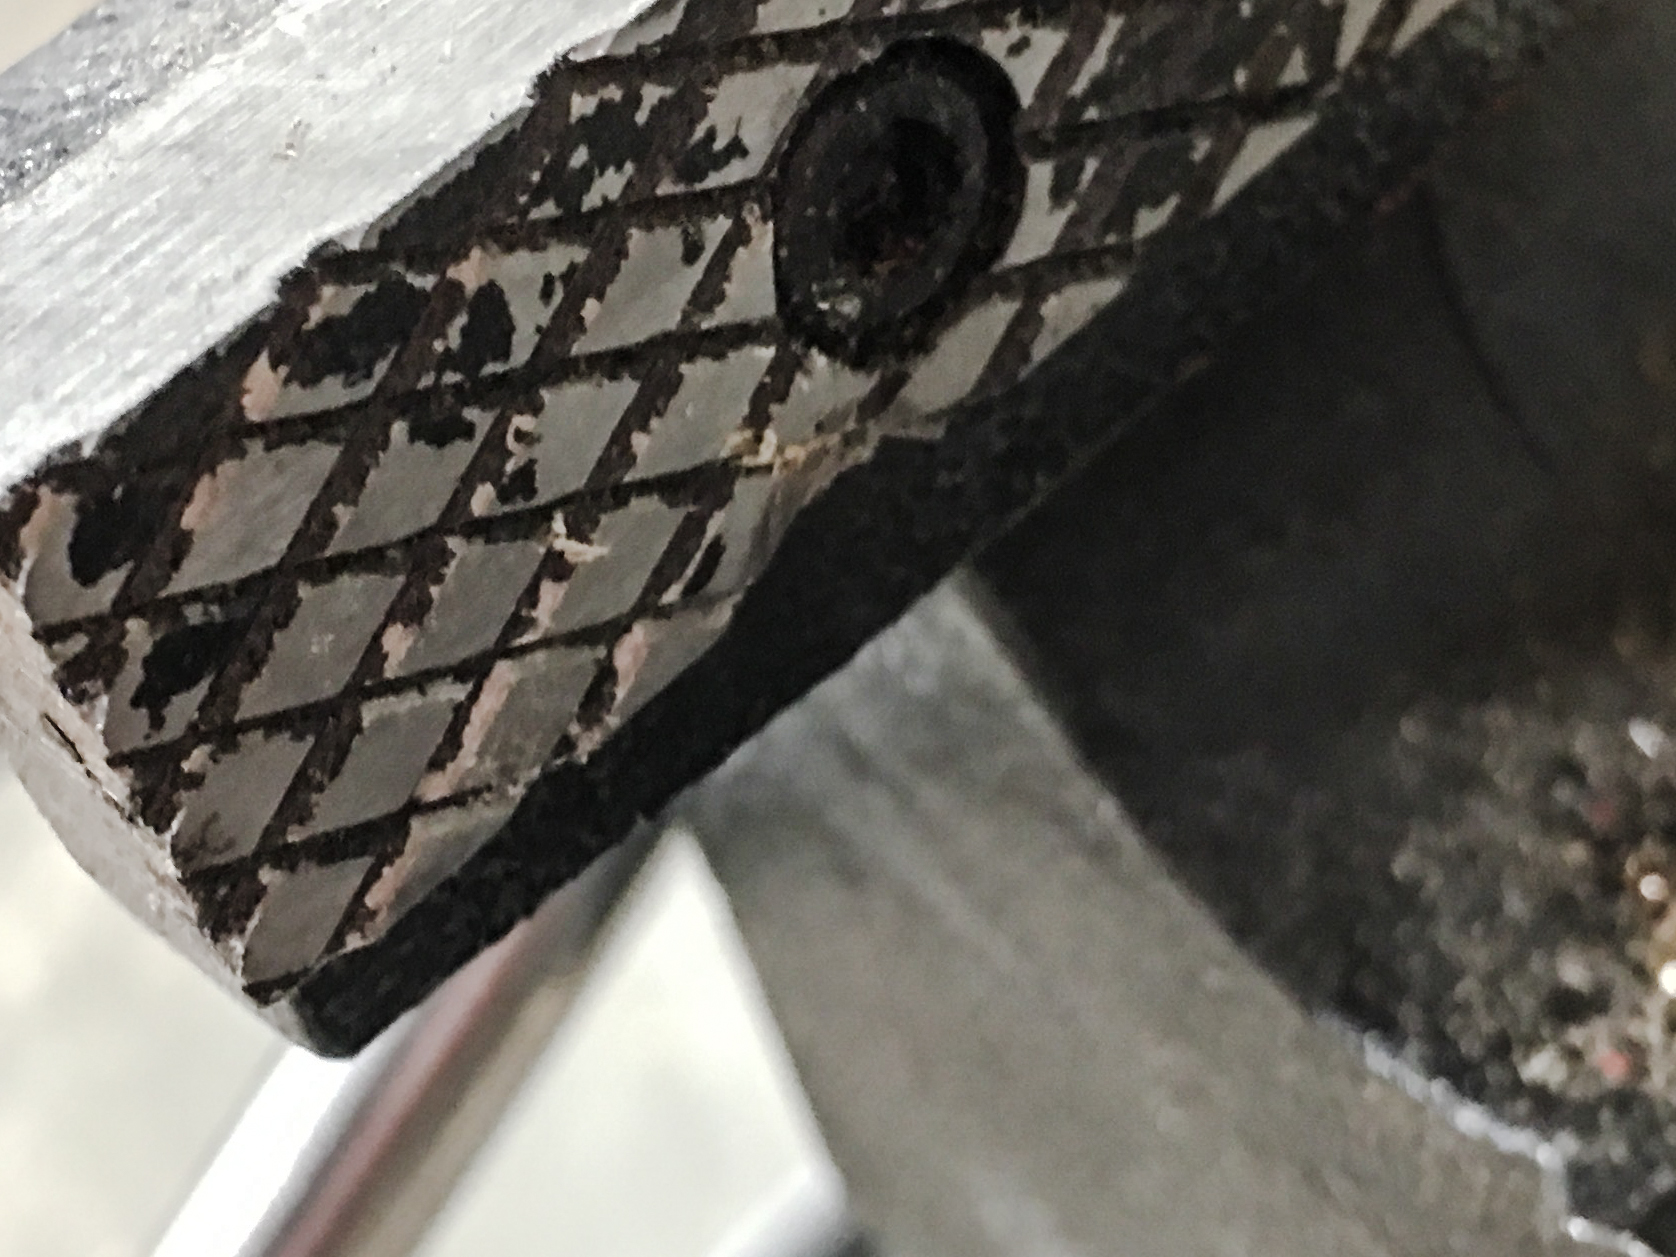
I was almost all the way through. It was getting hard to turn. Sparks flew and the shifter knob loosened in the vise. I opened the vise and found that a piece of it had chipped off. Because the base of the knob was tapered, the majority of the force was at the bottom edge of the vise. I guess it just couldn't take it! I ended up putting some pretty good gouges in the base of the knob, too.
At this point, I had trouble getting everything clamped together tight enough to even remove the tap. Because of all the marring I had already inflicted, I just tightened it without the paint stirrers. I took out the tap and called it good.
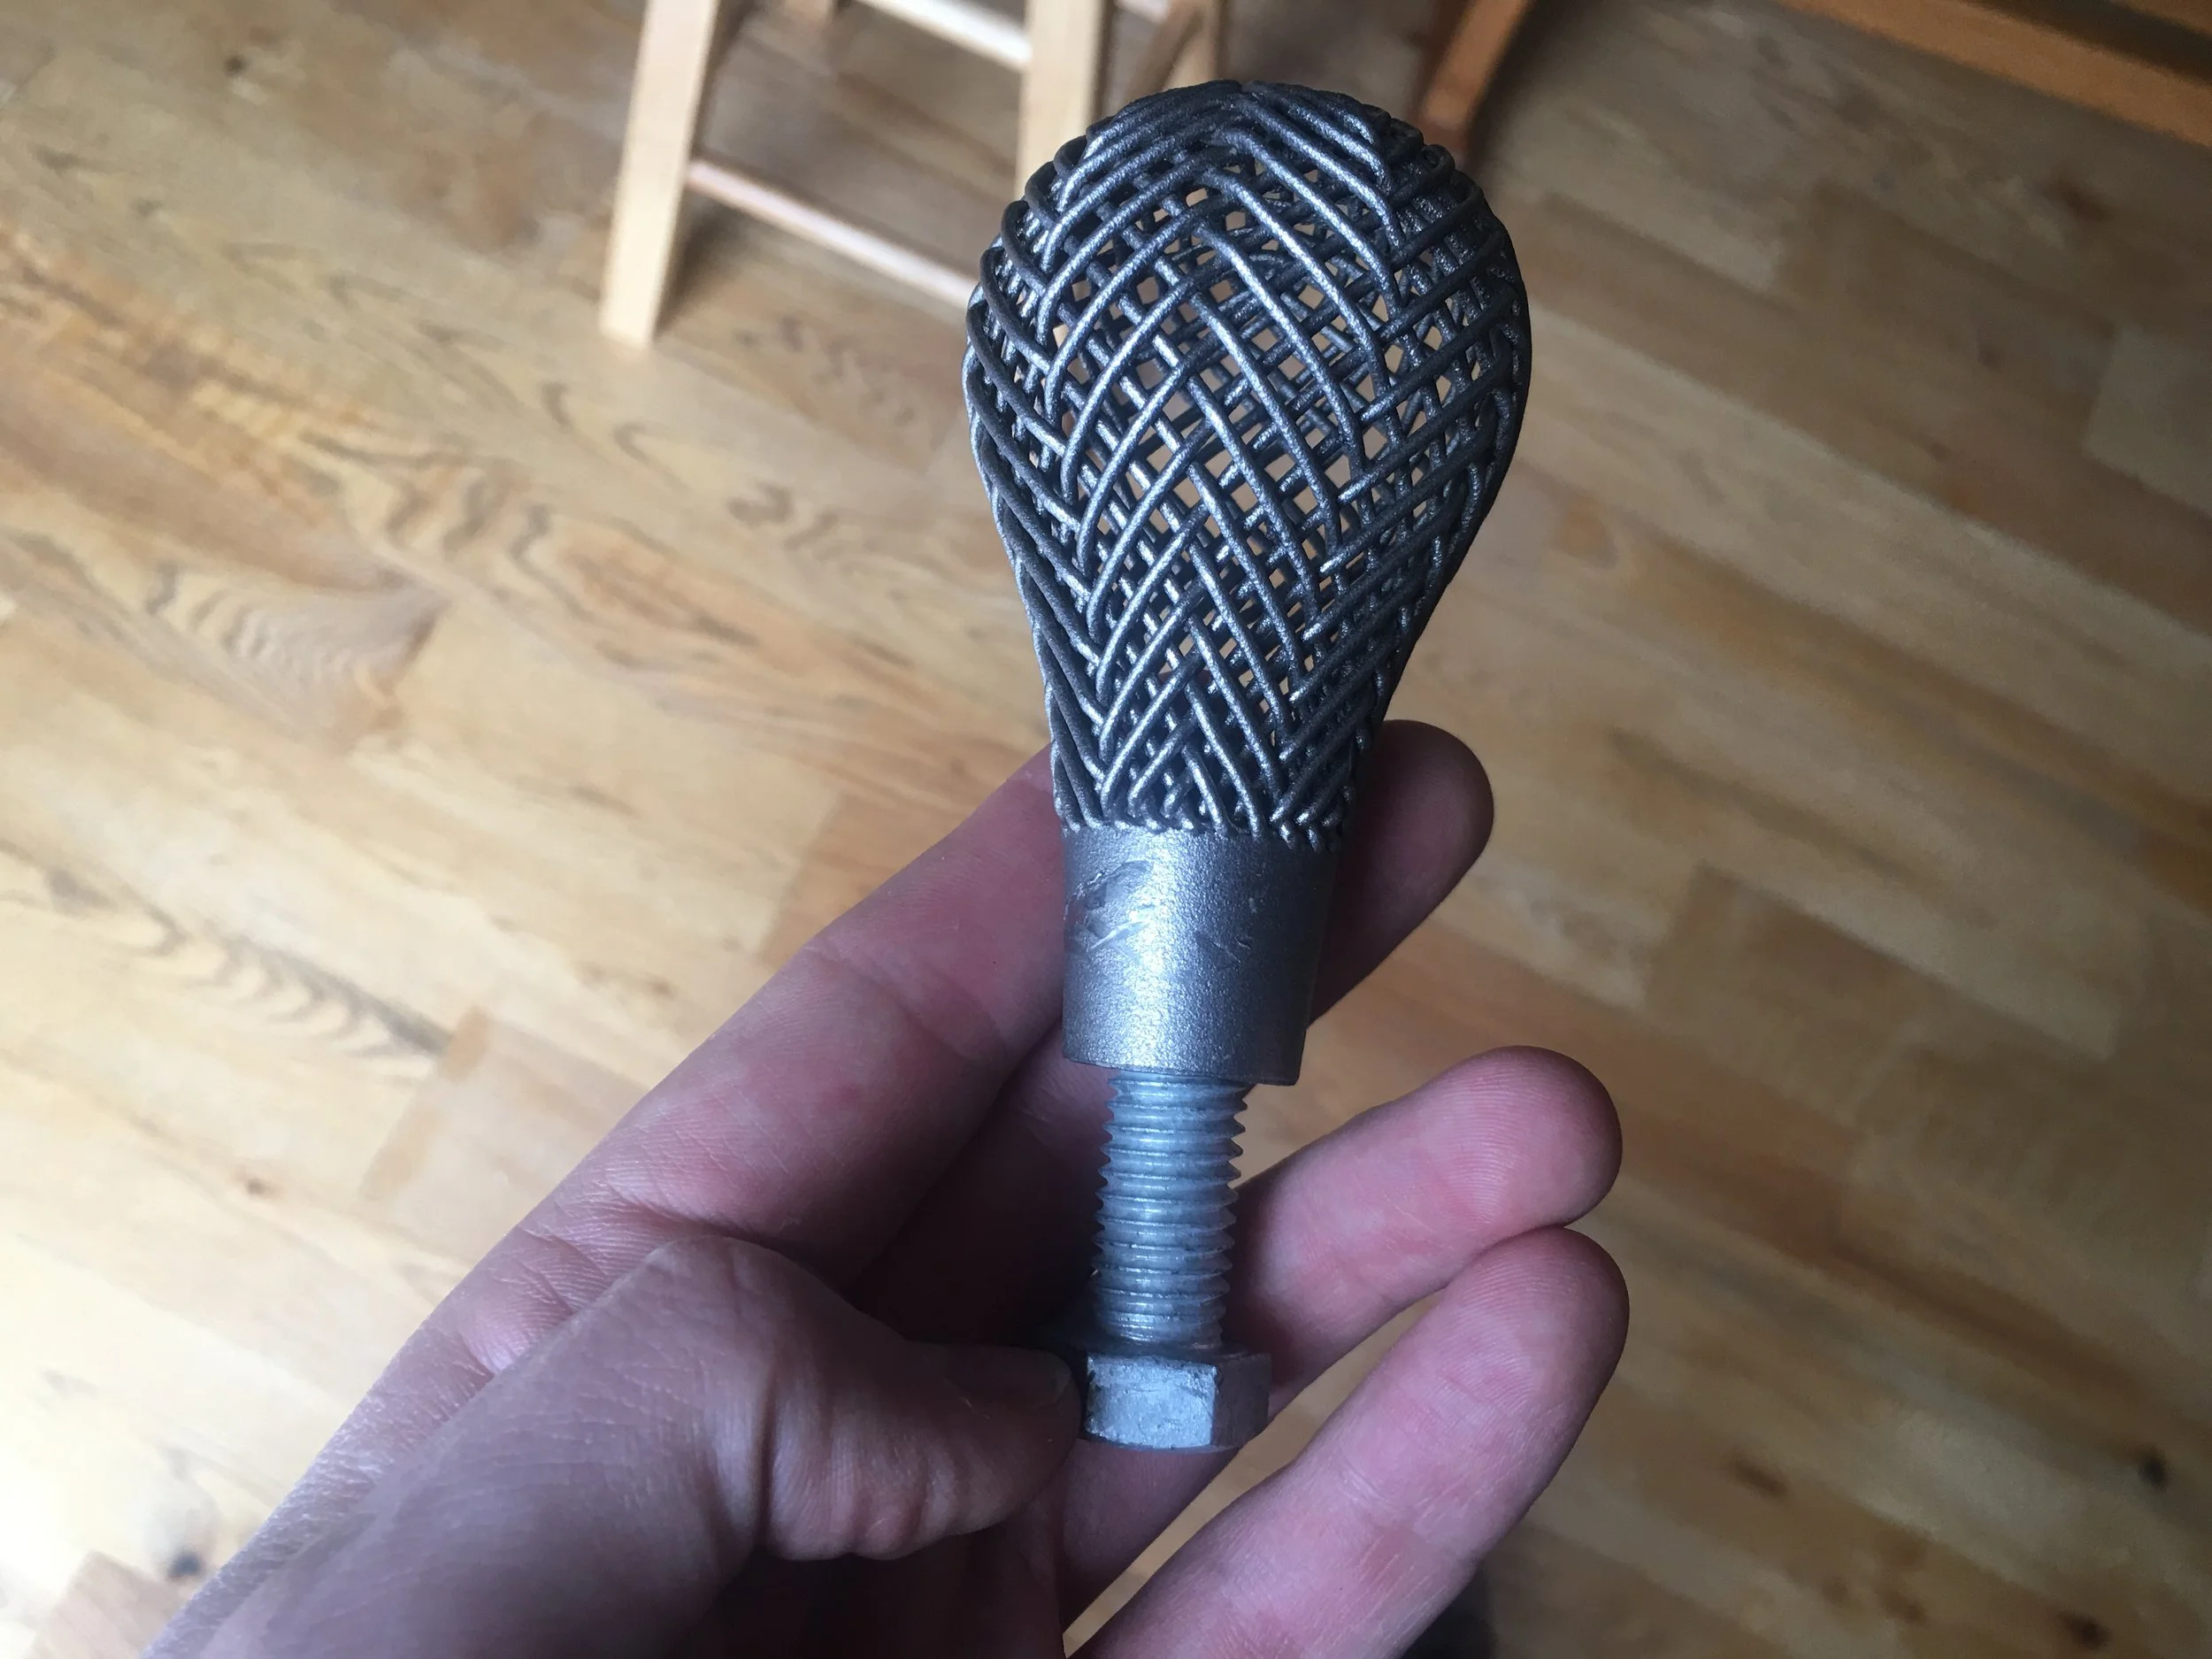
Now I have an awesome shifter knob with a little extra character! Unfortunately, my VW is part of dieselgate and I'll be selling it back to VW at the end of the month, so I'm not sure when I'll be able to use it. I'll probably make sure the next car I get has a shifter with 1/2" - 13 TPI threads. For now, I screwed a 1/2" bolt into it to prove that it works.
Thanks for following along! Let me know what you think in the comments below. I'm sure someone can give me some good pointers for next time.